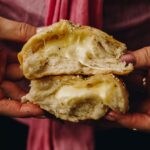
These Cheesy No-knead Bread Buns are stuffed with gooey mozzarella cheese for an oozy centre. They are made with a few simple ingredients but always bring the wow factor. So, let's get to it and bake bread together.
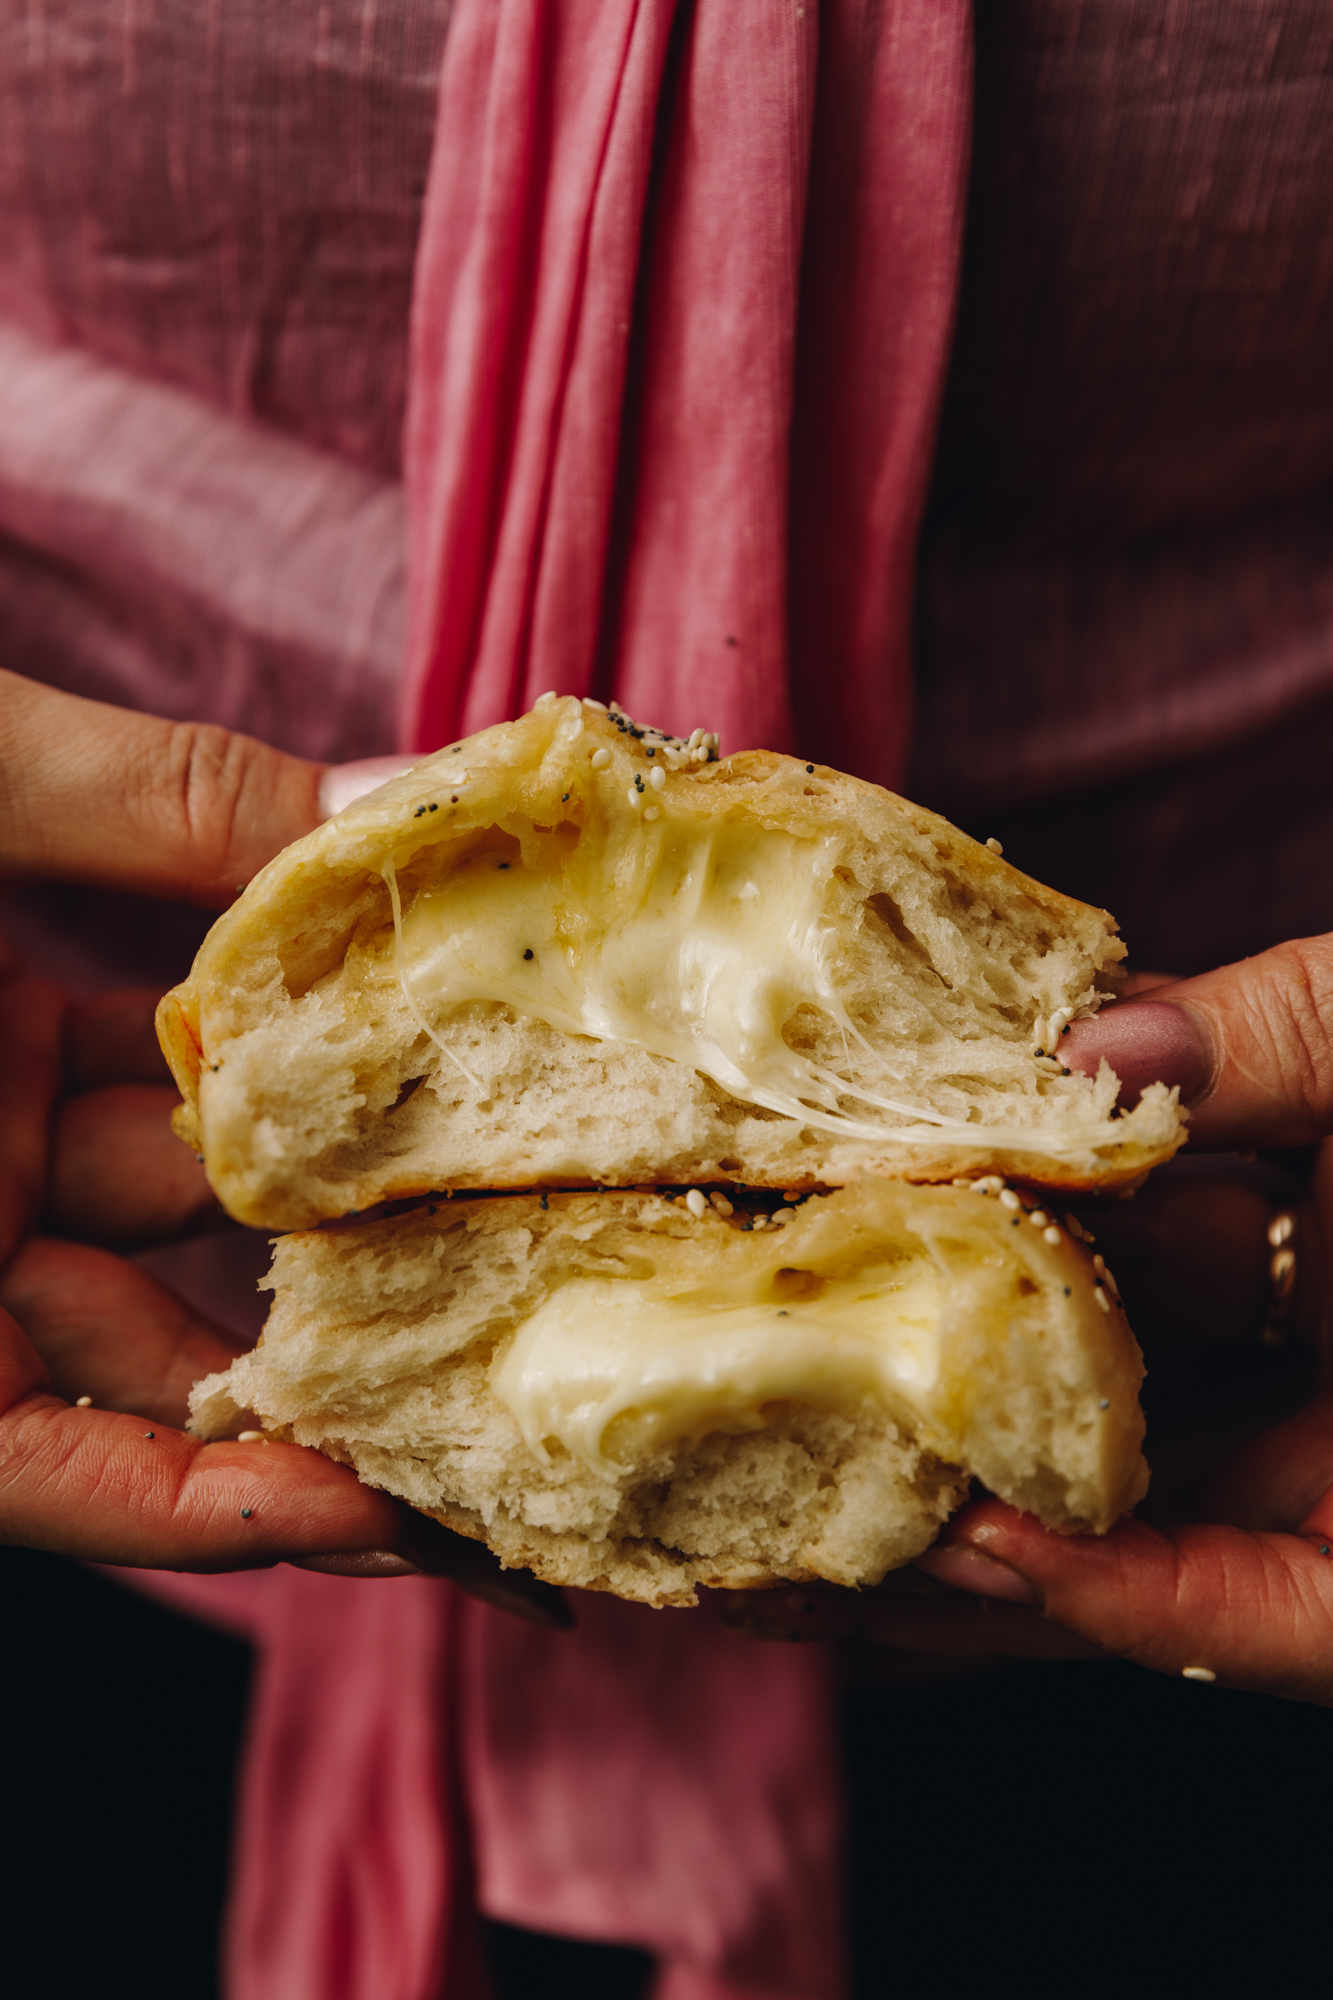
These delightful, cheesy buns are my No-knead Bread Buns but with a cheesy twist. I love kneading but for this recipe, we leave the dough in the bowl and stretch and fold it instead. It yields super fluffy buns that everyone will rave about.
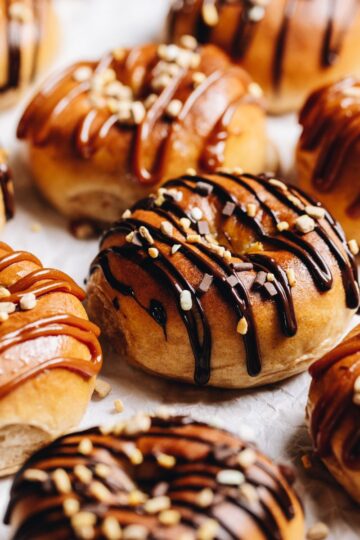
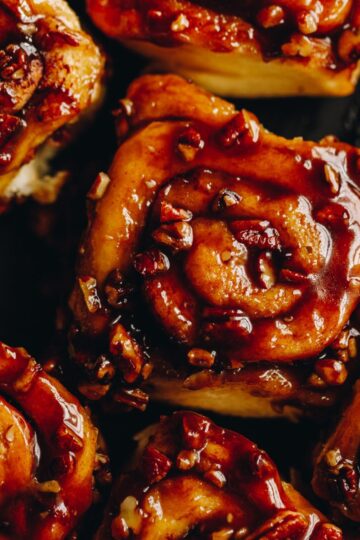
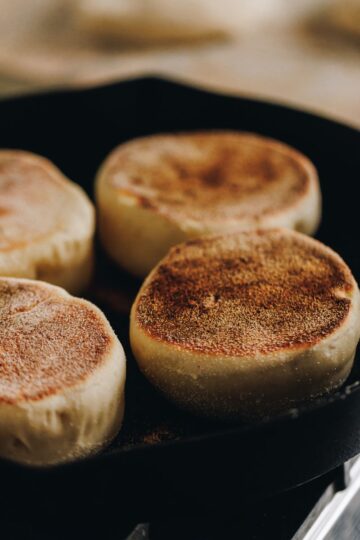
More no-knead recipes:
Bake this no-knead bread loaf in a loaf tin or this rustic no-knead bread in a cast iron pot. If you want a sweeter variety, then try my no-knead chocolate stuffed fry bread. Let me know if you have any pātai (questions), I am more than happy to help!
Videography and photography by Sarah Henderson.
INGREDIENT TIPS FOR THESE CHEESY NO-KNEAD BREAD BUNS:
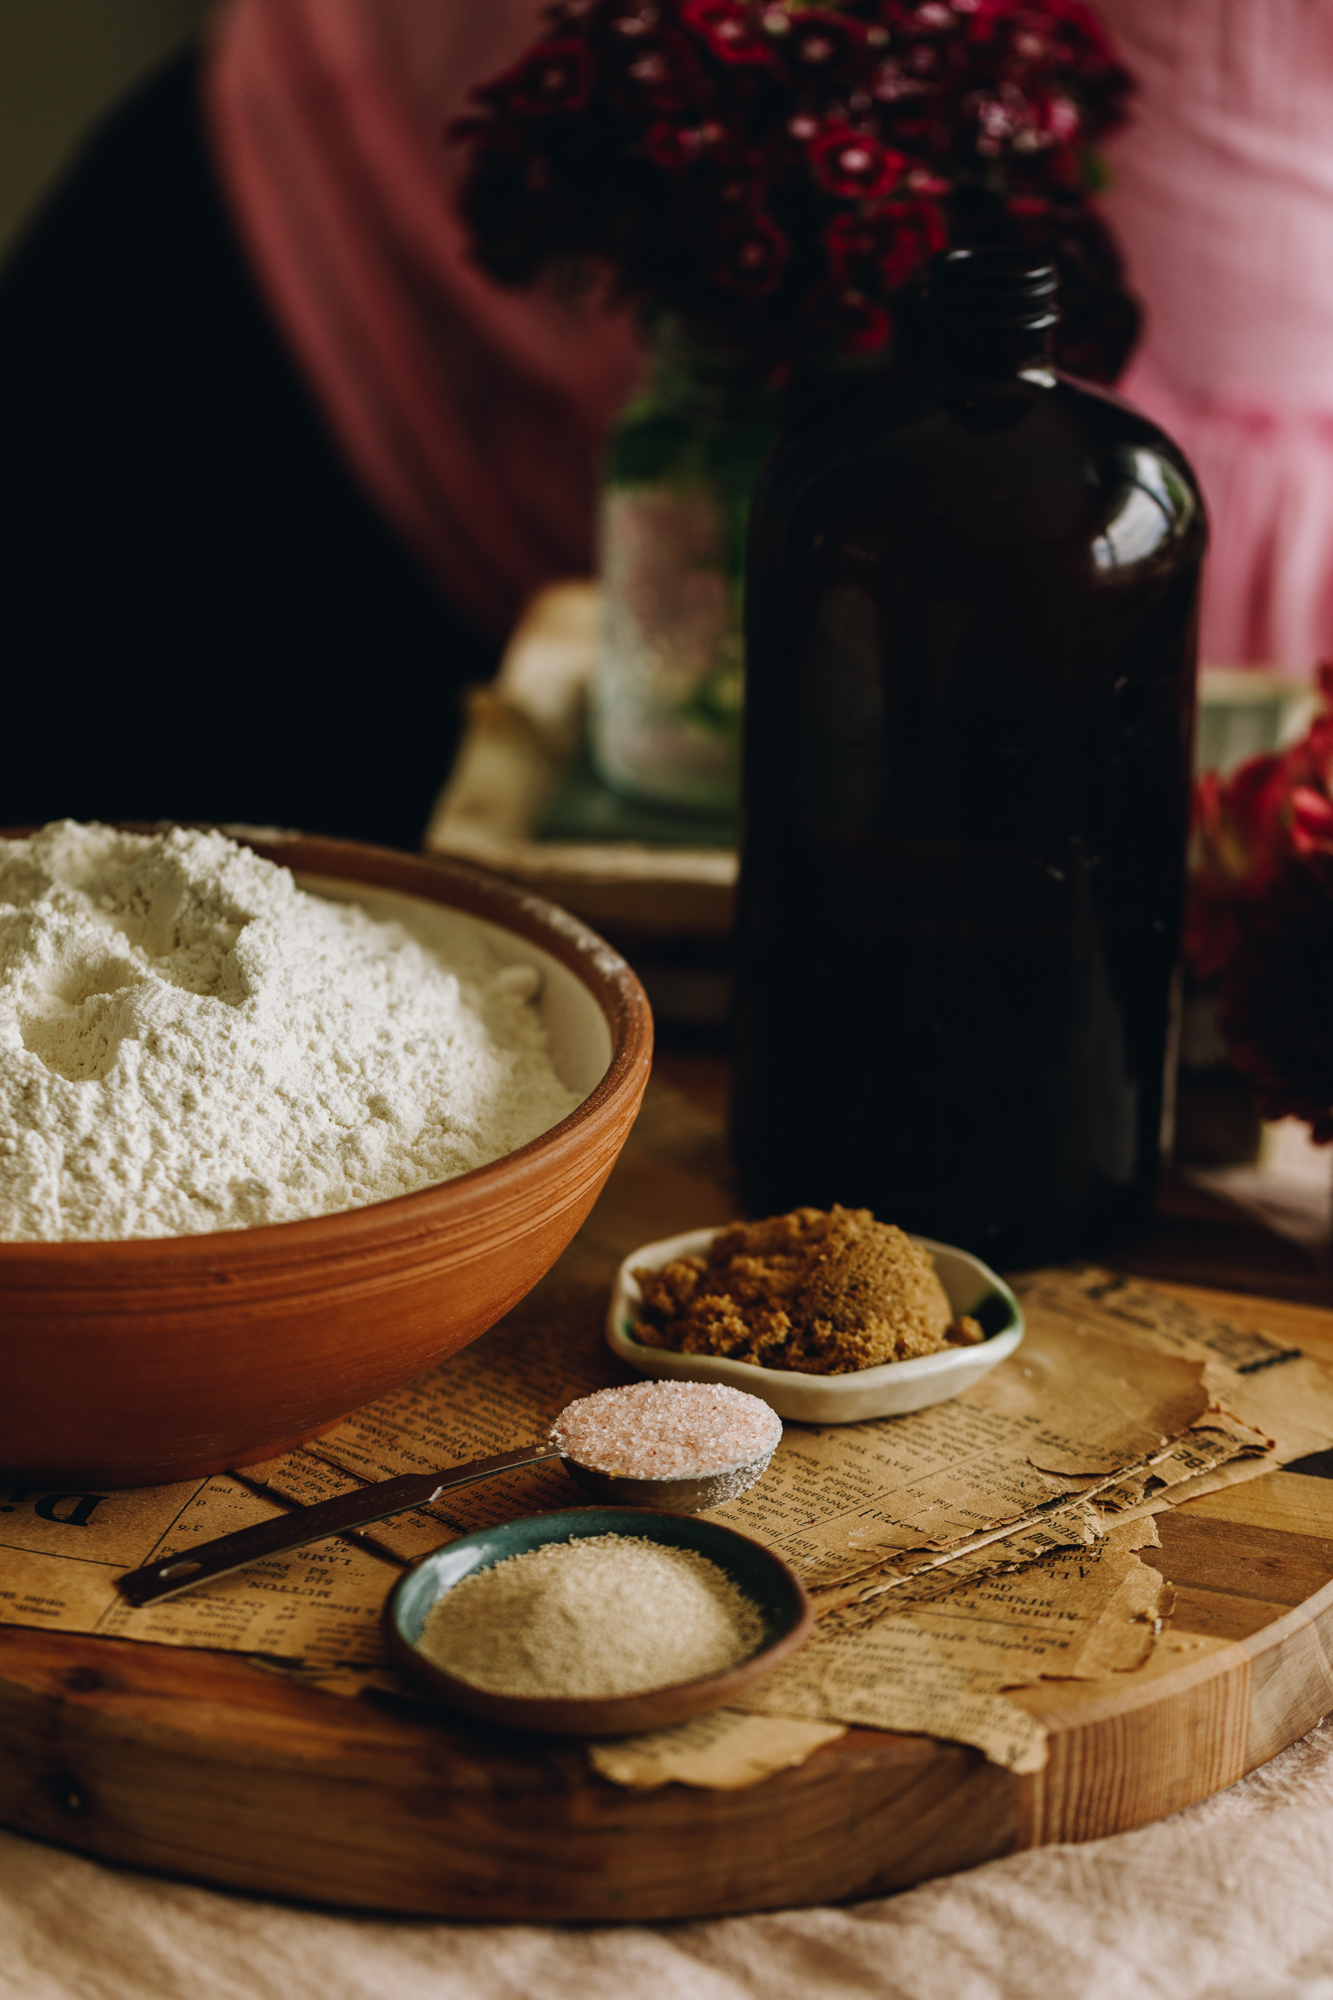
- Brown sugar: Use huka hāura (brown sugar), huka mā (white sugar), marahihi māpere (maple syrup) or mīere (honey) in the dough.
- Instant yeast: Use īhi horo (instant yeast) in this recipe for efficient rising. If you are using Surebake or breadmakers yeast, double the amount.
- High grade flour: Always use puehu parāoa kounga (high grade flour) in bread recipes for the fluffiest result.
- Salt: I use Himalayan salt in my baking because it gives a subtle flavour. If you are using iodised table salt, half the quantity.
- Butter: I always use salted butter in my baking but unsalted is fine too. If you want to make these buns dairy-free, swap the butter for 4 tablespoon of noni (oil).
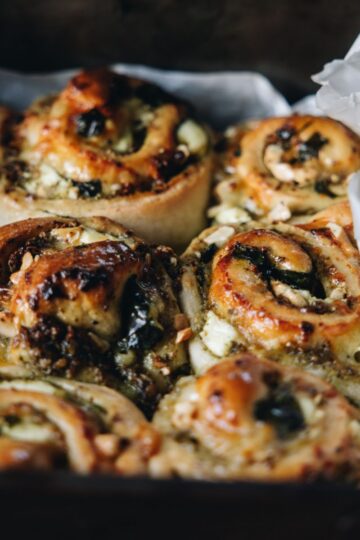
- Cheese: I use mozzarella cheese for the best gooey cheese factor but use what you love.
- Pesto: As a delicious option, add a teaspoon of penu amiami (pesto) on top of each piece of cheese and bake that in to the dough too.
Expert Advice:
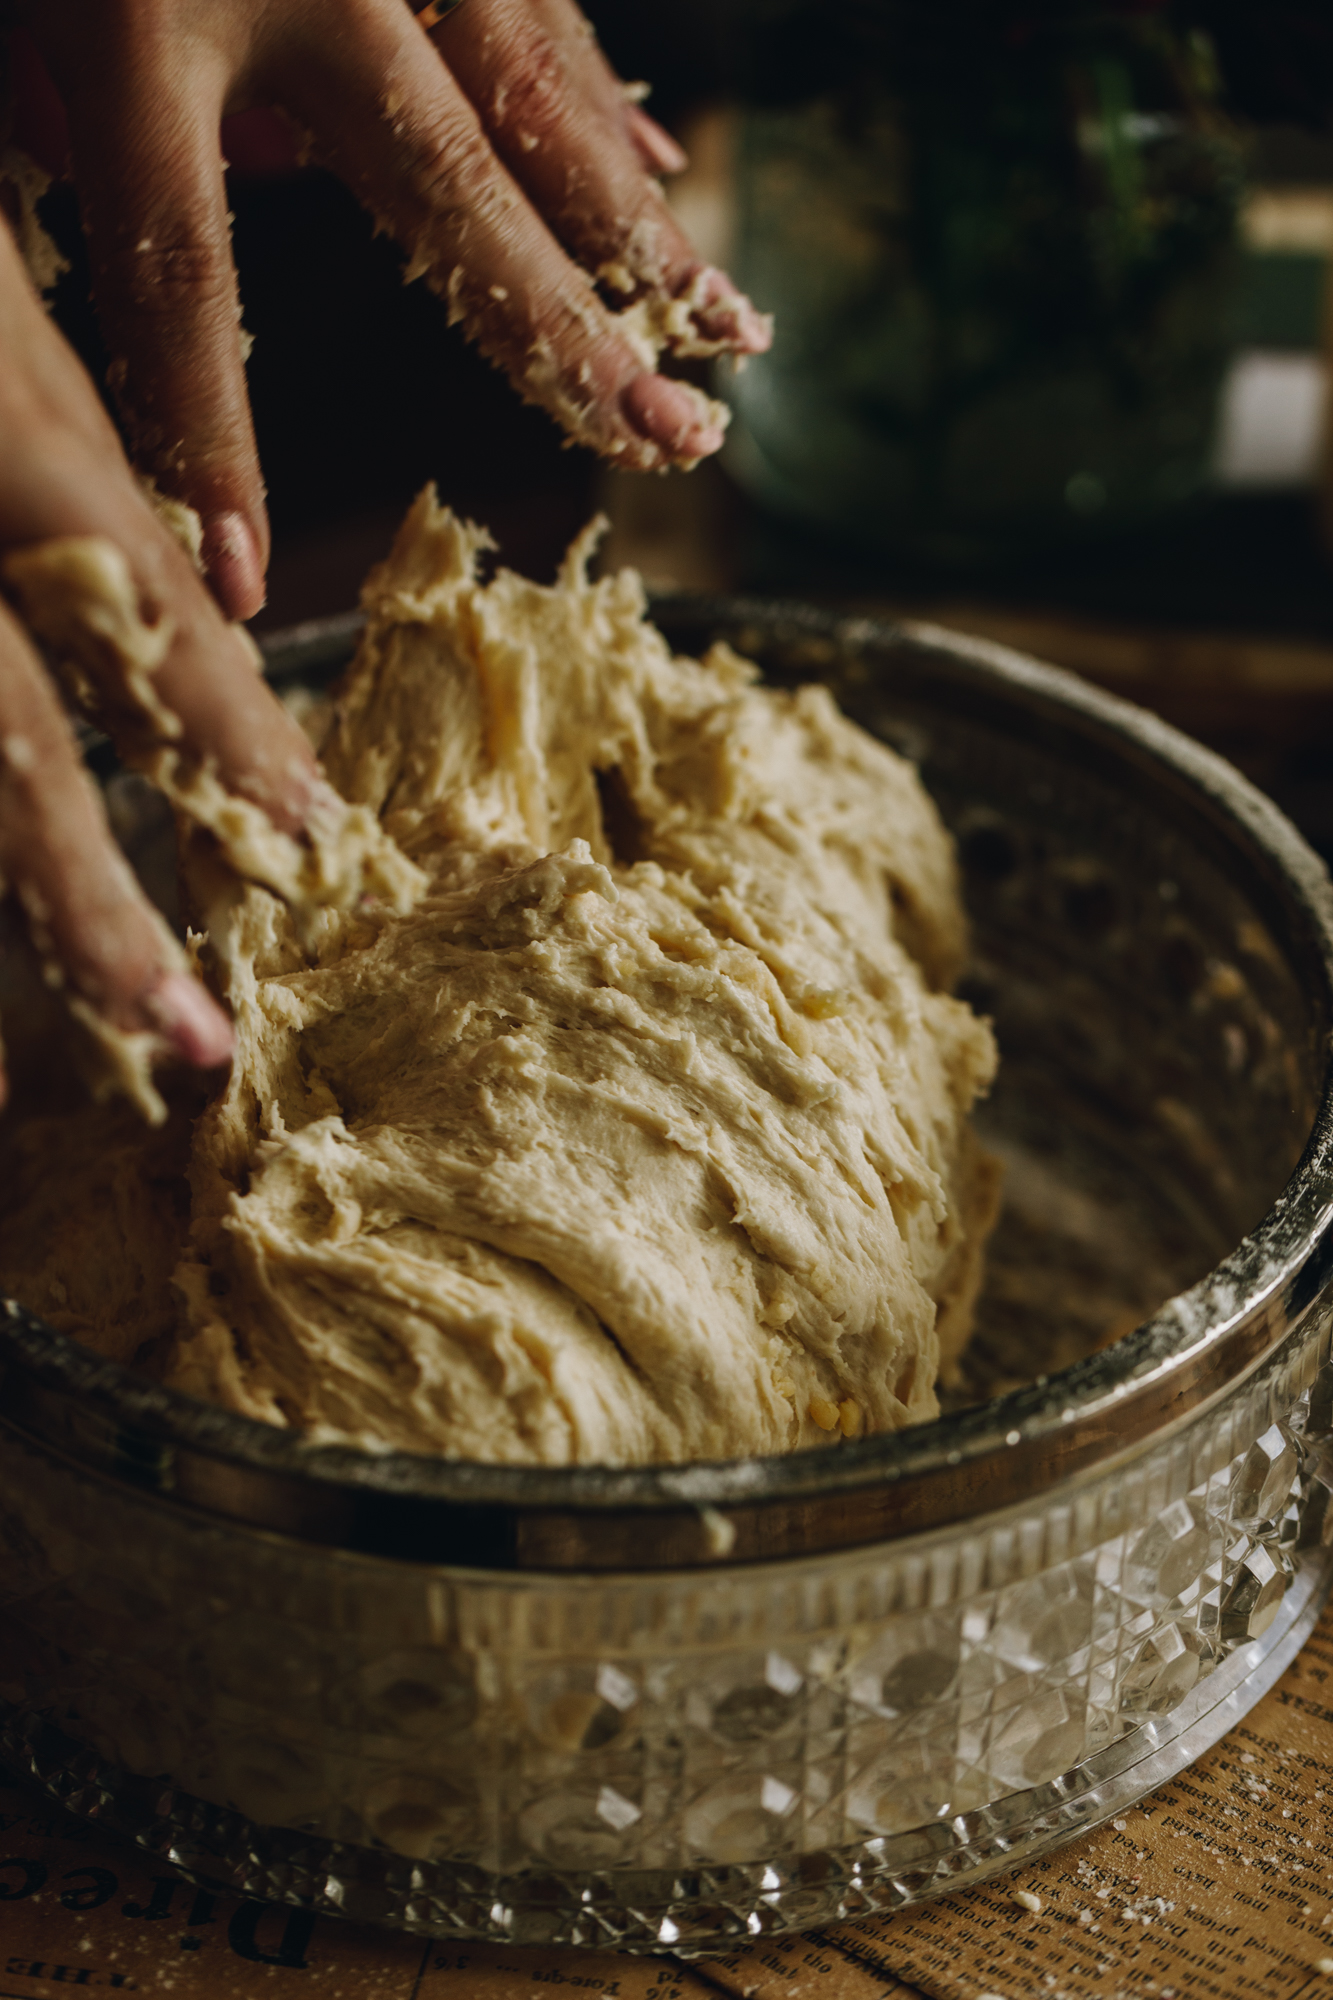
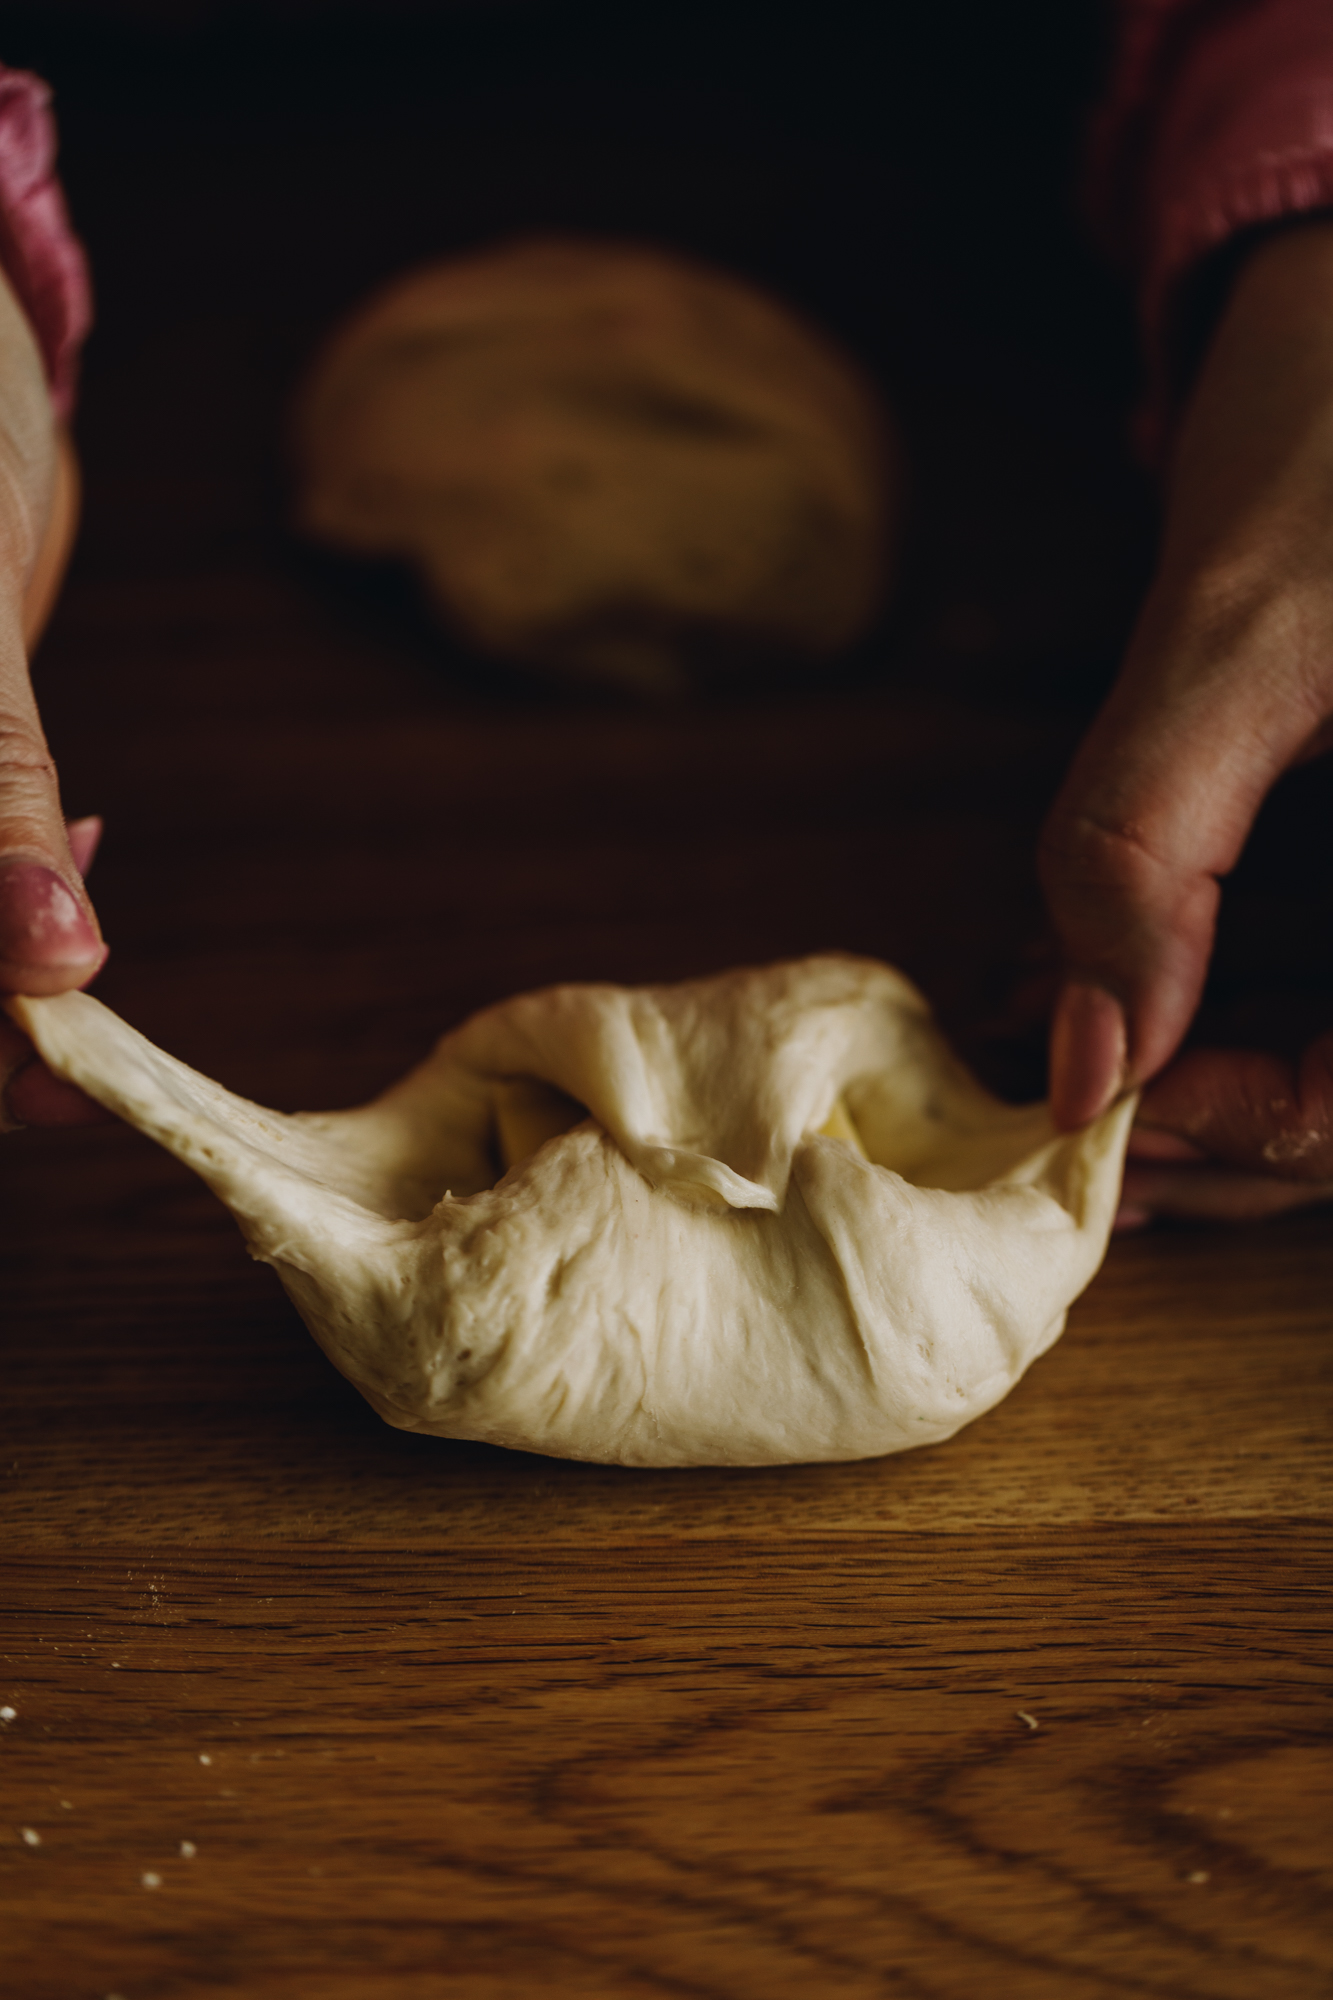
In this recipe, I use a stretch and fold technique that is used when making sourdough. This allows us to activate the gluten in the flour without actually removing the dough out of the bowl. Take a moment to watch the video to see the technique in real time. It is much simpler than you think.
This pokenga (dough) is slightly looser than some bun dough. Again this is similar to the type of dough you would find when making sourdough. Try not to add extra puehu parāoa (flour) because this will alter the final product.
Keep the rising dough away from hot spots and direct sunlight or heat. Remember that īhi (yeast) is alive and is super sensitive to heat during the rising process. The only time we want the heat is when we are baking it.
I use a 25 cm by 35 cm tray when baking these parāoa iti (buns). Try and get a tray close to this size as it helps the buns rise in a more uniform way.
After the dough has risen and it is time to shape the buns, don't be tempted to knead or work the dough again, we want to handle the dough lightly so the buns stay nice and fluffy.
To test if the buns are baked, press the bottom part of one of the buns. If the buns springs back, they are ready. If the dough stays indented when you press it, bake for a couple more minutes.
STEP BY STEP INSTRUCTIONS FOR THE CHEESY NO-KNEAD BREAD BUNS:
Note: The full recipe card with the full list of ingredients, instructions and step by step video are found at the bottom of this page.
1. PREPARE THE TRAY:
Lightly grease a 25 cm by 35 cm tray with a little noni (oil).
Try and get a tray close to this size as it helps the buns rise in a more uniform way.
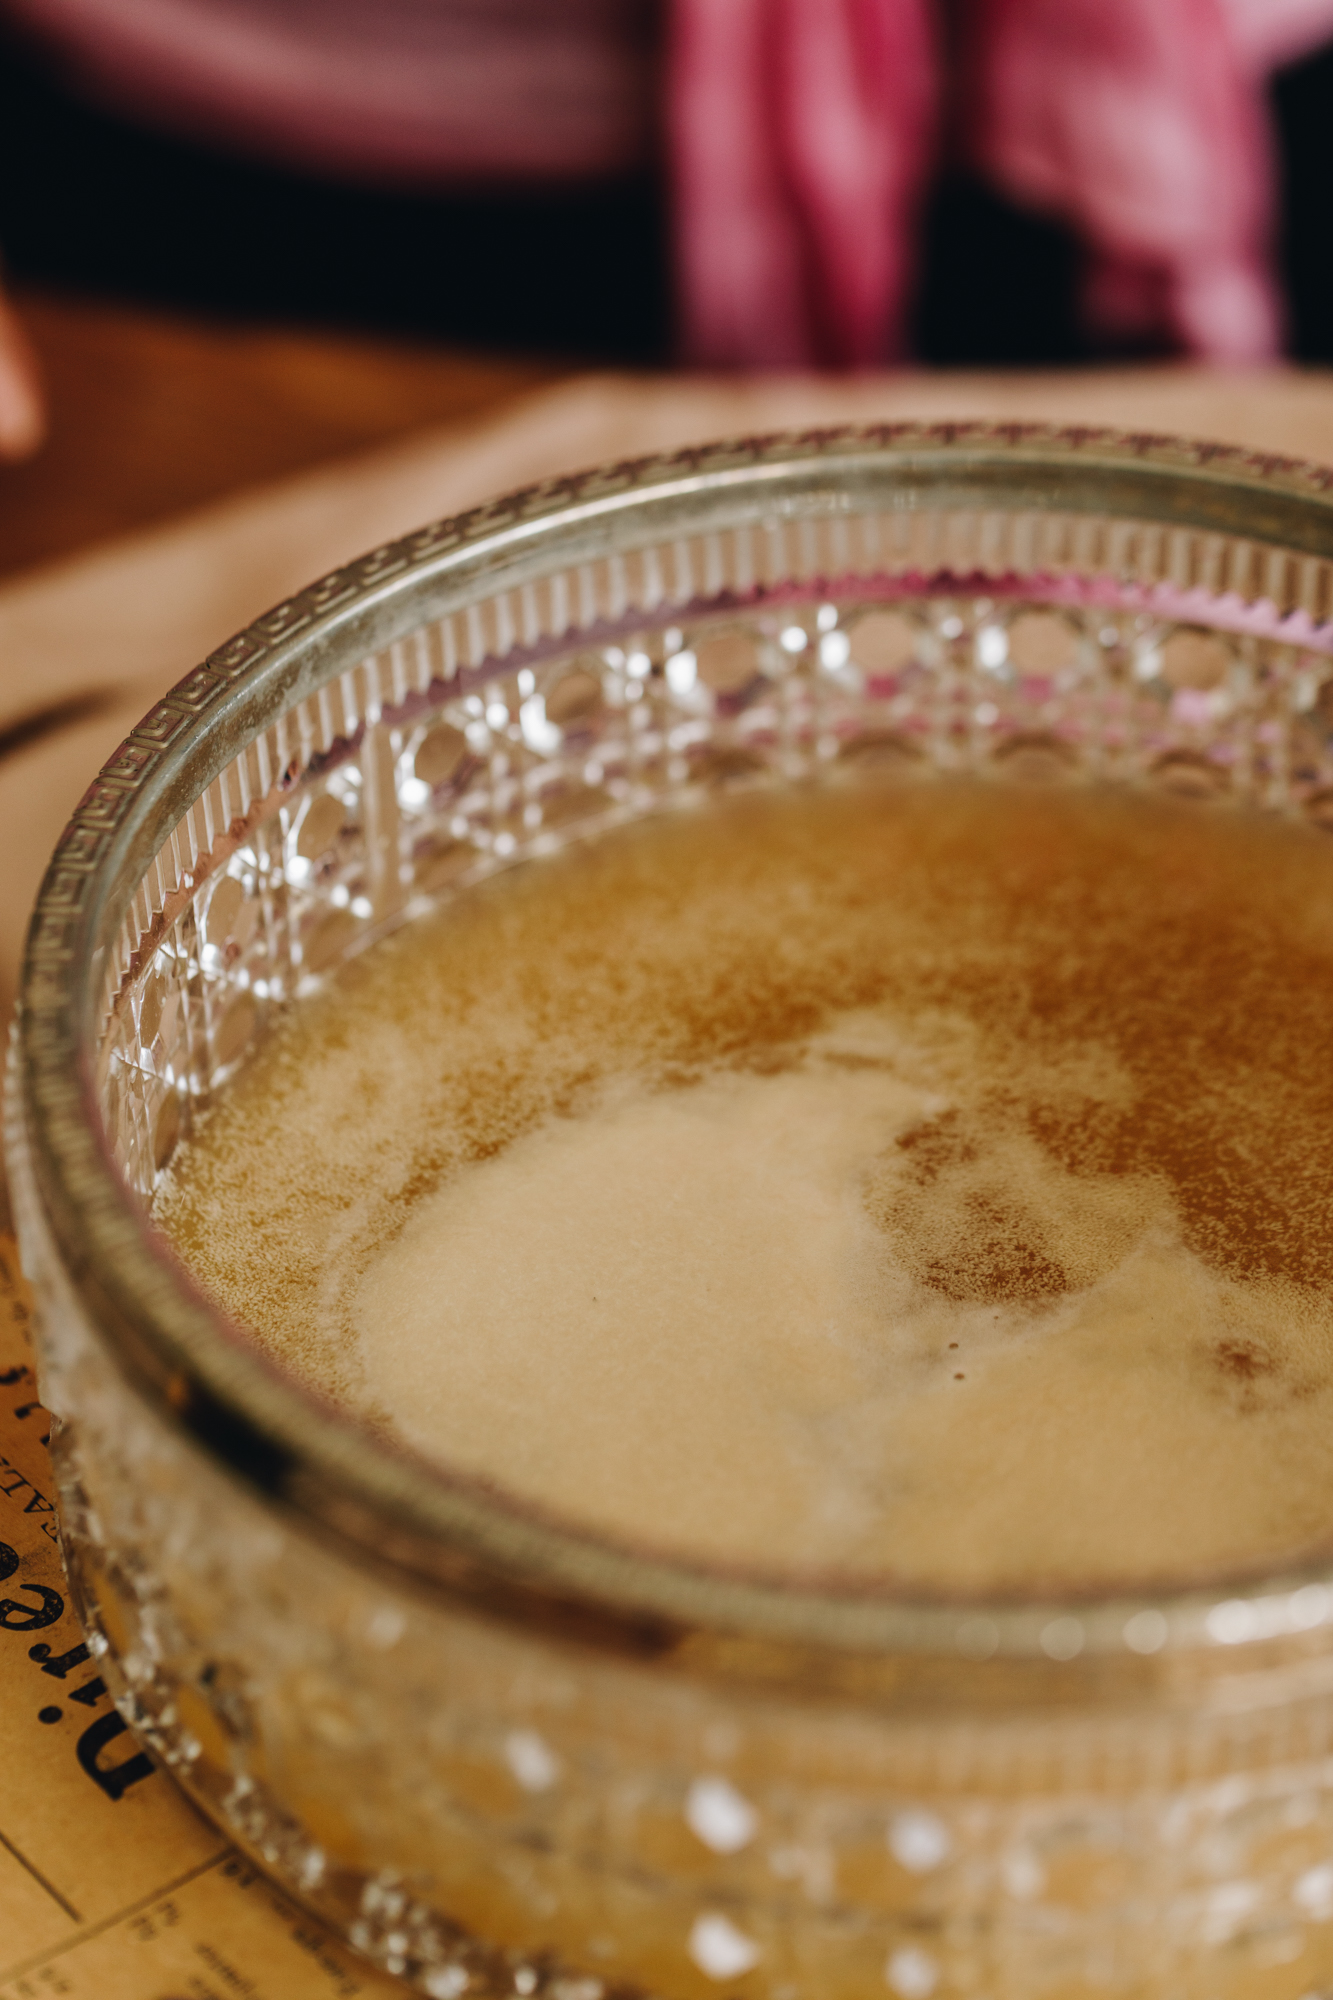
2. ACTIVATE THE YEAST:
Add the wai (water) and huka (sugar) in to a large bowl. Stir it until the huka (sugar) is dissolved.
Add the īhi horo (instant yeast) and stir it in.
Leave the īhi (yeast) to activate for five minutes. The yeast is activated when it has floated to the top.
3. ADD THE REMAINING INGREDIENTS:
Add the puehu parāoa (flour), tote (salt) and pata (butter).
Stir it all together with a bread and butter knife for 1-2 minutes until combined.
Use your hands to make sure all the puehu parāoa and pata (butter) are combined well. It will be sticky, don't add any more flour.
4. FIRST RISE:
Cover the bowl with a bowl cover or tea towel.
Leave to rise for 30 minutes.
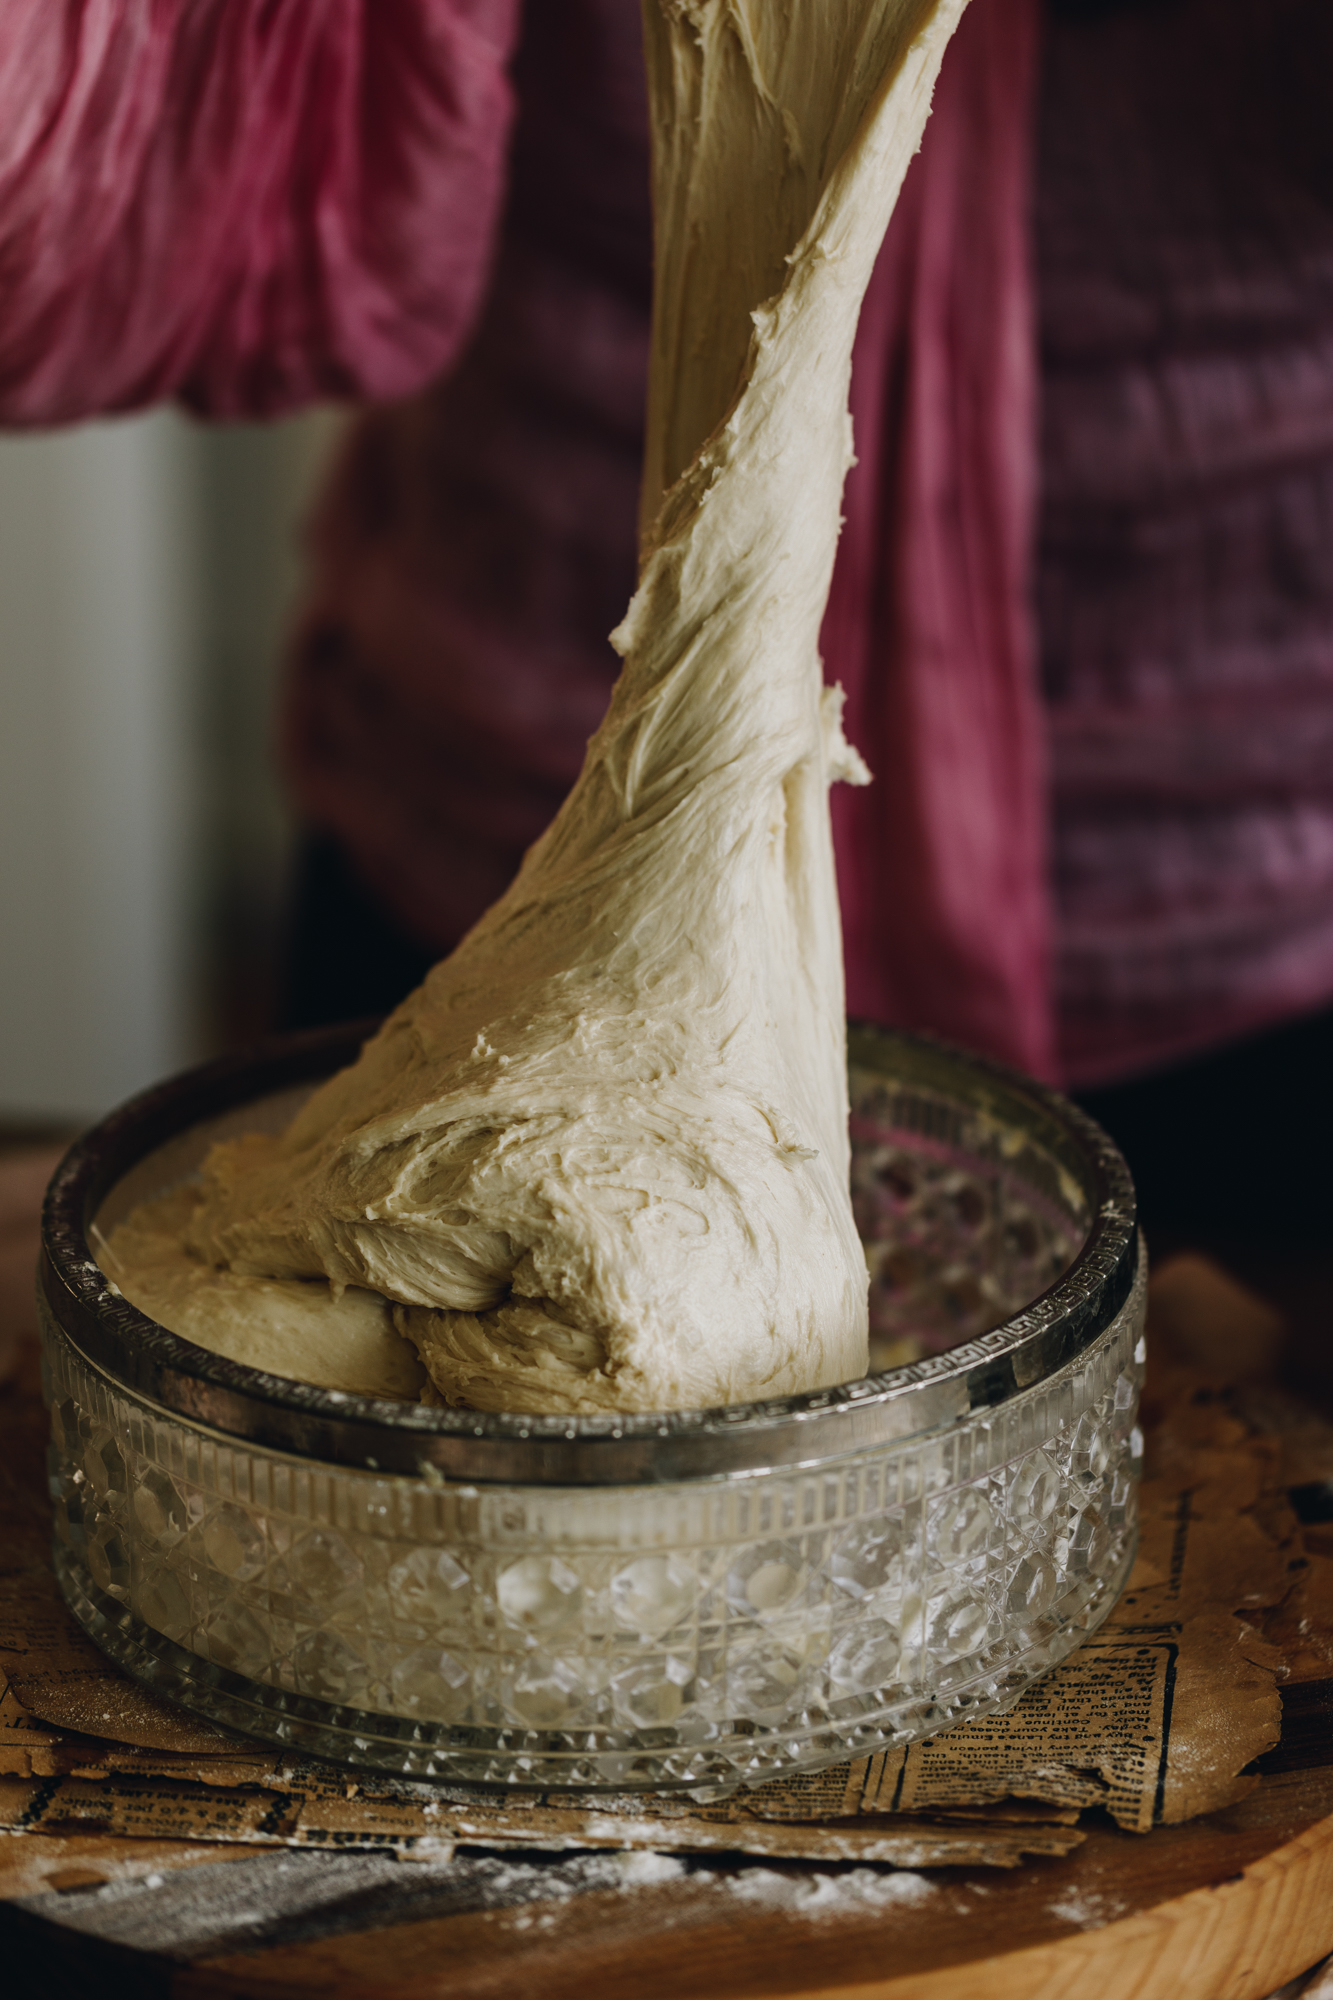
5. FIRST STRETCH AND FOLD:
After 30 minutes, stretch and fold the dough. (Refer to the video for a guide).
With wet hands, take a handful of dough from the side of the bowl, pull it high in the air and then place it in to the centre of the bowl. Turn the bowl a quarter turn and repeat that process.
Every time you place the dough in to the centre it is one count.
In total do 30-35 stretch and folds. This should only take a minute or so.
6. SECOND RISE:
Cover the bowl with a bowl cover or tea towel.
Leave to rise for 30 minutes.
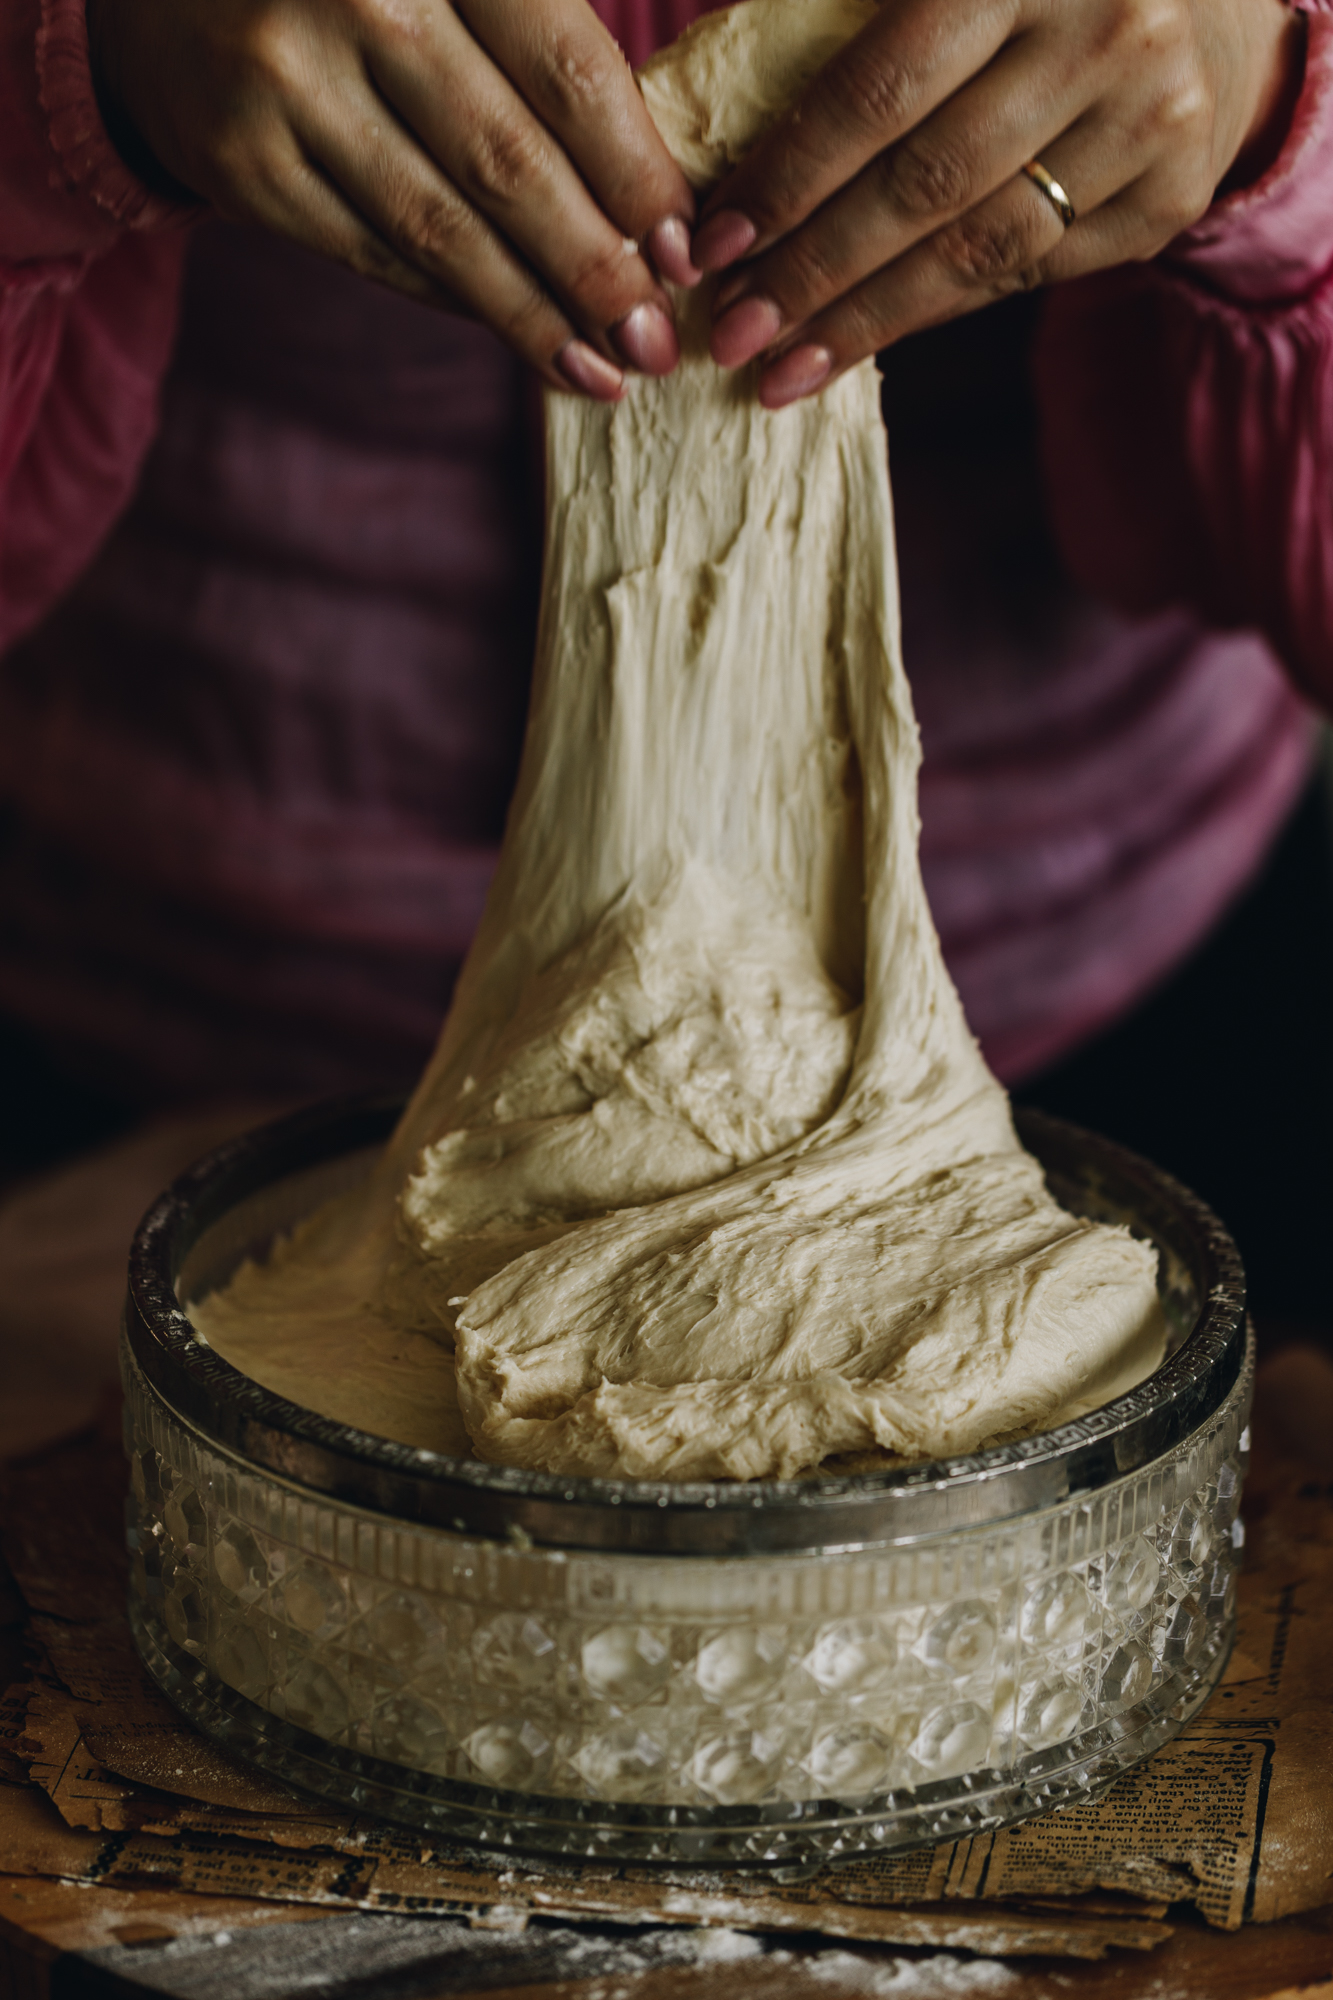
7. SECOND STRETCH AND FOLD:
After 30 minutes, stretch and fold the dough again.
This time do 25 stretch and folds.
8. THIRD RISE:
Cover the bowl with a bowl cover or tea towel.
Leave to rise for 15 minutes.
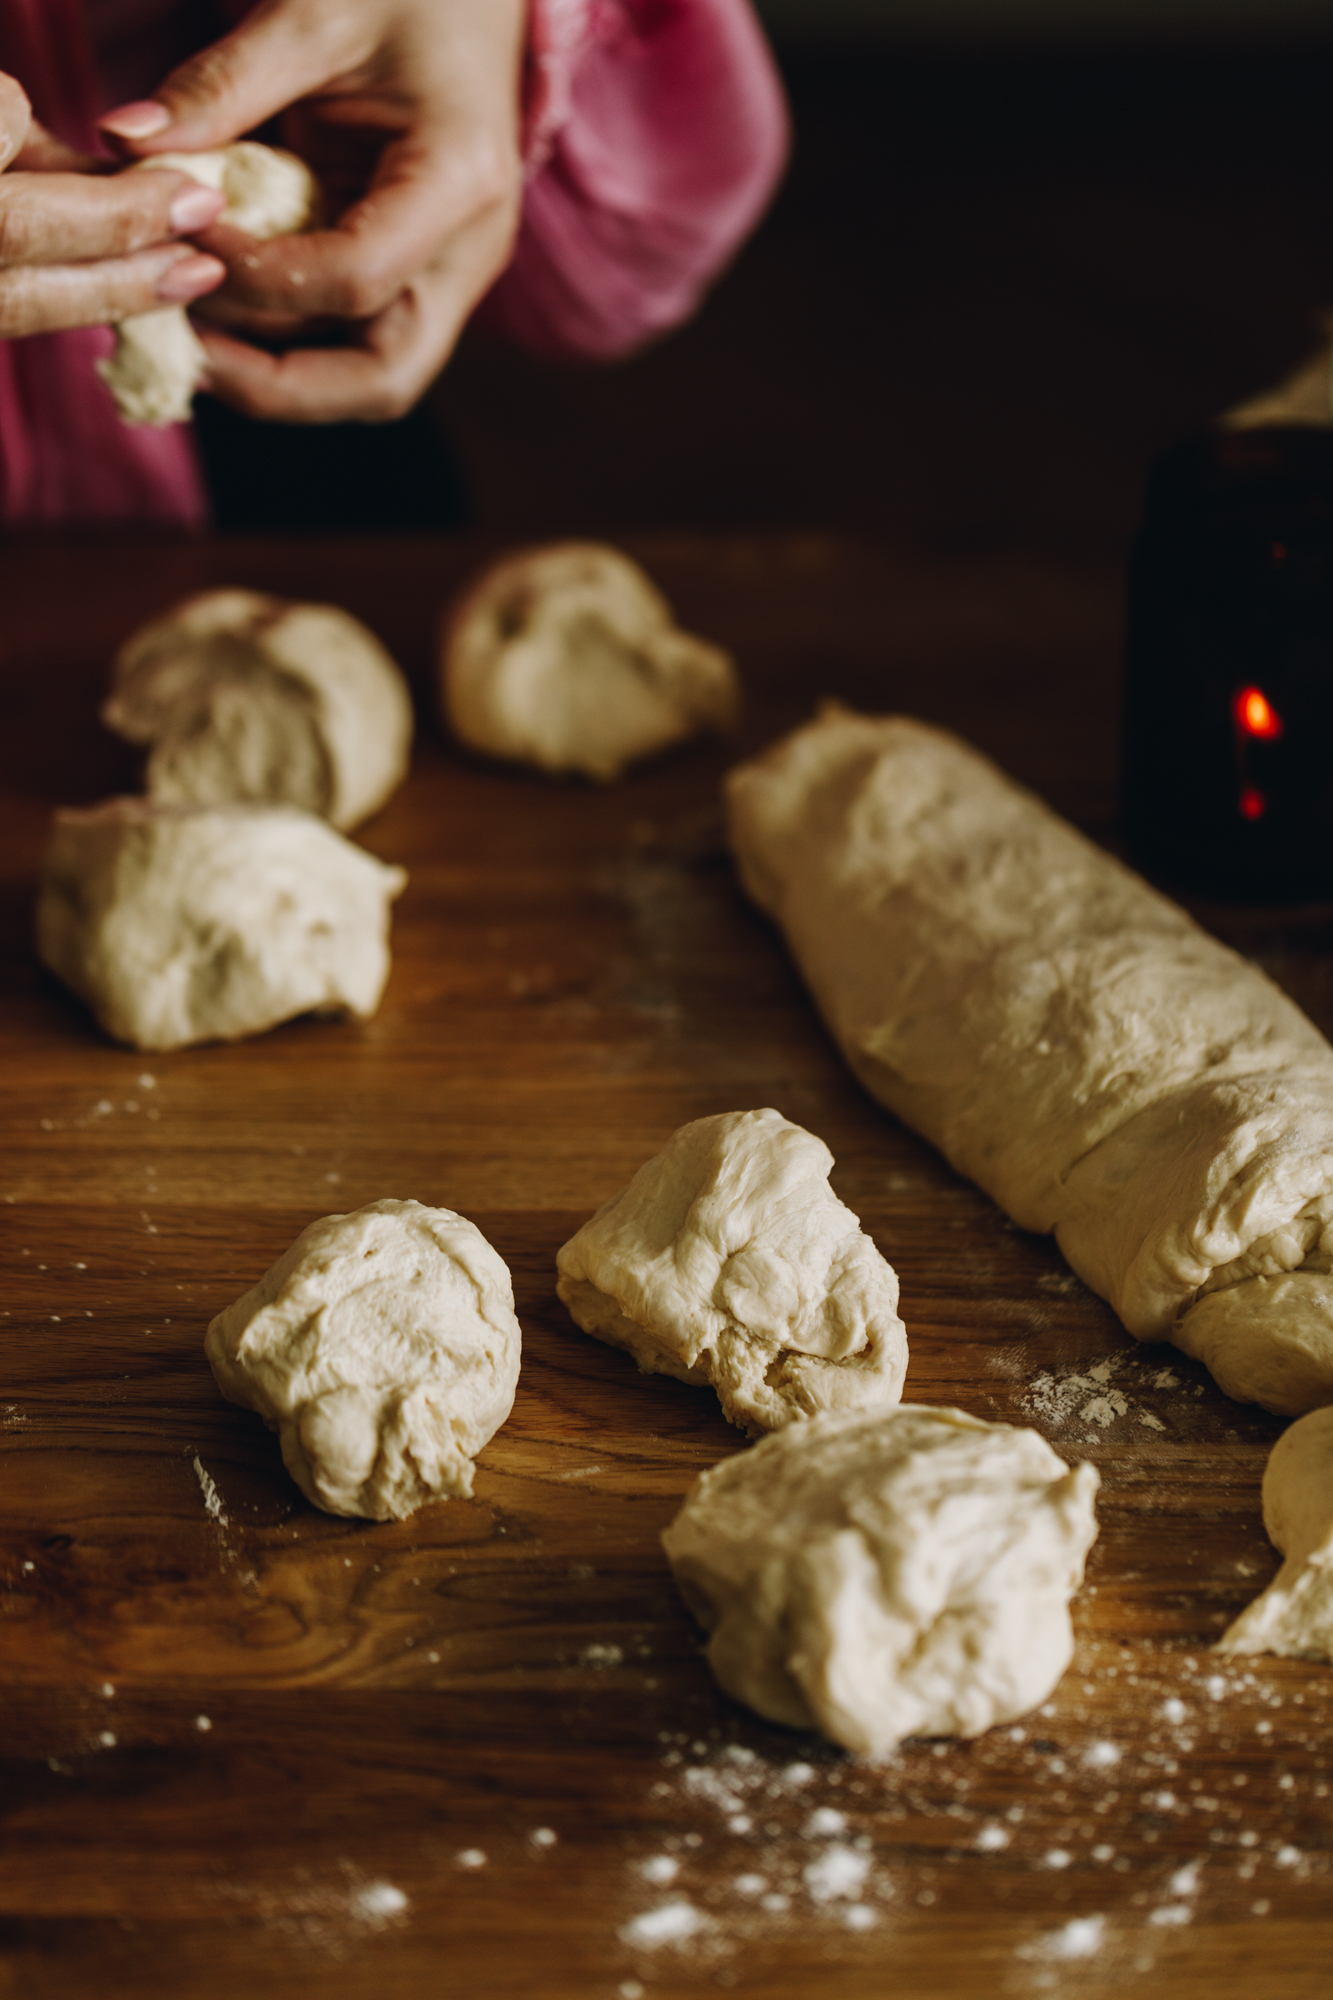
9. DIVIDE THE DOUGH:
Tip the risen dough on to lightly floured bench.
Divide the dough in to 12 equal pieces.
Don't be tempted to knead or work the dough again here, we want to handle the dough lightly so the buns stay nice and fluffy.
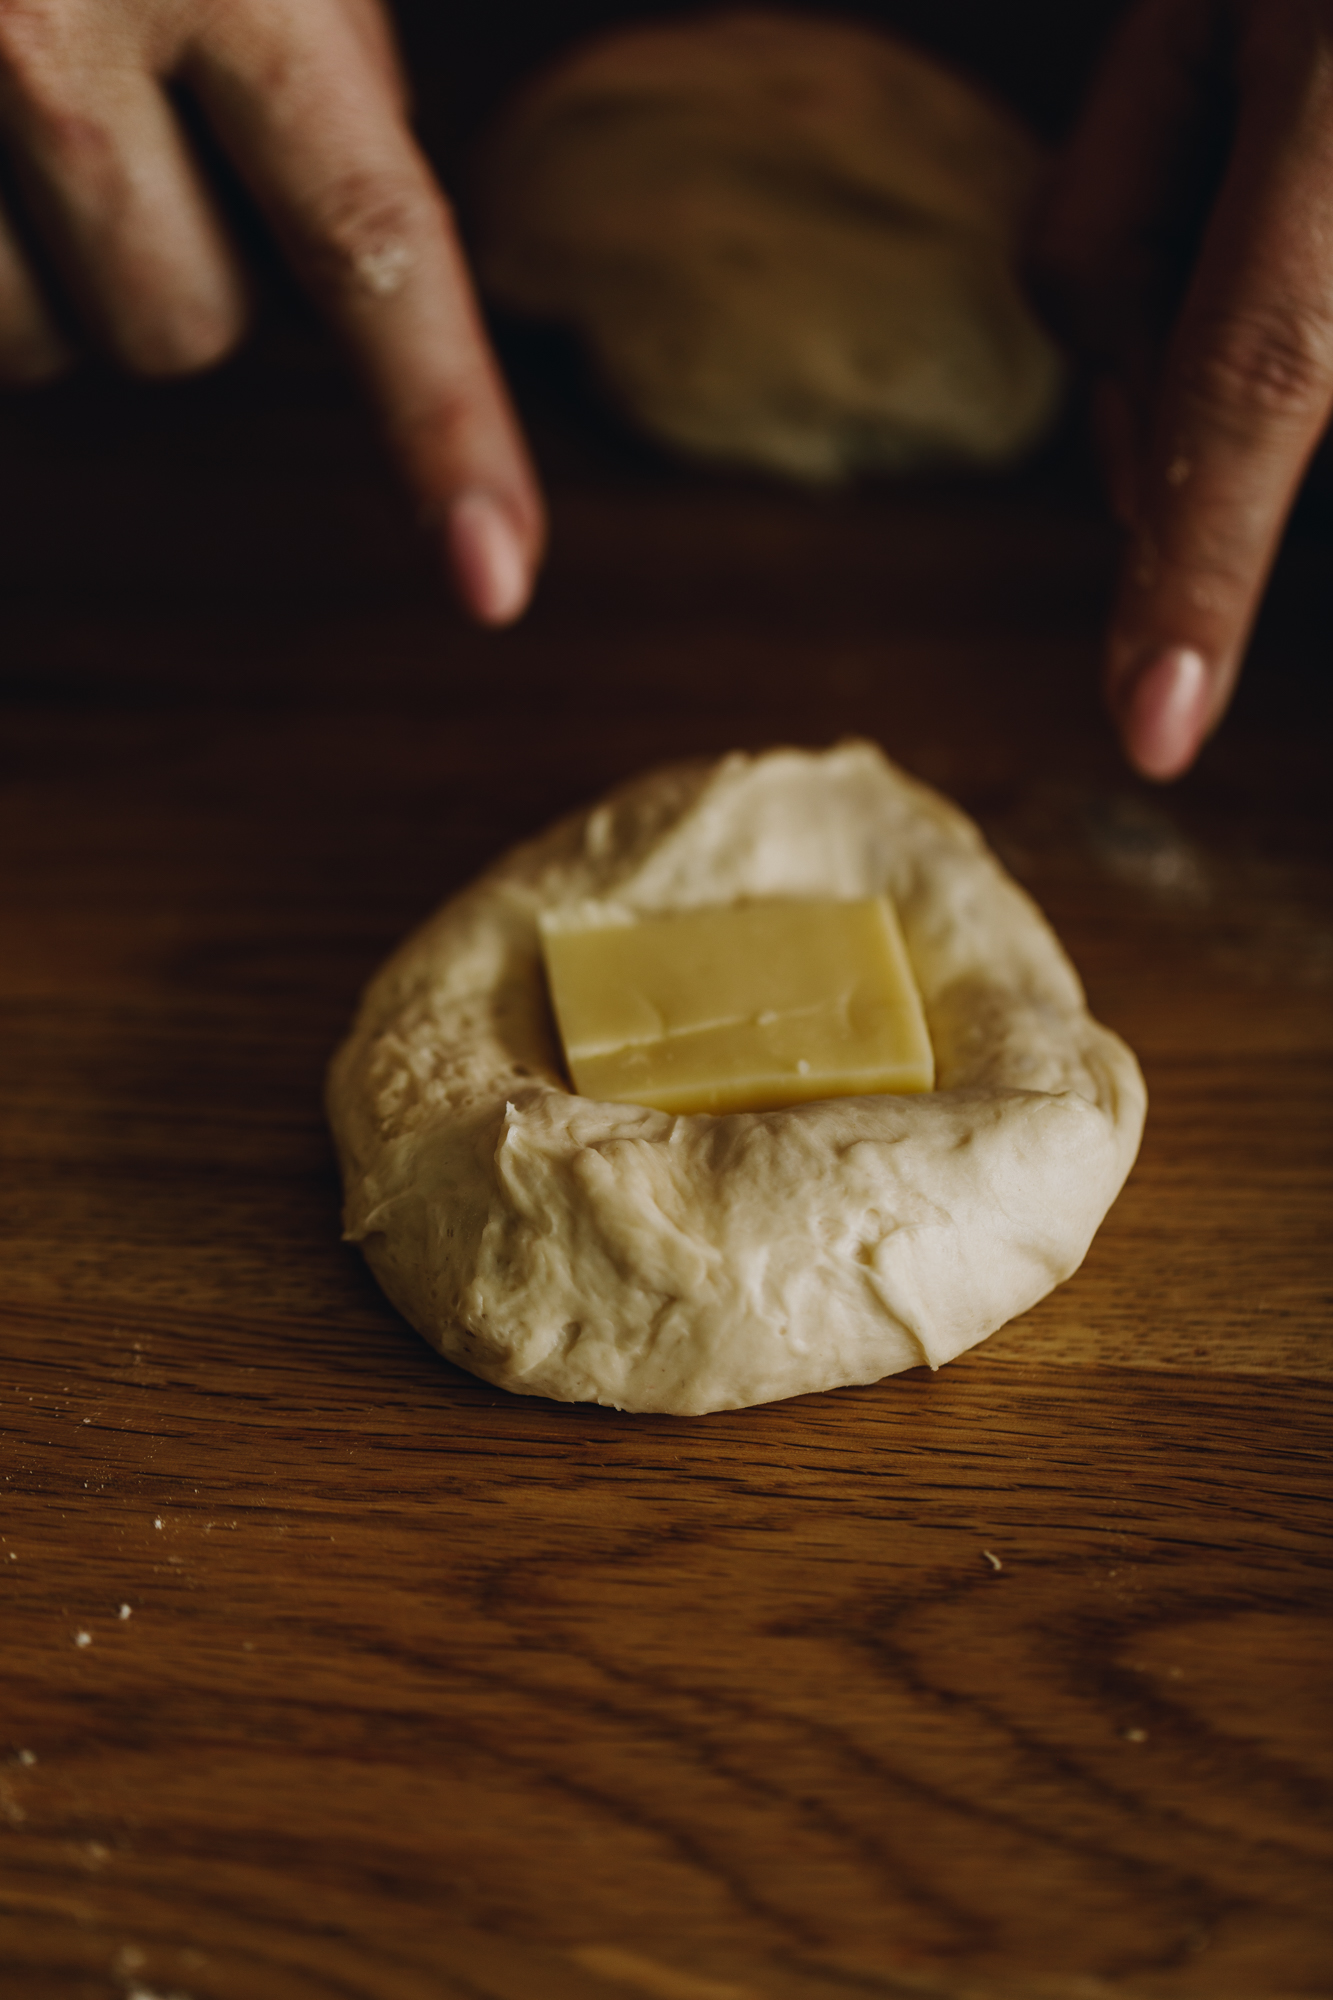
10. Prepare the Cheese:
Cut the tīhi (cheese) in to 12 equal squares.
11. Add the Cheese in to the Dough:
Take each piece, add a piece of cheese and gently press it in to the centre.
If you are adding the penu amiami (pesto), add that on top.
12. Mould the Buns:
Fold all the corners in to the centre until you have a tight ball, seal the seams by pinching them with your fingers.
(Refer to the video for a guide).
Flip the dough over and use the table to help you tuck it in to a ball shape.
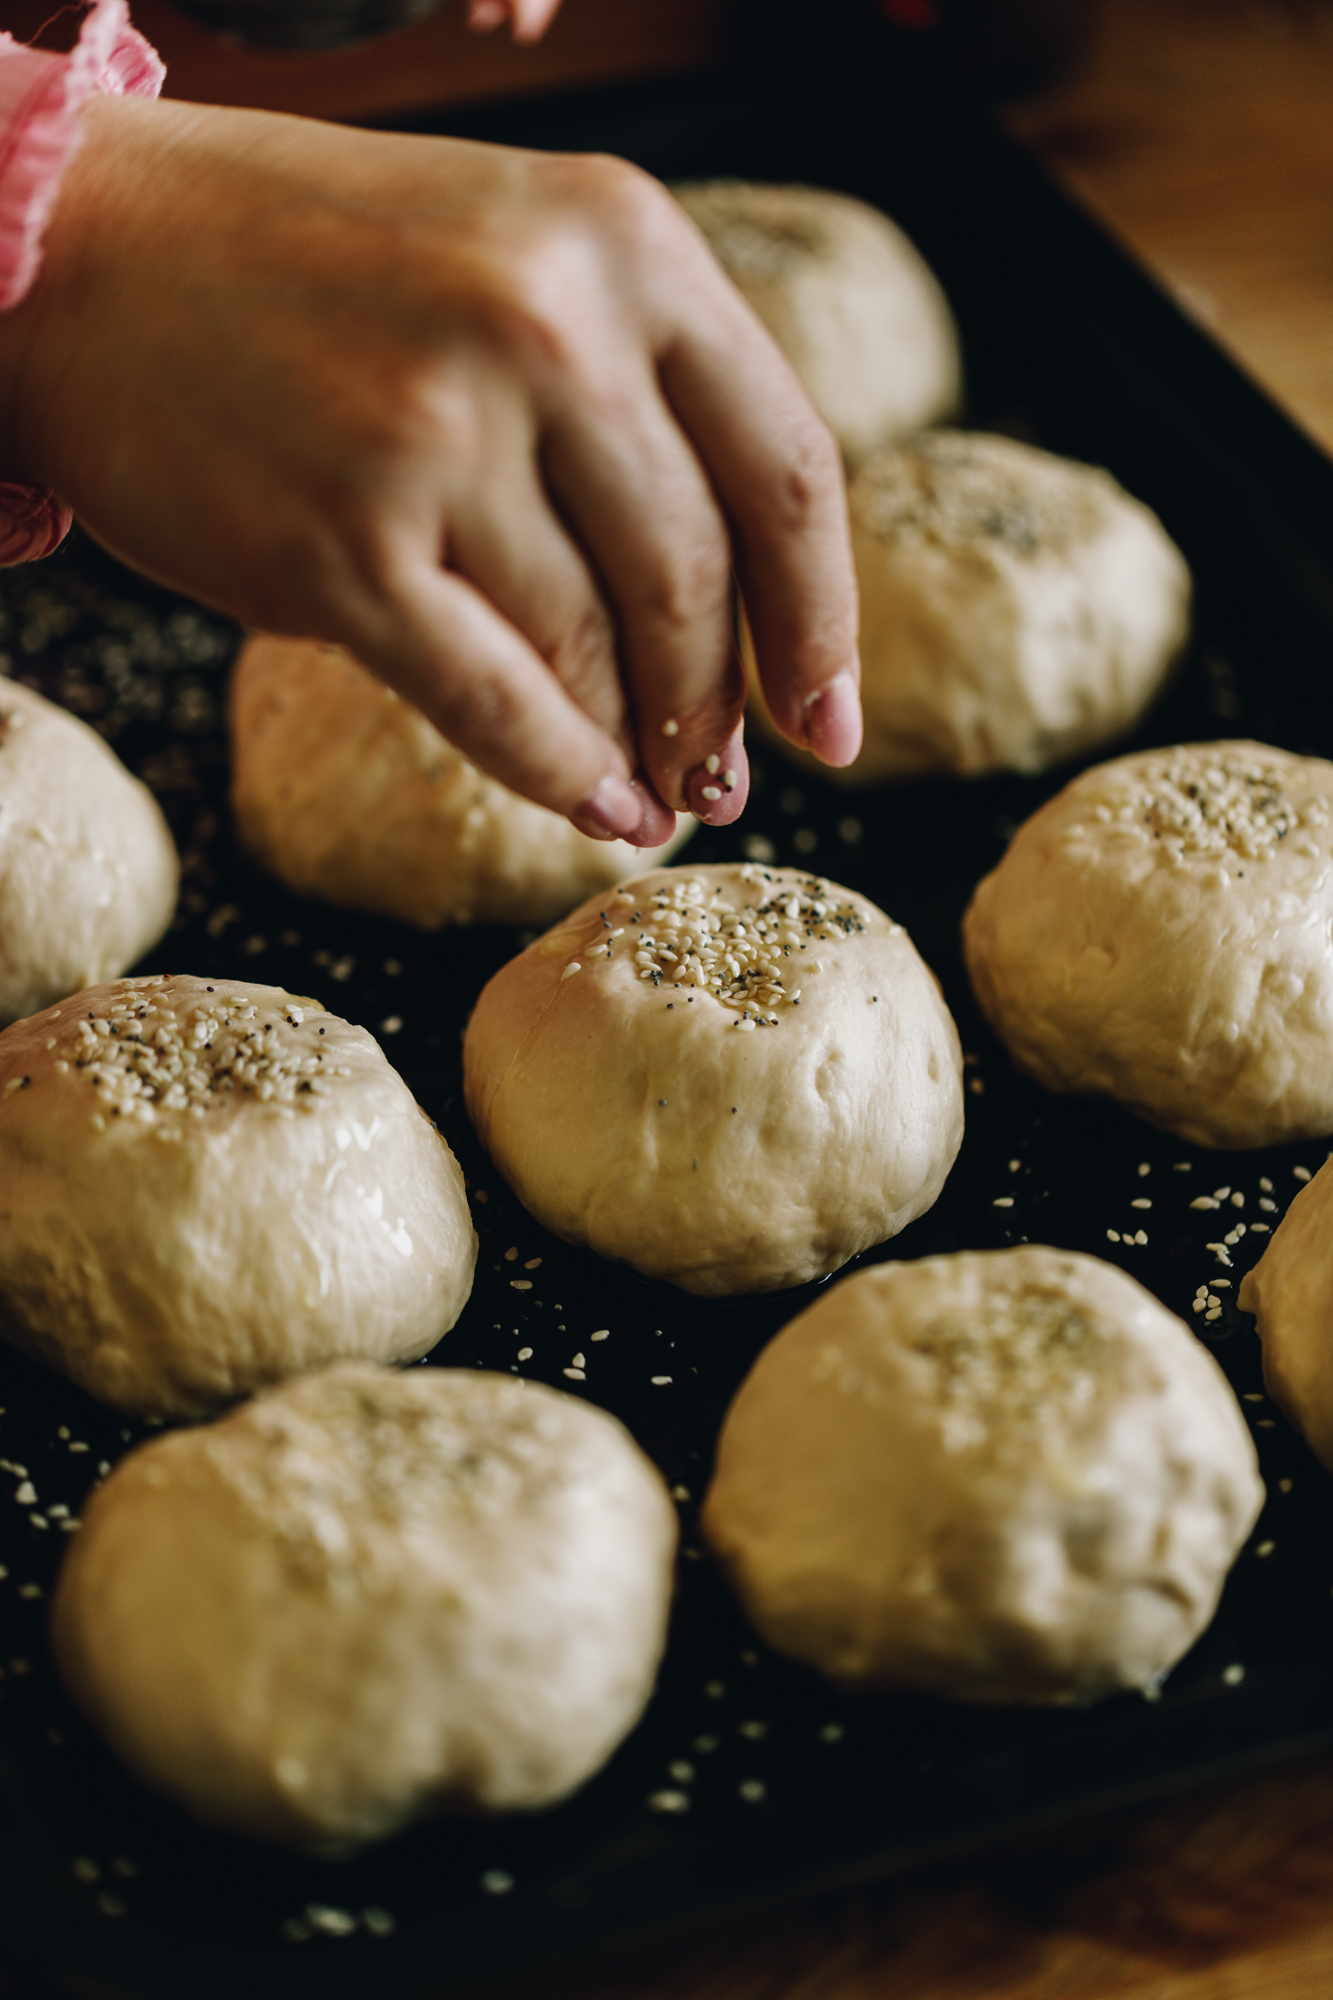
13. Add them to a Tray:
Place it on to the oiled tray.
Repeat the process with each piece dough.
If you are using the bagel seasoning, sprinkle that all over the tops of the buns.
14. Fourth and Final Rise:
Cover the buns with a tea towel.
Rise for 45 minutes.
15. Preheat the Oven:
15 minutes before the rising time is up, preheat the oven to 175 °C bake setting or 165 °C fan bake setting.
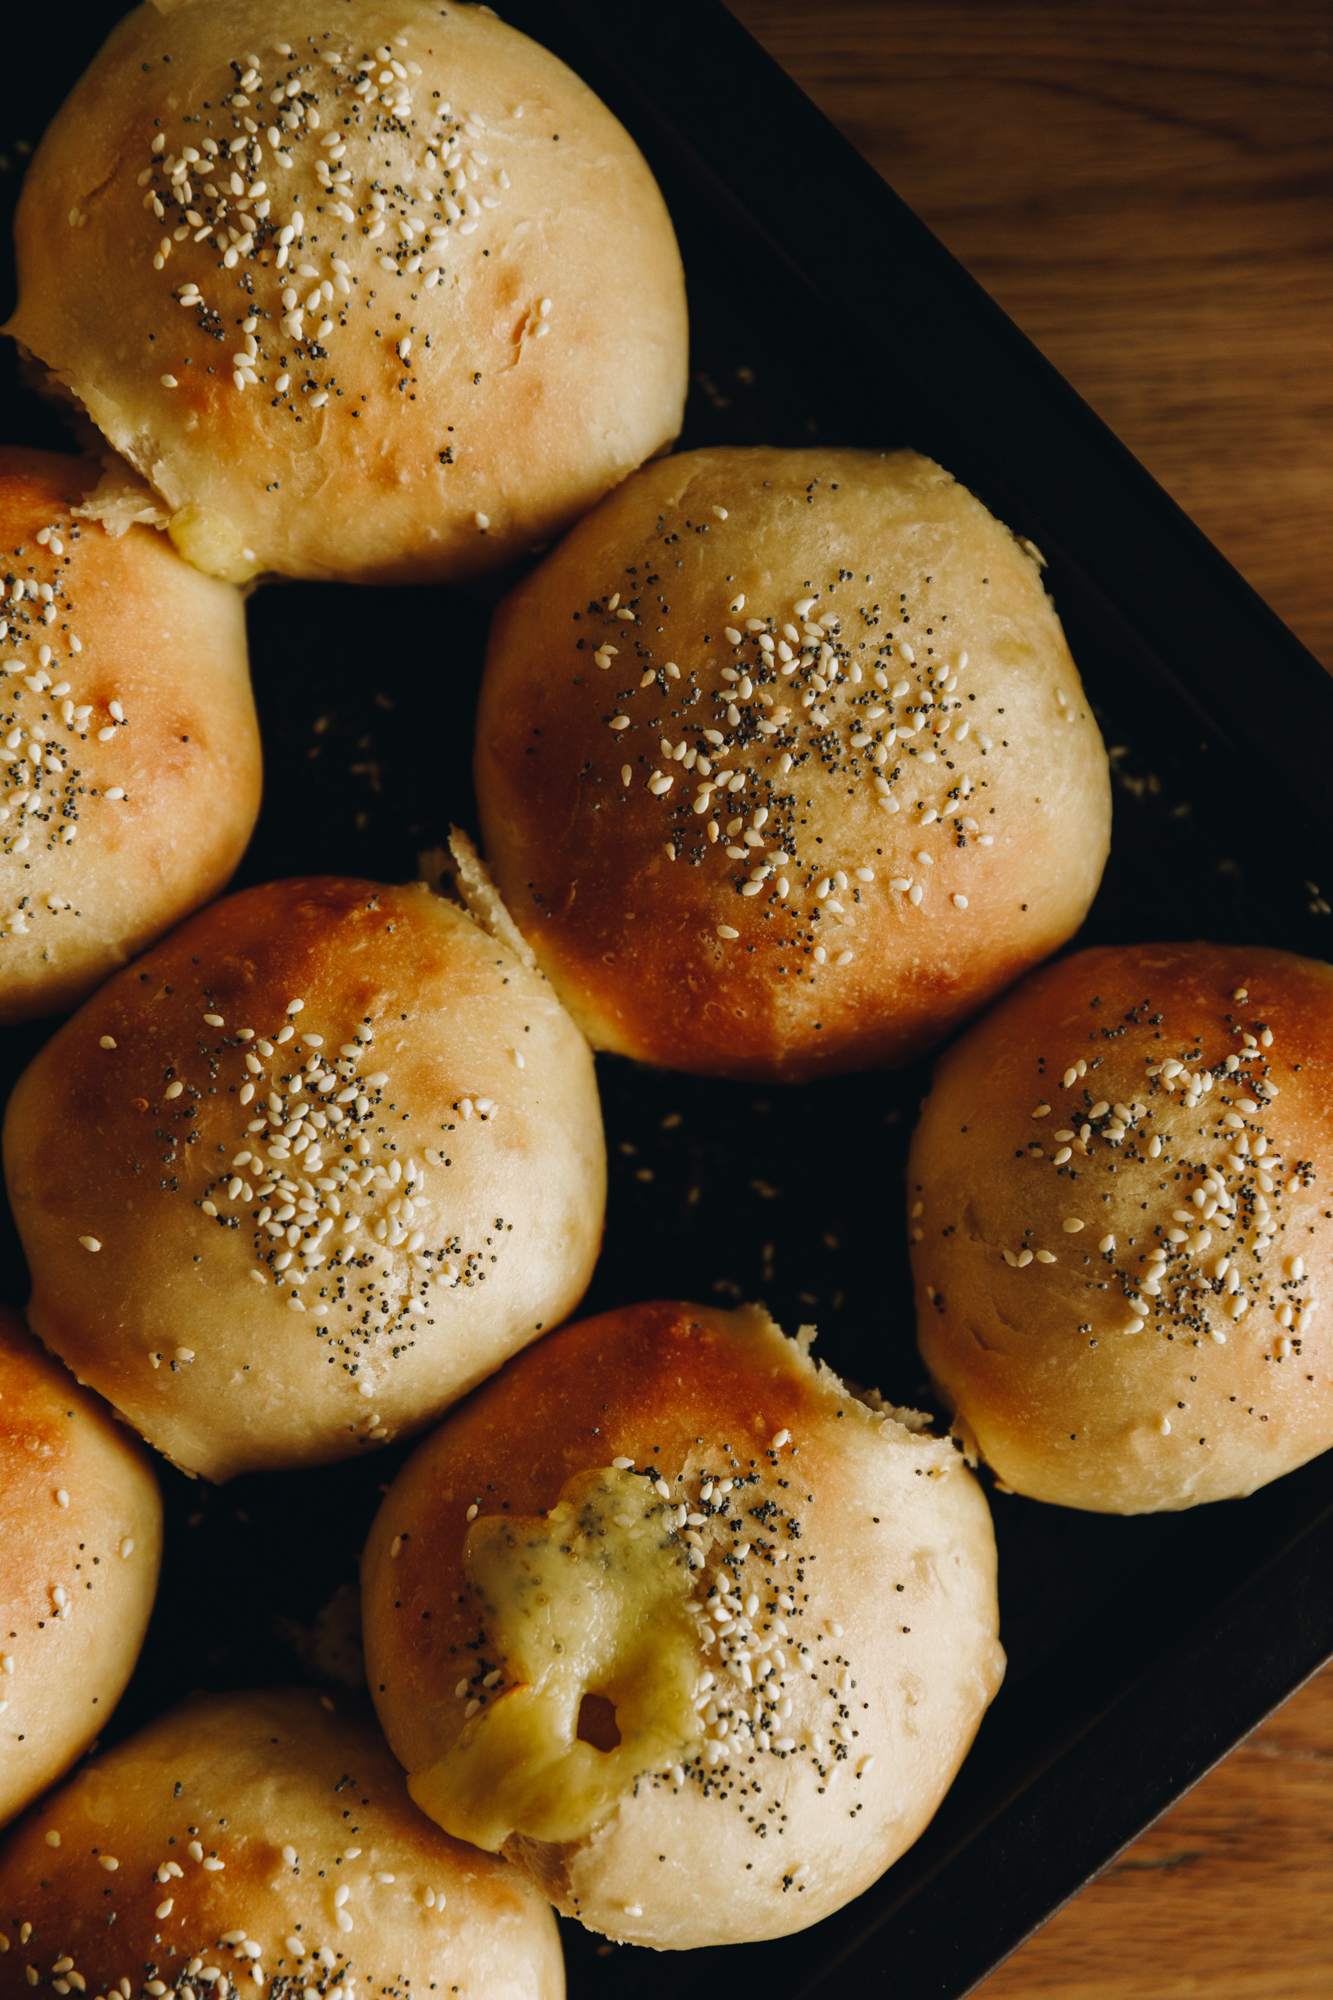
16. Bake the Buns:
Bake for 25 - 27 minutes, until golden.
To test if the buns are done, press the bottom part of one of the buns. If the buns springs back, they are ready. If when you press it, the dough stays indented, bake for a couple more minutes.
17. Glaze the Buns:
When the buns come straight out of the oven, brush them with a knob of pata (butter) for a glossy finish.
Storing the Buns:
These are at their best eaten immediately or cut open and toasted the next day.
I keep my homemade bread buns in a plastic bag for a day or so on the bench. Beyond that I slice them open and store it in the freezer and toast them when needed.
Sink your hands in to these
Parāoa (Bread) Recipes
Bread, fresh from the oven is like a warm hug for the soul.


DID YOU ENJOY THIS RECIPE?
It would be so awesome if you could please leave a review/comment by clicking the “leave a comment” section at the top of the page.
I love seeing you all make my creations, so send a whakaahua (photo) or kiriata (video) to my Instagram and show me what you made. Let me know if you have any pātai (questions) too, I would love to help.
No-knead Bread Buns Stuffed with Cheese - Parāoa Iti e kikī ana ki te tīhi!
Ingredients
The Dough - Te Pokenga
- 2 ¼ C (565 ml) wai aromahana (lukewarm water)
- 2 ½ tablespoon huka hāura (brown sugar)
- 2 ½ teaspoon (8 g) īhi tere (instant yeast) or 16 g (2 tbsp) Surebake/breadmakers yeast.
- 5 C + 2 tablespoon (770 g) puehu parāoa kounga (high grade flour)
- 2 teaspoon tote (salt, fine). I use Himalayan salt here, if you are using iodised table salt, half this amount.
- 65 g pata kua rewaina (melted butter). If you don't want to use butter, replace it with the same amount of noni (oil).
- 220 g tīhi mozzarella (mozzarella cheese).
Optional flavour bombs:
- 120 g penu amiami (pesto)
- 3 tablespoon bagel seasoning
Instructions
Prepare the Tray:
- Lightly grease a 25 cm by 35 cm tray with a little noni (oil). Try and get a tray close to this size as it helps the buns rise in a more uniform way.
Activate the Yeast:
- Add the wai (water) and huka (sugar) in to a large bowl. Stir it until the huka (sugar) is dissolved.
- Add the īhi horo (instant yeast) and stir it in. Leave the īhi (yeast) to activate for five minutes. The yeast is activated when it has floated to the top.
Add the remaining Ingredients:
- Add the puehu parāoa (flour), tote (salt) and pata (butter). Stir it all together with a bread and butter knife for 1-2 minutes until combined.
- Use your hands to make sure all the puehu parāoa and pata (butter) are combined well. It will be sticky, don't add any more flour.
First Rise:
- Cover the bowl with a bowl cover or tea towel. Leave to rise for 30 minutes.
First Stretch and Fold:
- After 30 minutes, stretch and fold the dough. (Refer to the video for a guide).
- With wet hands, take a handful of dough from the side of the bowl, pull it high in the air and then place it in to the centre of the bowl. Turn the bowl a quarter turn and repeat that process. Every time you place the dough in to the centre it is one count. In total do 30-35 stretch and folds. This should only take a minute.
Second Rise:
- Cover the bowl with a bowl cover or tea towel. Leave to rise for 30 minutes.
Second Stretch and Fold:
- After 30 minutes, stretch and fold the dough again. This time do 25 stretch and folds.
Third Rise:
- Cover the bowl with a bowl cover or tea towel. Leave to rise for 15 minutes.
Divide the Dough:
- Tip the risen dough on to lightly floured bench.
- Divide the dough in to 12 equal pieces. Don't be tempted to knead the dough again here, we want to handle the dough lightly so the buns stay nice and fluffy.
Prepare the Cheese:
- Cut the tīhi (cheese) in to 12 equal squares.
Add the Cheese in to the Dough:
- Take each piece, add a piece of cheese and gently press it in to the centre. If you are adding the penu amiami (pesto), add that on top.
Mould the Buns:
- Fold all the corners in to the centre until you have a tight ball, seal the seams by pinching them with your fingers. (Refer to the video for a guide).
- Flip the dough over and use the table to help you tuck it in to a ball shape. Place it on to the oiled tray.
- Repeat the process with each piece dough.
- If you are using the bagel seasoning, sprinkle that all over the tops of the buns.
Fourth and Final Rise:
- Cover the buns with a tea towel. Rise for 45 minutes.
Preheat the Oven:
- 15 minutes before the rising time is up, preheat the oven to 175 °C bake setting or 165 °C fan bake setting.
Bake the Buns:
- Bake for 25 - 27 minutes, until golden.
- To test if the buns are done, press the bottom part of one of the buns. If the buns springs back, they are ready. If when you press it, the dough stays indented, bake for a couple more minutes.
Glaze the Buns:
- When the buns come straight out of the oven, brush them with a knob of pata (butter) for a glossy finish.
Storing the Buns:
- These are at their best eaten immediately or cut open and toasted the next day.
- I keep my homemade bread buns in a plastic bag for a day or so on the bench. Beyond that I slice them open and store it in the freezer and toast them when needed.


Leave a Review