There’s nothing quite like the smell of freshly baked bread filling your kāuta (kitchen). This rustic no-knead bread is baked in a cast iron pot for a crispy crust and soft, airy crumb. Using a simple stretch and fold method, it delivers artisan-style results without kneading—perfect for an easy homemade loaf.
Baking the dough in a preheated cast iron pot traps steam, helping the bread rise beautifully while forming a crisp crust. With flexible same-day and overnight options, this method is an easy way to achieve bakery-quality bread at home—perfect for serving warm with butter, soups, or hearty meals.
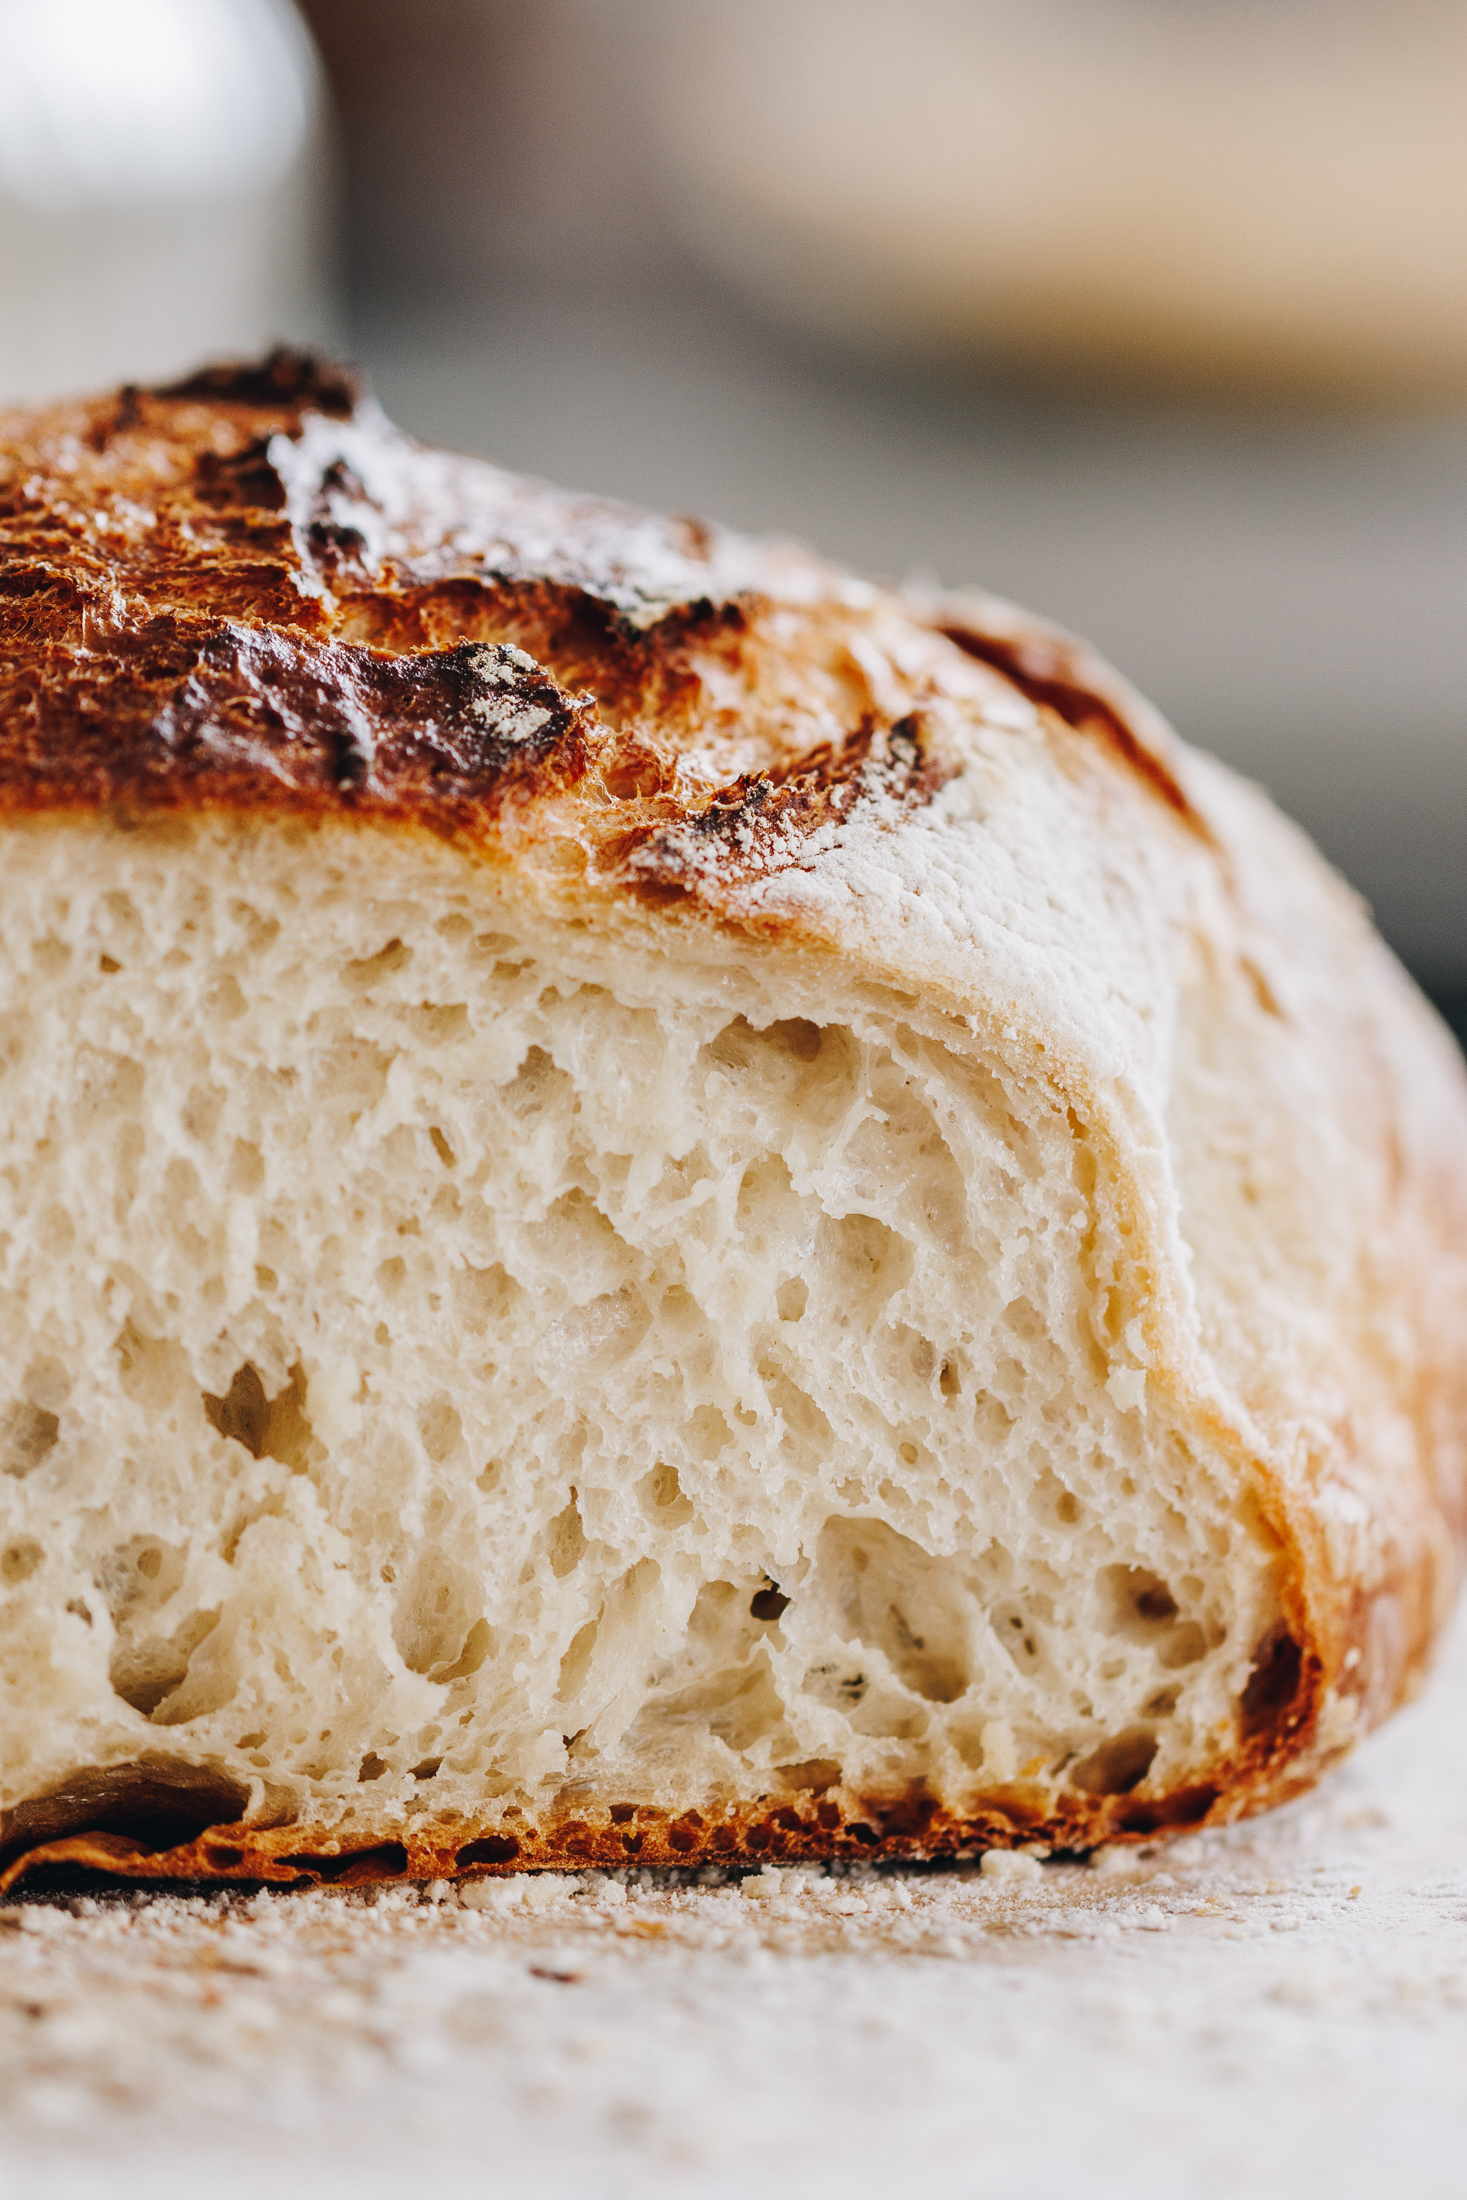
Why you will love this rustic no-knead bread loaf:
This rustic no-knead bread is simple, satisfying, and incredibly good with minimal effort. Made with just a handful of basic ingredients, it uses a stretch and fold technique instead of kneading, making it an easy recipe that fits into any day. Whether you’re new to bread baking or just want a reliable, fuss-free loaf, this recipe delivers every time. You can make it the same day or leave it overnight for a deeper flavour—kei a koe te tikanga, it’s up to you.
Other stretch and fold recipes to try:
Want a seedy version of this bread recipe? Then make this No-knead Seeded Oat Bread Loaf. My No-knead Focaccia Bread is also a hit whenever I serve it, so give it a go! Do you prefer a kneaded sweet bread? These Coconut Buns (Pani Popo) have been a favourite on this site for years.
Videography and photography by Sarah Henderson.
Ingredients:
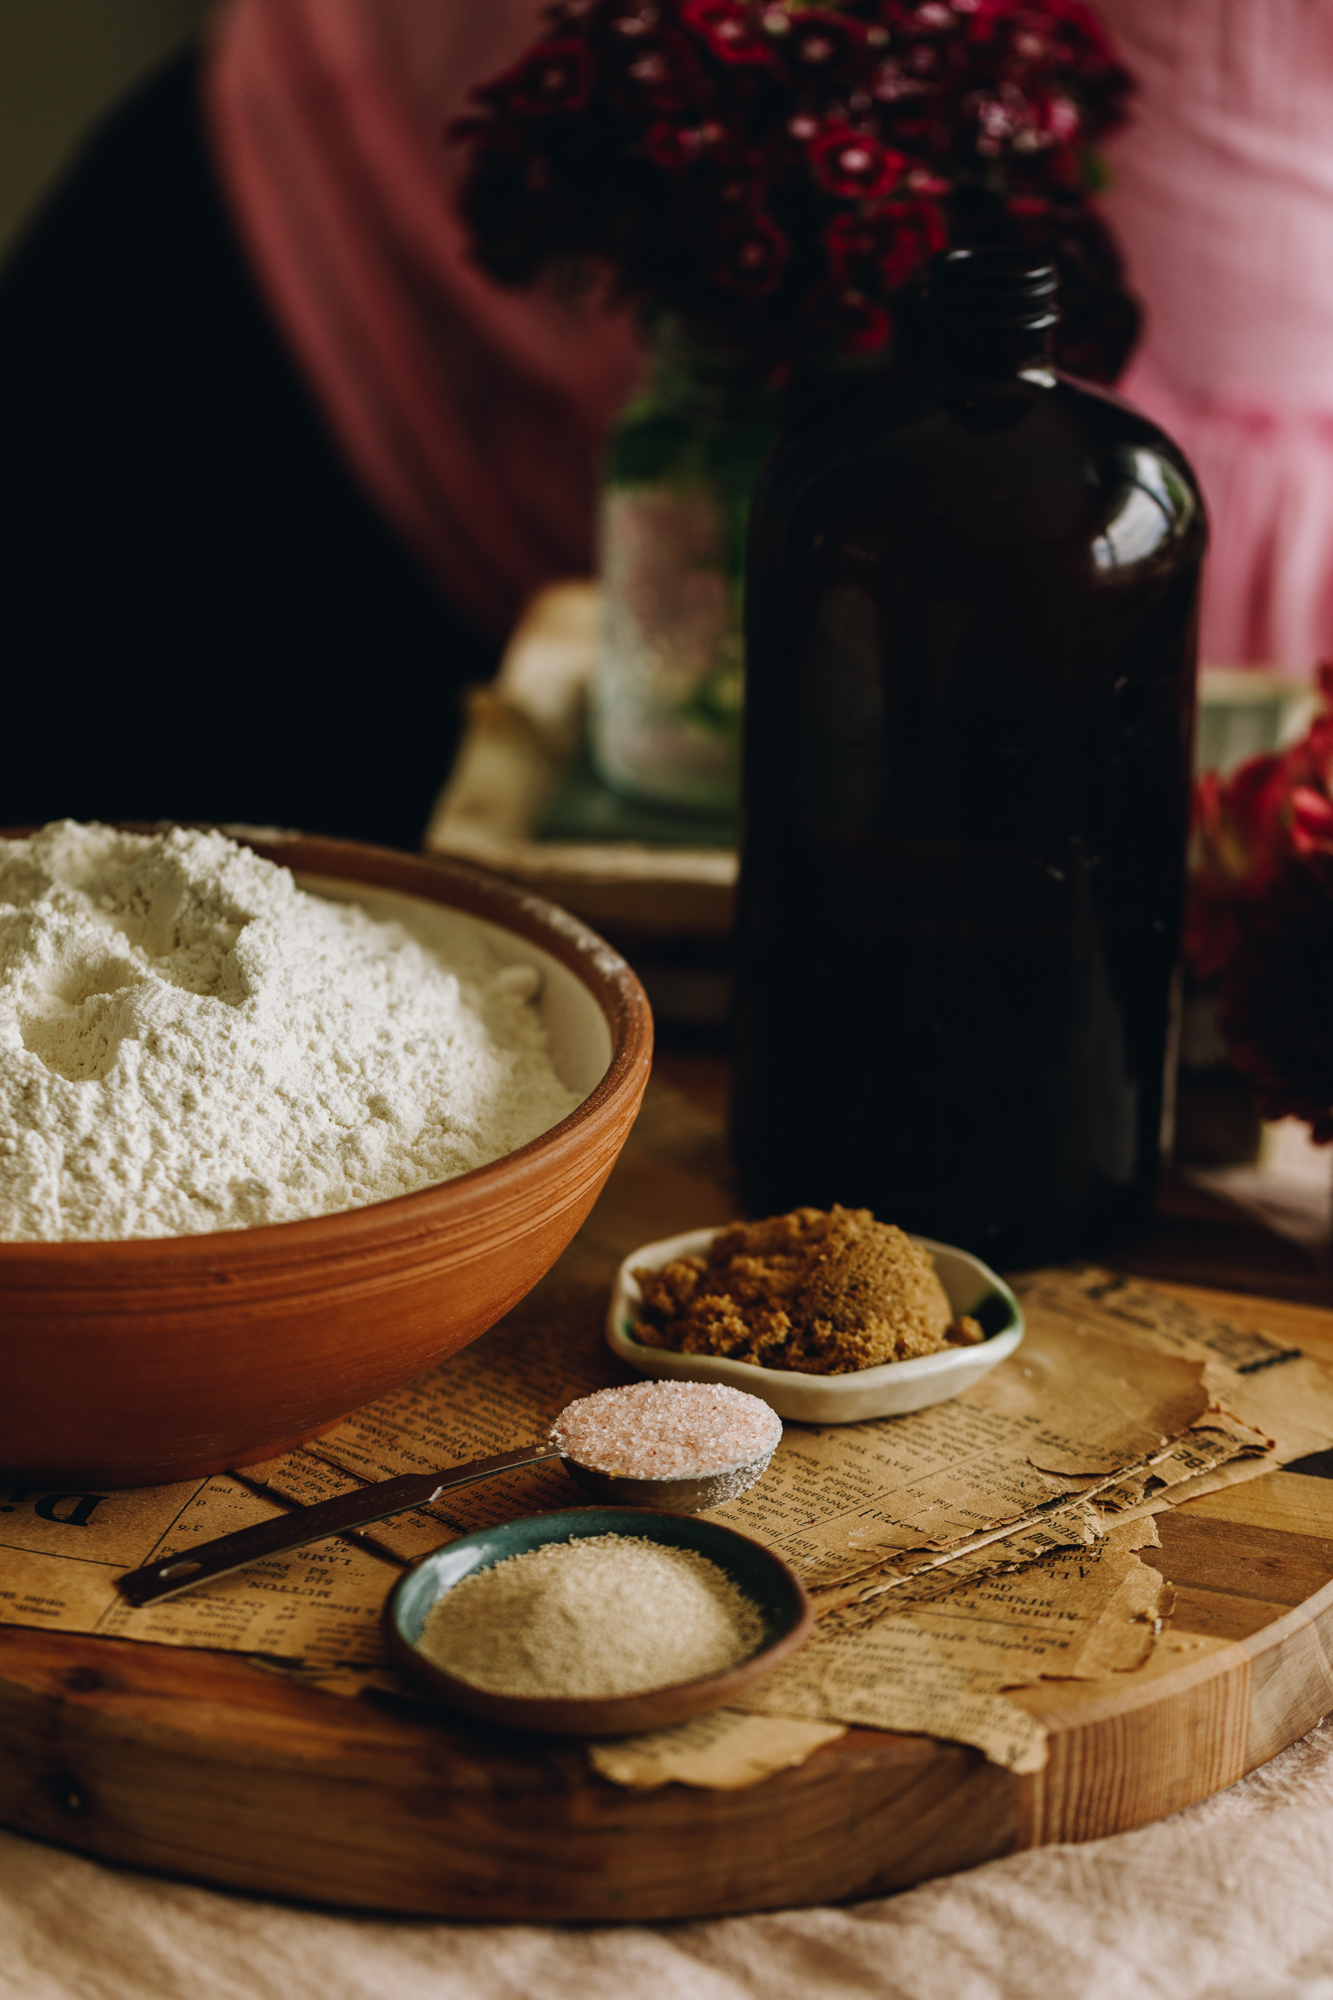
- Honey: I love honey in this recipe but feel free to swap it for the same amount of brown or white sugar or maple syrup.
- Instant yeast: Use īhi horo (instant yeast) in this recipe for efficient rising. If you are using Surebake or breadmaker's yeast, double the amount. I prefer instant yeast for this recipe so use Surebake as the last resort.
- High grade flour: Always use puehu parāoa kounga (high grade flour) in bread recipes for the fluffiest result.
- Salt: I use Himalayan salt in my baking because it gives a subtle flavour. If you are using iodised table salt, half the quantity.
- Seeds: These are optional but wonderful to add texture to the parāoa (bread). Sunflower, chia, linseed, LSA mix - any of these would work well in this recipe.
How to Make No-Knead Bread (Stretch and Fold Method):
Note: The full recipe card with the full list of ingredients, instructions and step by step video are found at the bottom of this page.
1. Prepare the Bowl or Banneton:
Grease a bowl that is the same shape as your cast iron pot or dust a a sourdough banneton heavily with cornflour. Set aside.
2. Activate the Yeast:
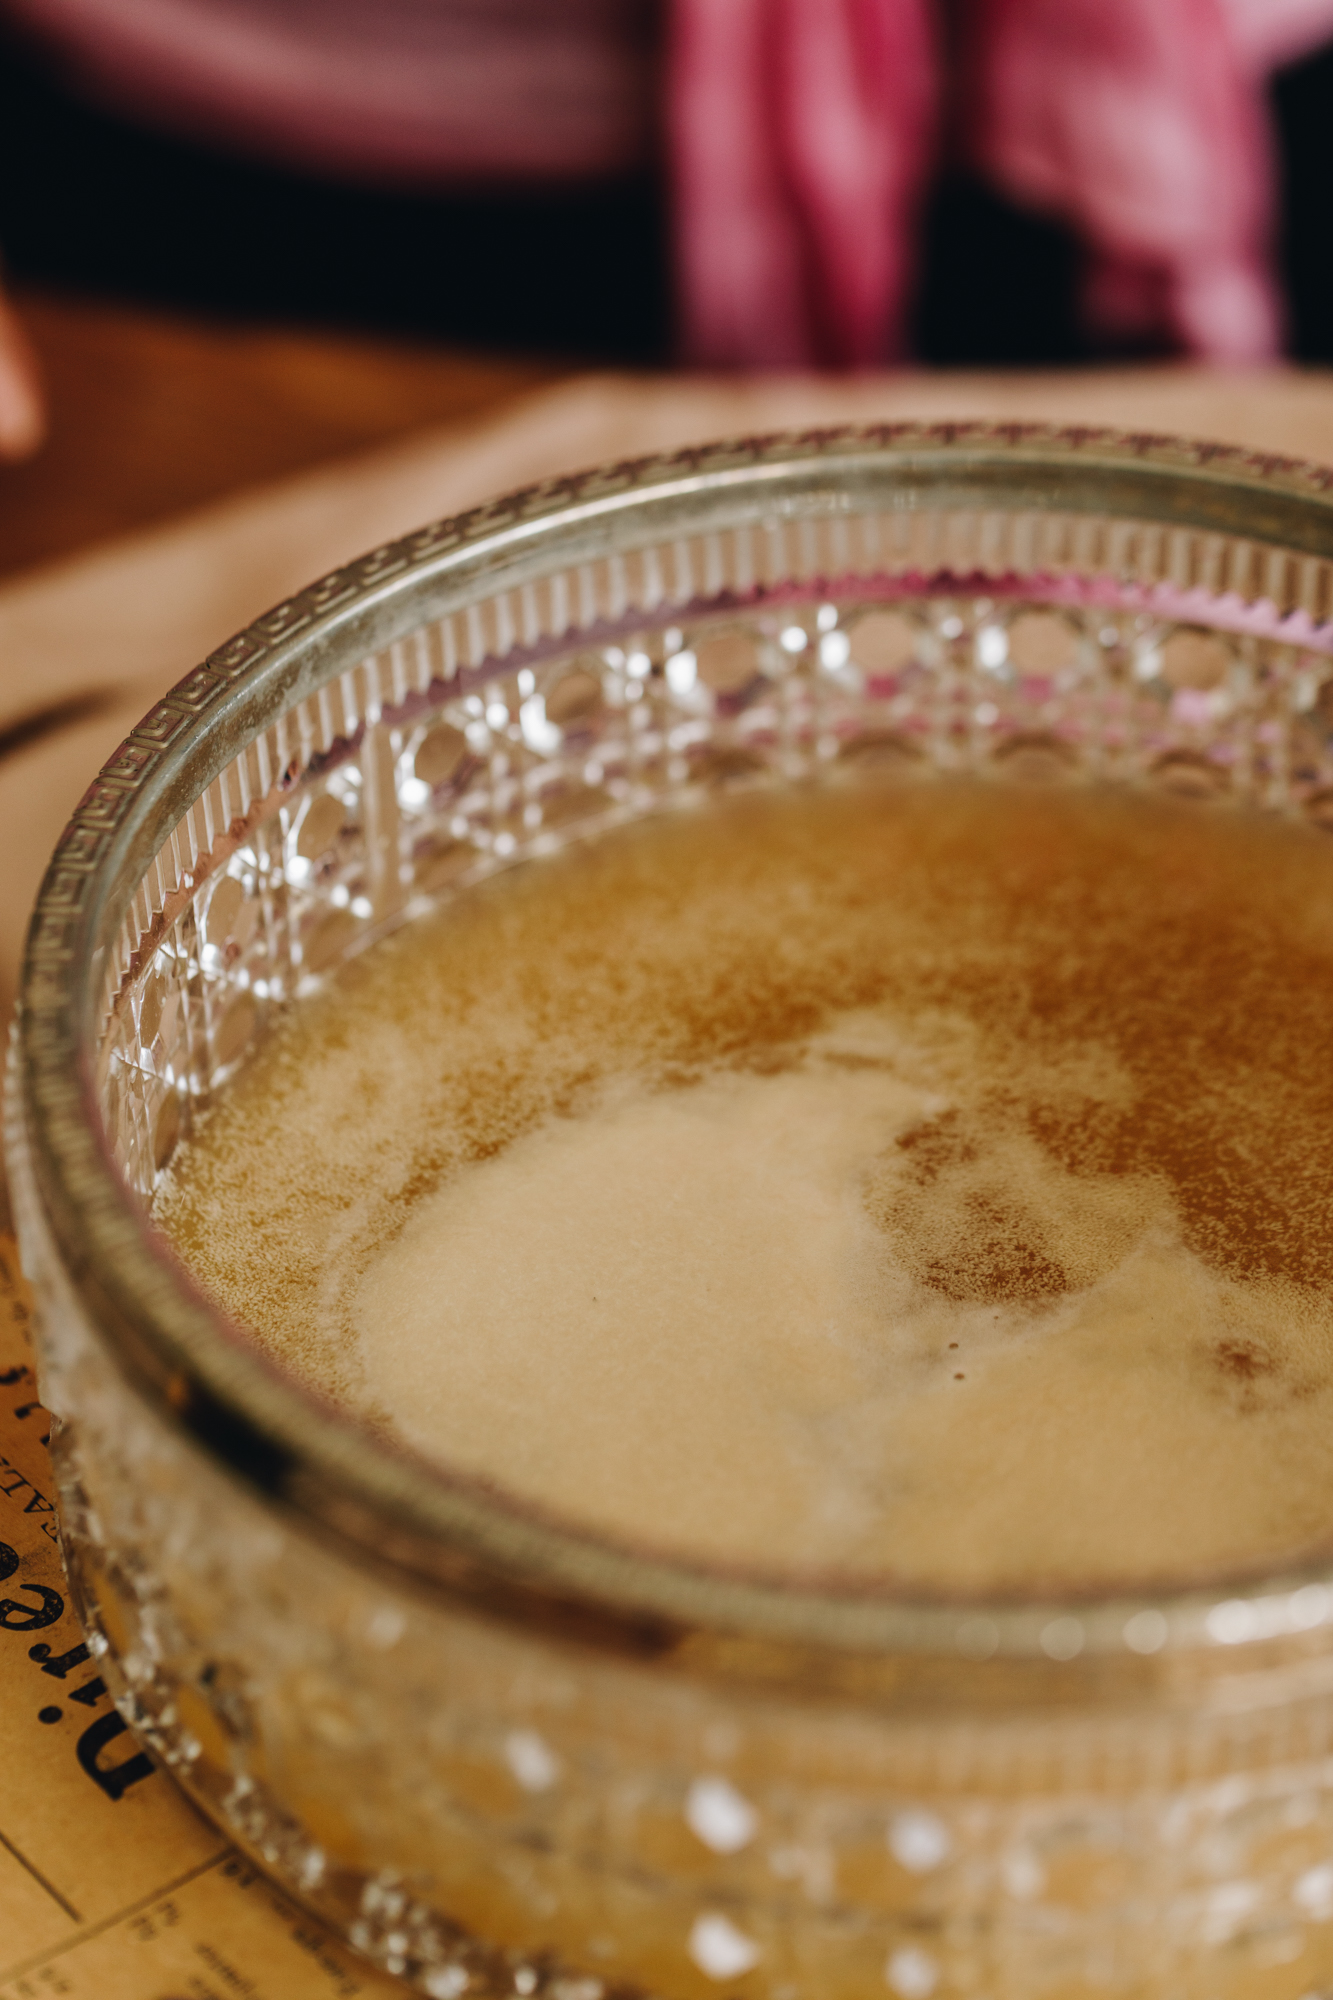
Pour the wai (water) and mīere (honey) in to a large bowl. Stir it until the mīere (honey) is dissolved.
Add the īhi horo (instant yeast), stir it in.
Leave the īhi (yeast) to activate for five minutes. The yeast is activated when it has floated to the top.
3. Add the Dry Ingredients:
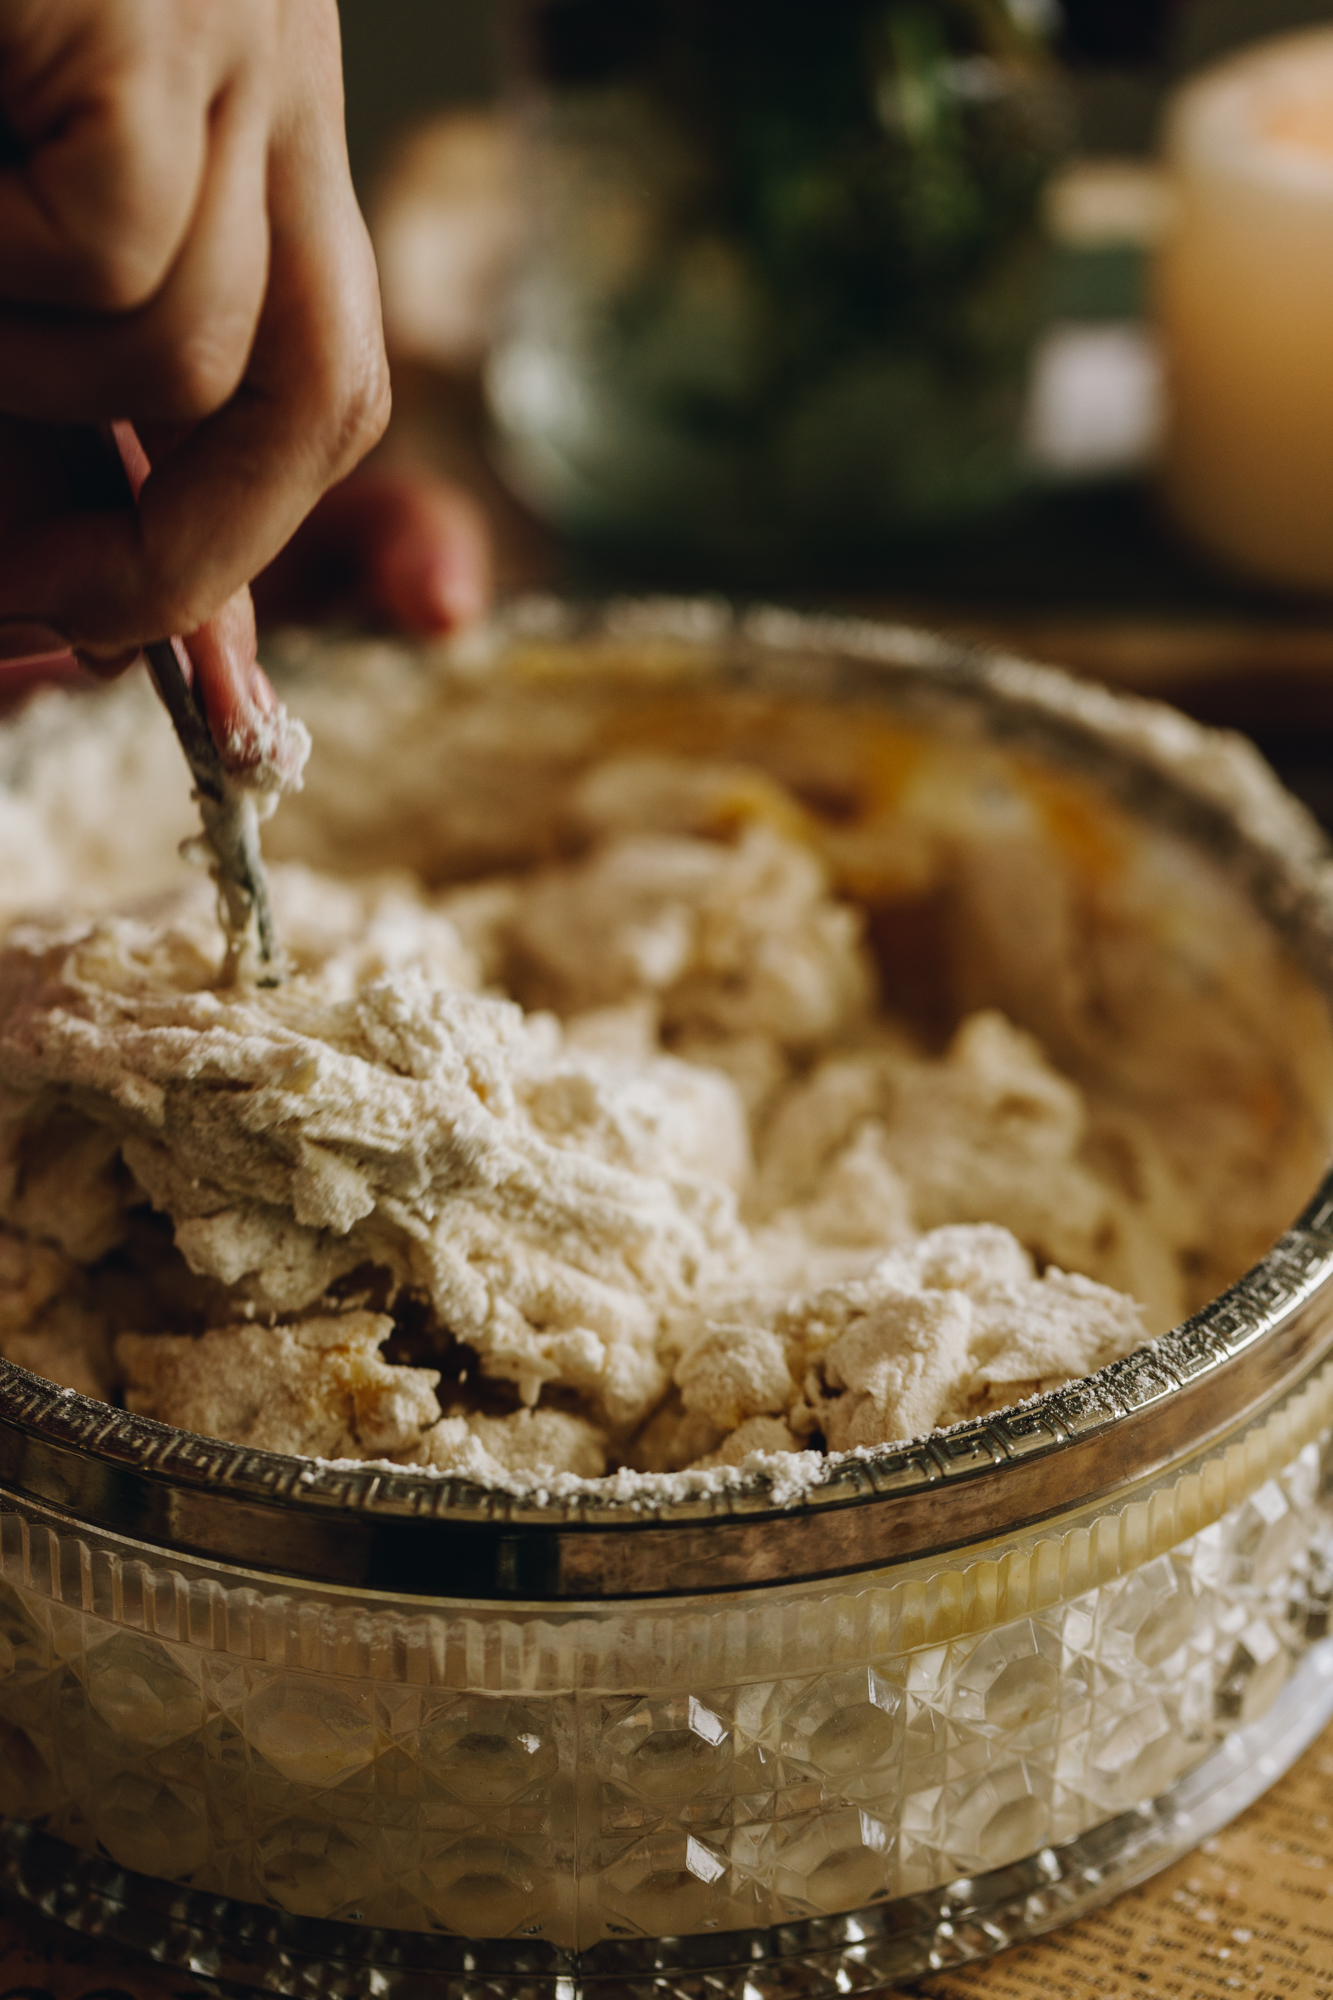
Add the puehu parāoa (flour) and tote (salt). If you are adding kākano (seeds), add them in now too.
Stir it all together with a bread knife for 1-2 minutes until combined. It will be sticky, don't add any more flour.
4. First Rise:
Cover the bowl with a bowl cover or tea towel.
Leave to rise for 30 minutes.
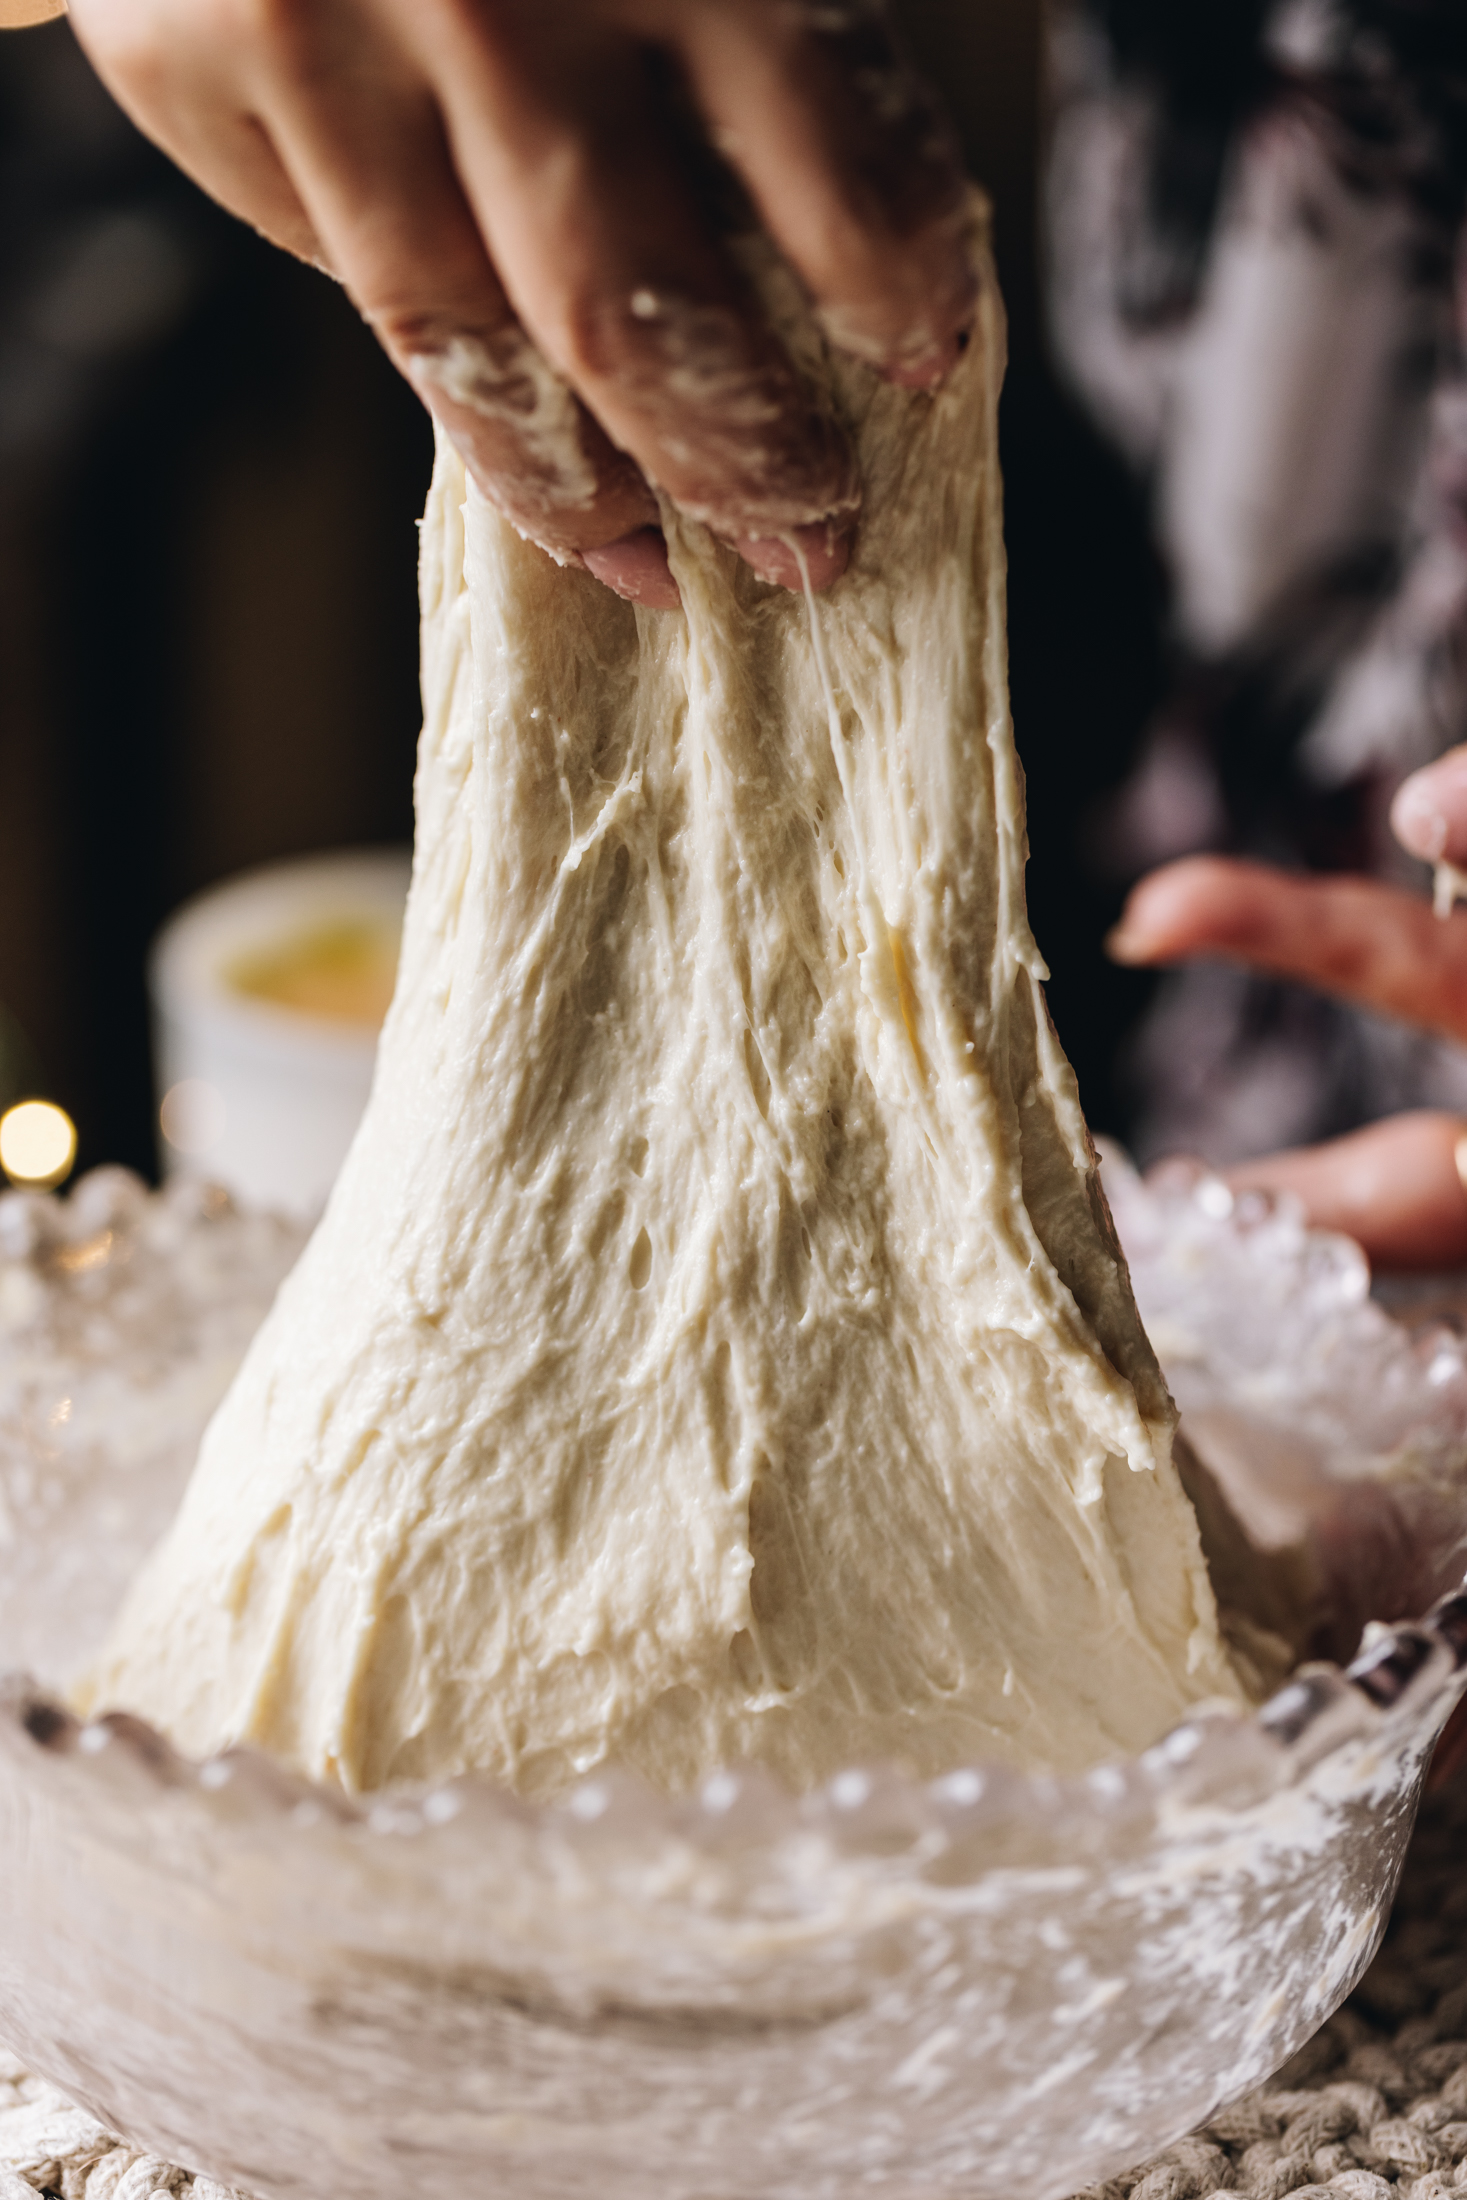
5. First Stretch and Fold:
After 30 minutes, it is time to stretch and fold the dough.
With wet hands, take a handful of dough from the side of the bowl, pull it high in the air (see video for reference) and then place it in to the centre of the bowl.
Turn the bowl a quarter turn and repeat that process. Every time you place the dough in to the centre it is one count.
In total do 26-30 stretch and folds. This should take 1-2 minutes.
6. Second Rise:
Cover the bowl again.
Leave to rise for 30 minutes.
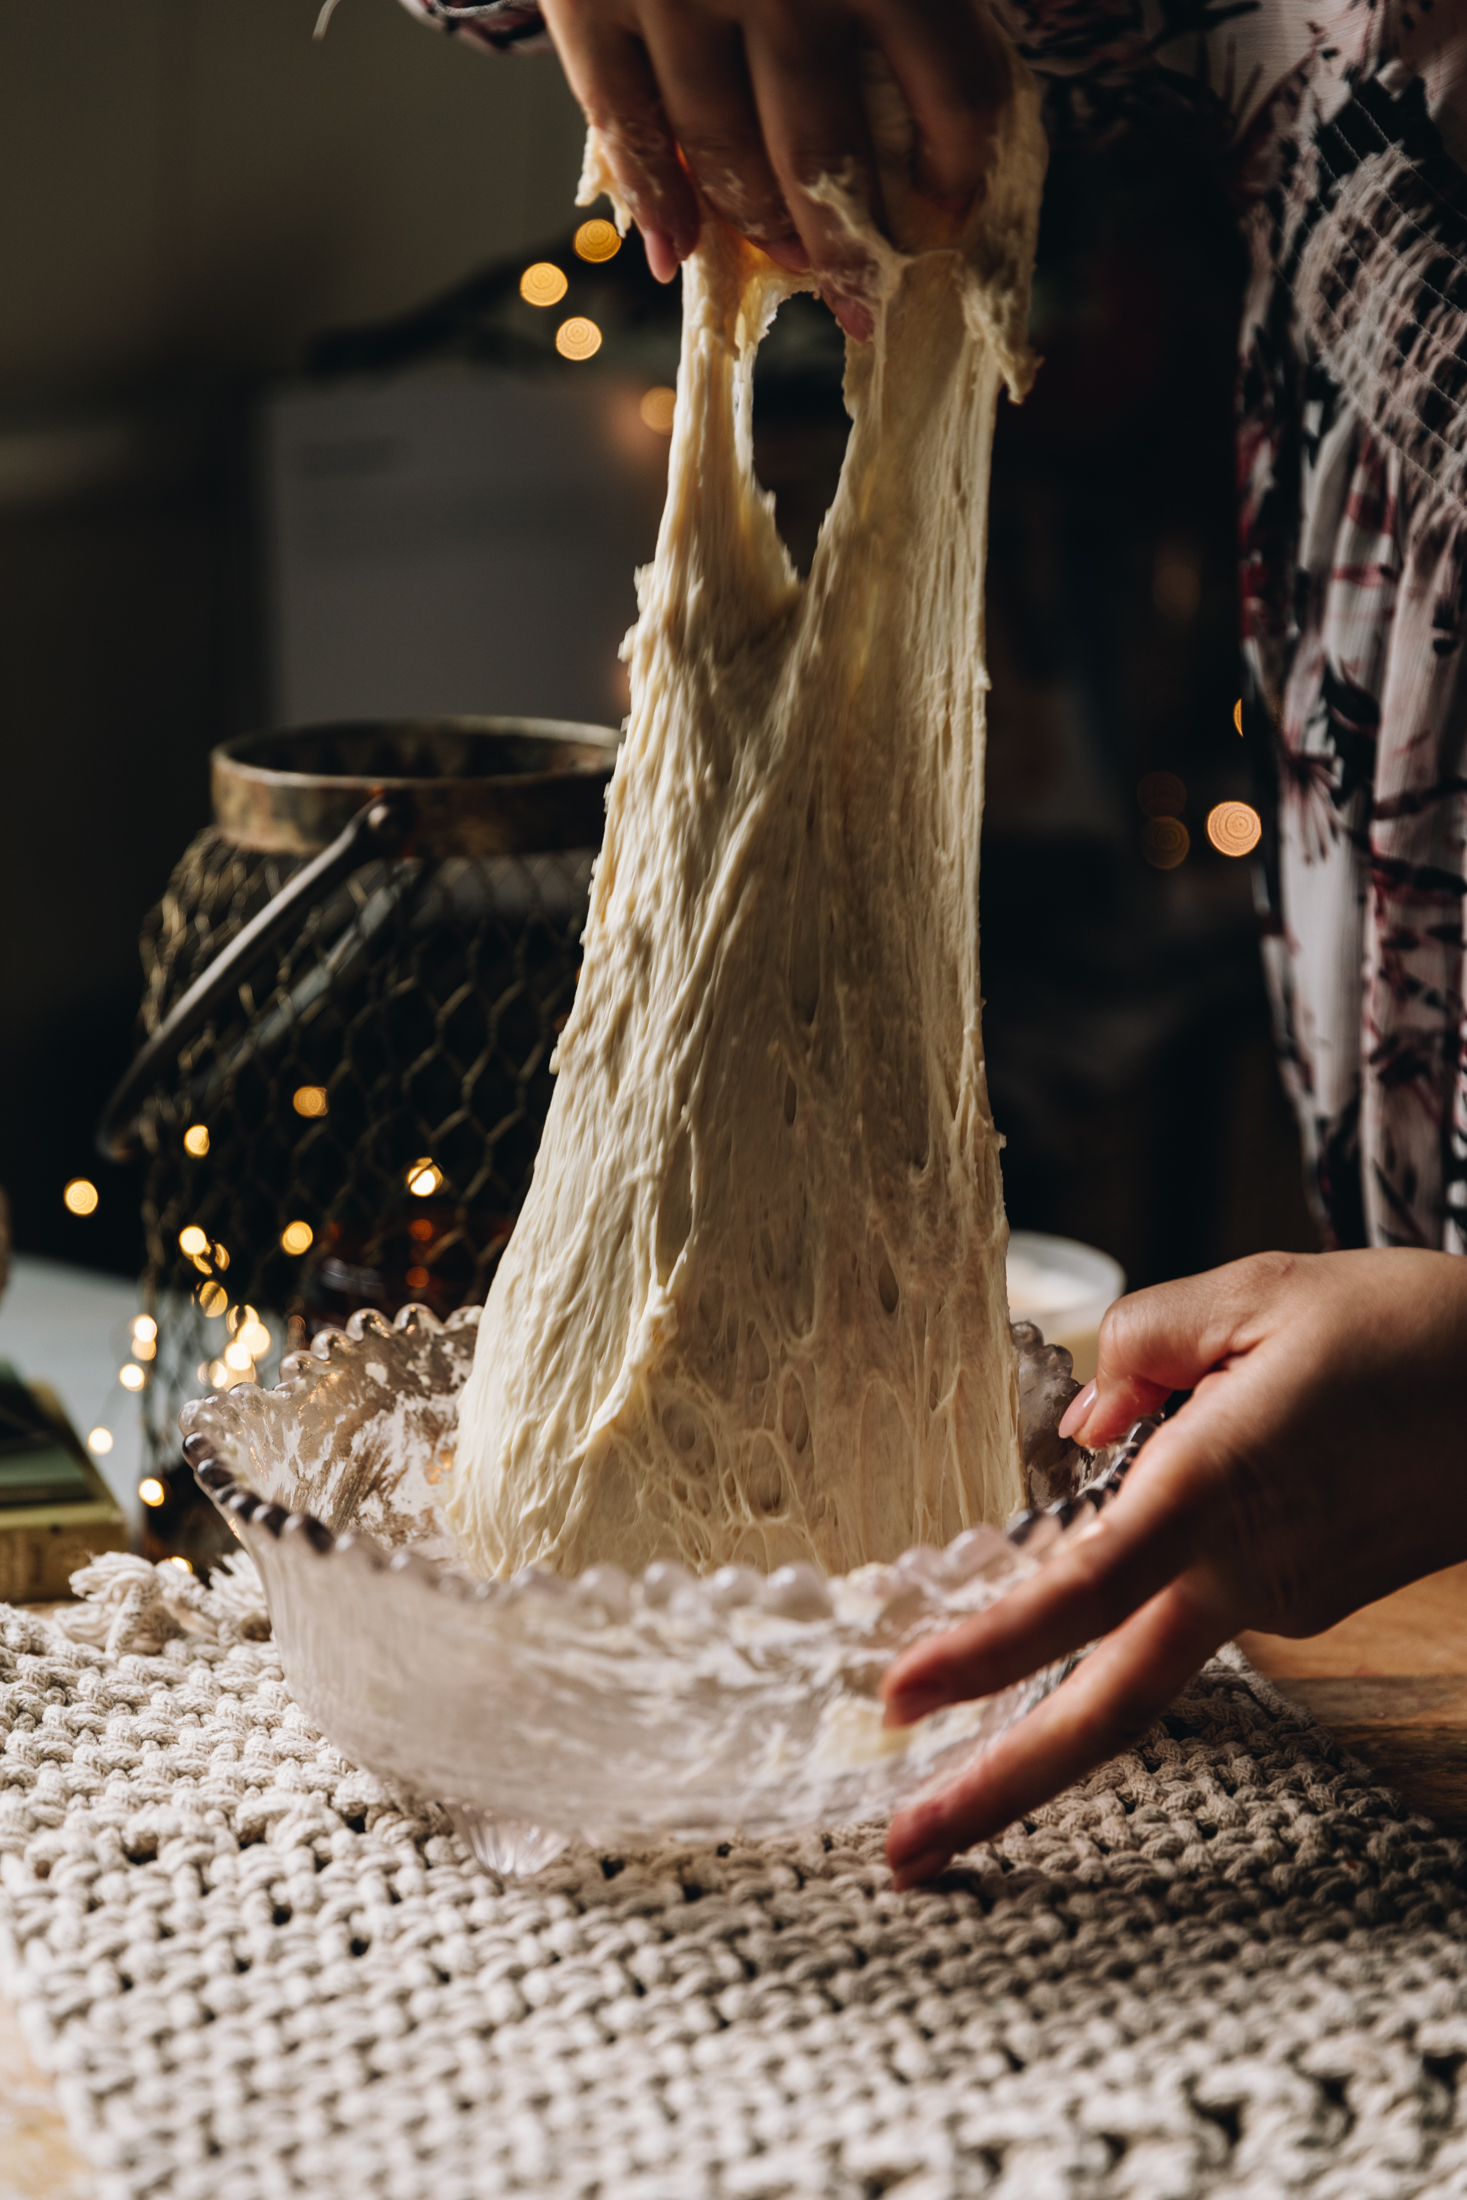
7. Second Stretch and Fold:
Repeat the stretch and fold process for the second time.
This time do 20-25 stretch and folds in the bowl.
From this point you choose what to do. If you are baking the sough the Same Day Version, carry on to the next step.
If you are doing the Overnight Version, see those details below in the recipe.
8. Same Day Version - Third Rise:
After you have completed the second round of stretch and folds, cover the bowl and allow the dough to rise again for 15 minutes.
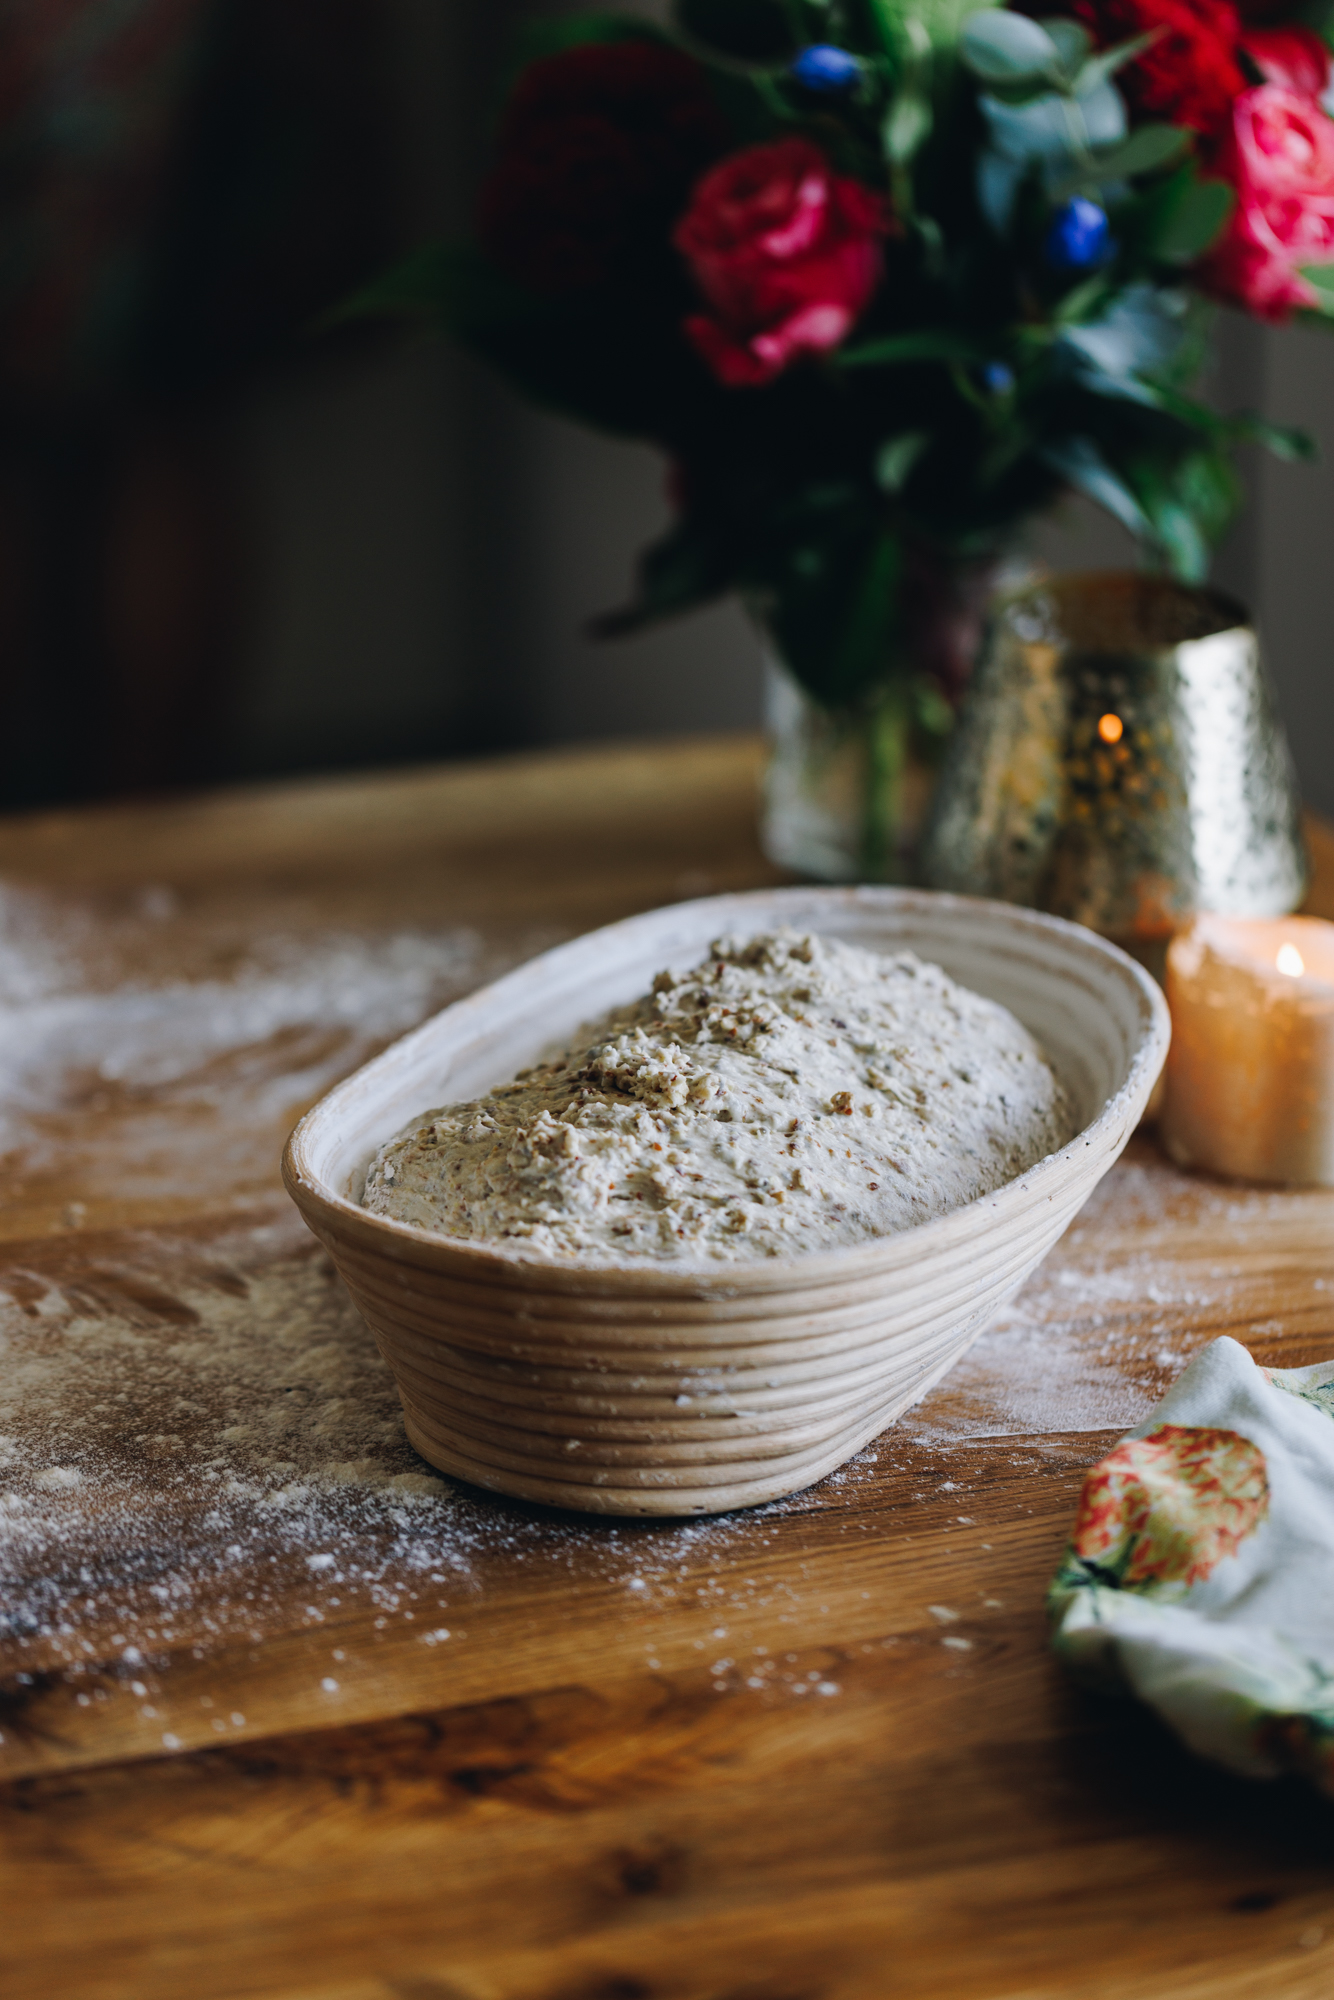
9. Shape the Dough:
Then tip the dough on to a very lightly floured bench.
Don't handle the dough too much here.
Fold the dough in to the centre from the top and each side. Then take the bottom piece and flip it forward, over the dough.
Tuck your hands underneath the dough and pull it towards yourself a couple of times to create tension.
Place the dough (seam side up) in to a well oiled bowl that is the same shape as your cast iron pot or in to a sourdough banneton that has been dusted heavily with cornflour.
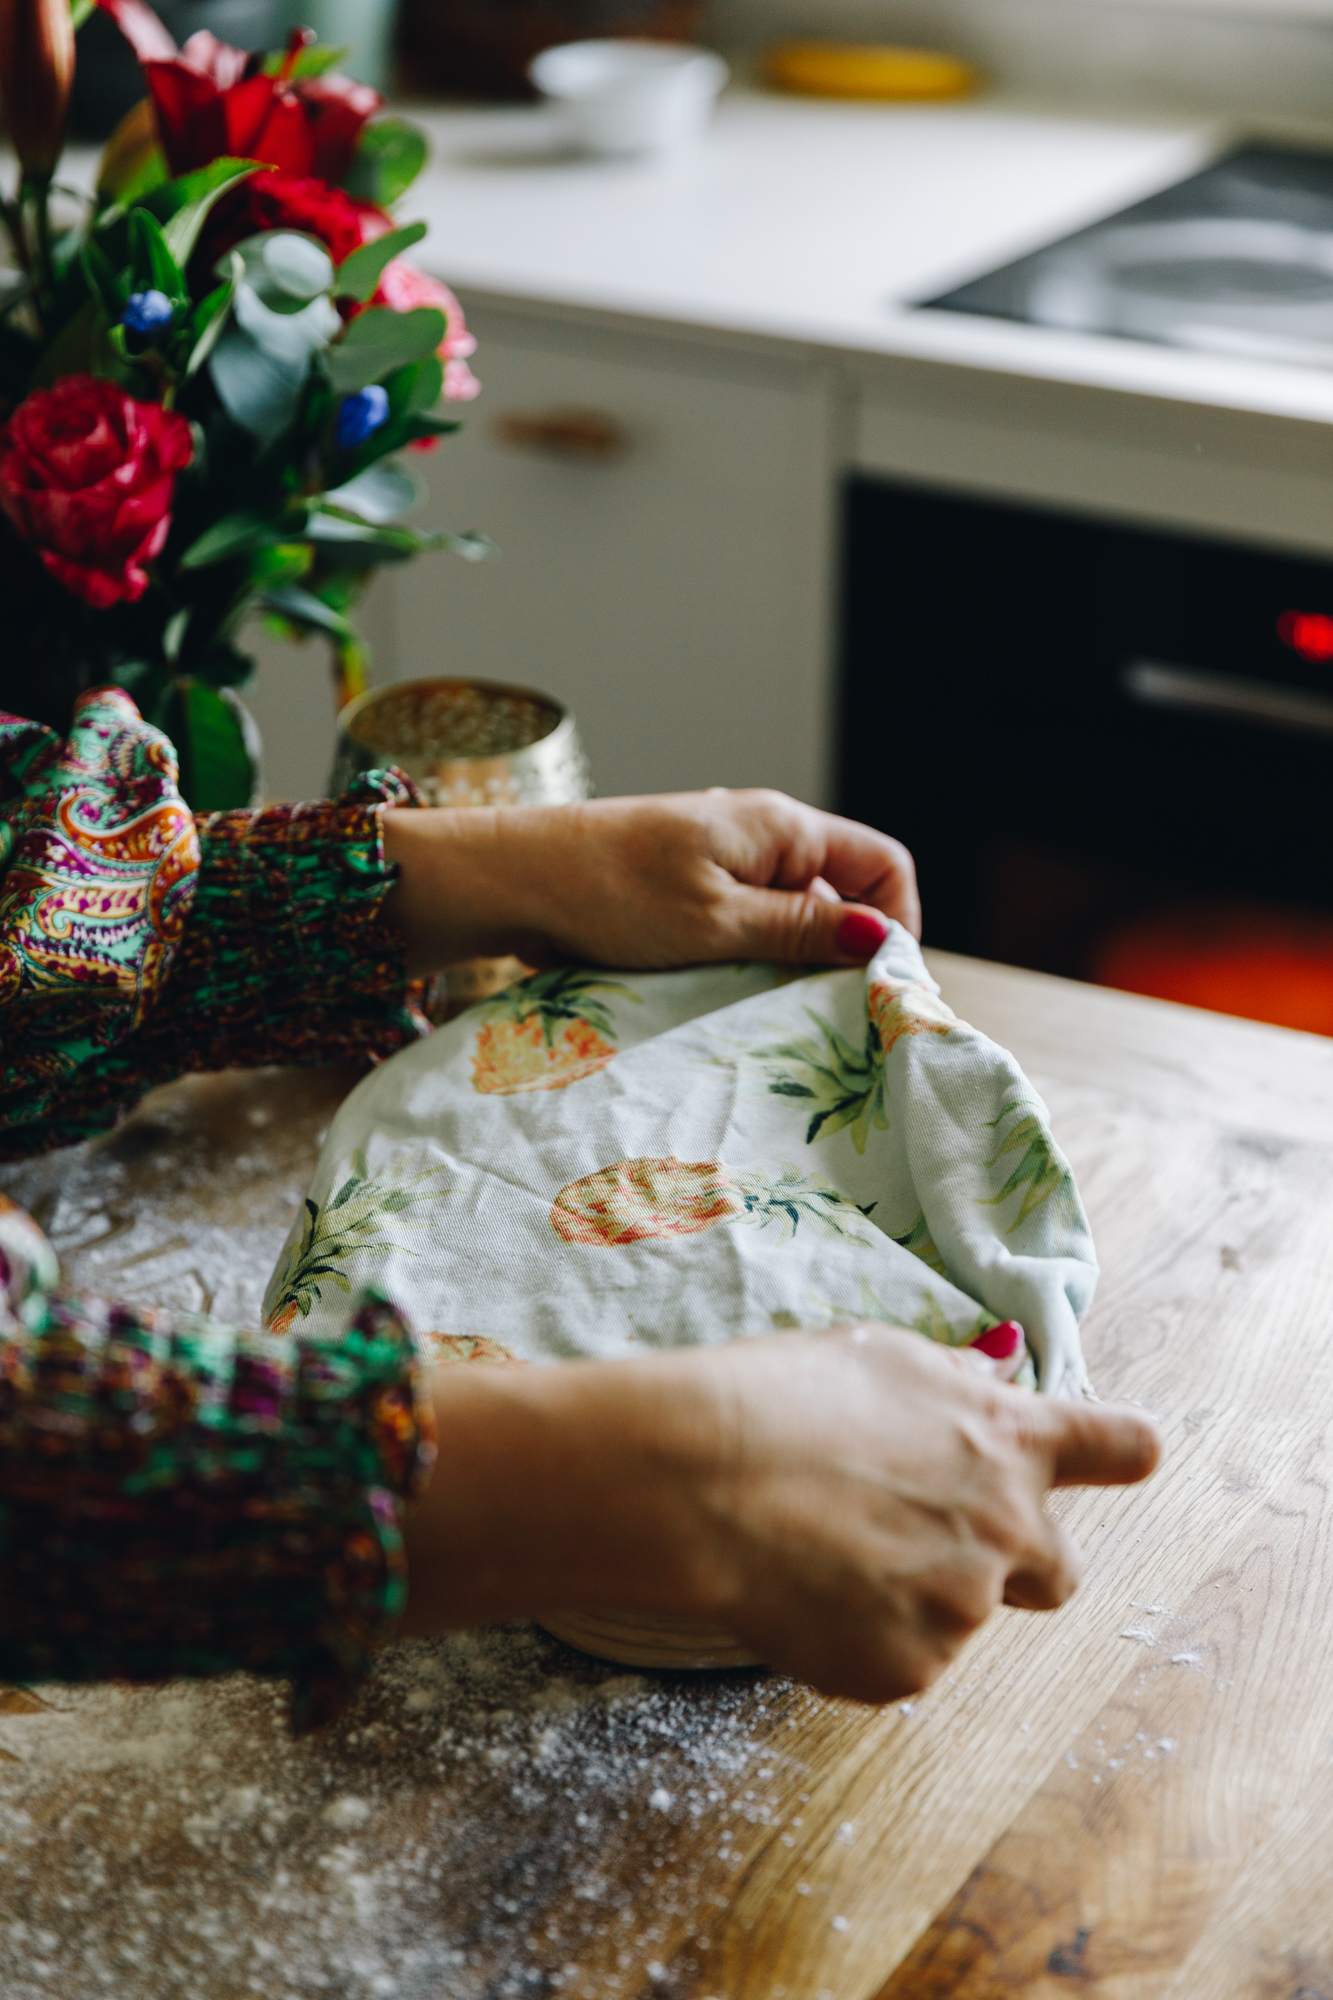
10. Fourth and Final Rise:
Once the dough is in the bowl or banneton, pull the dough from the sides in to the middle and pinch the seams together to create a tight dough.
Cover with a bowl cover or a tea towel and rise 15 - 30 minutes.
The main thing here is that the dough doubles in size.
In the colder months - the dough will need 30 minutes.
In the warmer months - the dough will only need around 15-20 minutes.

11. Preheat the Cast Iron Pot:
Place a 3.6 Litre cast iron pot and lid in to the oven.
Heat the oven and pot, with the lid on at 205 °C bake or 195 °C fan bake for 20 minutes before baking.
12. Score the Bread:
Cover a large plate or a chopping board with a piece of baking paper that will overlap the sides of the cast iron pot.
Flip the dough on to the plate or chopping board. Dust it with flour or fine semolina. Score it with a sharp knife so that the dough rises in uniform way in the oven.
If you want a crusty crust to you parāoa (bread), add a few ice cubes in to the bottom of the pre-heated pot before lowering the bread in. If you don't have ice, no worries.
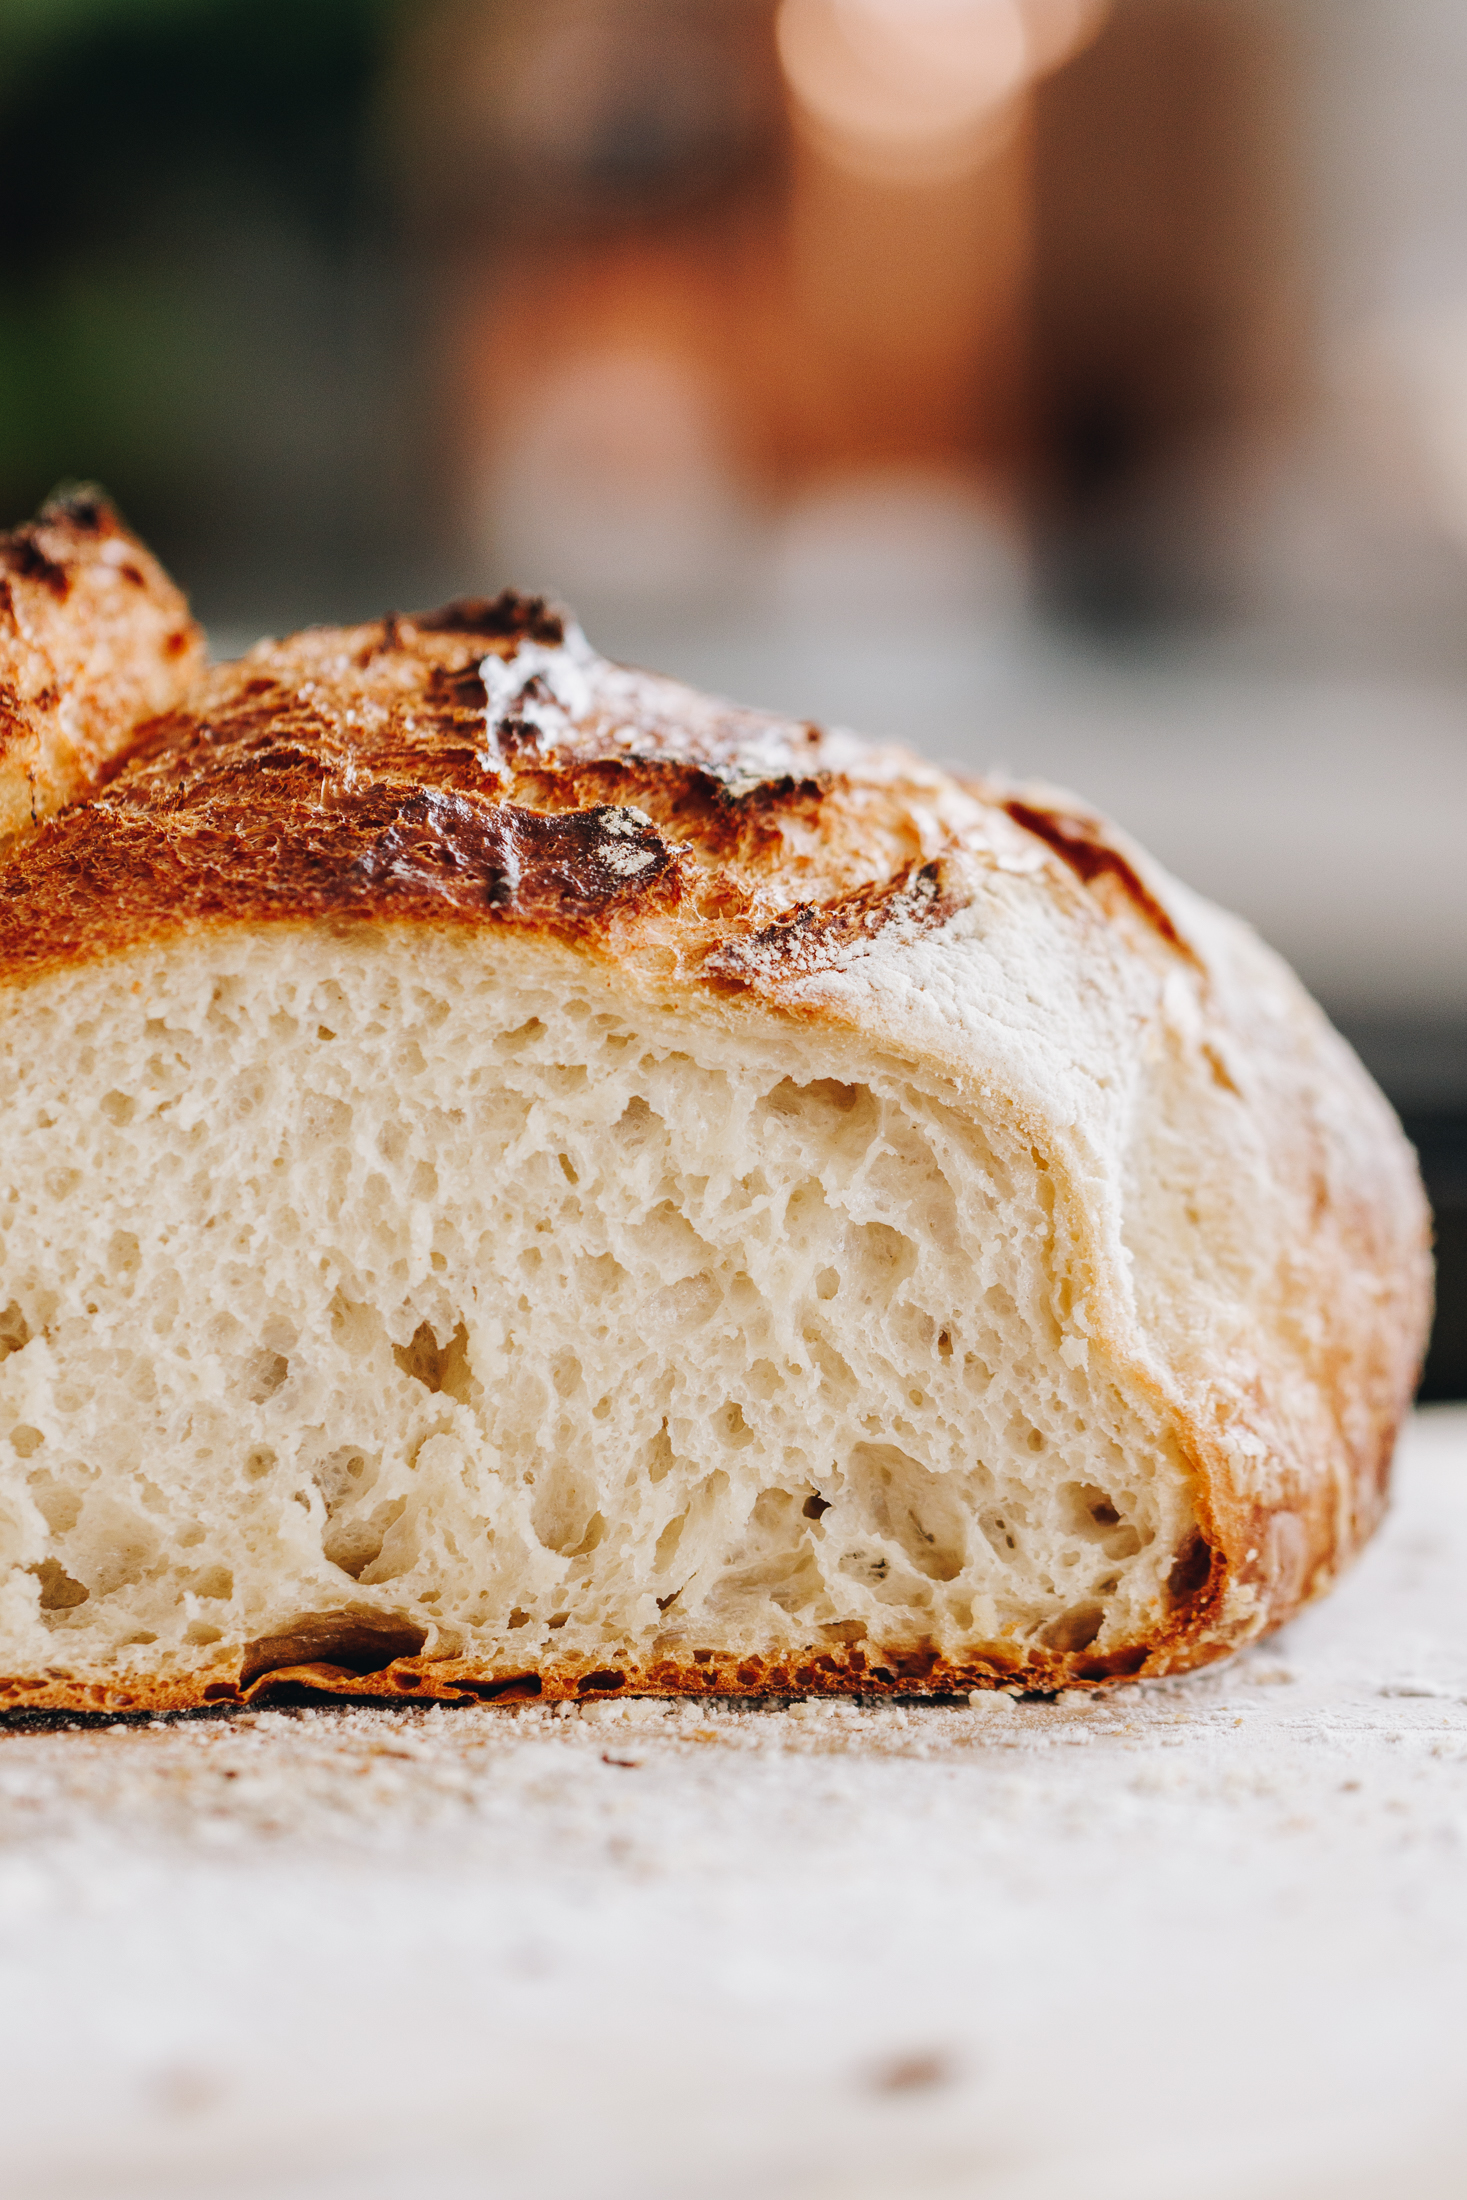
13. Bake the Rustic No-Knead Bread Loaf:
Lower the parāoa (bread) in to the pot using the baking paper to help you. Put the lid on.
Bake it for 23 minutes. Remove the lid and bake for a further 22 minutes.
Remove from the oven.
Leave to cool for 10 minutes and then remove it. Slice and eat with lashing of pata (butter).
Storing the Bread:
This loaf will be at its best on the day but will also make great toast or epic toasties the next day.
I keep homemade bread in a plastic bag for a day on the bench. Beyond that I slice it and store it in the freezer and remove a piece at a time for toasting.
Titiro mai e hoa mā - (look friends), there are more
Bread Recipes
Fill your whare (house) with the joyful aroma of fresh parāoa (bread).



DID YOU ENJOY THIS RECIPE?
It would be so awesome if you could please leave a review/comment by clicking the “leave a comment” section at the top of the page.
I love seeing you all make my creations, so send a whakaahua (photo) or kiriata (video) to my Instagram and show me what you made. Let me know if you have any pātai (questions) too, I would love to help.
No-knead Bread - Parāoa Kore-poke (Cast Iron Version)
Equipment
- 1 X 3.6 Litre cast iron pot
Ingredients
The Dough - Te Pokenga
- 2 C (500 ml) wai aromahana (lukewarm water)
- 2 tablespoon mīere (honey, you can also use maple syrup or any type of sugar here)
- 2 ½ teaspoon (8 g) īhi tere (instant yeast,) īhi tere (instant yeast) OR 16 g (2 tbsp) Surebake/ breadmakers yeast.
- 3 ¾ C (560g) puehu parāoa kounga (high grade flour). If you are not adding seeds increase the flour to 4 C (600 g).
- 2 teaspoon tote (salt, fine). I use Himalayan salt here, if you are using iodised table salt, half this amount.
- ½ C (70 g) kākano (seeds). Chia, sunflower, pumpkin or LSA would work well here.
Instructions
Prepare the Bowl or Banneton:
- Grease a bowl that is the same shape as your cast iron pot or dust a a sourdough banneton heavily with cornflour. Set aside.
Activate the Yeast:
- Add the wai (water) and mīere (honey) in to a large bowl. Stir it until the mīere (honey) is dissolved.
- Add the īhi horo (instant yeast) and stir it in. Leave the īhi (yeast) to activate for five minutes. The yeast is activated when it has floated to the top.
Add the Dry Ingredients:
- Add the puehu parāoa (flour) and the tote (salt). If you are adding kākano (seeds), add them in now too.
- Stir it all together with a bread knife for 1-2 minutes until combined. It will be sticky, don't add any more flour.
First Rise:
- Cover the bowl with a bowl cover or tea towel. Leave to rise for 30 minutes.
First Stretch and Fold:
- After 30 minutes, it is time to stretch and fold the dough.
- With wet hands, take a handful of dough from the side of the bowl, pull it high in the air (see video for reference) and then place it in to the centre of the bowl.
- Turn the bowl a quarter turn and repeat that process. Every time you place the dough in to the centre it is one count. In total do 26-30 stretch and folds. This should take 1-2 minutes.
Second Rise:
- Cover the bowl again. Leave to rise for 30 minutes.
Second Stretch and Fold:
- Repeat the stretch and fold process for the second time.
- This time do 20-25 stretch and folds in the bowl.
- From this point you choose what to do. If you are baking the sough the Same Day Version, carry on to the next step.If you are doing the Overnight Version, skip down to those instructions.
Same Day Version - Third Rise:
- After you have completed the second round of stretch and folds, cover the bowl and allow the dough to rise again for 15 minutes.
Shape the Dough:
- Then tip the dough on to a very lightly floured bench. Don't handle the dough too much here.
- Fold the dough in to the centre from the top and each side. Then take the bottom piece and flip it forward, over the dough. Tuck your hands underneath the dough and pull it towards yourself a couple of times to create tension.
- Place the dough (seam side up) in to a well oiled bowl that is the same shape as your cast iron pot or in to a sourdough banneton that has been dusted heavily with cornflour.
Fourth and Final Rise:
- Once the dough is in the bowl or banneton, pull the dough from the sides in to the middle and pinch the seams together to create a tight dough.
- Cover with a bowl cover or a tea towel and rise 15 - 30 minutes. The main thing here is that the dough doubles in size.
- In the colder months - the dough will most likely need 30 minutes. In the warmer months - the dough will only need around 15-20 minutes.
Preheat the Cast Iron Pot:
- Place a 3.6 Litre cast iron pot and lid in to the oven. Heat the oven and pot, with the lid on at 205 °C bake or 195 °C fan bake for 20 minutes before baking.
Score the Dough:
- Cover a large plate or a chopping board with a piece of baking paper that will overlap the sides of the cast iron pot. Flip the dough on to the plate or chopping board.
- Dust it with flour or fine semolina. Score it with a sharp knife.
Bake the Bread
- If you want a crusty crust to you parāoa (bread), add a few ice cubes in to the bottom of the pre-heated pot before lowering the bread in. If you don't have ice, no worries.
- Lower the parāoa (bread) in to the pot using the baking paper to help you. Put the lid on.
- Bake it for 23 minutes. Remove the lid and bake for a further 22 minutes.
- Remove from the oven. Leave to cool for 10 minutes and then remove it. Slice and eat with lashing of pata (butter).
Overnight Version.
Third Rise:
- After you have completed the second stretch and fold process, cover the bowl and leave it on the bench for 15 minutes. Then refrigerate for 2 - 20 hours.
Shape the Dough:
- When you are ready to bake, remove the dough from the fridge. Tip it straight on to a bench with no flour.
- Fold the dough in to the centre from the top and each side. Then take the bottom piece and flip it forward, over the dough. Tuck your hands underneath the dough and pull it towards yourself a couple of times.
- Place the dough (seam side up) in to a well oiled bowl that is the same shape as your cast iron pot or in to a sourdough banneton that has been dusted heavily with cornflour.
- Once the dough is in the bowl or banneton, pull the dough from the sides in to the middle and pinch the seams together to create a tight dough. Cover lightly with a tea towel.
Final Rise before Baking.
- Take note of the how long the dough has been in the fridge:
- If the dough has risen in the fridge for 2-6 hours, rise the dough for 45 minutes. If it has risen for 7-15 hours, rise the dough for 1 hour.If it has risen for 16 - 24 hours, rise for 1 hour and 15 minutes.
Preheat the Cast Iron Pot:
- Place a 3.6 Litre cast iron pot and lid in to the oven. Heat the oven and pot to 210 °C for 20 minutes before baking.
Score the Dough:
- Cover a large plate or a chopping board with a piece of baking paper that will overlap the sides of the cast iron pot. Flip the dough on to the plate or chopping board.
- Dust it with flour or fine semolina. Score it with a sharp knife.
Bake the Bread:
- If you want a bit of crusty crust to you parāoa (bread), add to ice cubes in to the bottom of the pre-heated pot before lowering the bread in. If you don't have ice, no worries Lower the parāoa (bread) in to the pot using the baking paper to help you. Put the lid on.
- Bake it for 25 minutes. Remove the lid and bake for a further 22 minutes.
- Remove from the oven. Leave to cool for 5 minutes in the pot and then remove it! Slice and eat with lashing of pata (butter)!
Storing the Bread:
- This loaf will be at its best on the day but will also make great toast or epic toasties the next day.
- I keep homemade bread in a plastic bag for a day on the bench. Beyond that I slice it and store it in the freezer and remove a piece at a time for toasting.
Video
What is the Stretch and Fold Technique?
Take a moment to watch the video to see the technique in real time—it’s much simpler than you might think.
In this recipe, I use a simple stretch and fold technique often used in sourdough baking. This method helps develop the gluten in the dough without needing to knead or remove it from the bowl. By gently stretching and folding the dough over itself during resting, you build structure while keeping the process easy and hands-off.
Expert Advice:
Same day or Overnight Loaf:
I have given you two options for this recipe. One is to make the loaf the same day and the second option is an overnight dough that you bake the next day. Please note, the overnight loaf will have a slightly lower rise than the same day one. It still makes a delicious loaf though so do not fear!
Sticky Dough:
This pokenga (dough) is quite wet as you can see in the whakaahua (photo's) but trust the process. Again this is similar to the type of dough you would find when making sourdough. Try not to add extra puehu parāoa (flour) as you go because this will alter the final product.
Rising the Dough:
Keep the rising dough away from hot spots and direct sunlight or heat. Remember that īhi (yeast) is alive and is super sensitive to heat during the rising process. The only time we want the heat is when we are baking it.
The Final Rise:
The final rise of the dough will vary in time. The main thing is that the dough has doubled in size. In the colder months - the dough will need 30 minutes. In the warmer months - it will only need around 15 -20 minutes. So take note of what the dough is doing and adjust accordingly.
Cast Iron Pot Size:
I use a 3.6 Litre cast iron pot but it still has some room to grow when it bakes. Anything that is 3 Litres and bigger will be fine for this loaf.
Preheating the Cast Iron Pot:
Preheat your pot properly. A very hot cast iron pot is key to getting that signature crust.
Shaping the Dough:
For the final shaping of the dough (before it goes in to the pot), do not work the dough or be tempted to knead it at all. The less you do, the fluffier and lighter the bread will be.
Variations:
Garlic & Herb Bread:
Add chopped rosemary, thyme, or garlic into the dough for a savoury twist.
Seeded Bread:
When you adding the puehu parāoa (flour) in to the dough, add half a cup of kākano paukena (pumpkin seeds), chia seeds or a ground LSA mixture for crunch and nutrition.
Wholemeal Version:
For a higher fibre parāoa (bread), replace 1 cup of puehu parāoa kounga (high grade flour) with half a cup of wholemeal flour.
Storage Instructions:
Refresh Tip:
To revive crispness, preheat the oven to 160°C. Sprinkle the crust lightly with water and place in the oven for 10 minutes.
Room Temperature:
Store in a recycled bread bag or bread bin for up to 1-2 days.
Freezing:
Slice the loaf once it is cooled. Place in to a plastic bag and freeze for up to 3 months. Toast the slices straight from frozen to enjoy delicious toast at any time.
Frequently Asked Questions:
Yes you can. if you prefer that method, take a look at my No-knead White Bread Loaf recipe, it is the same recipe but baked in a tin.
This usually happens if the dough didn’t rise long enough or if the yeast wasn’t active. Make sure your yeast is fresh and allow proper fermentation time specified in the recipe.
You can by around 5 - 15 minutes but no longer than that. Each rising time has been specifically measured to yield the best loaf so don't alter them too much.
The loaf should be deep golden brown and sound hollow when tapped underneath. If you follow the baking times the loaf will be cooked perfectly.

Hinerangi Nisbet
First time making bread,so I thought I would try whanaukai no knead white bread recipie.
And omg it turned out absolutely delicious 😋
Easy to follow recipies,and step by step video.
Will definitely be making this again.
Thank you Naomi for sharing your beautiful recipies
Naomi Toilalo WhānauKai
Tēnā koe Hinerangi, first time making bread - that is so awesome and I saw the photo's so I know you smashed it.
So glad that you are going to make it again, it is definitely a whānau favourite!
Ngā mihi nui, Naomi
Haylee Isaacs
Absolutely in love with this recipe and will be using it forever!!!! Have been struggling with sourdough and this completely worked with zero stress. Thanks so much!!
Ariana Estoras
This recipe is so simple and even a first time bread maker like me can smash it out of the park. Thank you to your Mama and to you too Naomi for sharing your gifts with us and helping us remember that we can all bake easy and delicious paraoa for our whānau. Ngā manaakitanga Ariana
Naomi Toilalo WhānauKai
Oh tēnā koe Ariana and thank you for your beautiful message. I am so so glad to hear that you loved this bread and your first time? That is absolutely incredible - ka pai e hoa!
Ngā mihi nui, Naomi
Rachel
I think the weight measurement for the flour might be off? 550g is approx 90% hydration? Should it be 650g? I tried the recipe using the weights and I had to add heaps of extra flour as it was so sticky. Quite excited to try this recipe again with the correct measurements.
Naomi Toilalo WhānauKai
Kia ora Rachel, I have made this recipe so many times and have never needed to alter the flour. The ratio is supposed to be high hydration as I treat it like a sourdough loaf. Hope this helps, happy to answer many more questions but if the stretch and fold process is done correctly it should not need any extra flour.
Ngā mihi, Naomi
Rachel Tiddy
Just made it using the cup measurements and it was awesome! Love the flavour of the honey!
Naomi Toilalo WhānauKai
Woo hoo - so stoked Rachel, I love the little hint of honey too. So delicious!