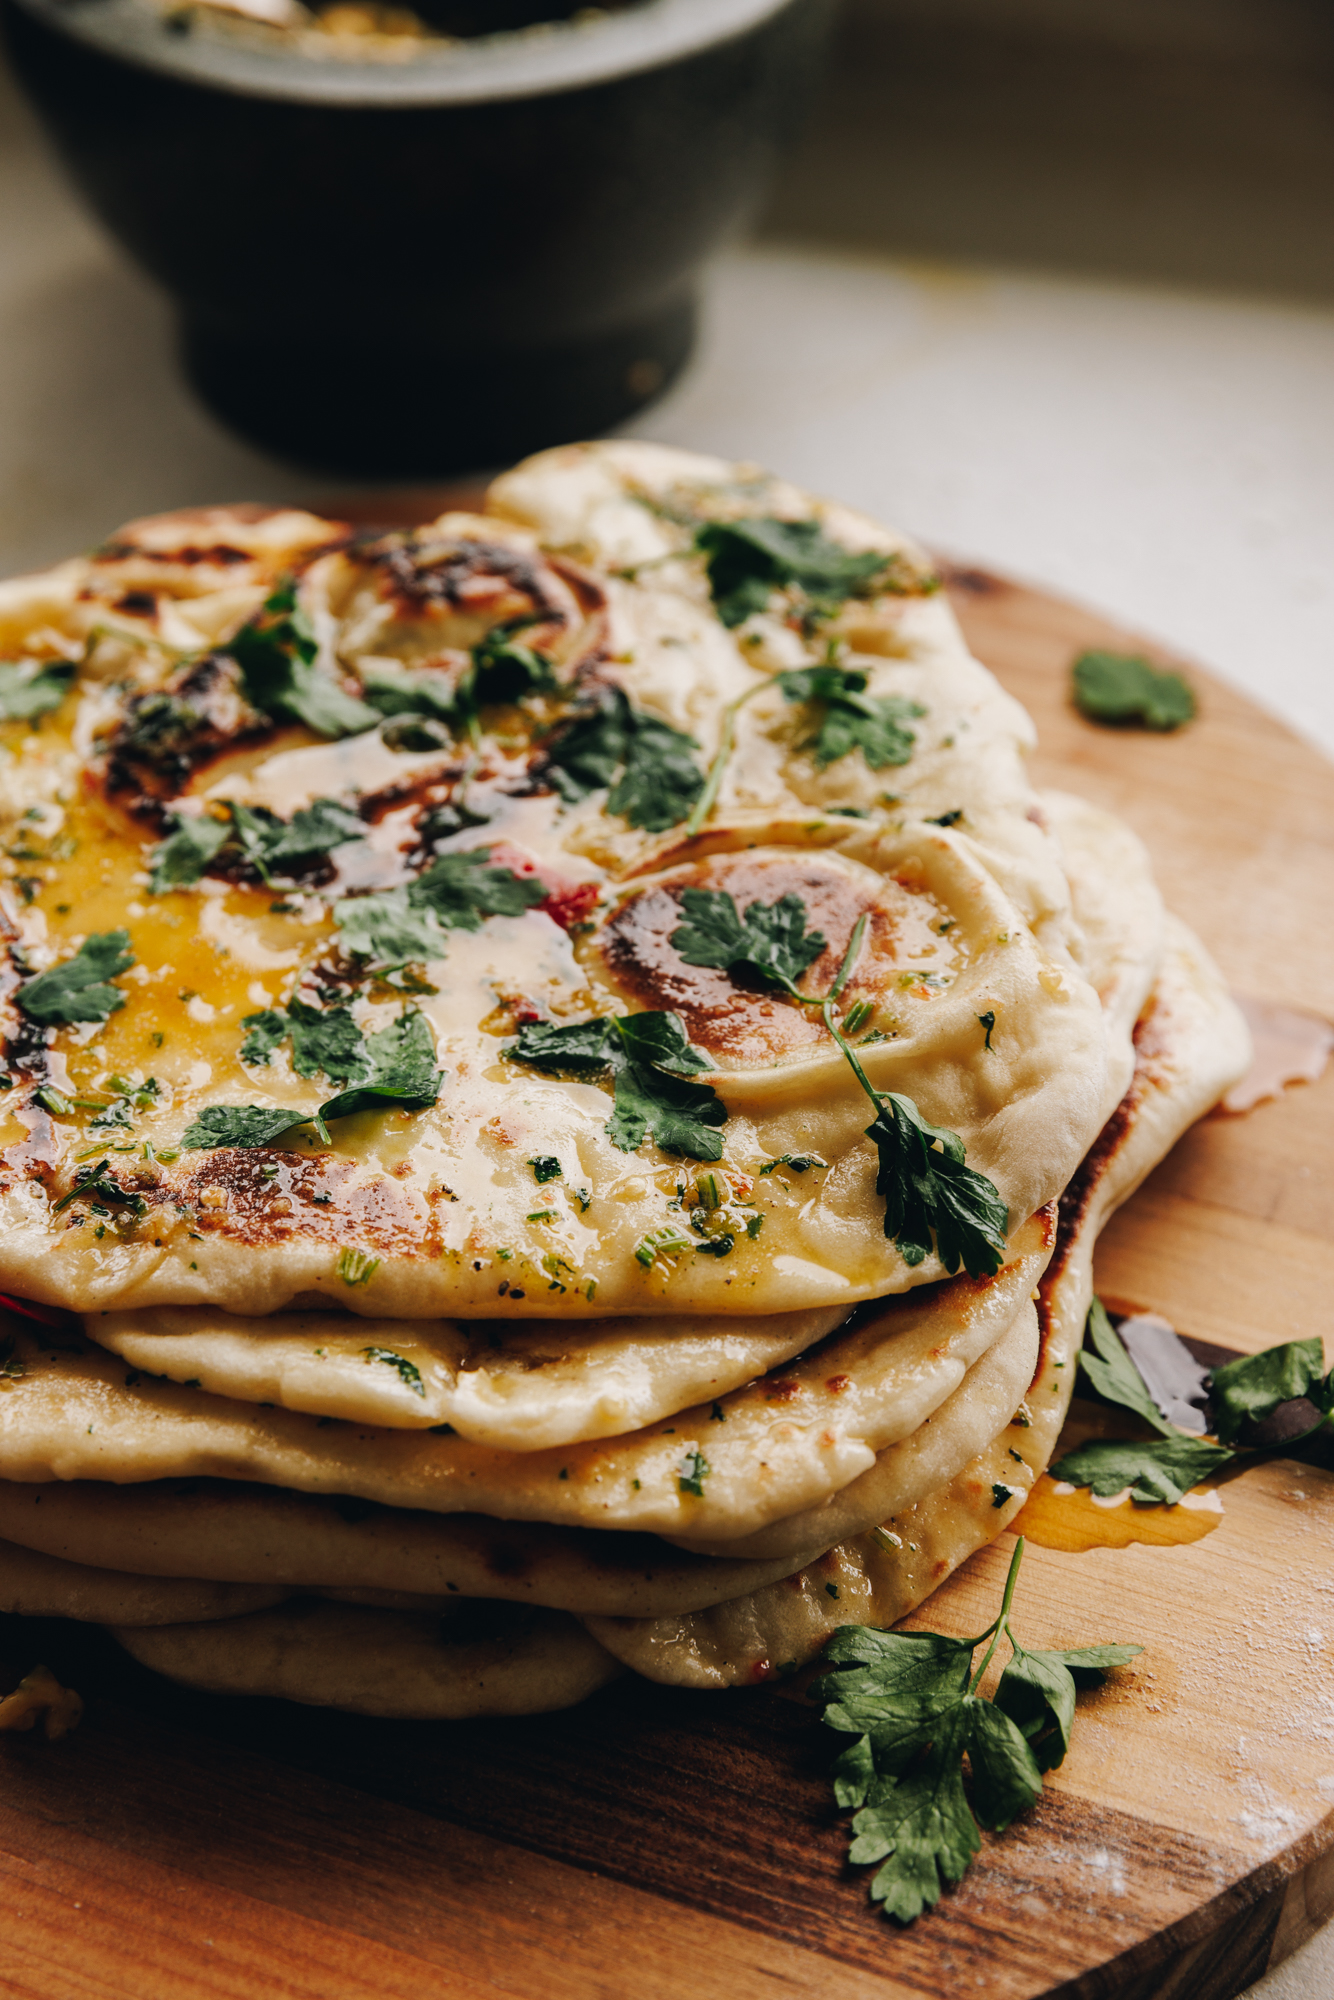
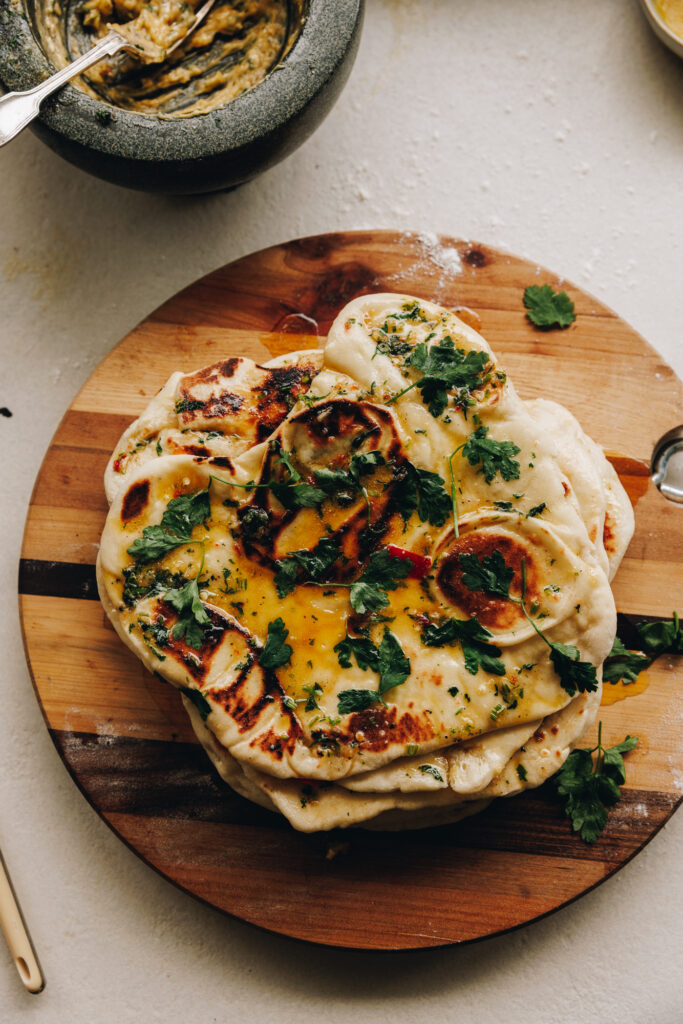
I have made these light and fluffy Garlic Naan Bread too many times to count. Why? Because they always work and everyone loves them. Soft, pillowy and brushed with a rich garlic herb butter, this homemade naan bread is the perfect side for curries, wraps or sharing platters. With just a short knead and a single rise, these easy stovetop naan come together faster than you’d expect—no oven or tandoor needed. Finished with a hint of honey and fresh herbs, each piece is golden, fluffy and packed with flavour.
Why you'll love this Easy Garlic Naan Bread:
Our whānau (family) absolutely loves this recipe and we all line up with a job to do when it is cooking time. A couple roll out the dough, someone cooks them and another one rubs on the pata kāriki (garlic butter). This recipe is cooked on the stove and is ready in under 90 minutes. The result is a soft, fluffy and beginner-friendly naan bread, perfect for any curry, wrap or easy dinner.
More tohutao (recipes):
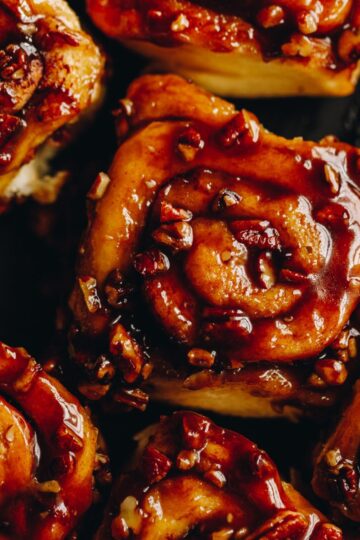
Do you need a bread recipe for hosting a brunch? Then you must try these Bacon and Egg Buns or my Light and Fluffy Fry Bread recipe. Do you want to make sticky scrolls instead? Then try these moorish Sticky Maple and Pecan Scrolls or a ginger flavoured version, these Gingerbread Scrolls.
Videography and photography by Sarah Henderson.
INGREDIENT:
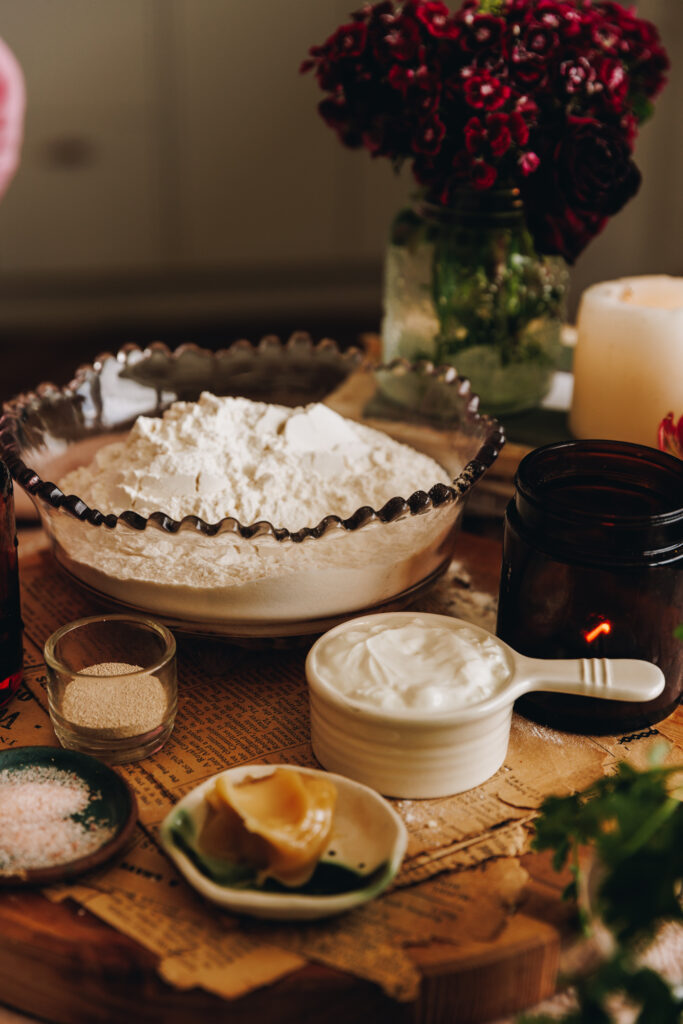
- High grade flour: Always use puehu parāoa kounga (high grade flour) in bread recipes for the fluffiest result.
- Instant yeast: Use īhi horo (instant yeast) in this recipe for efficient rising. If you are using Surebake or Breadmaker's yeast, double the amount.
- Honey in the dough: This can be replaced with the same amount of maple syrup or any sugar.
- Honey in the garlic butter: You can swap the honey for the same amount of maple syrup or half the amount sugar.
- Yogurt: Use an unsweetened yogurt of any kind.
- Herbs: Use whatever fresh herbs you love or leave them out completely.
- Chilli: If you love spice in your life, add one finely chopped fresh chilli to the garlic butter.
How to make this recipe:
Note: The full recipe card with the full list of ingredients, instructions and step by step video are found at the bottom of this page.
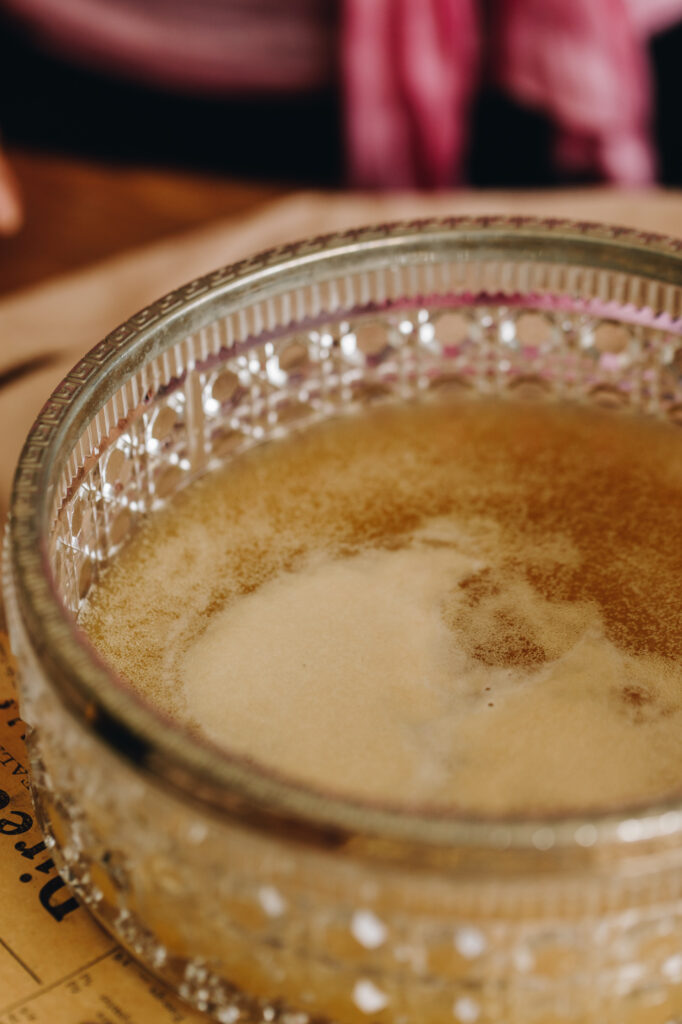
1. Activate the Yeast:
Add the wai aromahana (lukewarm water) and mīere (honey) to a bowl. Stir until the mīere (honey) has dissolved.
Ruia te īhi horo ki runga – sprinkle over the instant yeast. Stir again with a whisk and leave to activate for 5 minutes until foamy.
The īhi (yeast) has activated when it has floated to the top.
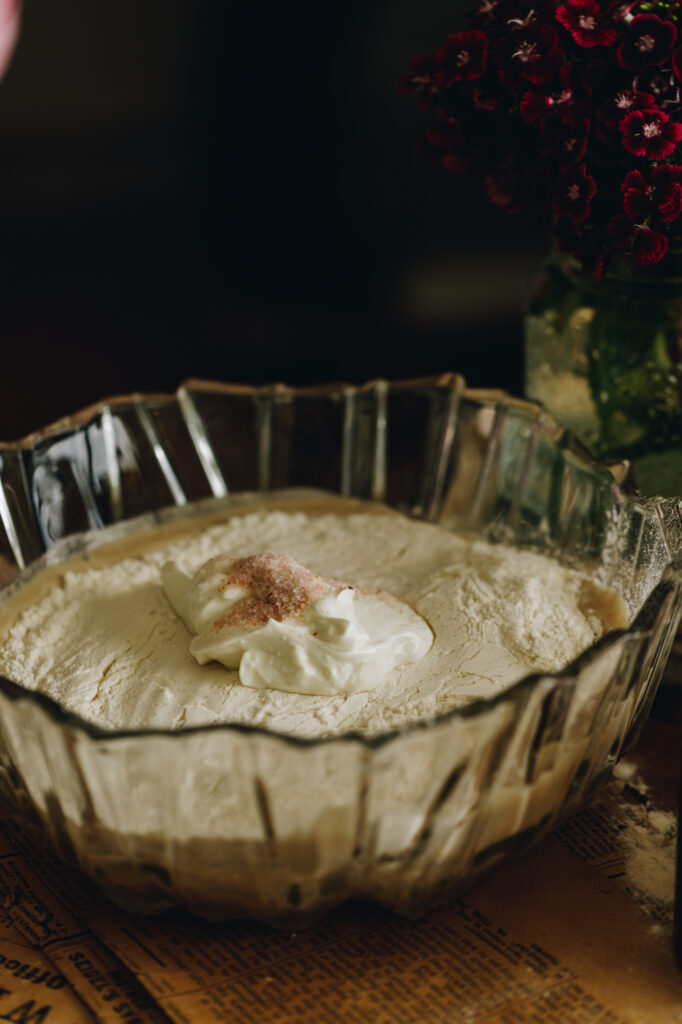
2. Combine the Ingredients:
Add the puehu parāoa (flour), pēkana paura (baking powder), tote (salt) and miraka tepe (yogurt) in to the yeast mixture and stir until a rough dough forms.
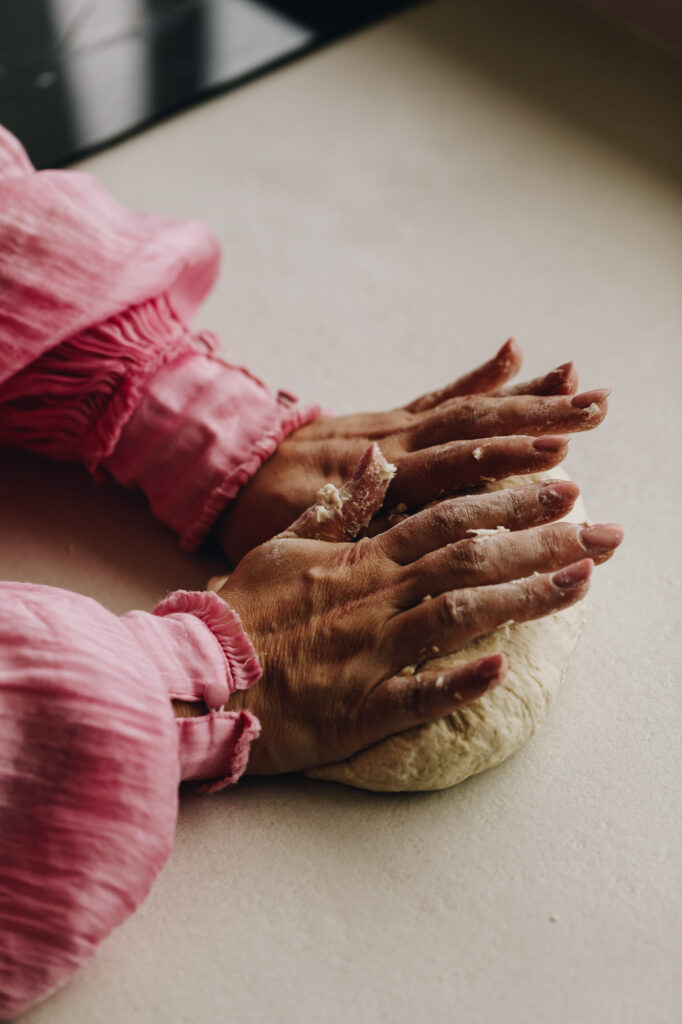
3. Knead the Dough:
Pokepokea te pokenga – knead the dough.
If you are using a stand mixer: Using a dough hook, knead for 4 minutes on low-medium speed.
If you are kneading by hand: Knead the dough on a lightly floured bench, with the palms of your hands (not with your fingers), for 5 minutes.
If the dough is quite sticky you can add up to 2 tablespoon of extra flour but try not to add any more than that.

4. First and only Rise:
Add the dough to a bowl, cover with a bowl cover or tea towel. Leave to rise for 45 minutes – 1 hour on the bench.
5. Prepare the Garlic and Herb Butter:
Grind the wāhi kāriki (garlic cloves) and pāhiri (parsley), with ¼ teaspoon each of tote (salt) and pepa (salt) in a mortar and pestle or chop it finely it on a chopping board.
Add the mīere (honey) and pata (butter). Whakaranuhia – mix and it is ready!
6. Divide the Dough:
Once the dough has risen, divide it in to 8 equal pieces.
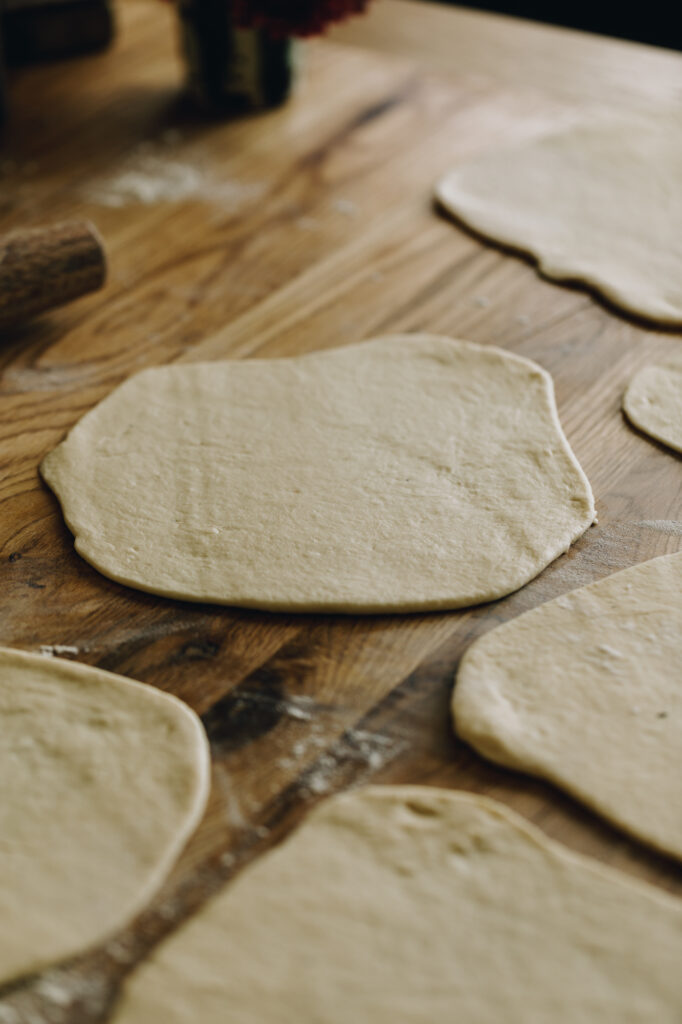
7. Roll out the Dough:
Roll out each piece of dough in to a rough circle that is slightly smaller than the size of your pan.
Roll the dough out just before you are going to cook it and don't leave them on the bench for too long as the dough can dry out. Up to around 15 minutes is fine but no longer.
8. Preheat the Pan:
Set a large frying pan or pans (I like to use two pans for quicker output) over medium – high heat. For reference, my stove goes up to 9 and I heat my pans at 7.
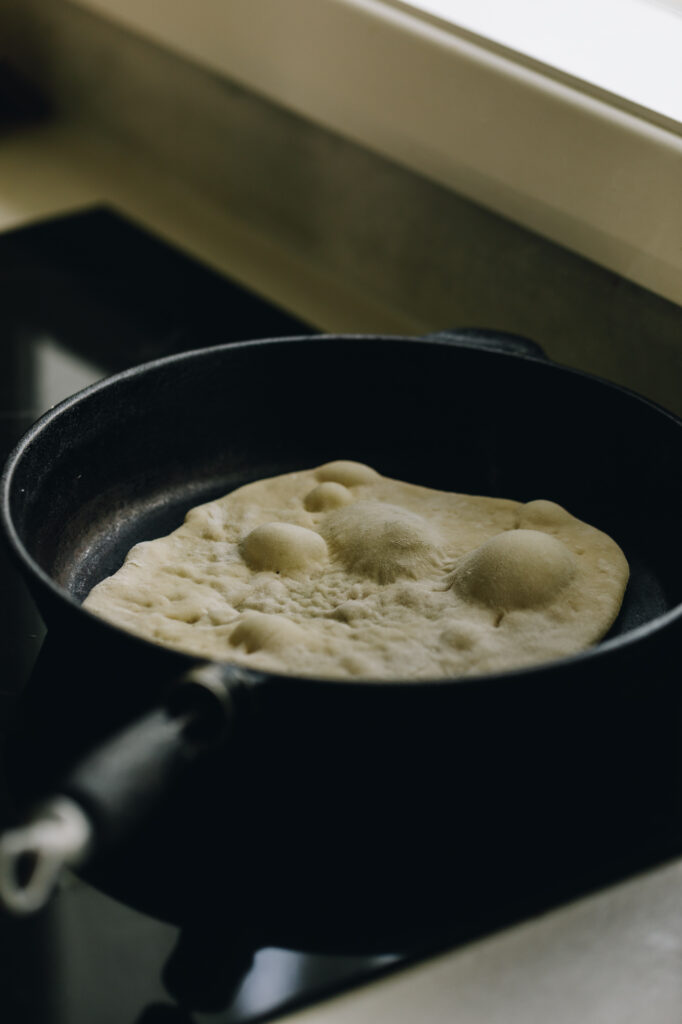
9. Cook the Naan Bread:
Once your pan is hot, add the naan directly on the hot pan without any oil. Cook on one side until you see the bubbles coming through. This should only take 1-2 minutes. Flip it over and cook on the other side for 1-2 minutes. Remove them from the pan and add to a chopping board or a plate.
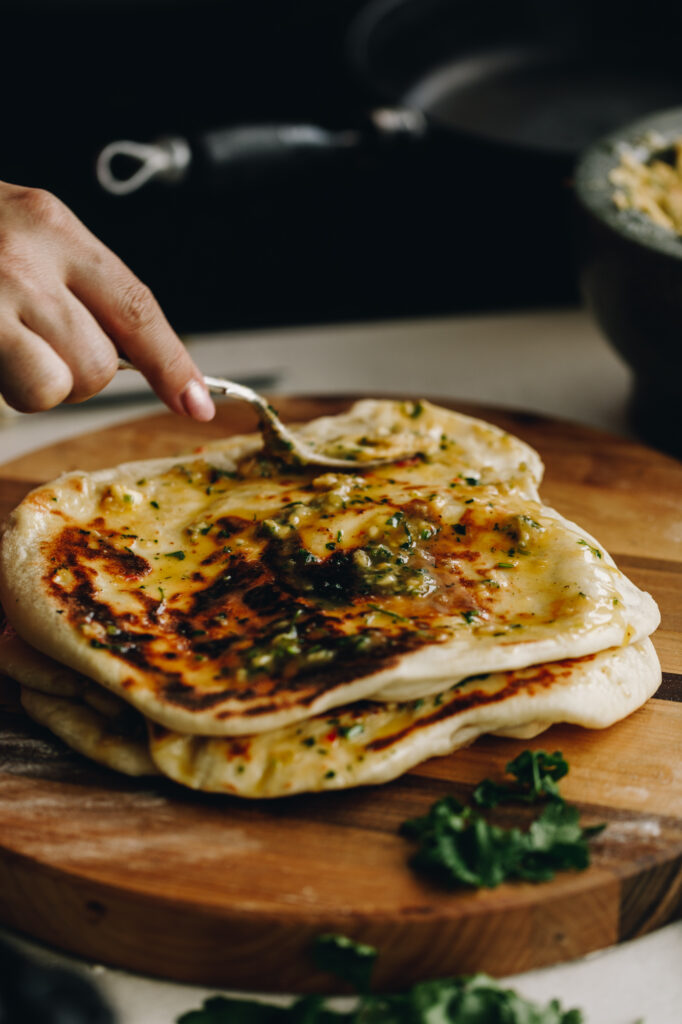
10. Add the Garlic and Herb Butter:
Using a pastry brush or fork, add around 1 tablespoon of the pata kāriki (garlic butter) on to the top size of the cooked naan. Cover with a tea towel.
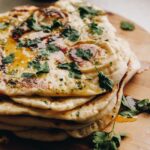
11. Pile them up:
Repeat this process.
Cook the parāoa (bread) in the pan on both sides, add the naan on top of the previously cooked one and spread with 1 tablespoon of the pata kāriki (garlic butter).
How to Serve:
These are best served warm with whatever you love to eat them with.
These are perfect along side your favourite curry, or eat them as a wrap stuffed full of fresh veggies with charred meat.
They can also be gently re-heated the next day, wrapped in a tea towel and placed in a 100 °C oven, for 10 minutes.
Check out more of our
Bread Recipes
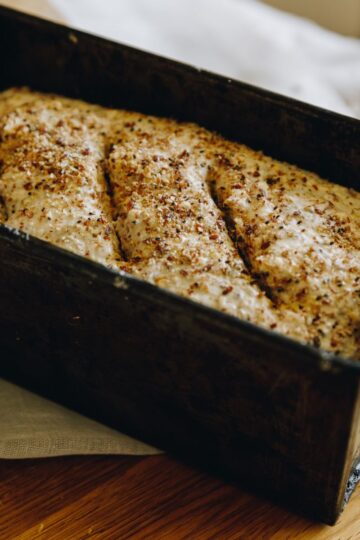
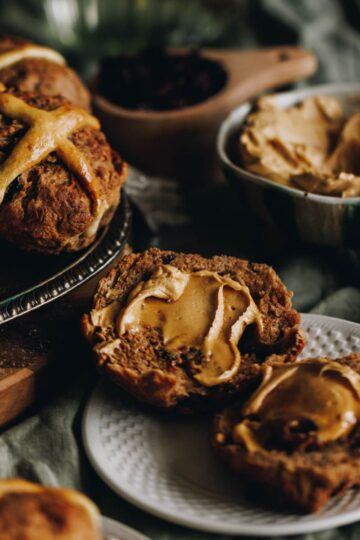
Break open the warm, fragrant dough, made from your own hands.


DID YOU ENJOY THIS RECIPE?
It would be so awesome if you could please leave a review/comment by clicking the “leave a comment” section at the top of the page.
I love seeing you all make my creations, so send a whakaahua (photo) or kiriata (video) to my Instagram and show me what you made. Let me know if you have any pātai (questions) too, I would love to help.
Naan Bread with Garlic Butter - Parāoa Papatahi me te Pata Kāriki
Ingredients
- 1 C (250 ml) wai aromahana (lukewarm water)
- 1 tablespoon (20 g) mīere (honey). You can replace this with maple syrup or half the amount of sugar.
- 3 teaspoon (9 g) īhi horo (instant yeast)
- 3 C (450 g) puehu parāoa kounga (high grade flour)
- 1 teaspoon pēkana paura (baking powder)
- 1 teaspoon (5 g) tote (salt, fine)
- ½ C (125 g) miraka tepe (yogurt, unsweetened greek yogurt)
Garlic Butter - Pata Kāriki
- 5 wāhi kāriki (garlic cloves)
- 15 g pāhiri Itāriana (Italian parsley or any fresh herbs like coriander or fresh basil)
- Tote me te pepa (salt and pepper)
- 1 large tablespoon (25 g) mīere (honey or maple syrup works well)
- 65 g pata kūteretere (softened butter)
Instructions
Activate the Yeast:
- Add the wai aromahana (lukewarm water) and mīere (honey) to a bowl. Stir until the mīere (honey) has dissolved.
- Ruia te īhi horo ki runga - sprinkle over the instant yeast. Stir again and leave to activate for 5 minutes. The īhi (yeast) has activated when it has floated to the top.
Combine the Ingredients:
- Add the puehu parāoa (flour), pēkana paura (baking powder), tote (salt) and miraka tepe (yogurt) in to the yeast mixture and stir until a rough dough forms.
Knead the Dough:
- Pokepokea te pokenga – knead the dough. If you are using a stand mixer: Using a dough hook, knead for 4 minutes on low-medium speed.
- If you are kneading by hand: Knead the dough on a lightly floured bench, with the palms of your hands (not with your fingers), for 5 minutes. If the dough is quite sticky you can add up to 2 tablespoon of extra flour but try not to add any more than that.
First and only Rise:
- Add the dough to a bowl, cover with a bowl cover or tea towel. Leave to rise for 45 minutes - 1 hour on the bench.
Prepare the Garlic and Herb Butter:
- Note: This can be prepared up to a week in advance and stored in a sealed container in the fridge until you are ready to use it.
- Grind the wāhi kāriki (garlic cloves) and pāhiri (parsley), with ¼ teaspoon each of tote (salt) and pepa (salt) in a mortar and pestle or chop it finely it on a chopping board.
- Add the mīere (honey) and pata (butter). Whakaranuhia - mix and it is ready!
Divide the Dough:
- Once the dough has risen, divide it in to 8 equal pieces.
Roll out the Dough:
- Roll out each piece of dough in to a circle that is slightly smaller than the size of your pan. Roll the dough out just before you are going to cook it and don't leave them on the bench for too long as the dough can dry out. Up to around 15 - 20 minutes is fine.
Preheat the Pan:
- Set a large frying pan or pans (I like to use two pans for quicker output) over medium – high heat. For reference, my stove goes up to 9 and I heat my pans at 7.
Cook the Naan Bread:
- Once your pan is hot, add the naan directly on the hot pan without any oil. Cook on one side until you see the bubbles coming through. This should only take 1-2 minutes. Flip it over and cook on the other side for 1-2 minutes. Remove them from the pan and add to a chopping board or a plate.
Add the Garlic and Herb Butter:
- Using a pastry brush, add around 1 tablespoon of the pata kāriki (garlic butter) on to the top size of the cooked naan. Cover with a tea towel.
Pile them up:
- Repeat this process. Cook the parāoa (bread) in the frying pan on both sides, add the naan on top of the previously cooked one and spread with 1 tablespoon of the pata kāriki (garlic butter).
How to Serve:
- These are best served warm with whatever you love to eat them with. These are perfect along side your favourite curry, or eat them as a wrap stuffed full of fresh veggies with charred meat!!
- They can also be gently re-heated the next day, wrapped in a tea towel and placed in a 100 °C oven, for 10 minutes.
Video
EXPERT TIPS:
Activating the Yeast:
Always give the yeast enough time to activate before adding the dry ingredients. The yeast will float to the top and it will be slightly foamy when it is ready.
Kneading:
When hand kneading use the palm of your hands, not your fingers. The dough and hands seem to get much stickier when it is worked like that, so work those palms in to the dough. If you need more tips on kneading dough, check out this How to Knead Dough post.
Baking Powder:
Even thought there is īhi (yeast) in the dough, the pēkana paura (baking powder) is still very important. The baking powder gives the dough extra rise when it hits the heat of the pan.
Rolling out the Dough:
Roll out the dough in to circles as you are cooking them. If you leave the rolled out dough on the bench too long, the dough starts to go crusty. Up to 15 minutes is fine but no longer.
Cooking the Naan:
I prefer to use cast iron pans for cooking Naan bread as they disperse the heat efficiently, however if you don't one, no worries at all just use what you have.
Different Variations to try:
Dairy-free Naan Bread:
If you want a vegan version of this parāoa (bread), simply swap the miraka tepe (yogurt) for miraka tepe kokonati (coconut yogurt). The pata (butter) for the garlic butter can also be replaced with a dairy-free butter like Olivini.
Spicy garlic naan:
If you like a bit of spice, the Naan bread tasted delicious if you add fresh chilli to the garlic butter. Chilli oil is also a delicious addition, drizzled over the top of the freshly cooked parāoa (bread).
Storage instructions:
Room temperature:
Store in an airtight container for up to 2 days. Gently warm up in the microwave or in a low oven before eating though so the dough comes back to life.
Freezer:
Freeze cooked naan with baking paper between layers in a plastic bag for up to two months. They freeze better without the pata kāriki (garlic butter) on them. Warm them up when needed and make the garlic butter fresh for the next flavour.
Reheating:
For the best results, preheat the naan in a pan over low-medium heat, for 1–2 minutes on each side. If you want to heat more than one at a time, wrap the naan in baking paper and heat at 100°C for ~10 minutes until warm.
Frequently Asked Questions:
Āe (yes), double the amount of baking powder instead. The texture will be slightly less airy but still soft and delicious.
This can be for a number of reasons. The first one is adding extra puehu parāoa (flour) in to the recipe, the more you add, the denser it will be. Try it one following the measurements exactly and I promise they won't be dense. Also, make sure the rising time is stuck unless it is cold in your kitchen. If so, increase the rising times by 10 - 15 minutes to boost the rising of the dough.


Annalita
Kia ora I love your programme on poaka whakaata thats how I went to your website. I Love your naan bread recipe and pata.
Kia ora Annalita
Naomi Toilalo WhānauKai
Kia ora Annalita, wow thank you so much for the support and I'm so glad that you enjoy my naan bread recipe, I love it too!
Bronwyn Bell
Made this a couple of times now. It's become my go to recipe for Naan Bread. I freeze my left overs and pop them in the oven to warm on low.
Naomi Toilalo WhānauKai
Kia ora Bronwyn, so glad to hear you enjoy it. That is awesome. We love it in our whānau too!
Sarah
This is such a reliable flatbread recipe, I use it heaps! Quick rise time, easy to follow instructions and great puff in the pan.
Naomi Toilalo WhānauKai
Woo hoo - I just made these other night too Sarah and we love them! So glad you like them too.
Naomi