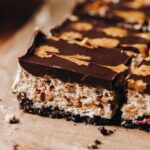
This No-bake Marshmallow Slice is another favourite of mine because of its delicious flavour and fantastic texture. Adapt the ingredients to what you love and make it your own in a few simple steps.
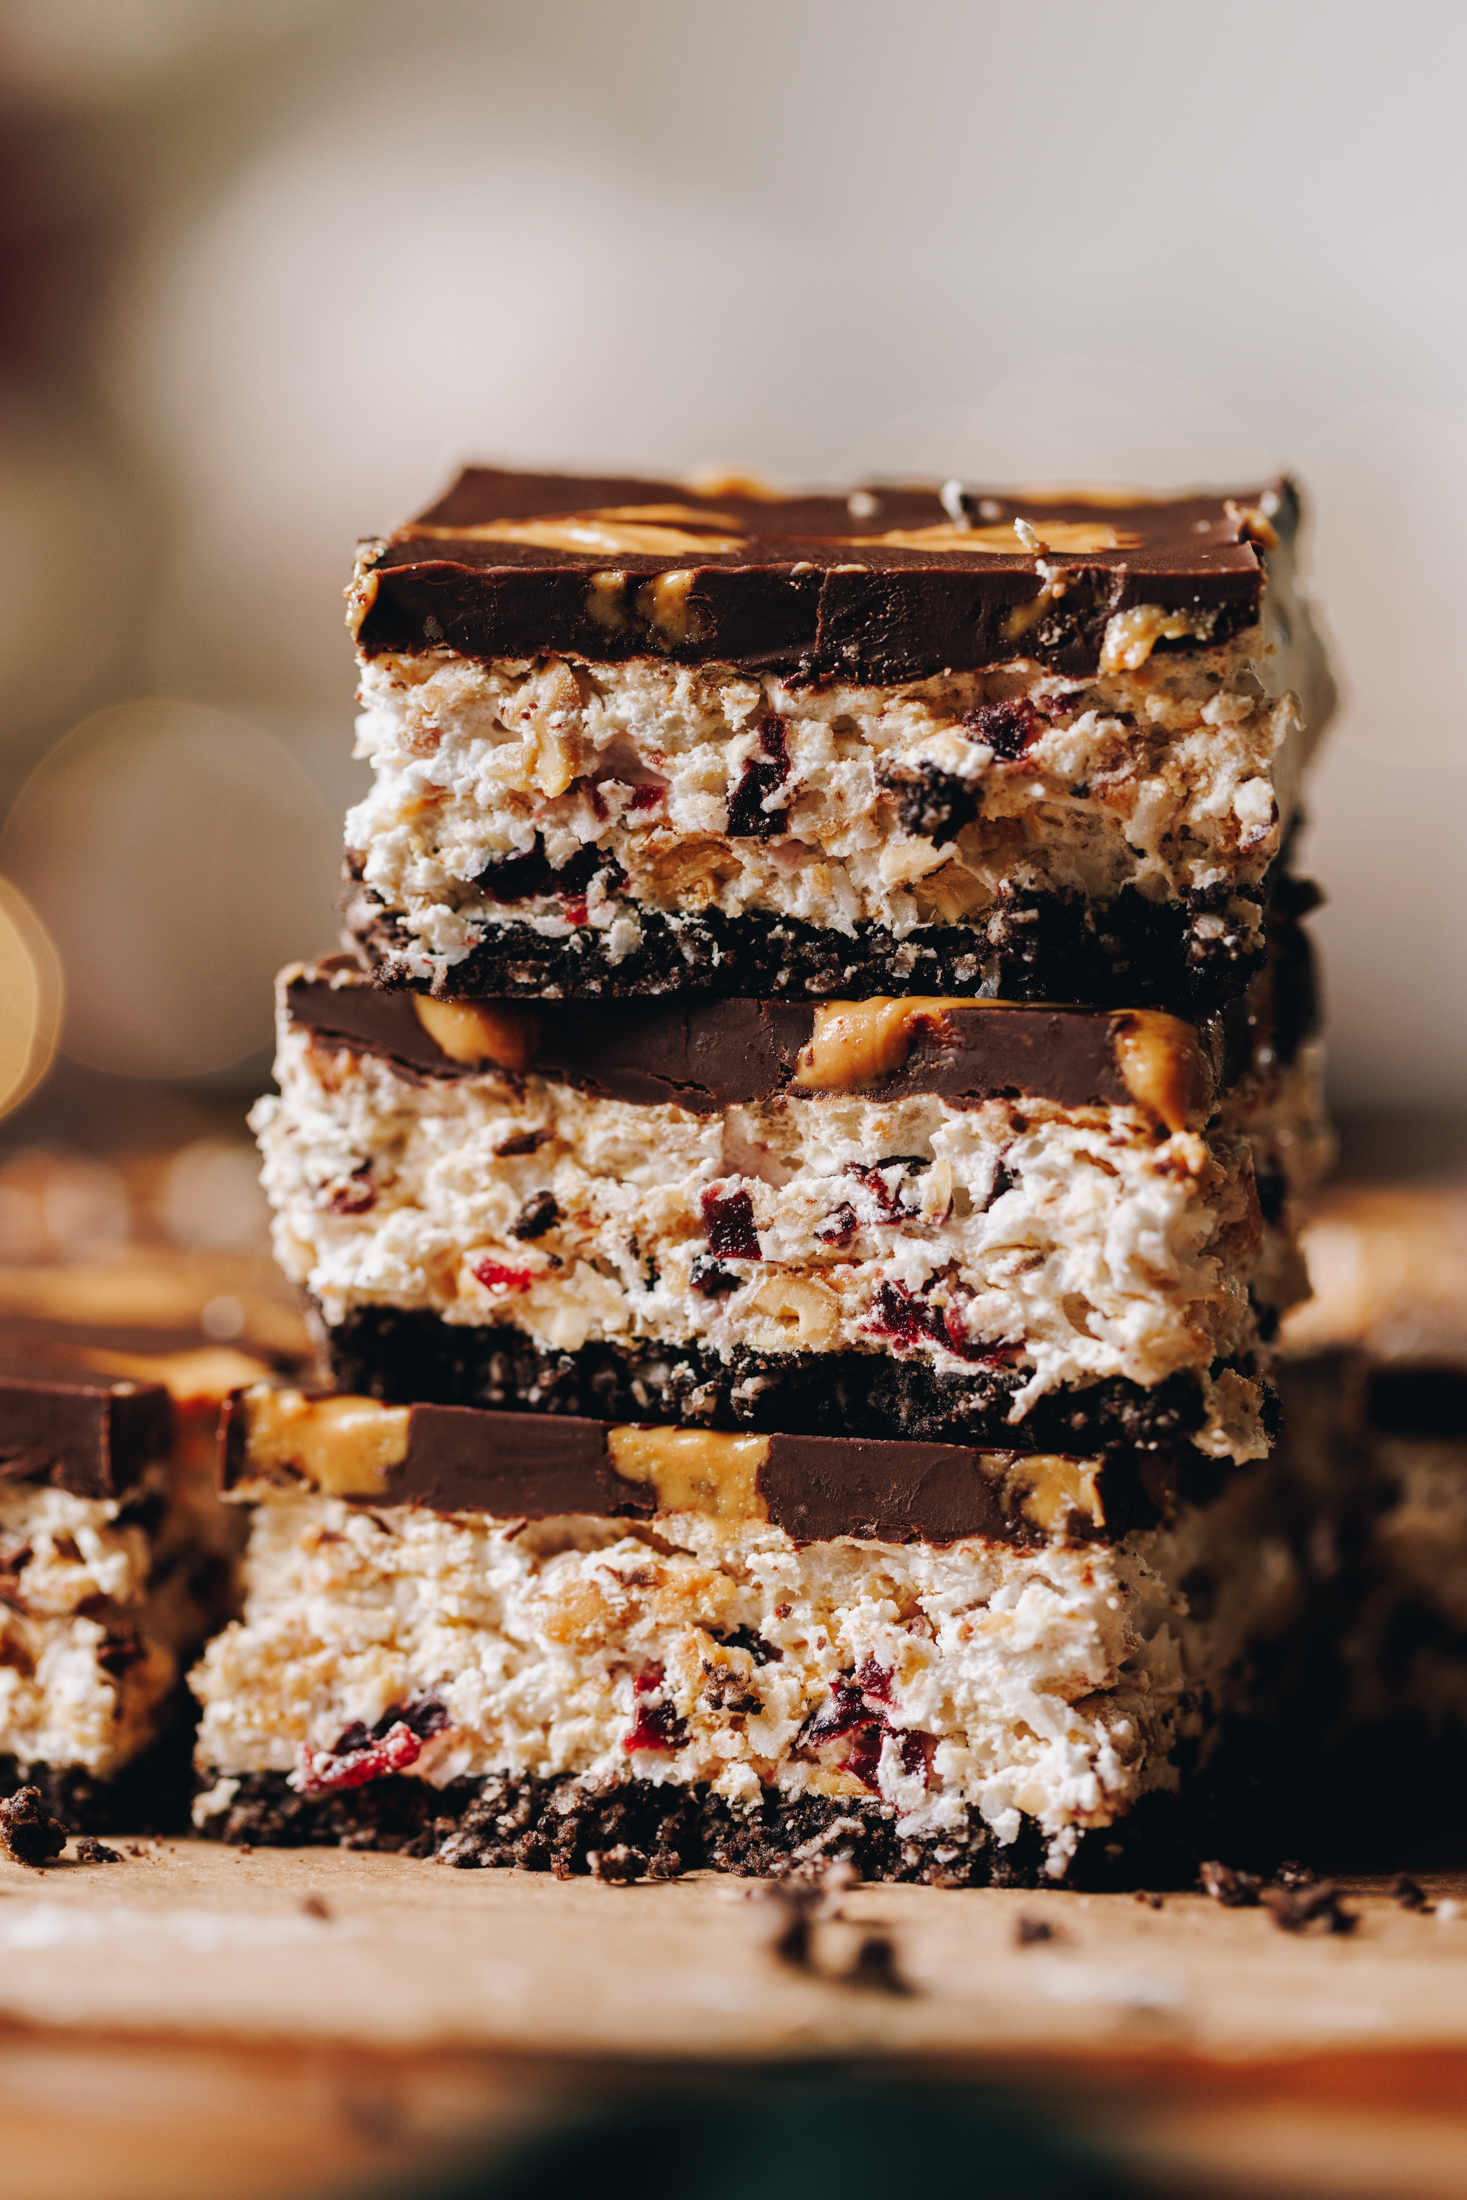
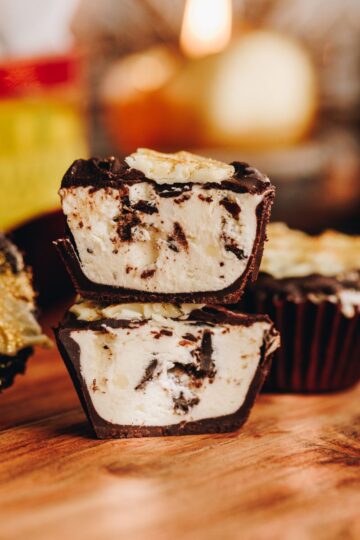
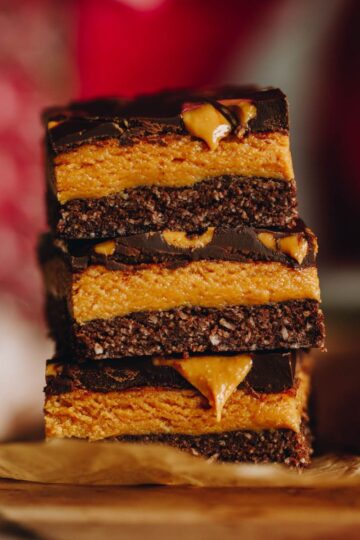
Originally I called this recipe nougat slice but the more I think about it, it has much more of a marshmallow quality to it, so I have changed the name! It has a chocolate biscuit base, a soft marshmallow centre and a chocolate top, perfect for parties, afternoon tea or any occasion at all. So, follow me and let's whip up this fun slice.
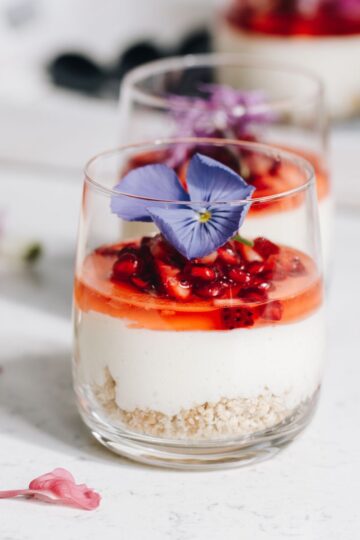
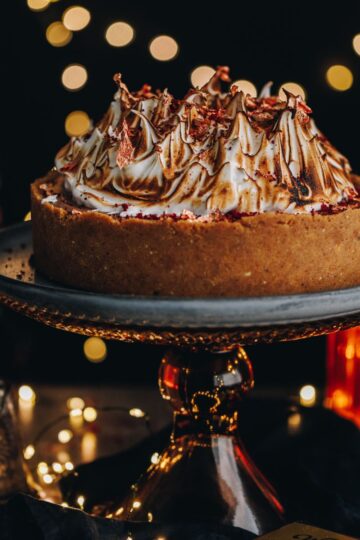
More māngohe (marshmallow) recipes to try:
What to try another no-bake recipe with marshmallow? Then try my No-bake Hedgehog Slice with Marshmallow or Brownie with Raspberry Marshmallow.
Videography and photography by Sarah Henderson.
Ingredient Tips for the No-bake Marshmallow Slice:
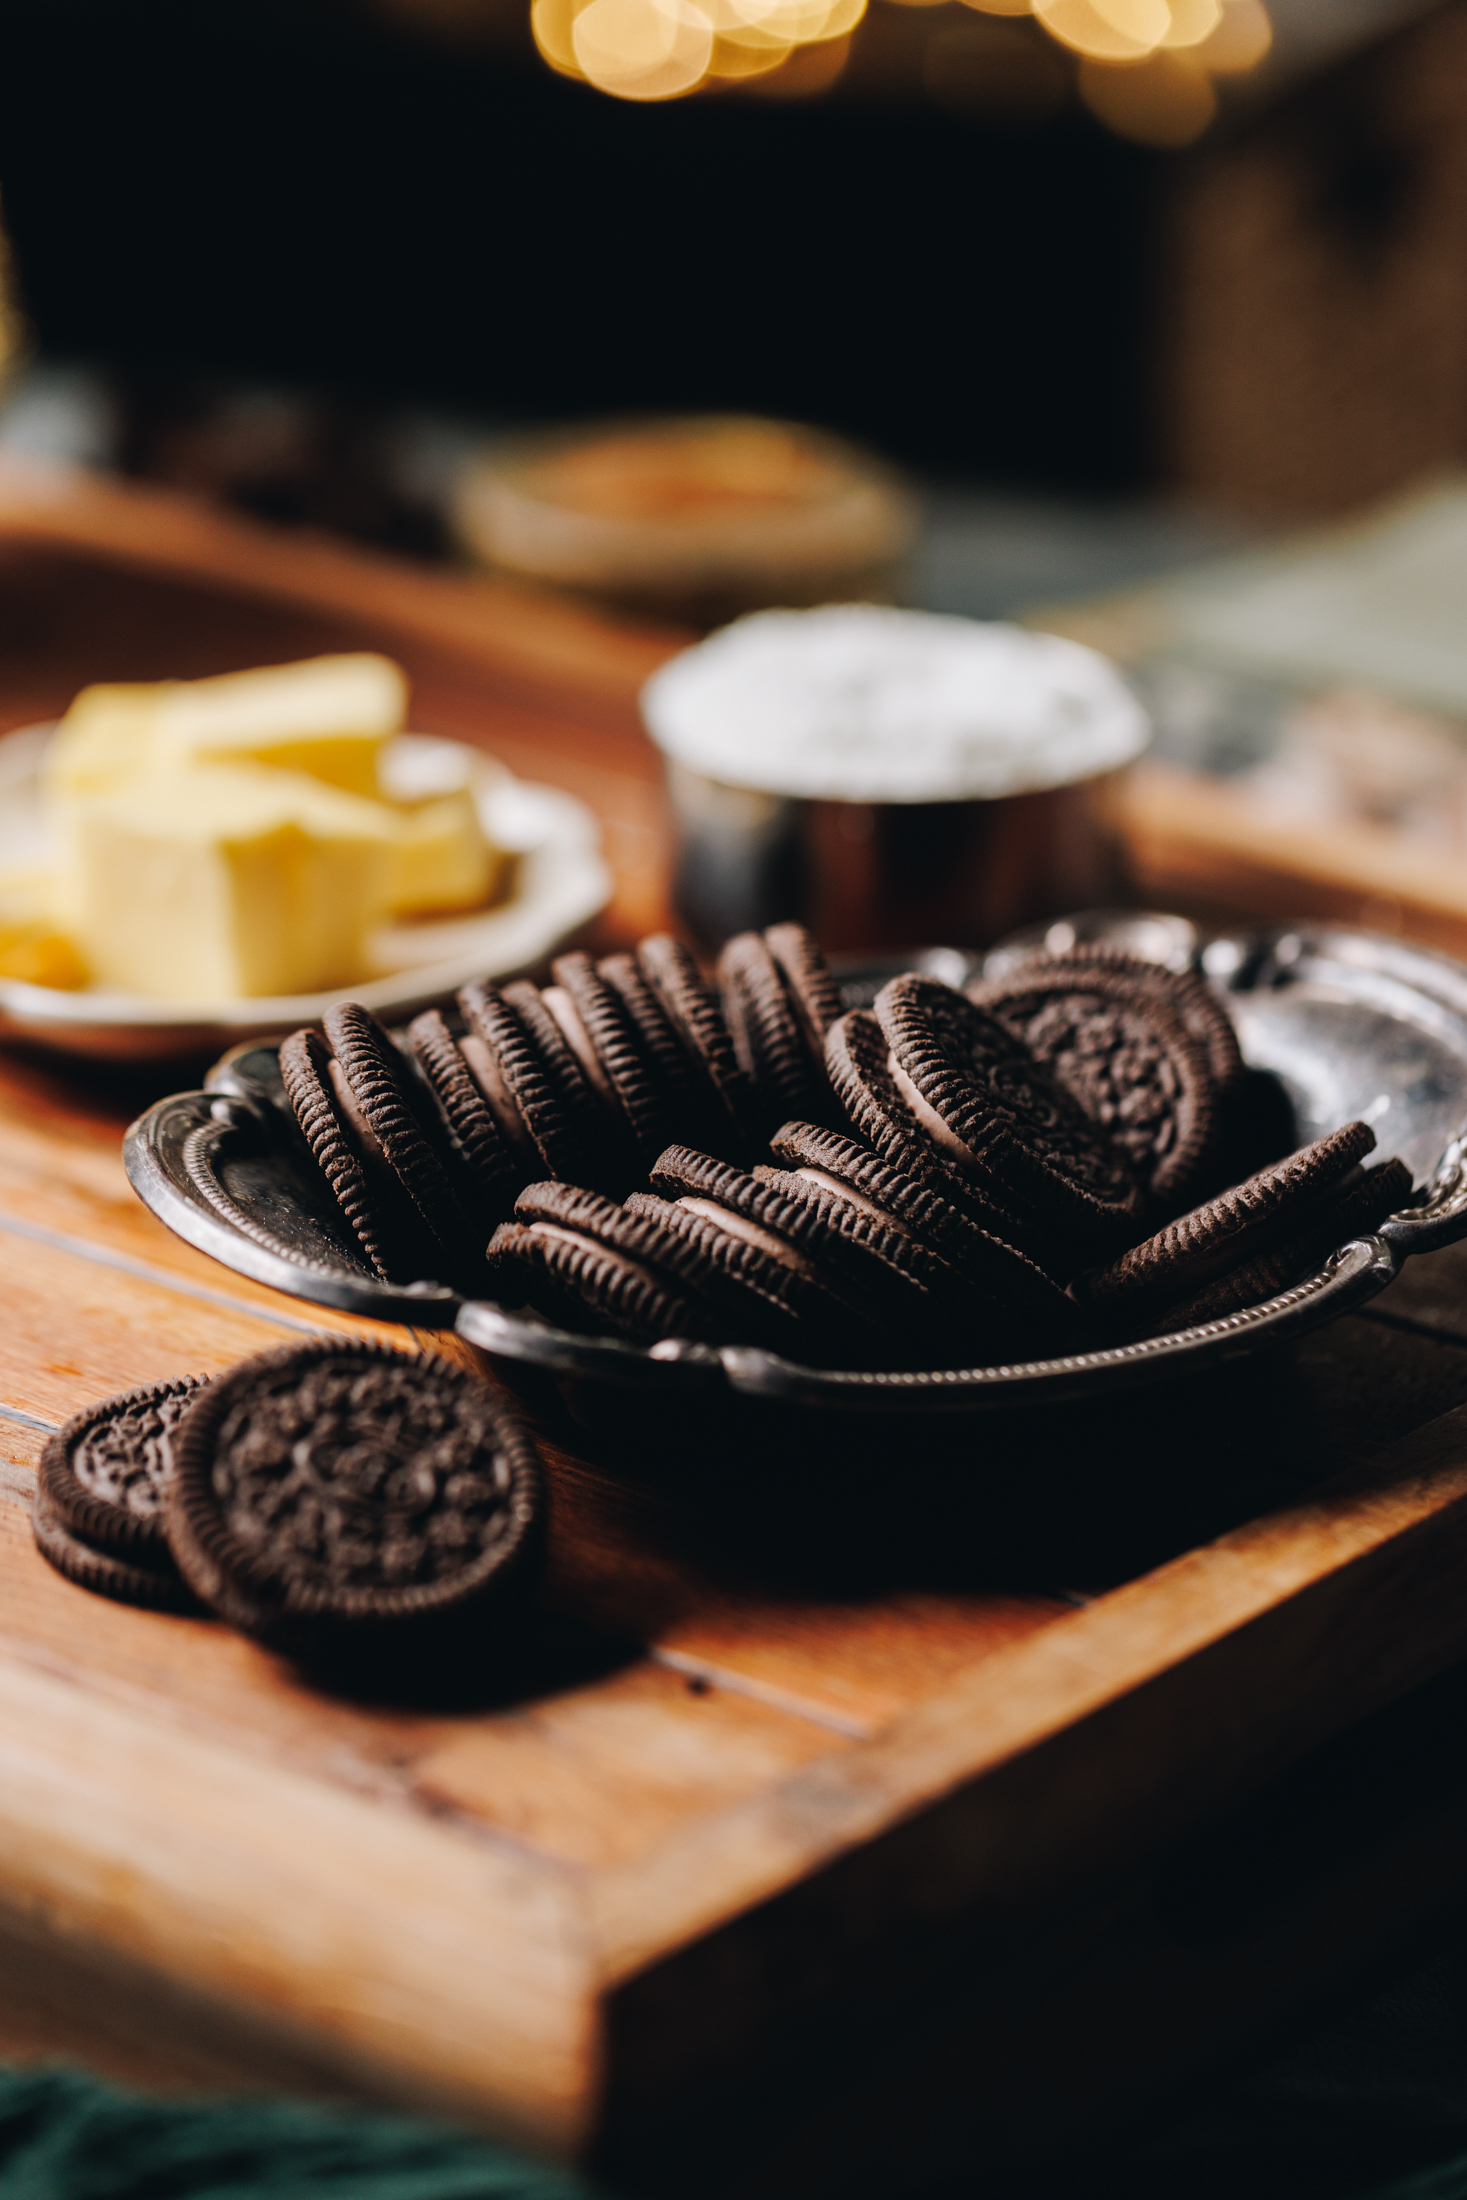
- Biscuits: I use chocolate filled Oreos but any store-bought chocolate cookies work.
- Coconut: I prefer kokonati pūtī (desiccated coconut) in this recipe but if you like a chunkier texture, use shredded.
- Butter: Melted butter or coconut oil can be used in the base.
- Gelatine Powder: This little ingredient helps the cake to set and if you live in NZ, I prefer the Mrs Rogers brand.
- Peanuts: Use dry roasted peanuts or any of your favourite nuts.
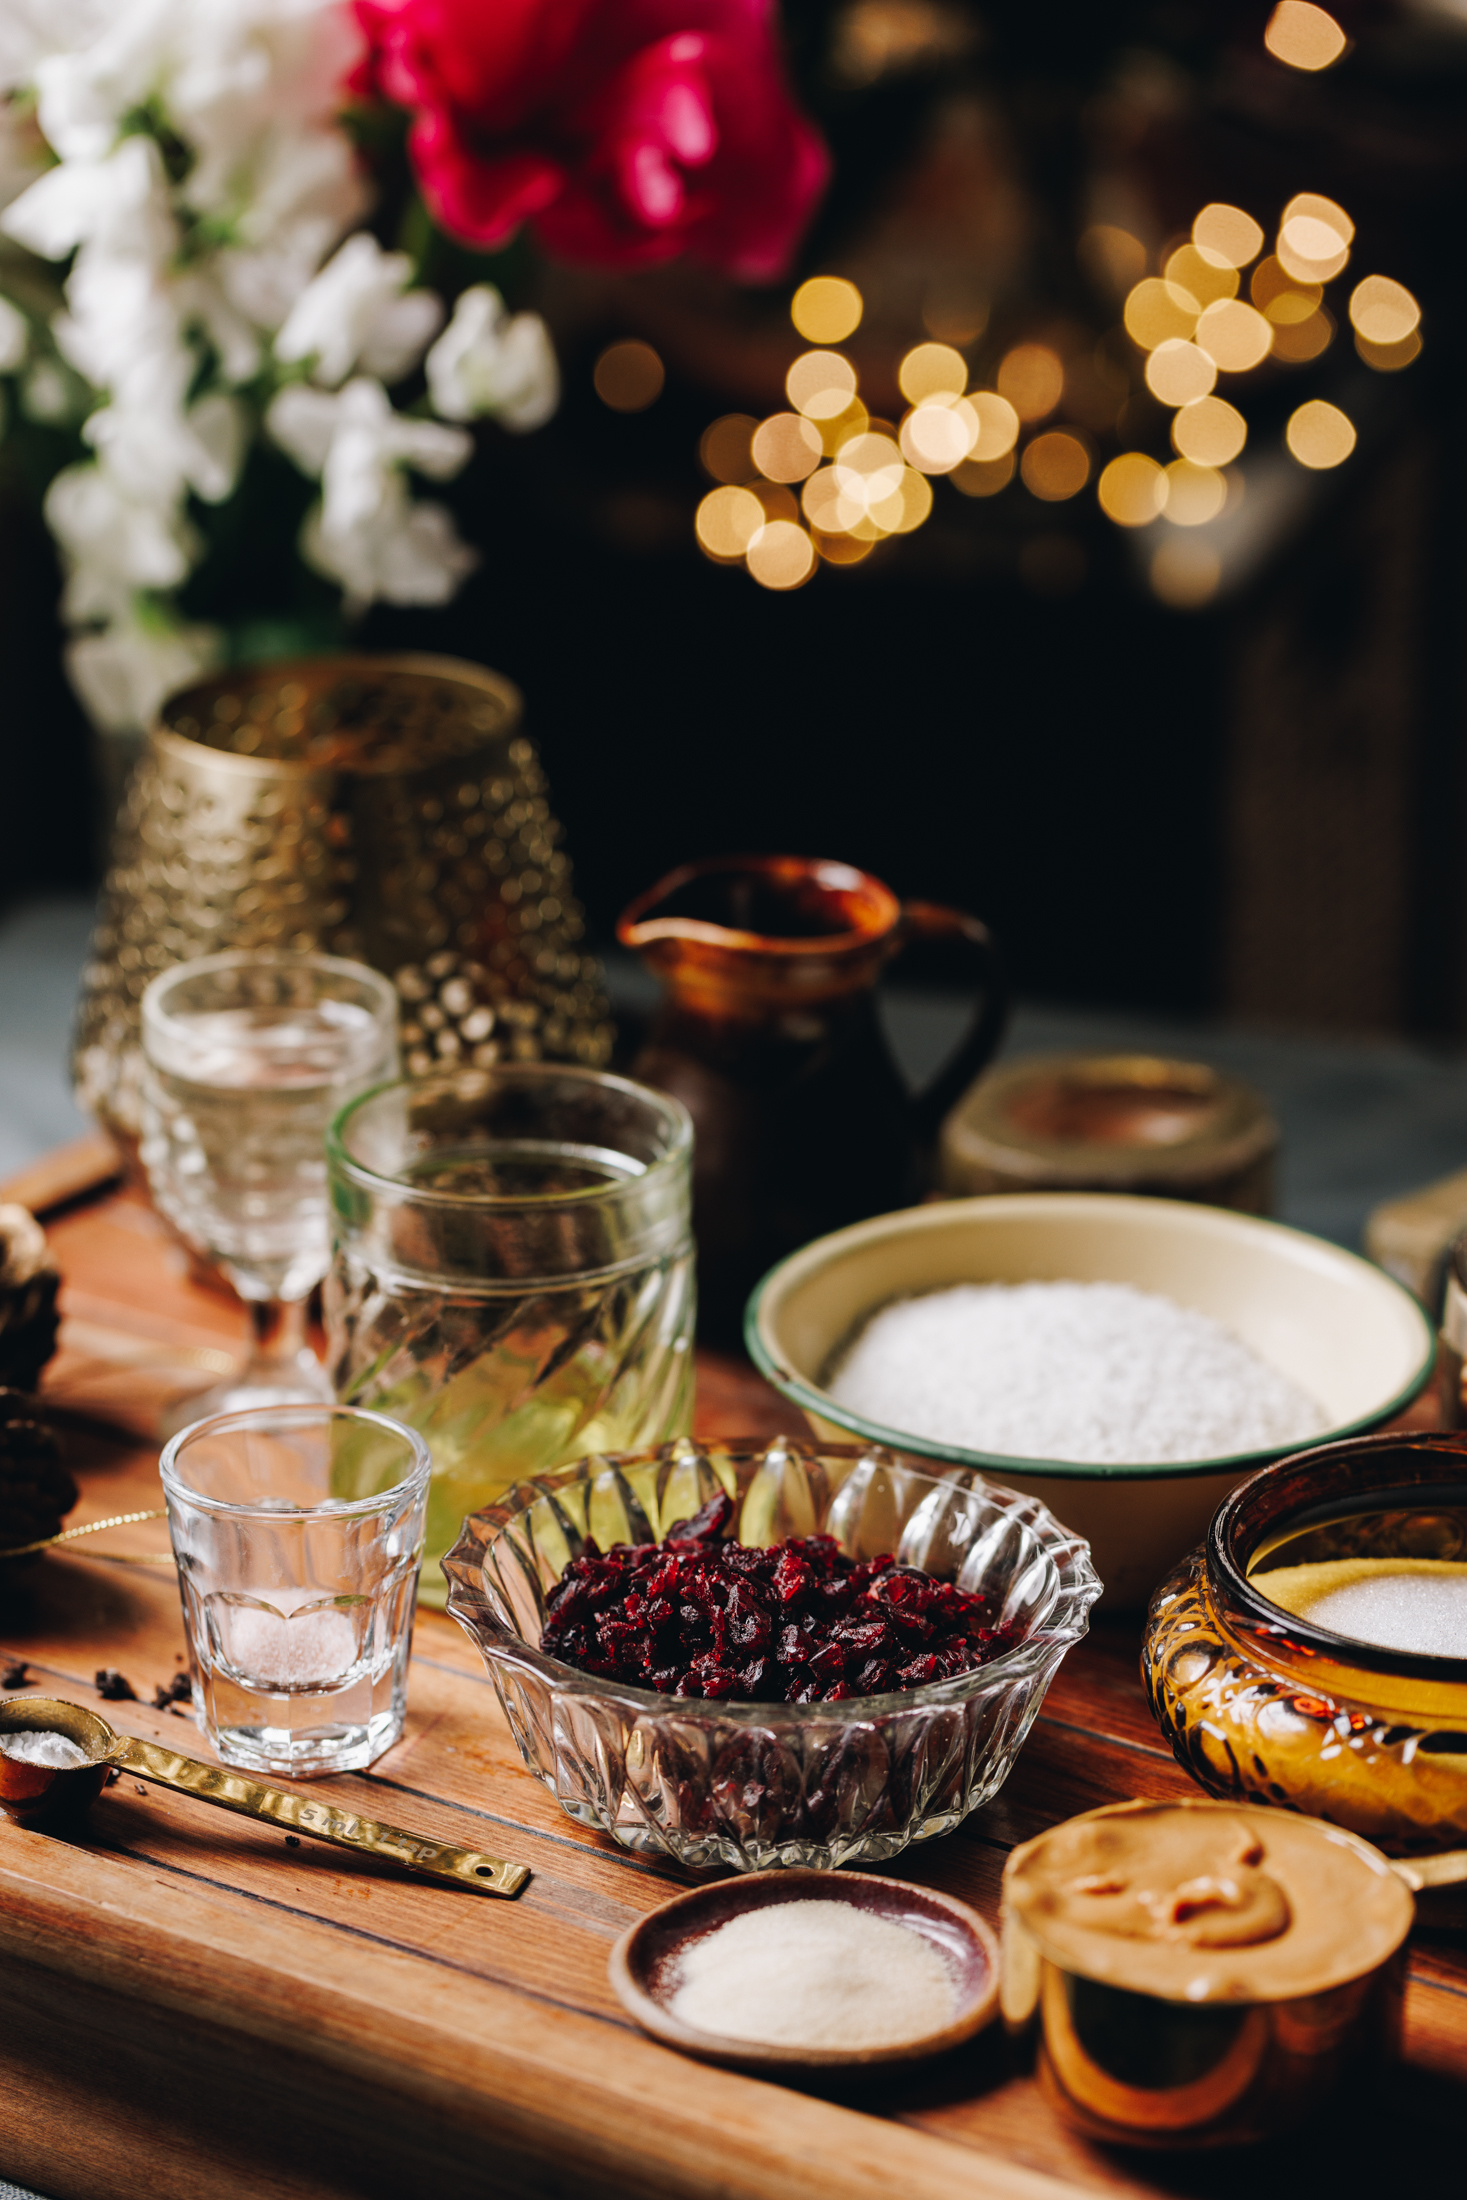
- Cranberries: Dried cranberries give a sweet and sharp flavour but they can be omitted or swapped out for any of your favourite dried fruit.
- Peanut Butter: This creates a delicious savoury note to the slice but it can be omitted or swapped for Nutella, Biscoff or any nut butter.
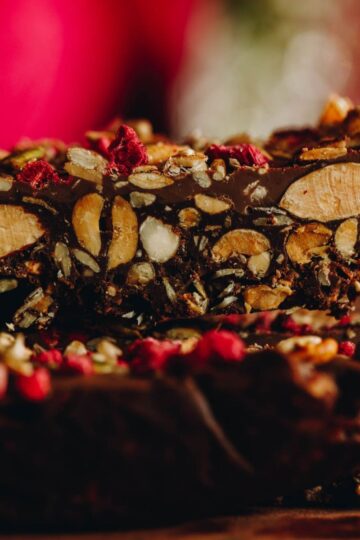
- Chocolate: I prefer tiakarete parauri (dark chocolate) because it balances the sweetness of the filling but use your favourite chocolate.
EXPERT TIPS:
Be careful when working with the sugar syrup. This māngohe (marshmallow) needs hot, boiling syrup poured in to a meringue so definitely keep little hands away from the marshmallow making part.
This is a very adaptable recipe that can have ingredients removed and swapped. Choose what flavour profile you want and then fold it in to the merenge (meringue) base.
STEP BY STEP INSTRUCTIONS FOR THE NO-BAKE MARSHMALLOW SLICE:
Note: The full recipe card with the full list of ingredients, instructions and step by step video are found at the bottom of this page.
1. Prepare the Tin:
Prepare a 20 cm square baking tin with baking paper.
2. Process the Biscuits:
Add the pihikete tiakarete (chocolate biscuits) and kokonati (coconut) in to the tāwhirowhiro (food processor), then turn in to a fine crumb. If you don't have a food processor you can crush the biscuits in a mortar and pestle or with a rolling pin.
3. Mix in the Butter:
Add the pata kua rewaina (melted butter) or hinu kokonati kua rewaina (melted coconut oil) and process for 30 seconds.
4. Press the Base in to the Tin:
Add the crumb to the prepared baking tin and press the mixture in as firmly as it can go. Chill it in the fridge while you make the māngohe (marshmallow).

5. Bloom the Gelatine:
Add the paura tetepe (gelatine powder) and wai (water) in to a heatproof cup. Stir until combined and leave for 5 minutes to bloom.
6. Toast the Coconut:
You can skip the toasting part if you don't want but it does add beautiful flavour.
Add the kokonati (coconut) to a pot or frying pan and toast over medium heat until golden.
Remove it from heat and add to a plate to cool slightly.
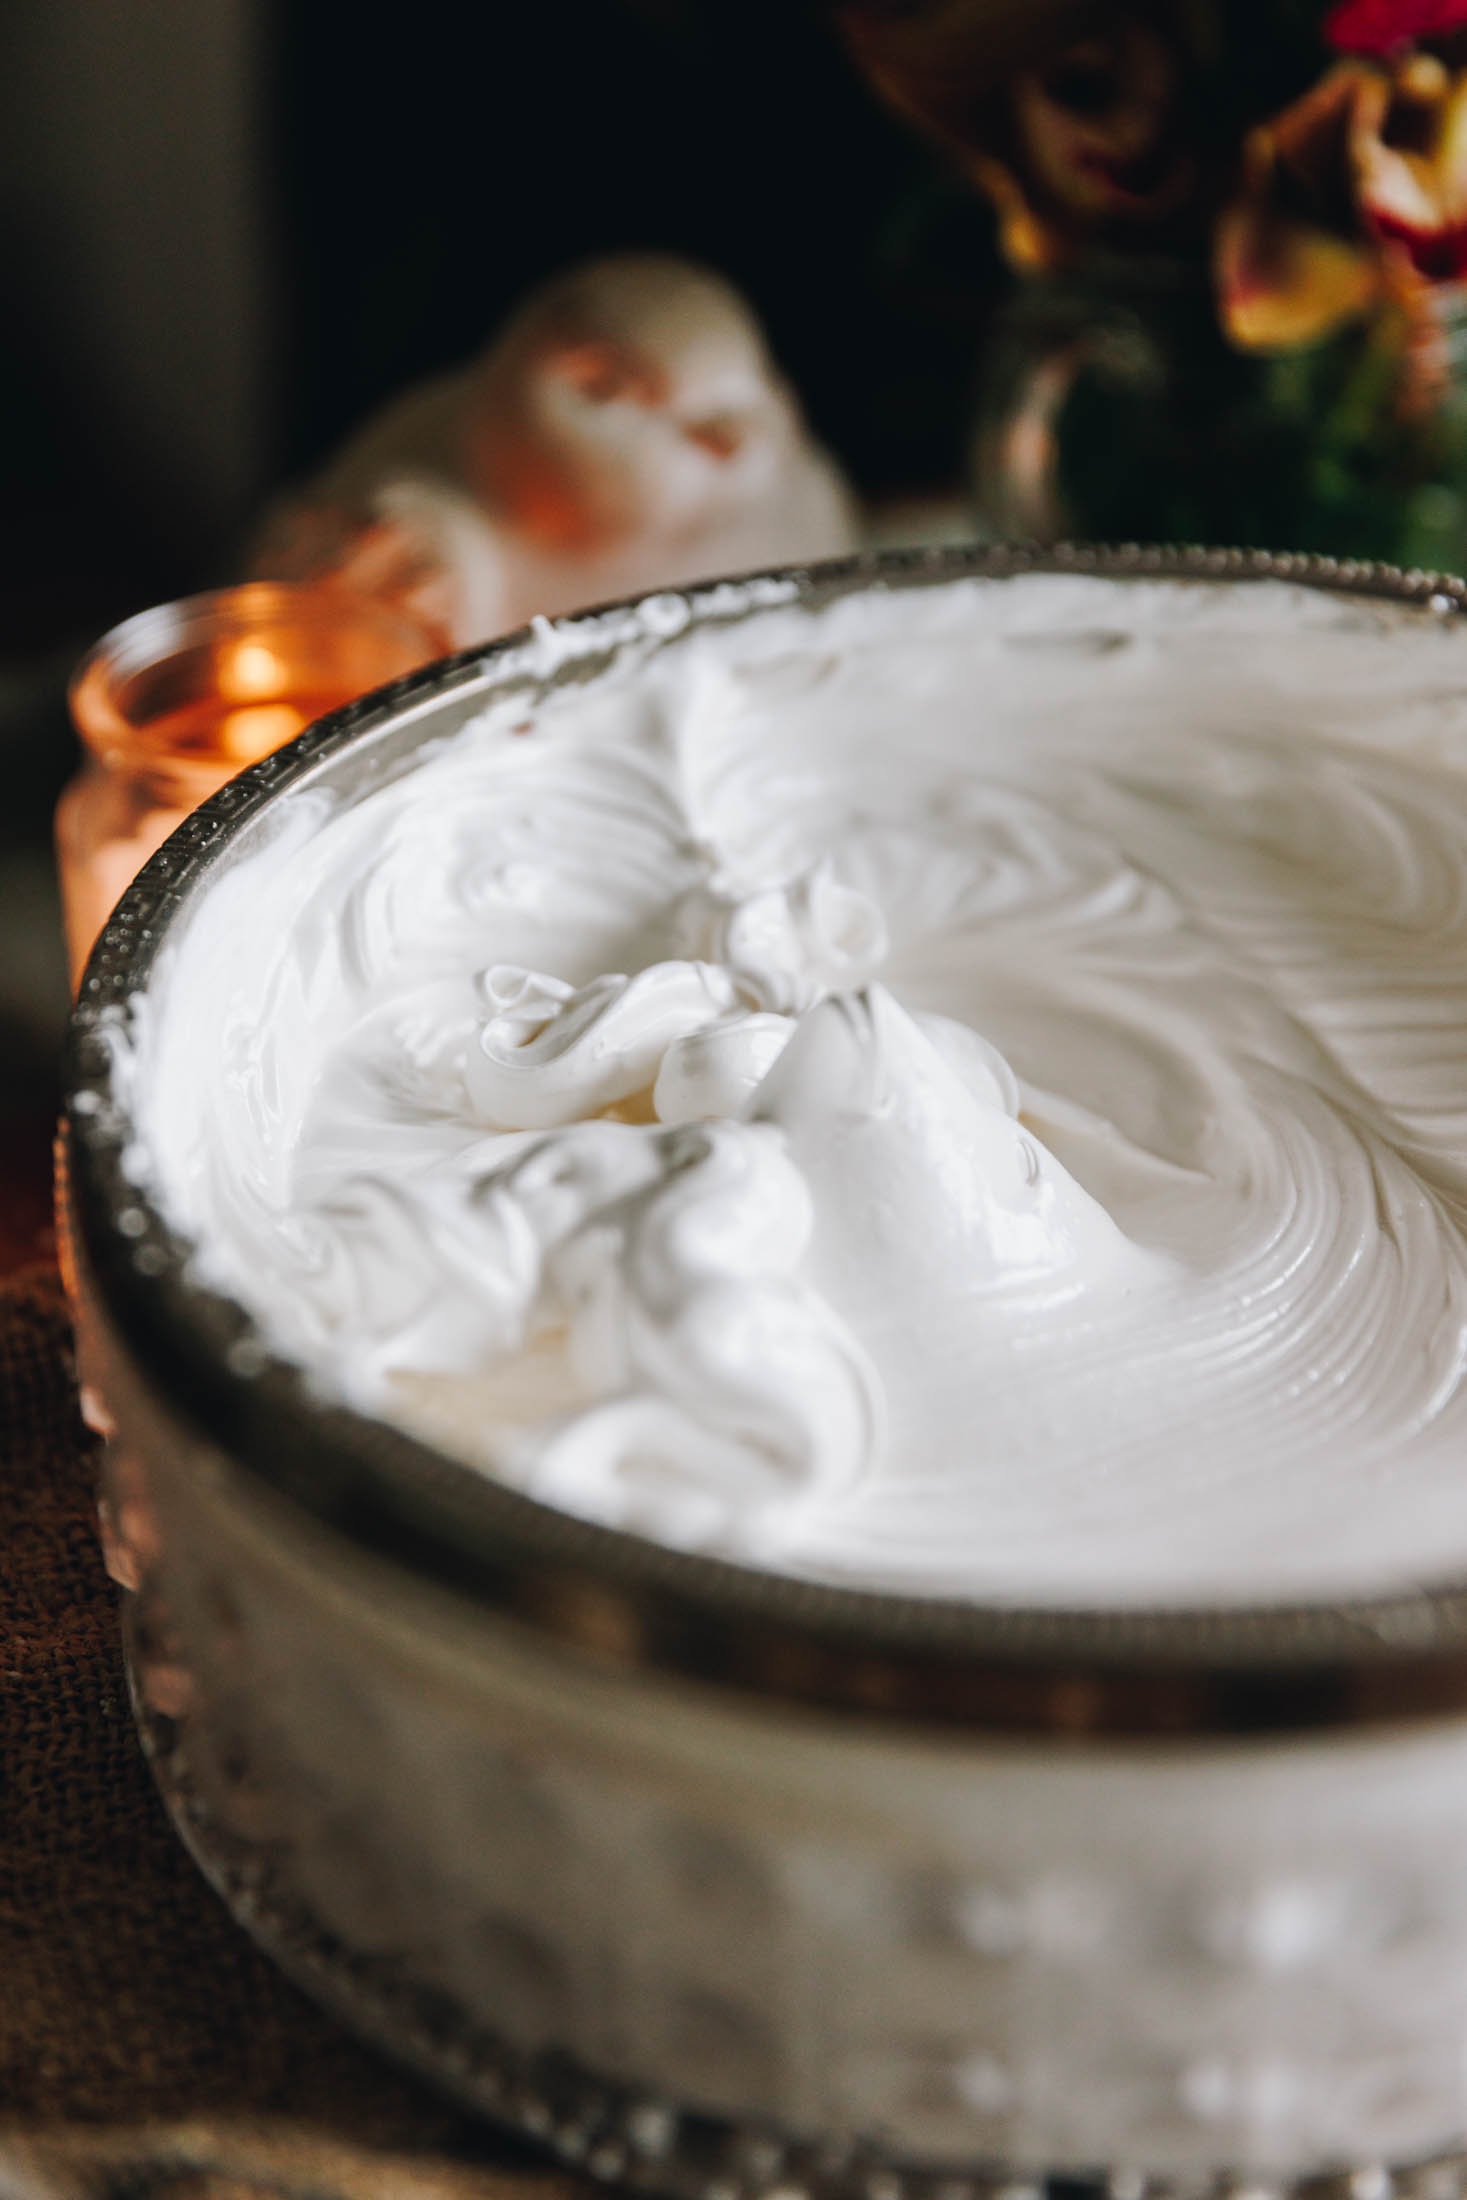
6. Prepare the Egg Whites:
Add the kahu hēki (egg white) and kirīmi tāta (cream of tartar) to a heatproof bowl.
Whip them on medium-high speed until soft peaks form and set it aside.
7. Make the Sugar Syrup:
Add huka one (caster sugar), tote (salt) and wai (water) to a pot.
Boil over high heat until it reaches 140 °C.
8. Melt the Bloomed Gelatine:
As the sugar syrup is heating up, melt the bloomed gelatine in the microwave for 20 seconds.
9. Combine the Egg Whites and Sugar Syrup:
Slowly pour the hot sugar syrup into the whipped meringue and whip on high for a minute or so.
Then pour in the melted gelatine as you continue to whip for 5-7 minutes. Add in the wanira around the three minute mark.
10. Mix all the Ingredients together:
Once the meringue has stiff peaks, fold in the kokonati (coconut), pīnati (peanuts) and karanipere (cranberries). Then, fold through the pata pīnati (peanut butter).
11. Add the Mixture to the Tin:
Pour the māngohe (marshmallow) on top of the cooled base and refrigerate for 15 minutes to start the setting process.
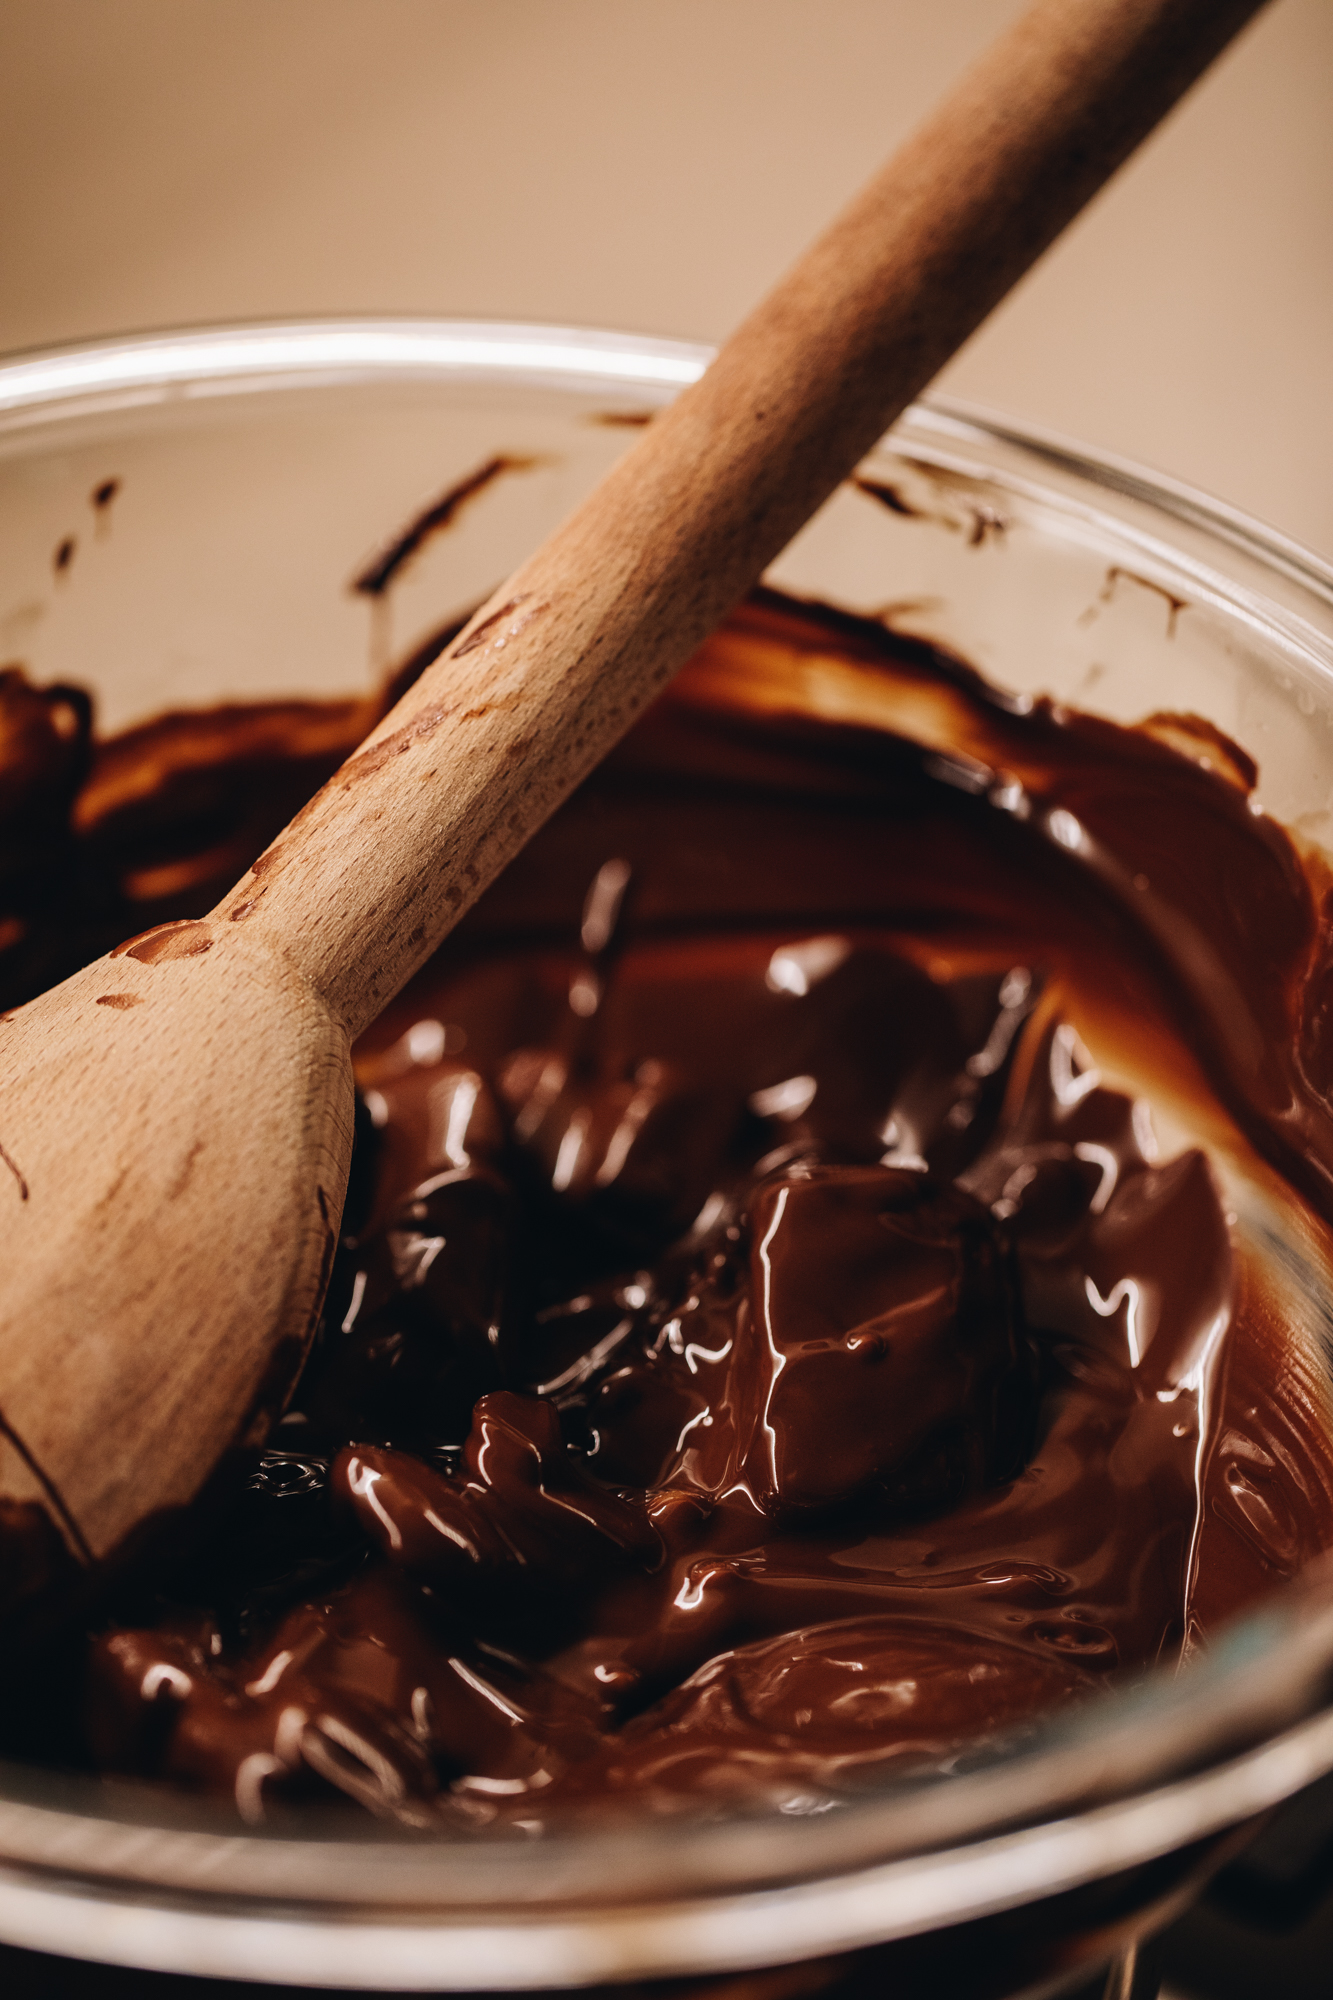
12. Prepare the Chocolate Topping:
Chop the tiakarete parauri (dark chocolate) in to chunks. Then add the chocolate and noni (oil) in to a small pot. Gently melt it on the stove over super low heat as you gently stir.
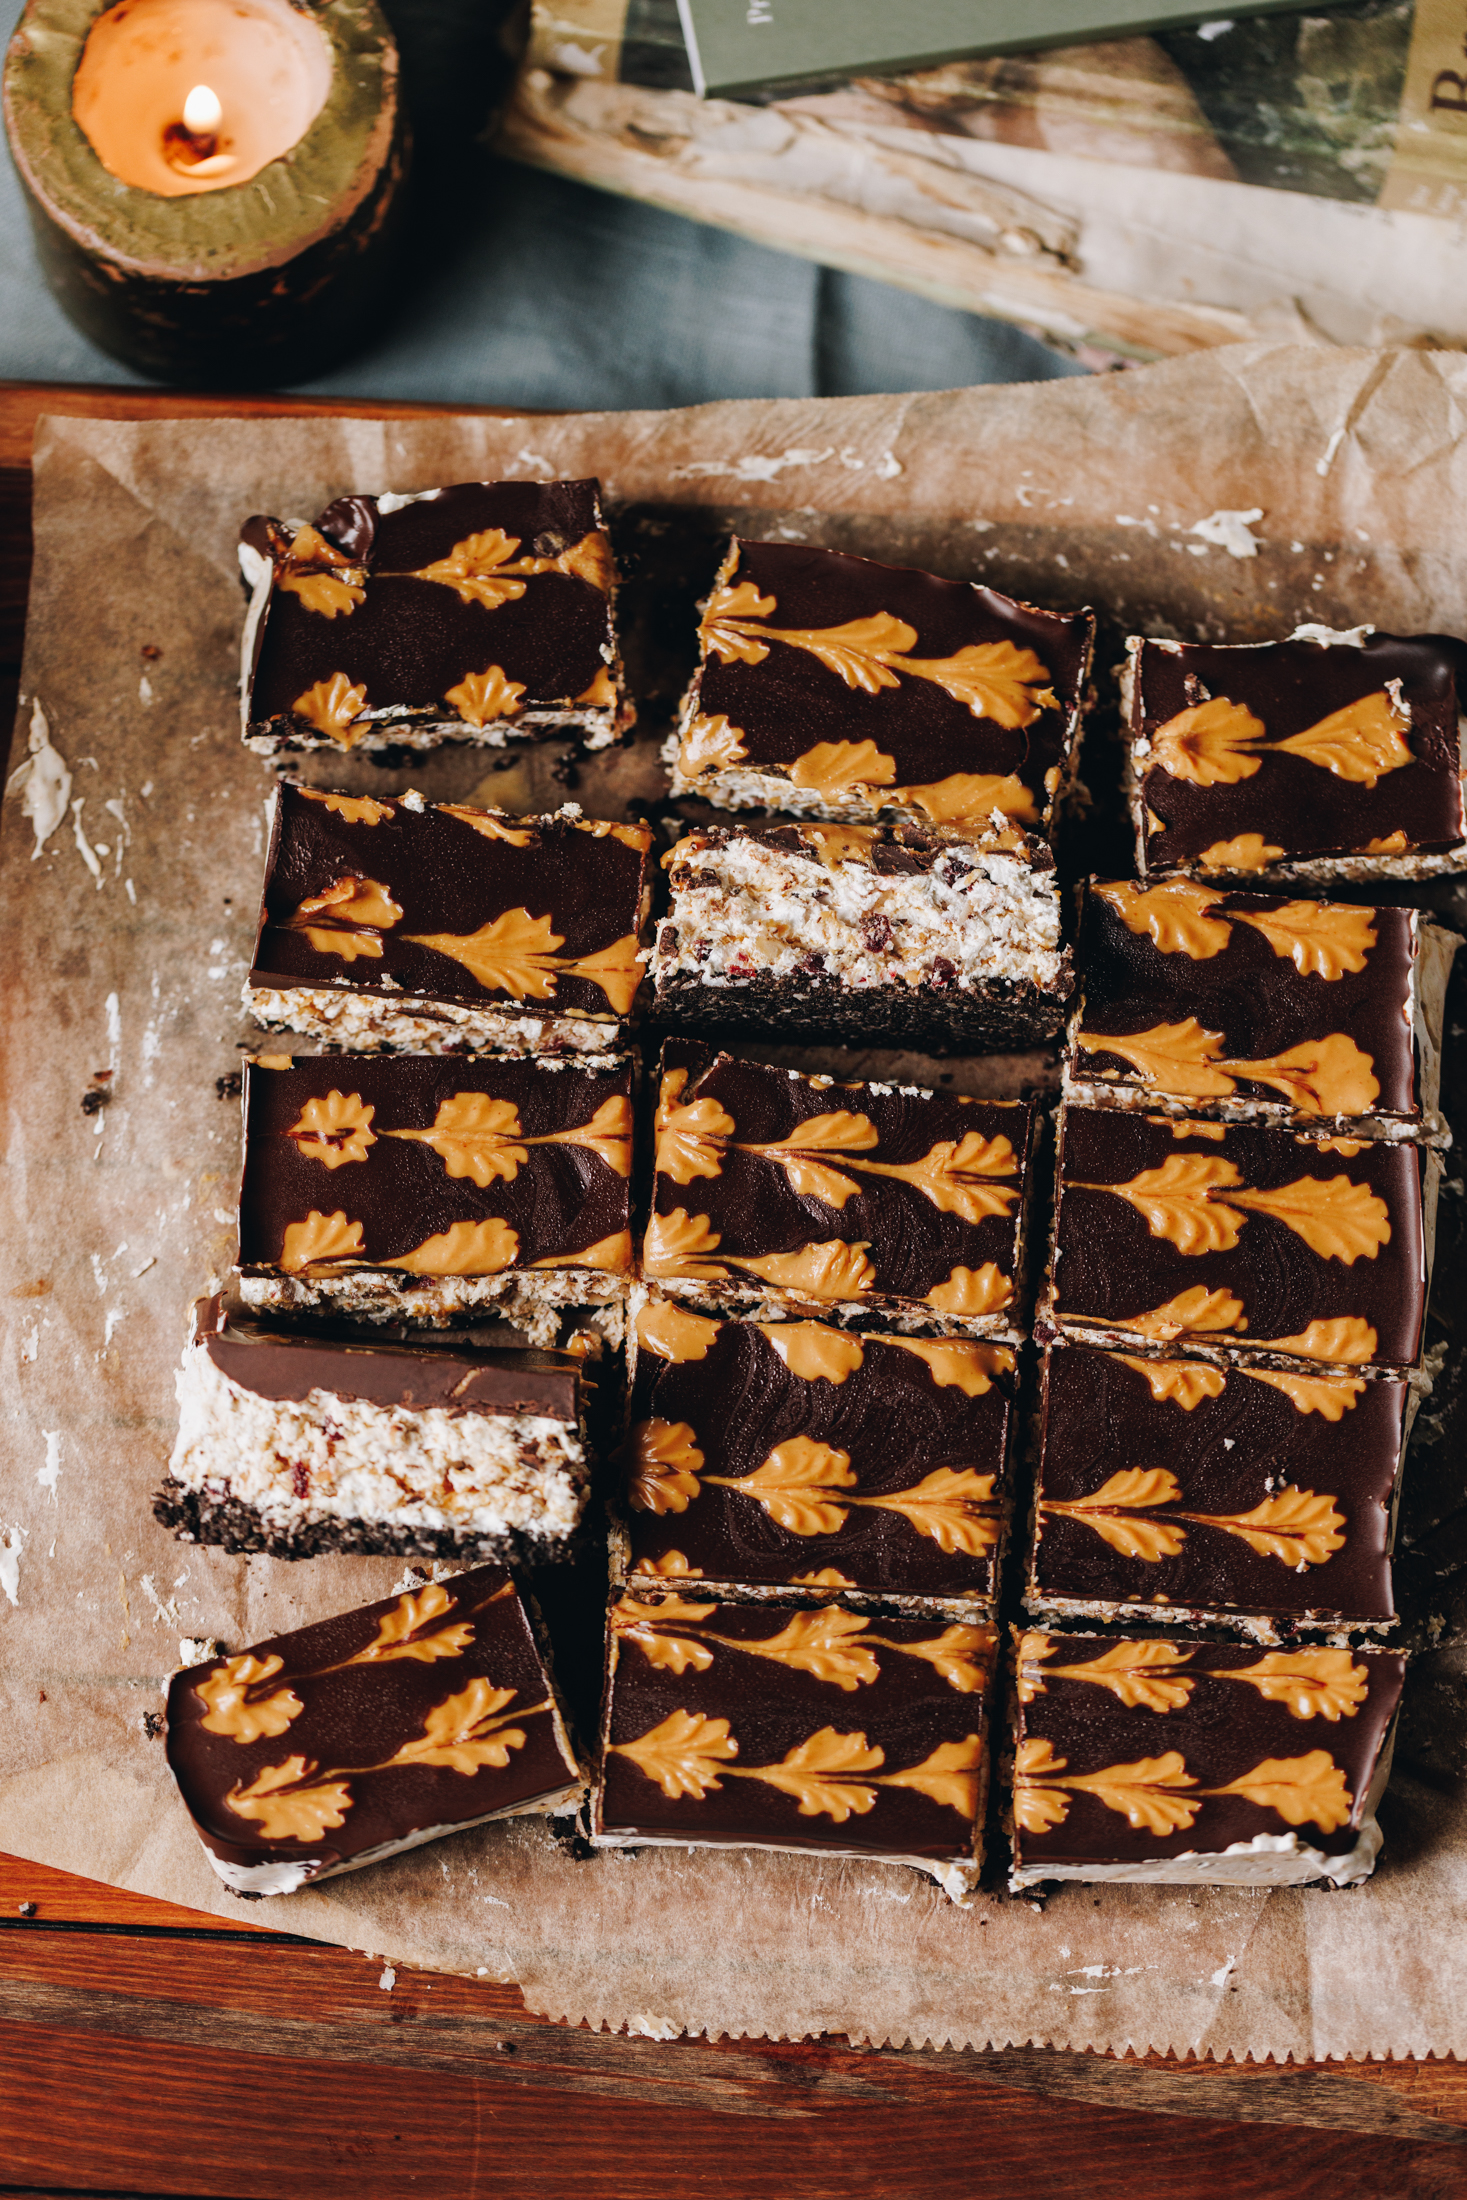
Once it is smooth, pour it gently over the slightly chilled slice. Give the tin a shake to smooth out the chocolate.
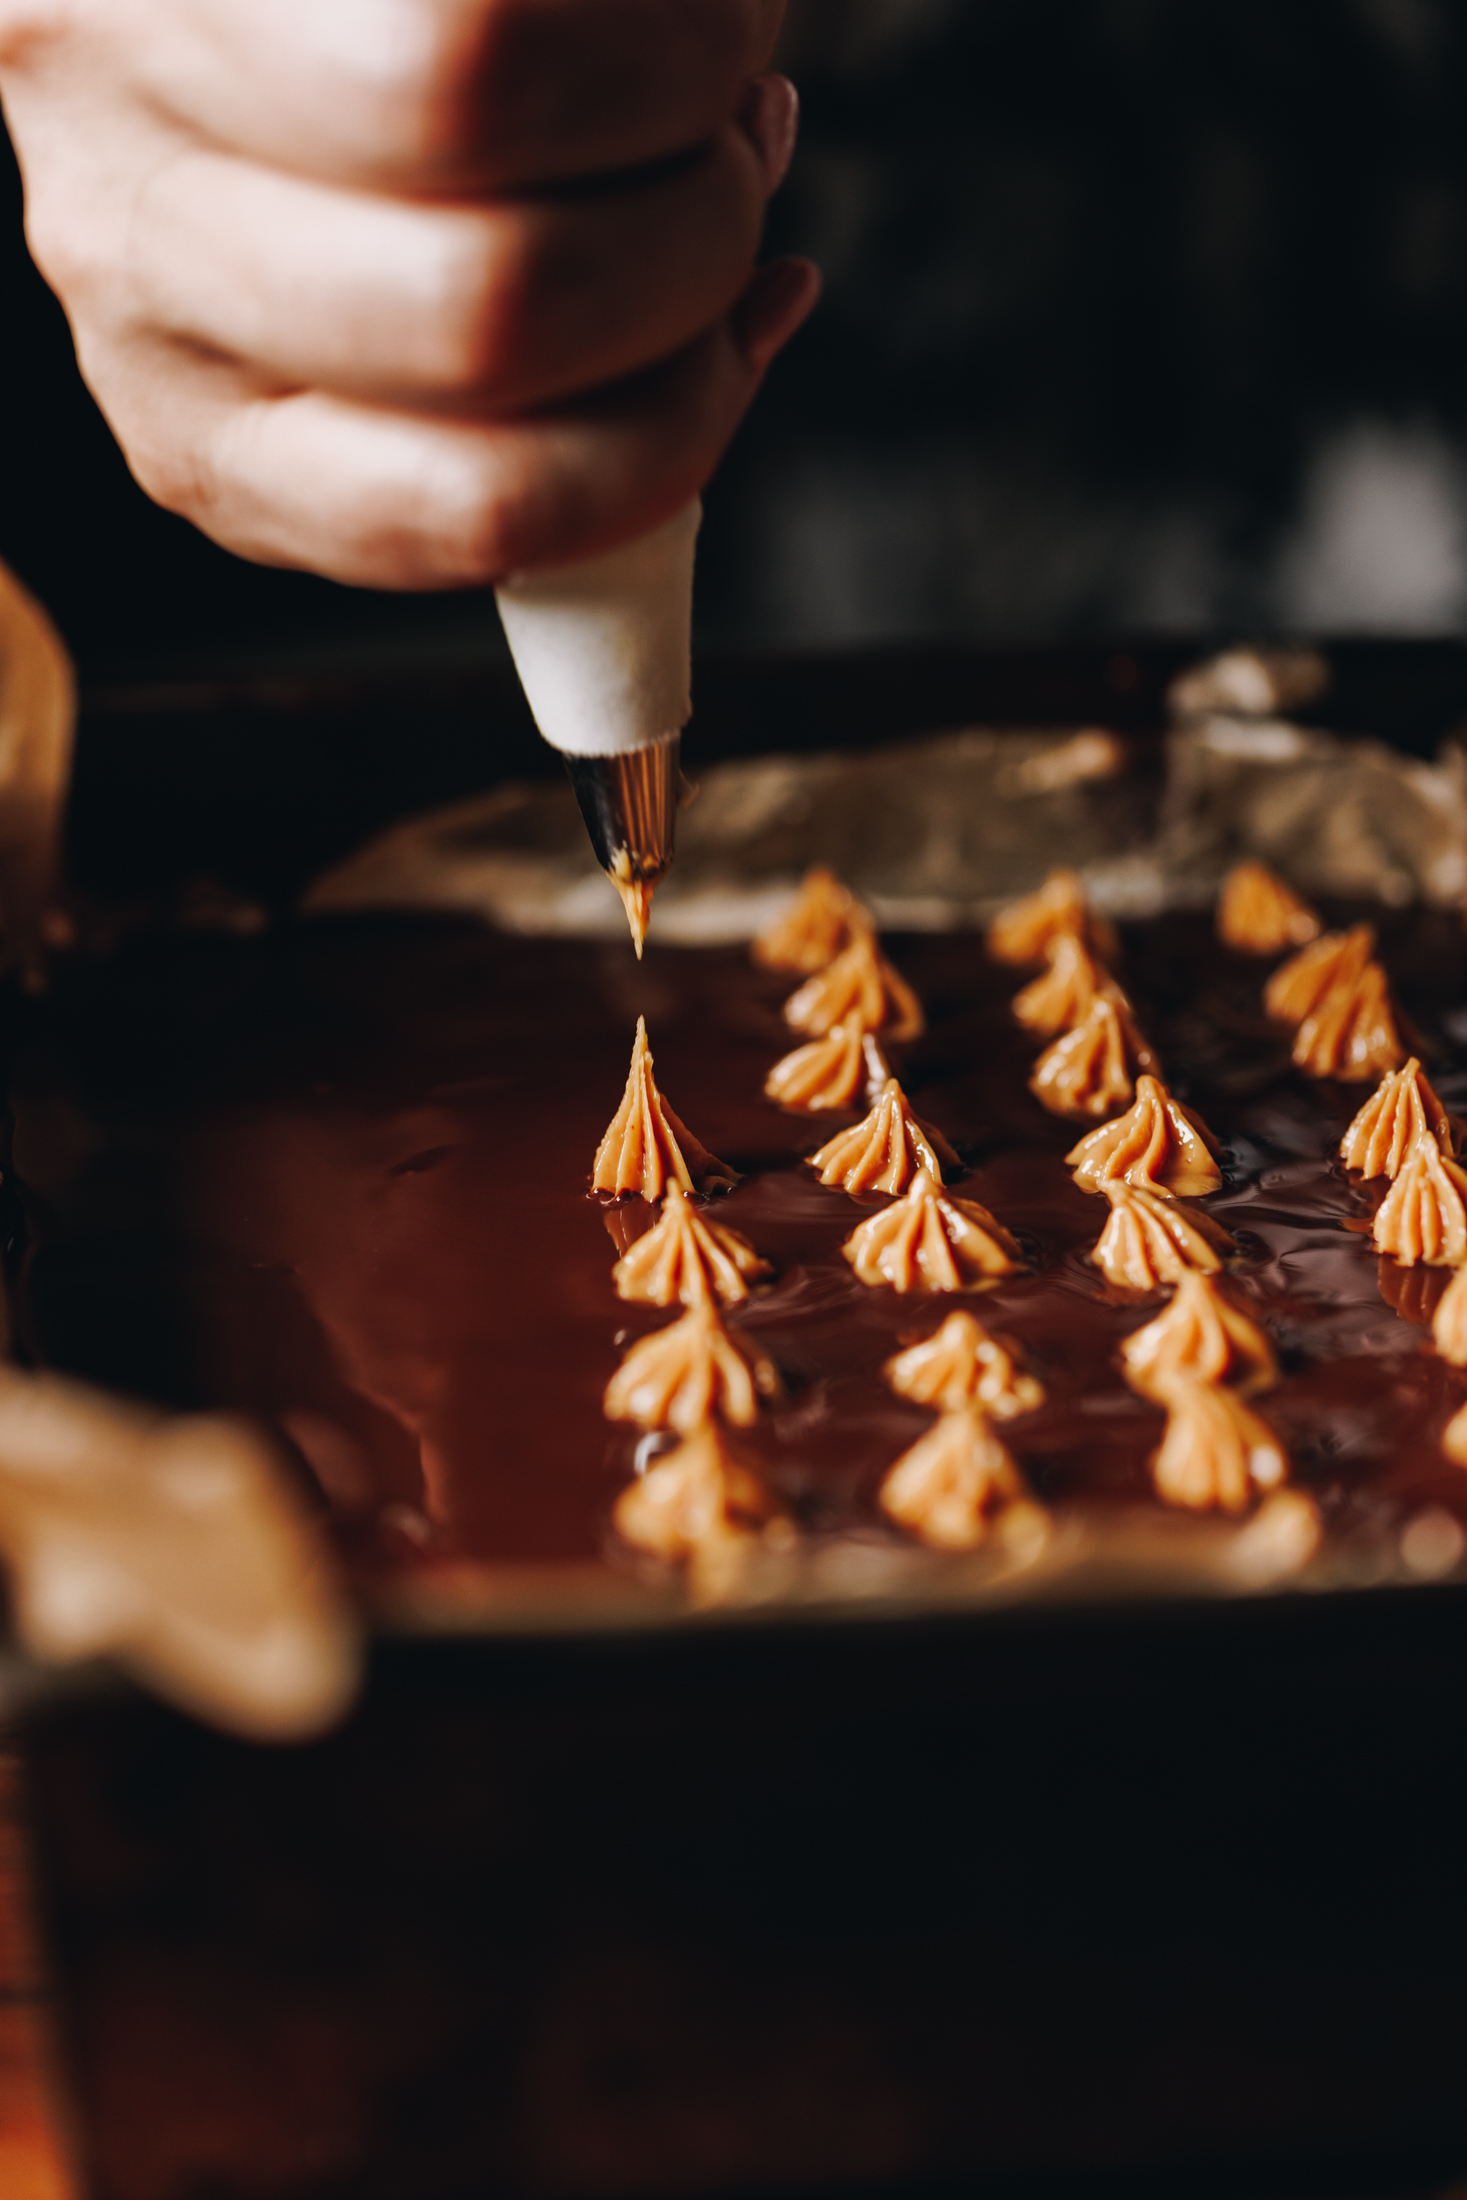
13. Add the Peanut Butter Decoration (Optional)
Immediately (before the chocolate sets), pipe dots of the pata pīnati (peanut butter) in little lines all over the slice. It is easiest in a piping bag with a small star tip.
Once you have added all the dots, gently drag a kebab stick through each one to get a simple design.
Again, this is just an option. You can leave the slice with plain chocolate or sprinkle it with chopped nuts or freeze dried fruit too.
14. Refrigerate:
Set in the fridge for an hour or so.
Store the Slice:
Keep this slice stored in the fridge in a sealed container. It will last for up to a week this way.
There are many more
No-bake Recipes
Take a browse and see which recipe you want to try next.


DID YOU ENJOY THIS RECIPE?
It would be so awesome if you could please leave a review/comment by clicking the “leave a comment” section at the top of the page.
I love seeing you all make my creations, so send a whakaahua (photo) or kiriata (video) to my Instagram and show me what you made. Let me know if you have any pātai (questions) too, I would love to help.
No-bake Marshmallow Slice - Keke Māngohe Tunu-kore
Equipment
- 1 sugar candy thermometer
- 1 x 20 cm square baking tin with 3 -4 cm high sides.
Ingredients
The Biscuit Base - Te Paparanga Pihikete
- 125 g pihikete tiakarete (chocolate biscuits - I use Oreos but any store bought cookies work)
- ½ C (45 g) kokonati pūtī (coconut)
- 60 g pata kua rewaina (melted butter) or hinu kokonati kua rewaina (melted coconut oil)
The Nougat - Te Tāhungahunga
- 2 kahu hēki (egg whites, size 6 eggs)
- ½ teaspoon kirīmi tāta (cream of tartar)
- 1 ½ teaspoon paura tetepe
- 2 tablespoon wai (water)
- ¾ C (70 g) kokonati (coconut)
- ¾ C (165 g) huka one (caster sugar)
- ¼ C (65 ml) wai (water)
- ¼ teaspoon tote (salt, fine)
- 1 tablespoon wanira (vanilla)
Fold ins (these can be changed according to what you like)
- ⅔ C (100 g) pīnati kua tapahia (chopped peanuts, dry roasted)
- ½ C (65 g) karanipere kua tapahia (chopped cranberries)
- ¼ C (65 g) pata pīnati (peanut butter, add more if you want)
The Chocolate Layer - Te Paparanga Tiakarete
- 140 g tiakarete parauri (dark chocolate, 50%)
- 1 ½ tablespoon noni (oil)
Peanut Butter Decoration - Whakarākei Pata Pīnati (optional)
- ¼ C (65 g) pata pīnati māeneene (smooth peanut butter, optional for decoration)
Instructions
Prepare the Tin:
- Prepare a 20 cm square baking tin with baking paper.
Process the Biscuits:
- Add the pihikete tiakarete (chocolate biscuits) and kokonati (coconut) in to the tāwhirowhiro (food processor). Turn it in to a fine crumb. If you don't have a food processor you can crush the biscuits in a mortar and pestle or with a rolling pin.
Mix in the Butter:
- Add the pata kua rewaina (melted butter) or hinu kokonati kua rewaina (melted coconut oil) and process for 30 seconds.
Press the Base in to the Tin:
- Add the crumb to the prepared baking tin and press the mixture in as firmly as it can go.
- Chill it in the fridge while you make the māngohe (marshmallow).
Bloom the Gelatine:
- Add the paura tetepe (gelatine powder) and wai (water) in to a heatproof cup. Stir until combined and leave for 5 minutes to bloom.
Toast the Coconut:
- Add the kokonati (coconut) to a pot or frying pan and toast over medium heat until golden. You can skip the toasting part if you don't want but it does add beautiful flavour.
- Remove it from heat and add to a plate to cool slightly.
Prepare the Egg Whites:
- Add the kahu hēki (egg white) and kirīmi tāta (cream of tartar) to a heatproof bowl.
- Whip them on medium-high speed until soft peaks form and set it aside.
Make the Sugar Syrup:
- Add huka one (caster sugar), tote (salt) and wai (water) to a pot.
- Boil over high heat until it reaches 140 °C.
Melt the Bloomed Gelatine:
- As the sugar syrup is heating up, melt the bloomed gelatine in the microwave for 20 seconds.
Combine the Egg Whites and Sugar Syrup:
- Slowly pour the hot sugar syrup into the whipped meringue and whip on high for a minute or so.
- Then pour in the melted gelatine as you continue to whip for 5-7 minutes. Add in the wanira around the three minute mark.
Mix all the Ingredients together:
- Once the meringue has stiff peaks, fold in the kokonati (coconut), pīnati (peanuts) and karanipere (cranberries). Then fold through the pata pīnati (peanut butter).
Add the Mixture to the Tin:
- Pour the māngohe (marshmallow) on top of the cooled base and refrigerate for 15 minutes to start the setting process.
Prepare the Chocolate Topping:
- Chop the tiakarete parauri (dark chocolate) in to chunks.
- Add the chopped tiakarete (chocolate) and noni (oil) in to a small pot. Gently melt it on the stove over super low heat as you gently stir. This can also be melted in a heat proof bowl in the microwave, heating for 20 seconds and stirring after each time until just melted.
- Once it is smooth, pour it gently over the slightly chilled slice. Give the tin a shake to smooth out the chocolate.
Add the Peanut Butter Decoration (Optional)
- Immediately (before the chocolate sets), pipe dots of the pata pīnati (peanut butter) in little lines all over the slice. It is easiest in a piping bag with a small star tip.
- Once you have added all the dots, gently drag a kebab stick through each one to create a simple design.
- Again, this is just an option. You can leave the slice with plain chocolate or sprinkle it with chopped nuts or freeze dried fruit too.
Refrigerate:
- Set in the fridge for an hour or so.
Store the Slice:
- Keep this slice stored in the fridge in a sealed container. It will last for up to a week this way.

Leave a Review