• Skip to primary navigation
  • Skip to main content
  • Skip to primary sidebar
  • Skip to footer
WhānauKai
  • WhānauKai
  • Whānaukai Recipes
    • Bread – Parāoa
    • Cakes – Keke
    • Slices – Keke Tapatahi
    • Biscuits – Pihikete
    • No Bake – Tunu kore
    • Savoury – Kai Mōkarakara
    • Pastry – Pōhā
    • Dessert – Purini
    • Peanut Butter – Pata Pīnati
    • Toppings - Ngā Whakarākei
  • About Naomi Toilalo
    • The Giving Series
  • Gallery
  • Whānaukai Cookbook
    • Facebook
    • Instagram
menu icon
go to homepage
  • WhānauKai
  • Whānaukai Recipes
    • Bread – Parāoa
    • Cakes – Keke
    • Slices – Keke Tapatahi
    • Biscuits – Pihikete
    • No Bake – Tunu kore
    • Savoury – Kai Mōkarakara
    • Pastry – Pōhā
    • Dessert – Purini
    • Peanut Butter – Pata Pīnati
    • Toppings - Ngā Whakarākei
  • About Naomi Toilalo
    • The Giving Series
  • Gallery
  • Whānaukai Cookbook
    • Facebook
    • Instagram
search icon
Homepage link
  • WhānauKai
  • Whānaukai Recipes
    • Bread – Parāoa
    • Cakes – Keke
    • Slices – Keke Tapatahi
    • Biscuits – Pihikete
    • No Bake – Tunu kore
    • Savoury – Kai Mōkarakara
    • Pastry – Pōhā
    • Dessert – Purini
    • Peanut Butter – Pata Pīnati
    • Toppings - Ngā Whakarākei
  • About Naomi Toilalo
    • The Giving Series
  • Gallery
  • Whānaukai Cookbook
    • Facebook
    • Instagram
×
Home

Crispy Meringue Shards

Updated: Dec 19, 2025 · Published: Apr 24, 2024 by Naomi Toilalo WhānauKai · This post may contain affiliate links · 0 Reviews

Jump to Recipe Jump to Video Print Recipe

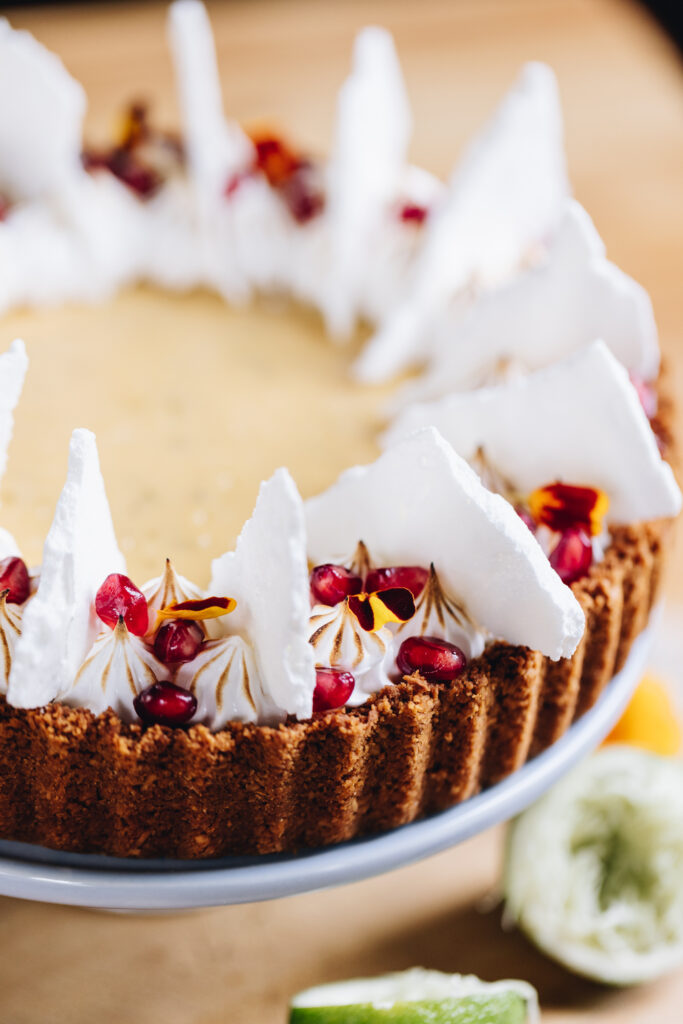
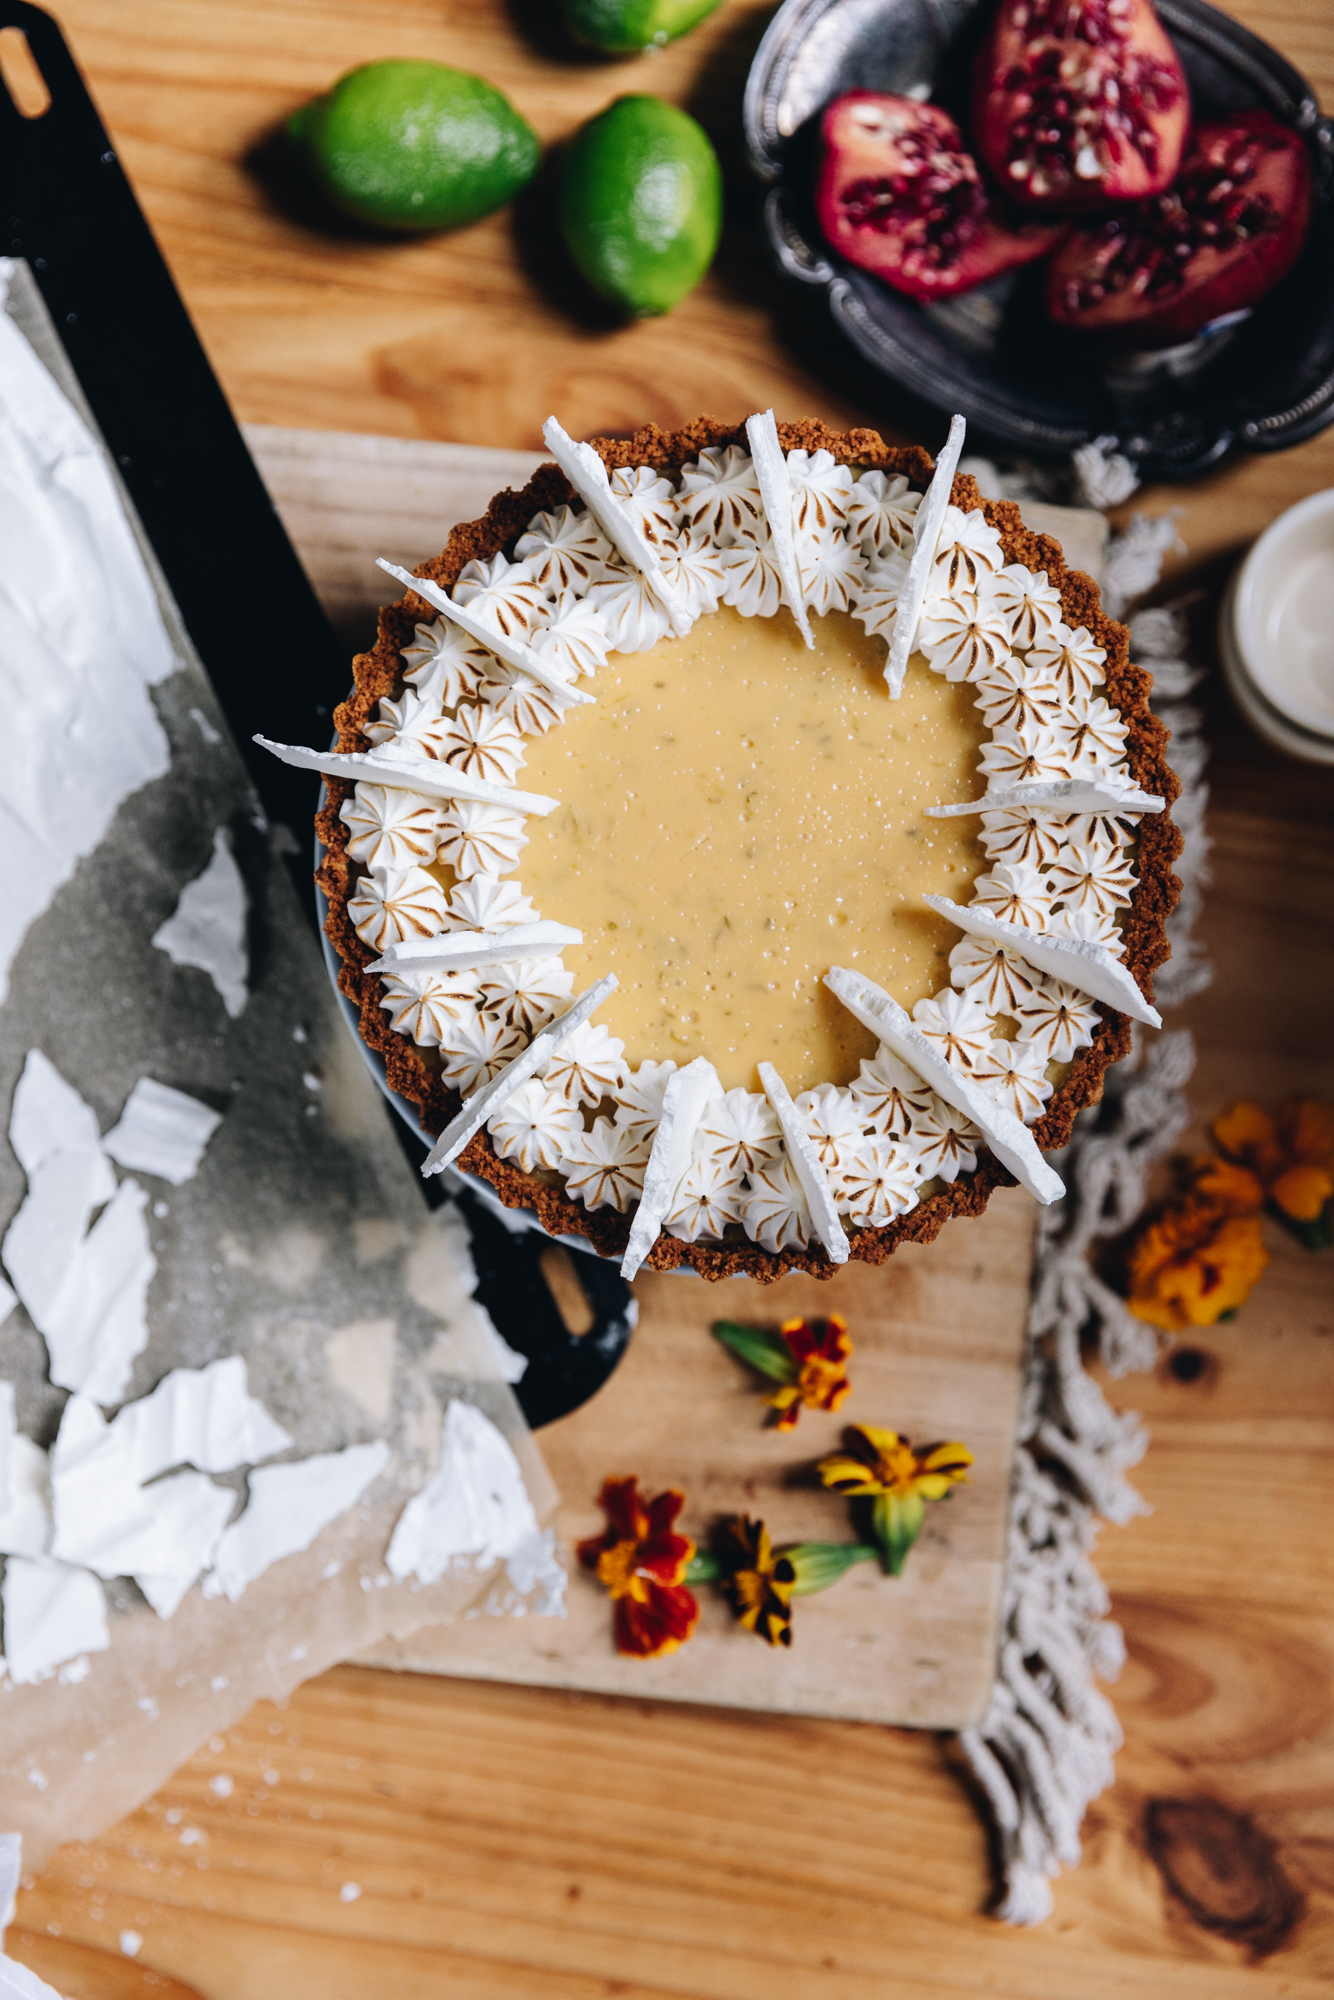
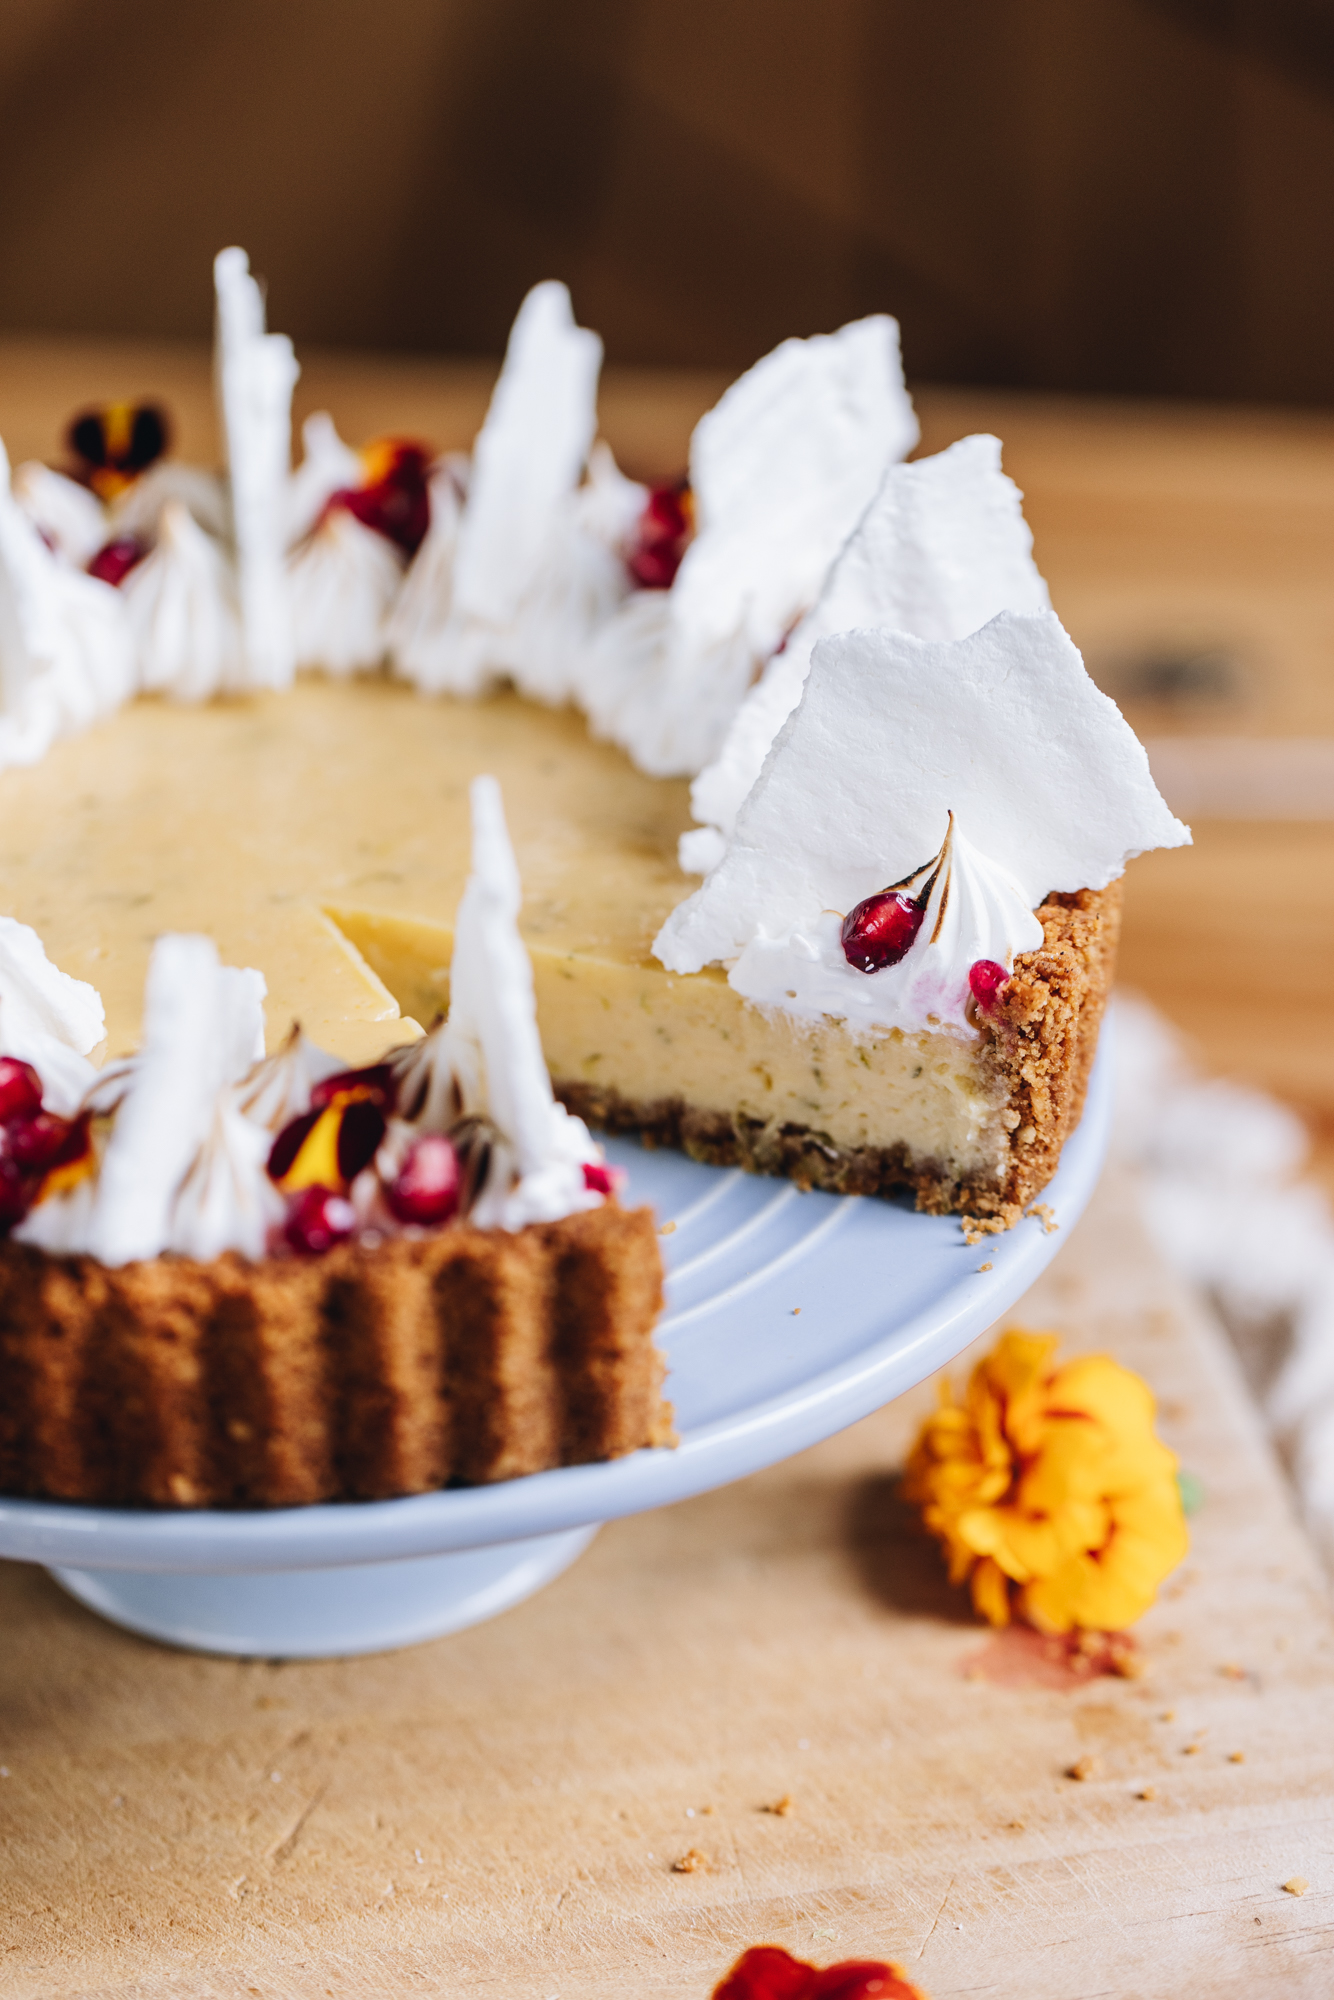
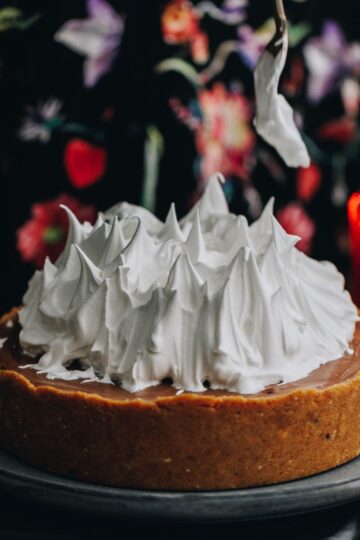
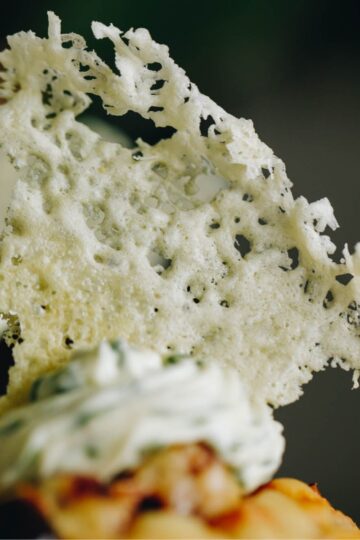
These Crispy Meringue Shards are simple showstoppers that are so easy to make. They give a stunning, rustic charm to so many different tohutao (recipes). I use them to decorate my lime pie and I just love how they look. How would you use them?

S freshly decorated key lime pie recipe has been decorated with piped meringue, crispy meringue shards, pomegranate seeds and flower petals. The pie is on a wooden board, sitting on a blue cake stand. Around the pie is cut limes.

These Crispy Meringue Shards are a little sensitive so be patient with these guys. Add the shards to the baking just before serving, not hours before. If they are left too long they soak up the moisture of the air and your baking and become limp and sad. Apart from that, if you can make a merenge (meringue), you can make these dramatic decorations.

More ideas for the Shards:

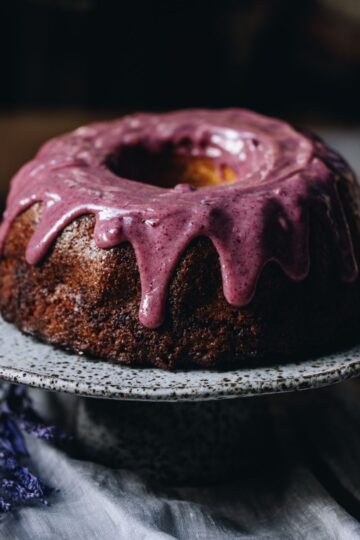
Use the shards to decorate anything. They would amazing on my cupcakes or what about sitting proudly on top of Chocolate Almond Cake? Let your creative imagination go wild!

Videography and photography by Sarah Henderson.

Ingredient Tips for these Crispy Meringue Shards:

On a wooden board sits vintage cups and spoons that are holding the ingredients for the Italian meringue. A baked lime pie is on the side of the board. It sits on a cream weaved mat, on top of a wooden table.
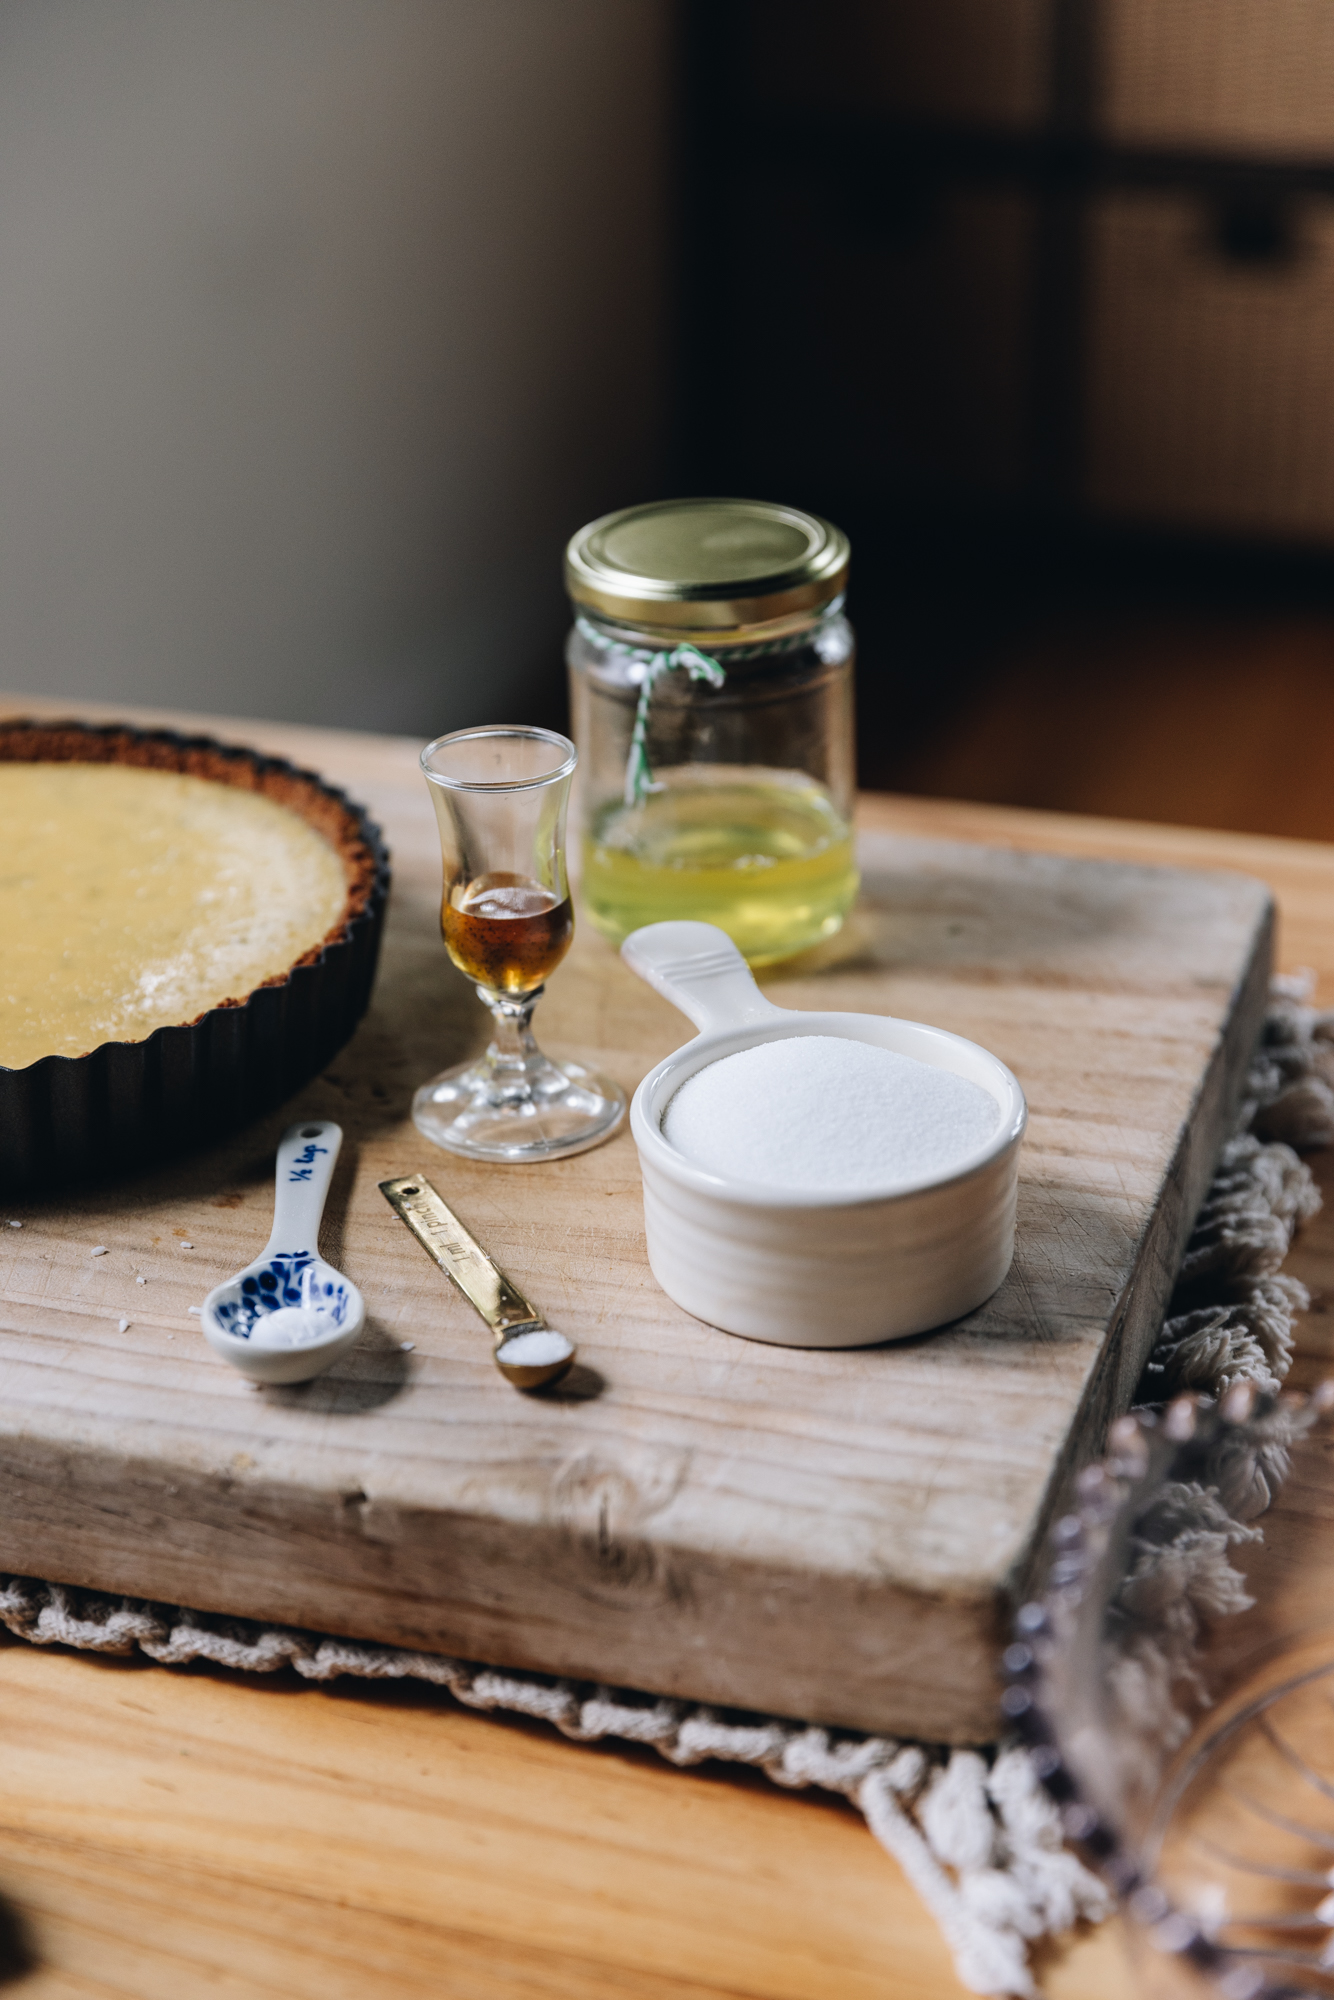
  • Eggs: I use small, size 6 eggs for this recipe. If you have larger ones, no worries, add 2 - 3 tablespoon of extra caster to the mixture and it will work perfectly.
  • Cream of tartar: This helps stabilise the meringue but if you don't have any it can still work.
  • Sugar: Caster sugar dissolves faster in to the syrup and results in a smoother meringue.

Expert Tips:

The merenge (meringue) is baked at a super low temperature but don't be tempted to turn up the heat. The low heat dries out the meringue that creates the perfect crunchy texture. Kia manawanui (be patient) and the oven will do the work.

If the meringue shards have softened slightly when you go to use them, do not fear. Bake them again in the same temperature oven for 20-30 minutes until they have gone hard again and no one will ever know.

Step by step instructions for the Crispy Meringue Shards:

Note: The full recipe card with the full list of ingredients, instructions and step by step video are found at the bottom of this page.

A wooden board is on a wooden table. To the front of the photo is a baked key lime pie. A small glass of vanilla and a spoon of cream of tartar sit next to it. A glass vintage bowl is also on the board, it has meringue in it and it is being whipped with a white hand mixer. A cup of sugar is next to it.

1. Preheat the Oven:

Preheat the oven to 80 °C bake setting or 70 °C fan bake setting. 

This temperature is low but perfect for drying out the meringue. 

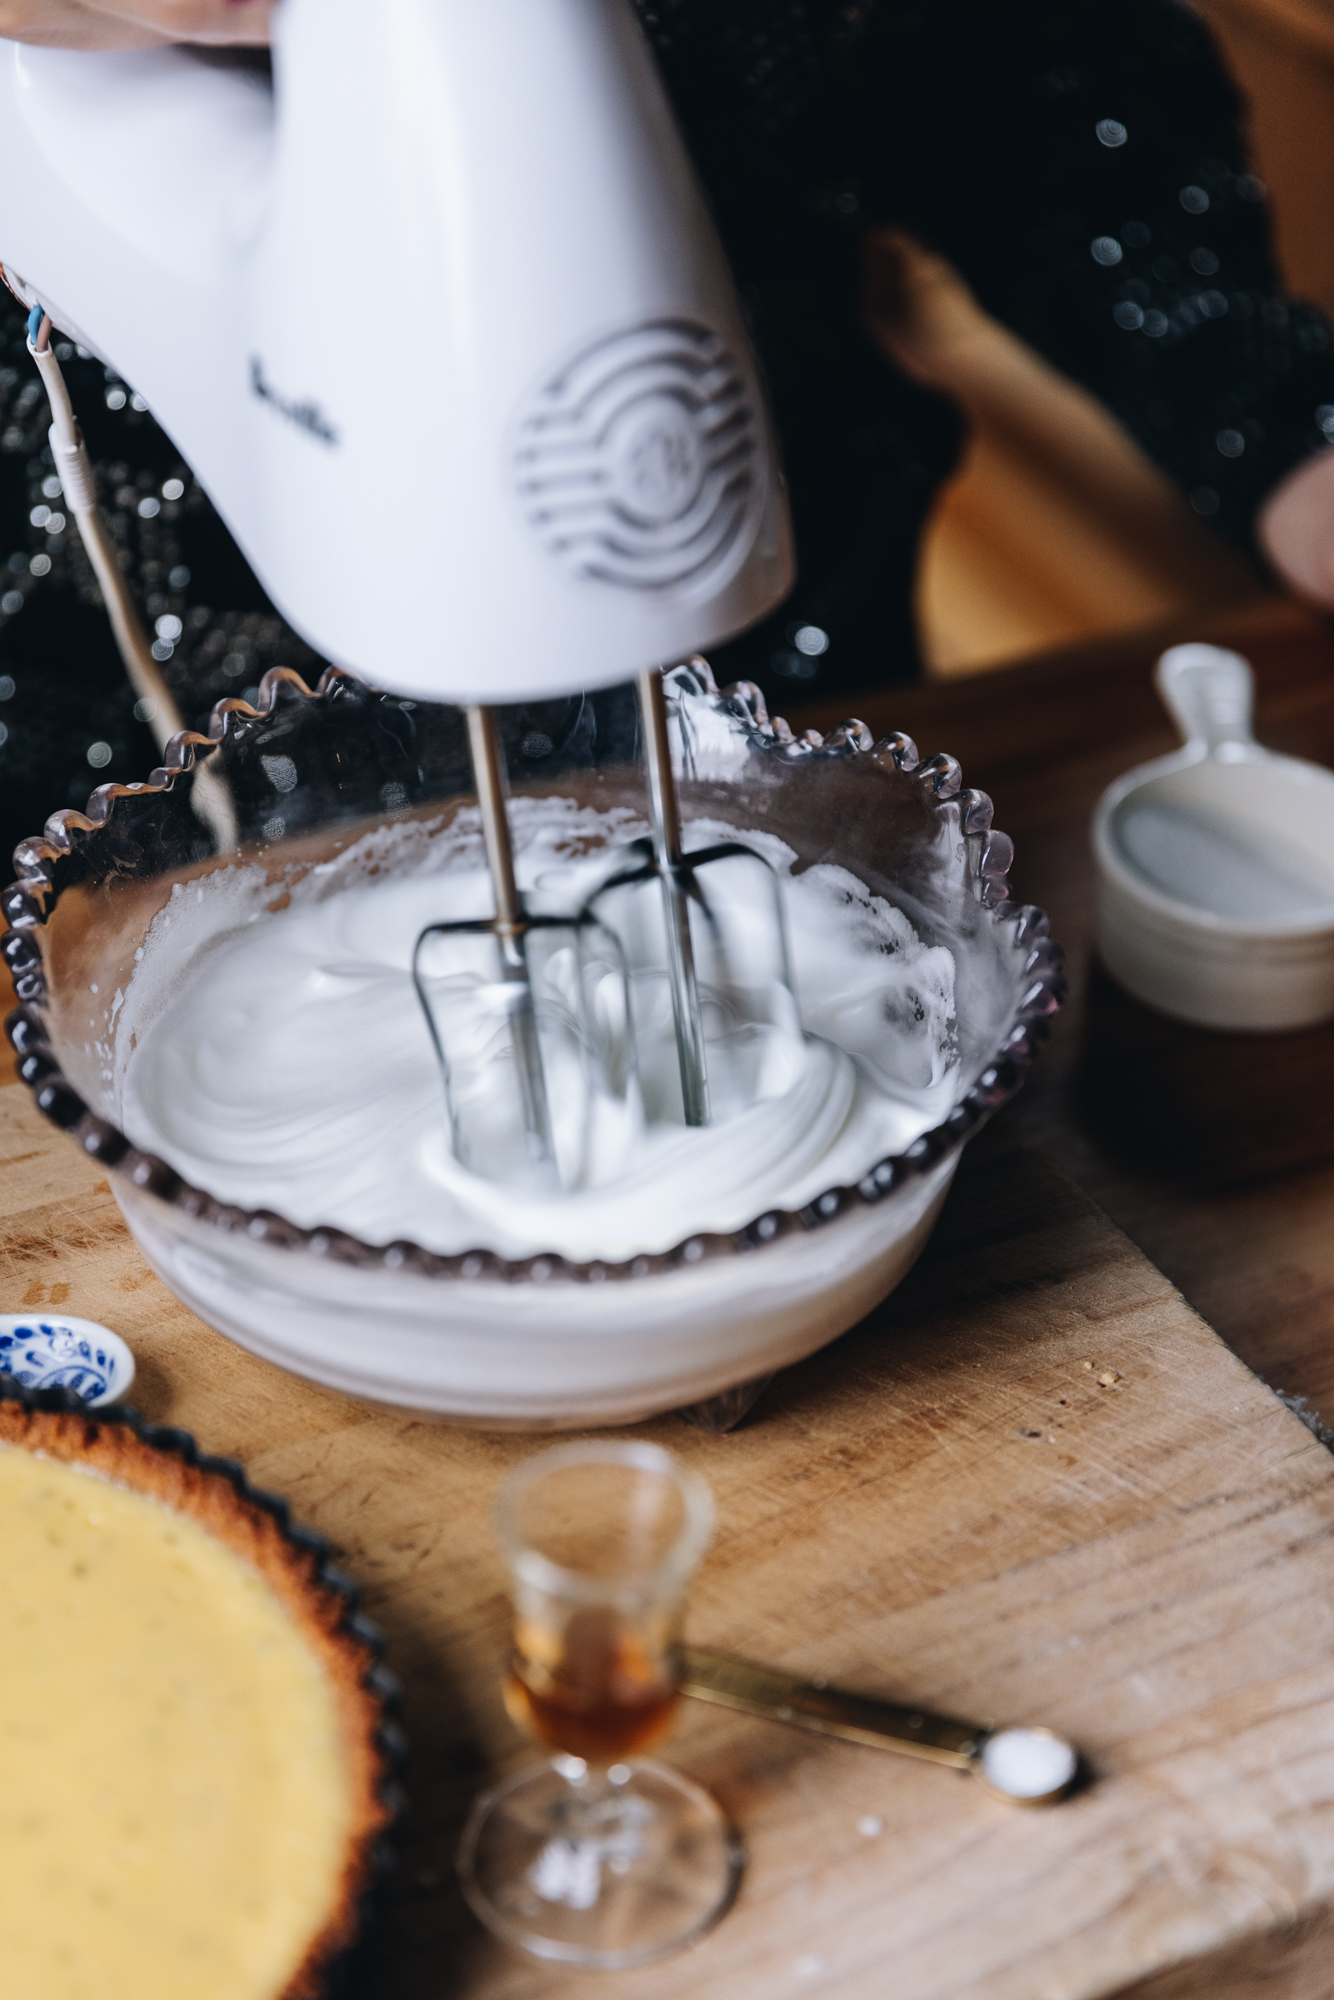
2. Make the French Meringue:

Follow the instructions for my French meringue recipe using the quantities below on the recipe.

A silver tray lined with brown baking paper is on a wooden board that is on a wooden table. The tray has meringue spread all over it and Naomi is smoothing it out with a knife.

3. Spread the Meringue on to Trays:

Once the meringue is made, simply spread it on to two trays lined with baking paper. 

4. Bake the Meringue:

Bake in the preheated oven for 1 ½ hours and then turn the oven off and leave them to cool completely before using them.

A flat lay shot shows a freshly decorated key lime pie recipe that has been decorated with piped meringue and meringue shards. The pie is on a wooden board and around the pie is limes, pomegranate pieces in a black small tray and some orange edible flowers. Next to the pie is a black tray with baking paper on it that has broken meringue shards on it.

5. Break in to Shards:

Once cool, break the meringue in to shards and decorate your baked goods. 

These will go soft if they sit too long so only add them just before serving for maximum crunch and wow factor. 

If the meringue shards have softened slightly when you go to use them, bake them again in the same temperature oven for 20-30 minutes until they have gone hard again.

A freshly decorated key lime pie recipe has been decorated with piped meringue, crispy meringue shards, pomegranate seeds and flower petals. The pie is on a wooden board, sitting on a blue cake stand. A slice has been cut out of the pie, revealing the inside. A small orange edible flower is on the board.

Store the Shards:

If you are not using them straight away, break the cooled merenge (meringue) in to shards and place in a sealed container. This will keep well for a day or so. 

You can also do this process the day before you want to use them and keep them in the closed oven until they are needed.

Try these other

Toppings

They will lift your baking game and wow your manuhiri (guests).

Browse all Toppings
  • On a table is a white tablecloth with a white plate and a silver fork. On the plate is two fried eggs on muffin splits with homemade hollandaise sauce, chill oil and spring onions on top.
    Homemade Hollandaise Sauce
  • Sitting on natural fabric is a ceramic cake stand with a lemon syrup bundt cake on top of it. It is decorated with a white chocolate and plum ganache dripping down the sides of it. A purple flowers sits underneath it.
    White Chocolate and Plum Ganache
  • How to make Italian Meringue
  • White chocolate yogurt cream piped on to lemon bars with a sprinkle of freeze dried raspberries on top.
    White Chocolate Yogurt Cream
Naomi Toilalo is at the table laden with baking. There is lamingtons, lemon meringue pie, custard slice and cream buns. She is decorating a cake in front of her and smiling.

DID YOU ENJOY THIS RECIPE?

It would be so awesome if you could please leave a review/comment by clicking the “leave a comment” section at the top of the page. 

I love seeing you all make my creations, so send a whakaahua (photo) or kiriata (video) to my Instagram and show me what you made. Let me know if you have any pātai (questions) too, I would love to help.

A key-lime pie is decorated with crispy meringue shards. They are rustic in shape and stick up in the air, off the pie.
Print Pin

Meringue Shards - Ngota Merenge Pakepakē

Delicious meringue shards make the perfect decoration for my lime pie or for any baked goods.
Course Baking
Cuisine Meringue
Keyword french meringue topping nz, maori recipes, Meringue decorations, Meringue decorations nz, Meringue shards, Meringue shards nz, simple baking decorations nz, te reo Māori
Prep Time 15 minutes minutes
Cook Time 1 hour hour 30 minutes minutes
Total Time 1 hour hour 45 minutes minutes

Ingredients

French Meringue – Tāhungahunga Wīwī

  • 2 kahu hēki (egg whites from small, size 6 eggs)
  • ½ C (110 g)  huka one (caster sugar)
  • ¼ tsp kirīmi tāta (cream of tartar)
  • 1 teaspoon (5 ml) iho hūperei (vanilla)
  •  He kini tote – a pinch of salt

Instructions

Preheat the Oven:

  • Preheat the oven to 80 °C bake setting or 70 °C fan bake setting.
    This temperature is low but perfect for drying out the meringue.

Make the French Meringue:

  • Follow the instructions for my French meringue recipe using the quantities above.

Spread the Meringue on to Trays:

  • Once the meringue is made, simply spread it on to two trays lined with baking paper.

Bake the Meringue:

  • Bake in the preheated oven for 1 ½ hours and then turn the oven off and leave them to cool completely before using them.

Break in to Shards:

  • Once cool, break the meringue in to shards and decorate your baked goods.
  • These will go soft if they sit too long so I only add them just before serving for maximum crunch and wow factor.
  • If the meringue shards have softened slightly when you go to use them, bake them again in the same temperature oven for 20-30 minutes until they have gone hard again.

Store the Shards:

  • If you are not using them straight away, break the cooled merenge (meringue) in to shards and place in a sealed container.
    This will keep well for a day or so.
  • You can also do this process the day before you want to use it and keep them in the closed oven until they are needed.

Video

https://d14qqjrp3wb13p.cloudfront.net/wp-content/uploads/2024/04/11203502/Meringue-Shards-WV-FInal.mp4

More Toppings - Ngā Whakarākei

  • A close up shot of a parmesan wafer is shown, it is sitting on top of herbed cream, on a muffin. The wafer is rustic.
    Parmesan Wafer Crisps
  • Whipped brown butter has been set in a small glass container, it is on a cream cloth with scones in the background.
    Whipped Brown Butter
  • Close up of sliced easy homemade vanilla marshmallow with free-dried raspberries on top.
    Easy Homemade Vanilla Marshmallows
  • A lemon cheesecake with berries on top is decorated with White Chocolate decorations that are rustic leaf shapes.
    White Chocolate Decorations

Reader Interactions

Leave a Review Cancel reply

Your email address will not be published. Required fields are marked *

Recipe Rating


Primary Sidebar

Footer

Categories

  • Basics – Tohutao Waiwai
  • Biscuits - Pihikete
  • Bread - Parāoa
  • Cakes - Keke
  • Dessert - Purini
  • No Bake - Tunu kore
  • Pastry - Pōhā
  • Peanut Butter - Pata Pīnati
  • Savoury - Kai Mōkarakara
  • Slices - Keke Papatahi
  • Toppings - Ngā Whakarākei

Latest

  • Pistachio and Blueberry Sponge
  • Homemade Hollandaise Sauce
  • Homemade Muffin Splits
  • No-bake Creamy Peppermint Cups
  • Spiced Gingerbread Cookies

techniques

Homemade Hollandaise Sauce

White Chocolate and Plum Ganache

How to make Italian Meringue

White Chocolate Yogurt Cream

Parmesan Wafer Crisps

Naomi Toilalo

Ko Naomi Toilalo ahau!
Welcome to my kāuta,
I share recipes and my
kete of te reo Māori!

  • Facebook
  • Instagram

Copyright © 2025 WhānauKai