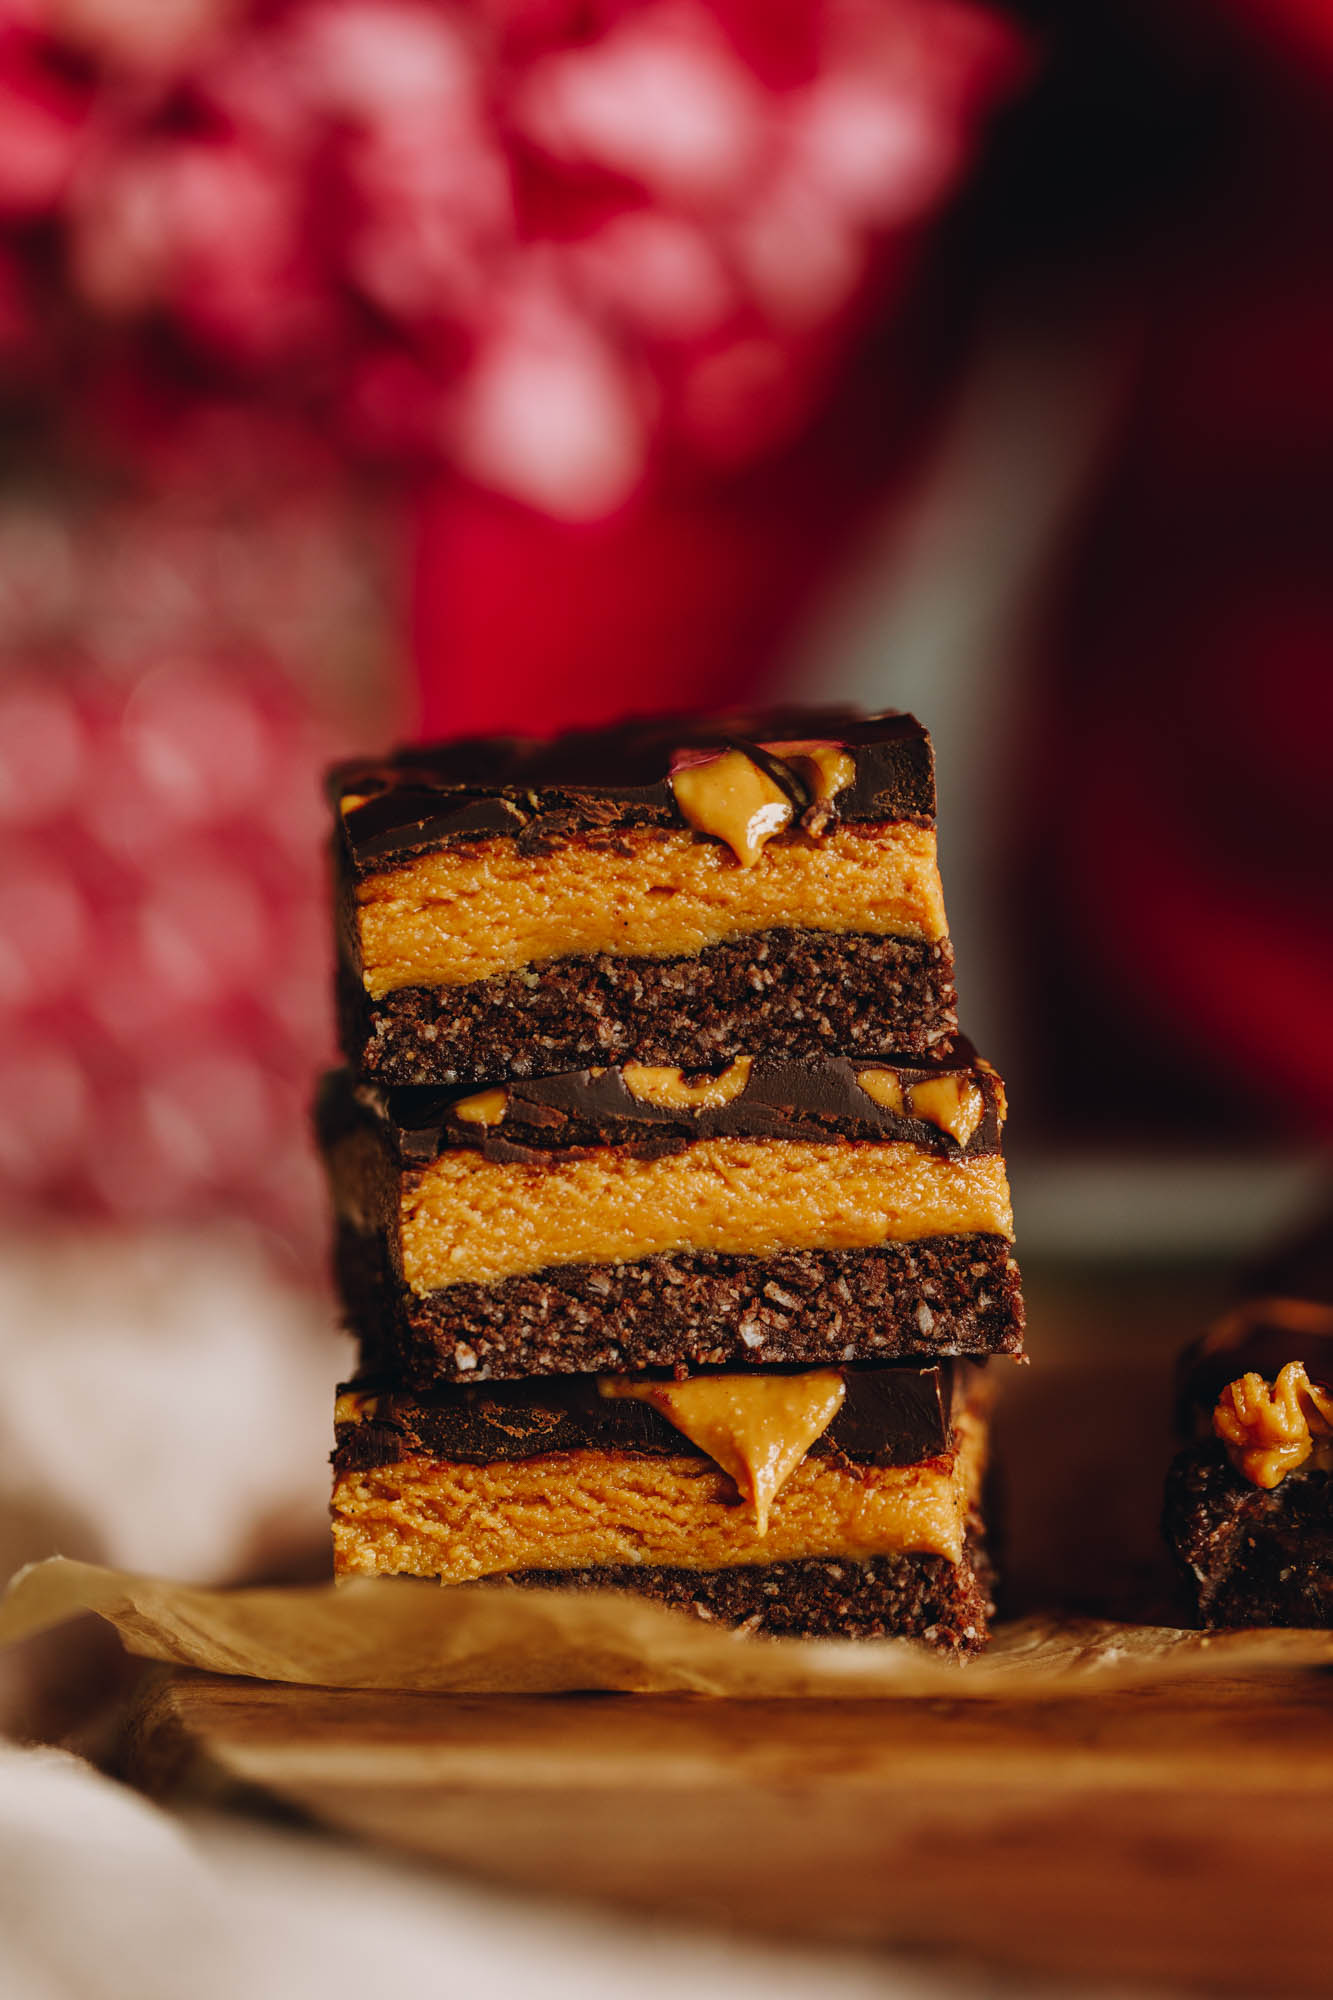
This no-bake peanut butter slice is rich, fudgy, and naturally gluten and dairy free — the perfect no-bake treat. Made with wholesome ingredients like peanut butter, coconut, and cocoa, it has a smooth, chocolatey finish with a lower sugar option using brown rice malt syrup. Whether you’re looking for a quick dessert, lunchbox snack, or a healthier slice recipe in Aotearoa (NZ), this one comes together in just 40 minutes.
Why You’ll Love This No-Bake Peanut Butter Slice:
No-bake slices have become increasingly popular because they are quick, require minimal equipment, and are perfect for getting kids involved in the kitchen However, I also love making treats that have a more restrained sugar content. In this No-bake Peanut Butter Slice (Keke Papatahi Pata Pīnati Kore-Tunu) recipe I use mīere raihi parauri (brown rice malt syrup). Have you tried it before? It is much cheaper than good quality marahihi māpere (maple syrup) and has a gentle sweetness to it.
More No-bake slices:
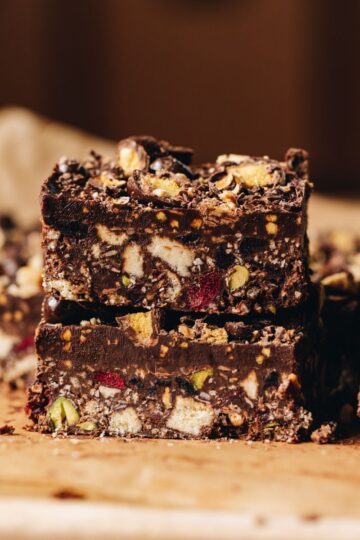
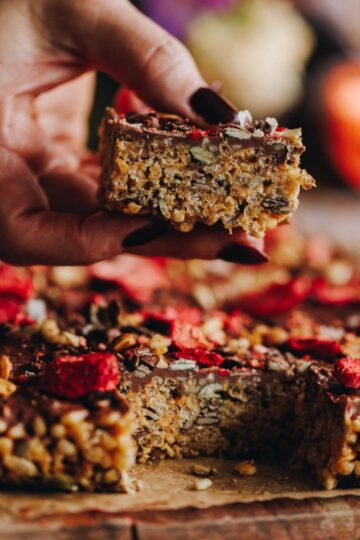
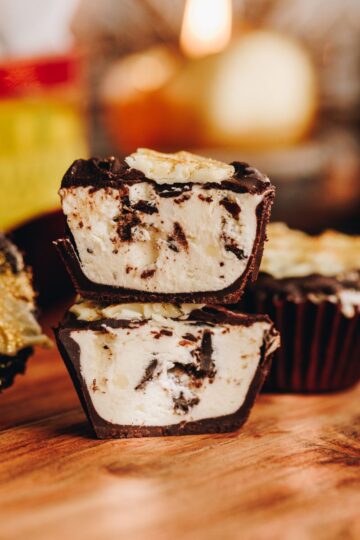
Love making no-bake recipes with peanut butter? This Chocolate Nut and Seed Slice is also gluten and dairy free and is whipped up in no time! My Peanut Butter Weetbix Slice is also very popular and if you need a dessert, then my No-bake Peanut Butter Pie is just so dreamy. If you want something a little radical, my Chocolate Banana Cream Buns celebrate chocolate, banana and chocolate peanut butter!
Videography and photography by Sarah Henderson.
Ingredients for this Recipe:
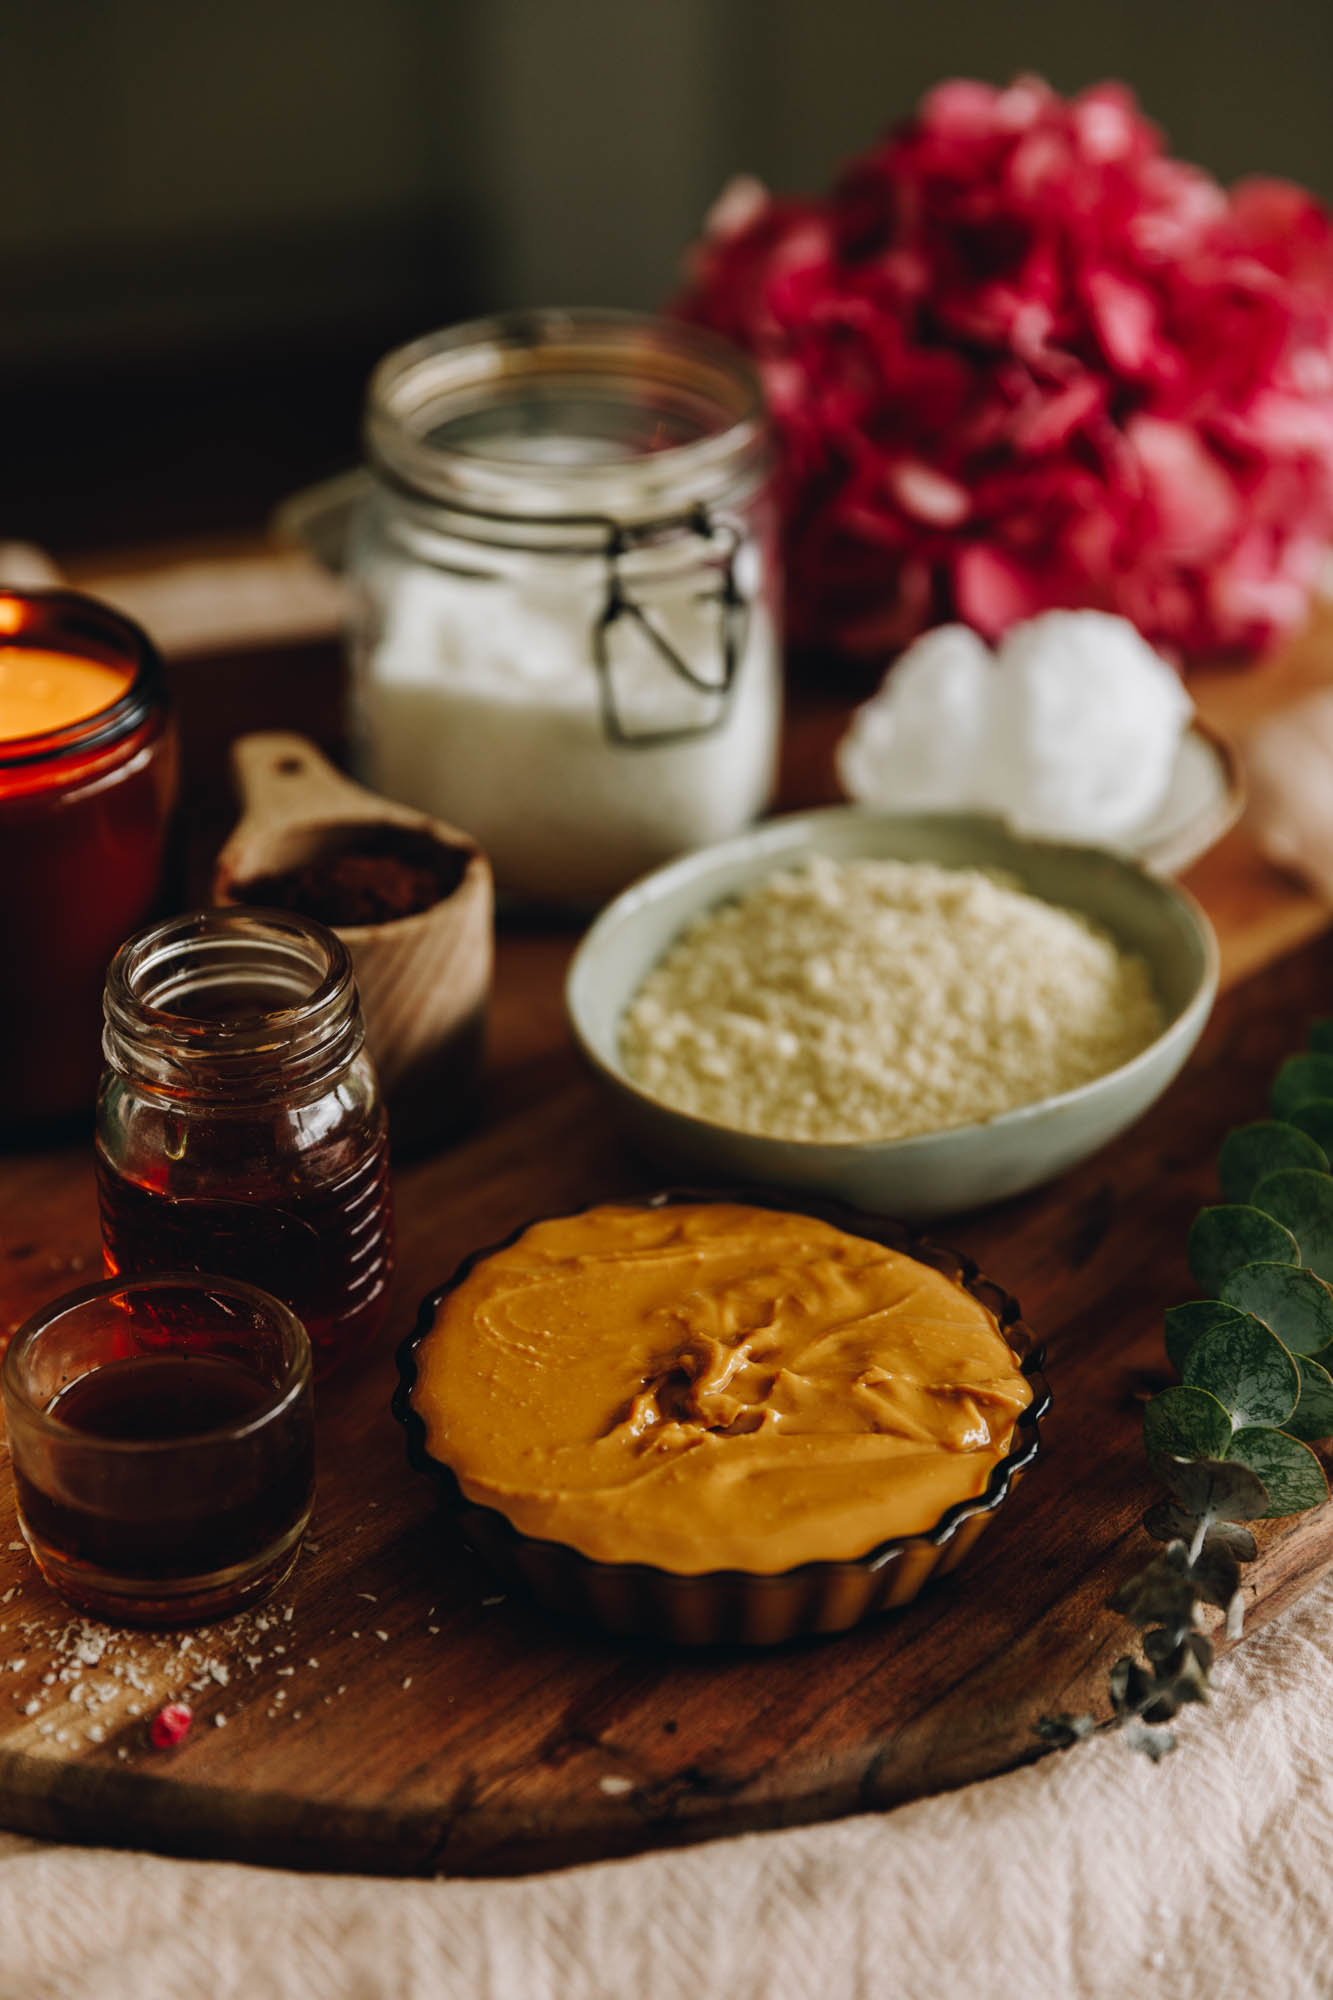
- Butter: You can use butter or coconut oil in this recipe. Both are delicious and work just as well as each other.
- Brown Rice Malt Syrup: This is a refine sugar free product and I love the subtle sweetness it has however you can also use maple or date syrup.
- Ground Almonds: Ground almonds are perfect for this recipe as they have a subtle flavour but you can swap this for any of your favourite ground nuts.
- Peanut butter: I always use a good quality peanut butter that just has peanuts and salt in the ingredients list. Not a fan of peanuts? You can swap it for any nut butters, Nutella, Biscoff or any thick spread that you enjoy.
- Dark chocolate: I like the depth of flavour that dark chocolate brings to this slice but you can top it with any chocolate that you like.
How to Make this delicious recipe:
Note: The full recipe card with the full list of ingredients, instructions and step by step video are found at the bottom of this page.
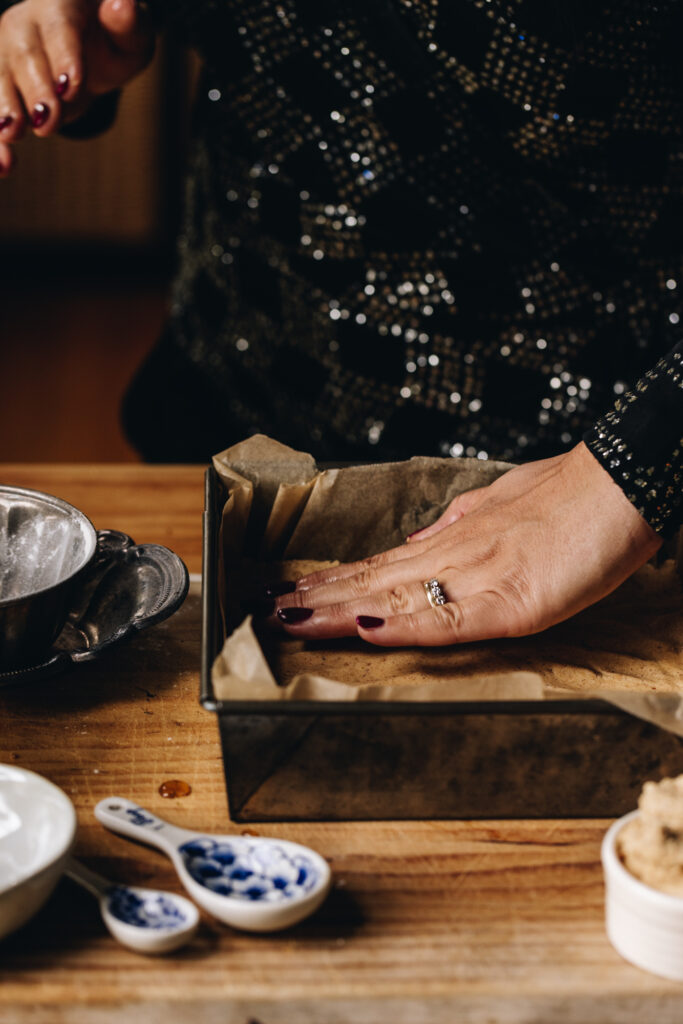
1. Prepare the slice tin.
Line a 20 cm square tin with baking paper.
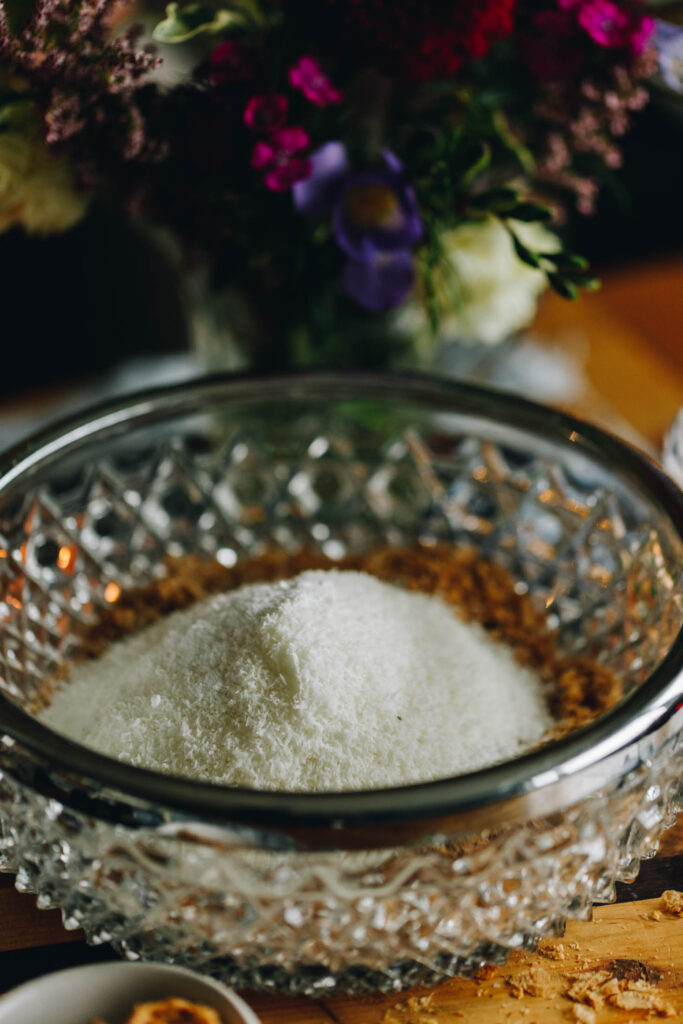
2. Prepare the cocoa and coconut base.
Melt hinu kokonati (coconut oil) or pata (butter) in a small pot over low heat on the stove or in a heat-proof bowl in the microwave. Add it to a medium bowl along with pata pīnati (peanut butter), mīere (syrup), wanira (vanilla) and kōkō (cocoa). Stir. Add the kokonati (coconut) and peru oneone (ground almonds). Kaurorihia anō – stir it again.

3. Press the base into the tin.
Add it to the prepared tin and press it down with a spatula until it is smooth and flat. Refrigerate as you make the paparanga pata pīnati (peanut butter layer).
Whakamātaohia - refrigerate as you continue on with the paparanga pata pīnati (peanut butter layer).
4. Make the Peanut Butter Layer:
Add the pata pīnati (peanut butter), mīere (syrup), wanira (vanilla) and peru oneone (ground almonds) in to a medium bowl. Whakaranuhia – mix until combined.
Add to the base and press it down with a spatula or with your hands until it is smooth and flat.
Refrigerate as you make the topping.
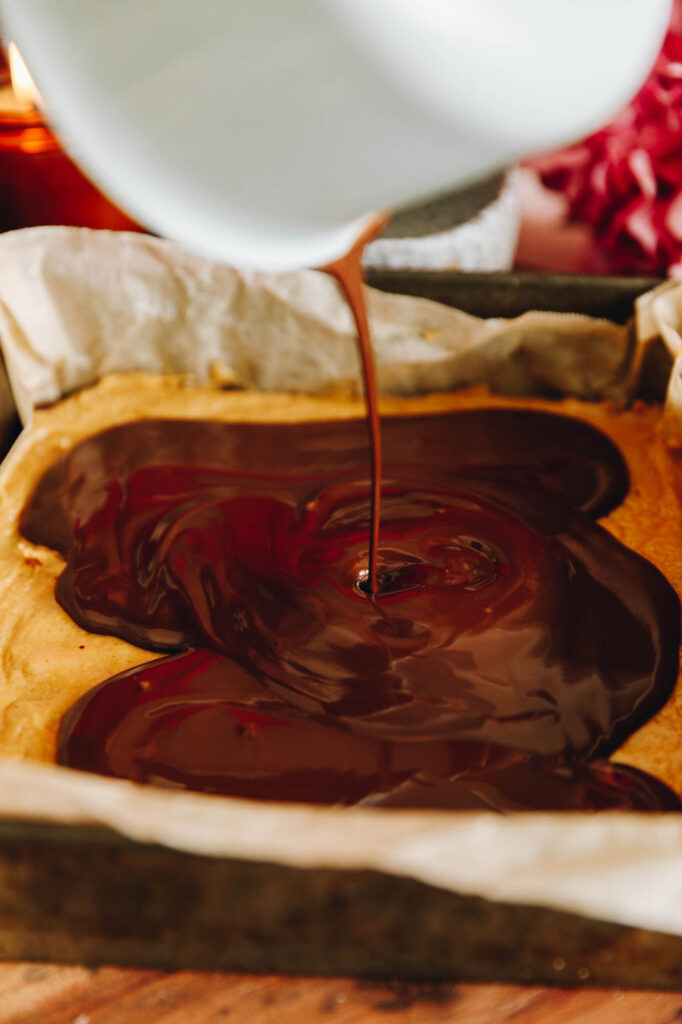
5. Add Chocolate to the Peanut Butter Slice:
Add the tiakarete (chocolate) and hinu kokonati (coconut oil) or pata (butter) in to a small pot. Gently melt it on the stove over super low heat as you gently stir. This can also be melted in a heat proof bowl in the microwave, heating for 20 seconds and stirring after each time, until just melted.
Pour it on top of the peanut butter filling and gently smooth it out until it is all covered. Give the tray a little shake so the chocolate flattens out evenly.
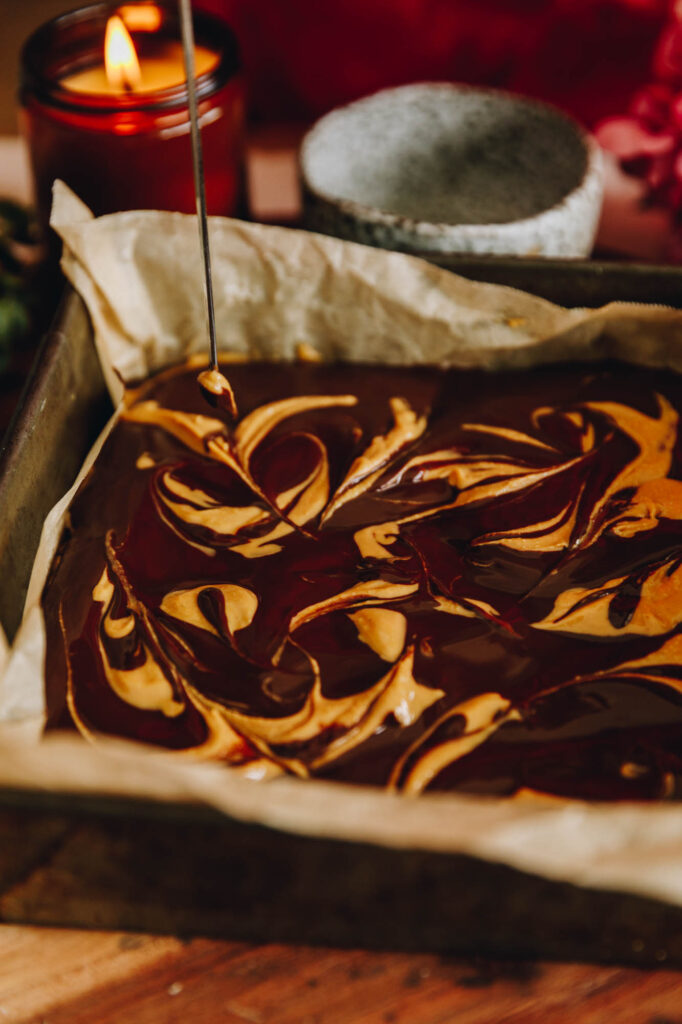
6. Add more peanut butter (optional):
If you want to, add small teaspoons of pata pīnati (peanut butter) spaced out on top of the tiakarete (chocolate) while it is still warm. Then use a skewer to create a simple marble effect by dragging it through the pata pīnati (peanut butter) in different directions.
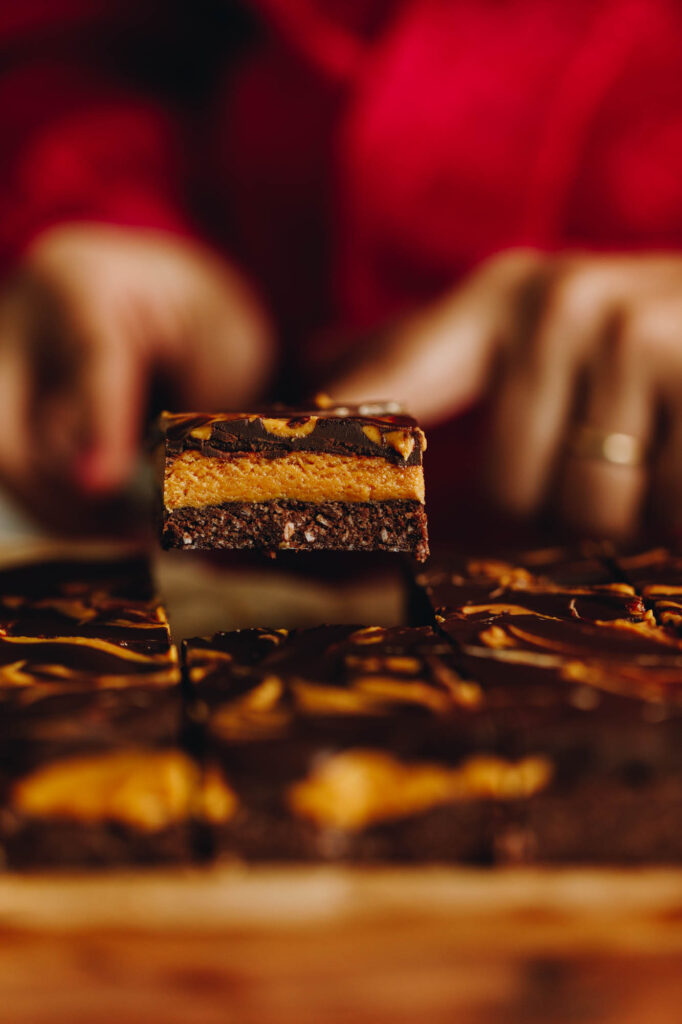
7. Refrigerate and serve.
Chill in the fridge for around 40 minutes and then it is time to cut and enjoy.
How to store the No-bake Peanut Butter Slice:
I store this slice in a sealed container, in the fridge because I like it cold when I eat. However, it can be stored in a cool cupboard as well.
This slice does not last long in our whare (house) and I'm sure it won't in yours either.
Enjoy this recipe? Try out these
No-bake Recipes
Delicious treats with no need to turn the oven on.


DID YOU ENJOY THIS RECIPE?
It would be so awesome if you could please leave a review/comment by clicking the “leave a comment” section at the top of the page.
I love seeing you all make my creations, so send a whakaahua (photo) or kiriata (video) to my Instagram and show me what you made. Let me know if you have any pātai (questions) too, I would love to help.

No-bake Peanut Butter Slice - Keke Papatahi Pata Pīnati Kore-Tunu
Equipment
- 1 20 cm Slice Tin
Ingredients
The Cocoa and Coconut Layer - Te Paparanga Kōkō me te Kokonati
- 3 tablespoon (45 g) hinu kokonati, pata rānei (coconut oil or butter)
- ½ C (130 g) pīnati māeneene (peanut butter)
- ¼ C (55 g) mīere raihi parauri (brown rice malt syrup) This can be swapped for date syrup or maple syrup.
- 1 teaspoon wanira (vanilla)
- 3 tablespoon ( kōkō (cocoa, I use Dutch cocoa)
- 1 C (80 g) kokonati pūtī (desiccated coconut)
- ½ C (60 g) peru oneone (ground almonds)
The Peanut Butter Layer - Te Paparanga Pata Pīnati
- ¾ C (200 g) pata pīnati māeneene (smooth peanut butter, I use Pic's Peanut Butter)
- ¼ C (55 g) mīere raihi parauri (brown rice malt syrup) This can be swapped for date syrup, maple syrup or golden syrup.
- ½ tablespoon wanira (vanilla)
- 3 tablespoon (30 g) peru oneone (ground almonds)
The Chocolate Layer - Te Paparanga Tiakarete
- 150 g tiakarete parauri (dark chocolate, 50%). I use Whittakers here but you could use a sugar-free version too.
- 1 tablespoon (15 g) hinu kokonati, pata rānei (coconut oil or butter)
- 6 teaspoon pata pīnati (peanut butter, optional decoration)
Instructions
Prepare the Slice Tin:
- Line a 20 cm square tin with baking paper.
Prepare the Cocoa and Coconut Base:
- Melt hinu kokonati (coconut oil) or pata (butter) in a small pot over low heat on the stove or in a heat-proof bowl in the microwave. Add it to a medium bowl along with pata pīnati (peanut butter), mīere (syrup), wanira (vanilla) and kōkō (cocoa). Stir.
- Add the kokonati (coconut) and peru oneone (ground almonds). Whakaranuhia - mix until combined.
Press the Base into the Tin:
- Add it to the prepared tin and press it down with a spatula or with clean hands until it is smooth and flat. Whakamātaohia (refrigerate) as you make the paparanga pata pīnati (peanut butter layer).
Make The Peanut Butter Layer:
- Add the pata pīnati (peanut butter), mīere (syrup), wanira (vanilla) and peru oneone (ground almonds) in to a medium bowl. Whakaranuhia - mix until combined.
- Add to the base and press it down with a spatula until it is smooth and flat. Refrigerate as you make the topping.
Add Chocolate to the Slice:
- Add the tiakarete (chocolate) and hinu kokonati (coconut oil) or pata (butter) in to a small pot. Gently melt it on the stove over super low heat as you gently stir. This can also be melted in a heat proof bowl in the microwave, heating for 20 seconds and stirring after each time until just melted.
- Pour it on top of the peanut butter filling and gently smooth it out. Give the tray a little shake so the chocolate flattens out evenly.
Add extra Peanut Butter (optional):
- If you are using them, add the blobs of pata pīnati (peanut butter) on top of the tiakarete (chocolate) while it is still warm. Use a skewer to create a simple marble effect by dragging it through the pata pīnati (peanut butter) in different directions.
Refrigerate and Serve:
- Chill in the fridge for around 40 minutes and then it is time to cut and enjoy.
How to store the slice:
- I store this slice in a sealed container, in the fridge. It will keep well for a couple of weeks this way but I am sure it will not last that long.
Video
TIPS for the best No-bake Peanut Butter Slice:
This recipe is designed to be simple and adaptable. So make it yours and play with the ingredients according to your tastes. I would love to know what you come up with.
Variations and Substitutions:
Make it nut-free:
If you need a nut-free option, swap the pata pīnati (peanut butter) for sunflower seed butter or tahini. This keeps the slice creamy while making it suitable for lunchboxes and those with nut allergies.
Swap the sweetener:
Brown rice malt syrup can be replaced with marahihi māpere (maple syrup), mīere (honey), or mīere teiti (date syrup). All of them work well and add a slightly different flavour to the finished product so use what you prefer.
Make it dairy-free:
If your chocolate topping contains dairy, simply use a dairy-free dark chocolate instead. Most dark chocolates over 50% are naturally dairy-free, but it’s always best to check the packaging.
Skip the coconut:
Not a fan of kokonati (coconut)? You can replace it with the same amount of ōti (rolled oats), or peru oneone (ground almonds). This will slightly change the texture but still hold the slice together well.
Add protein:
For a more filling snack, mix in a scoop of your favourite protein powder. You may need to add a little extra liquid (like coconut oil or syrup) to keep the mixture from becoming too dr. so, mix it in, give it a try and adjust accordingly.
Make it lower sugar:
Stick with brown rice malt syrup for a refine-sugar free slice. Using high-cocoa dark tiakarete (chocolate) (70%+) or a sugar-free version for the topping also helps lower the overall sugar content.
Storage Tips:
Fridge storage:
Store the peanut butter slice in an airtight container in the fridge. It will keep fresh for up to 1 week. The texture stays firm and the chocolate topping remains set when chilled. For best results, place baking paper between layers if stacking slices to prevent sticking.
Freezer storage:
You can freeze peanut butter slice for up to 3 months. Cut it into individual portions first, then store in an airtight container or freezer bag. To serve, thaw in the fridge overnight or leave at room temperature for 10–20 minutes until softened slightly.
Serving tip:
This slice tastes best slightly chilled. If left out at room temperature for too long, it may soften depending on the weather.
Frequently Asked Questions:
This usually happens if there’s too much liquid or not enough chilling time. Double check the recipe and see if you have miscalculated the ratio of an ingredient. This takes little time to set due to the quantity of ingredients so if it is not set in an hour, something has gone wrong in the process.
It depends on ingredients used. Using natural peanut butter and reducing sweetener makes it a more balanced treat and I am a big believer in, everything in moderation.


Tania
Thank you for this recipe. I've now made this two times. It is quick and simple to put together and is a decadent treat. Great for both the gluten intolerant and dairy intolerant people in our household.
Naomi Toilalo WhānauKai
Kia ora Tania, yay, this is definitely one of my favourite slices. I am so stoked that you like it, it is so good to have some DF and GF recipes up your sleeve aye. Thanks for the awesome review!