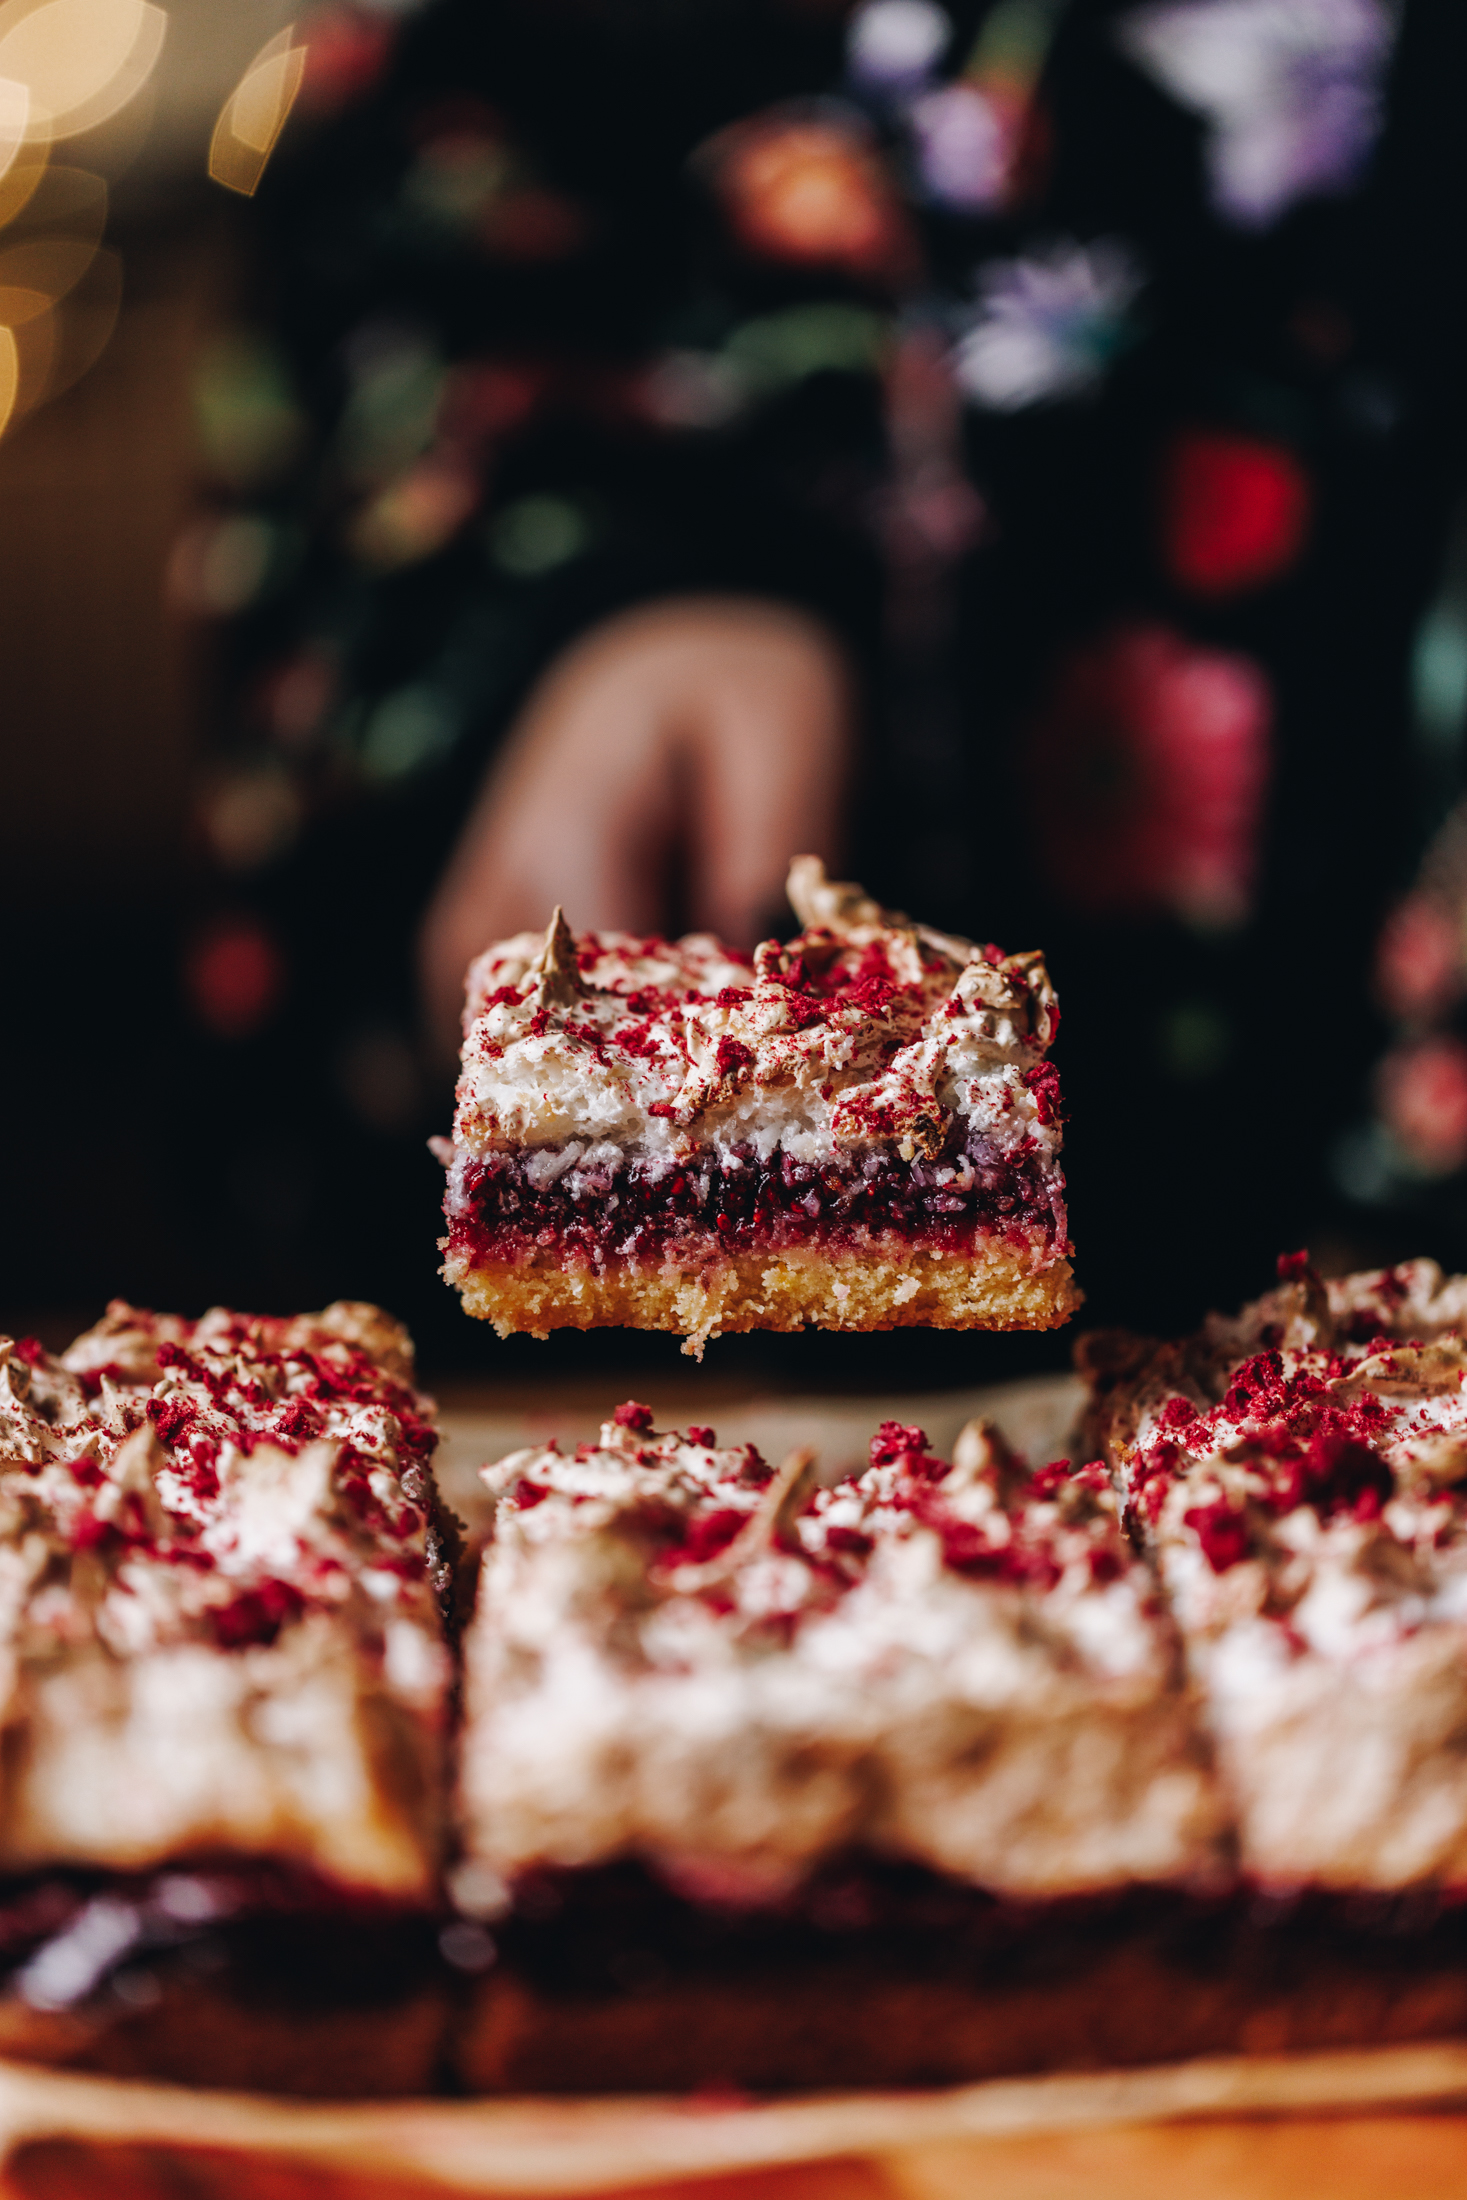
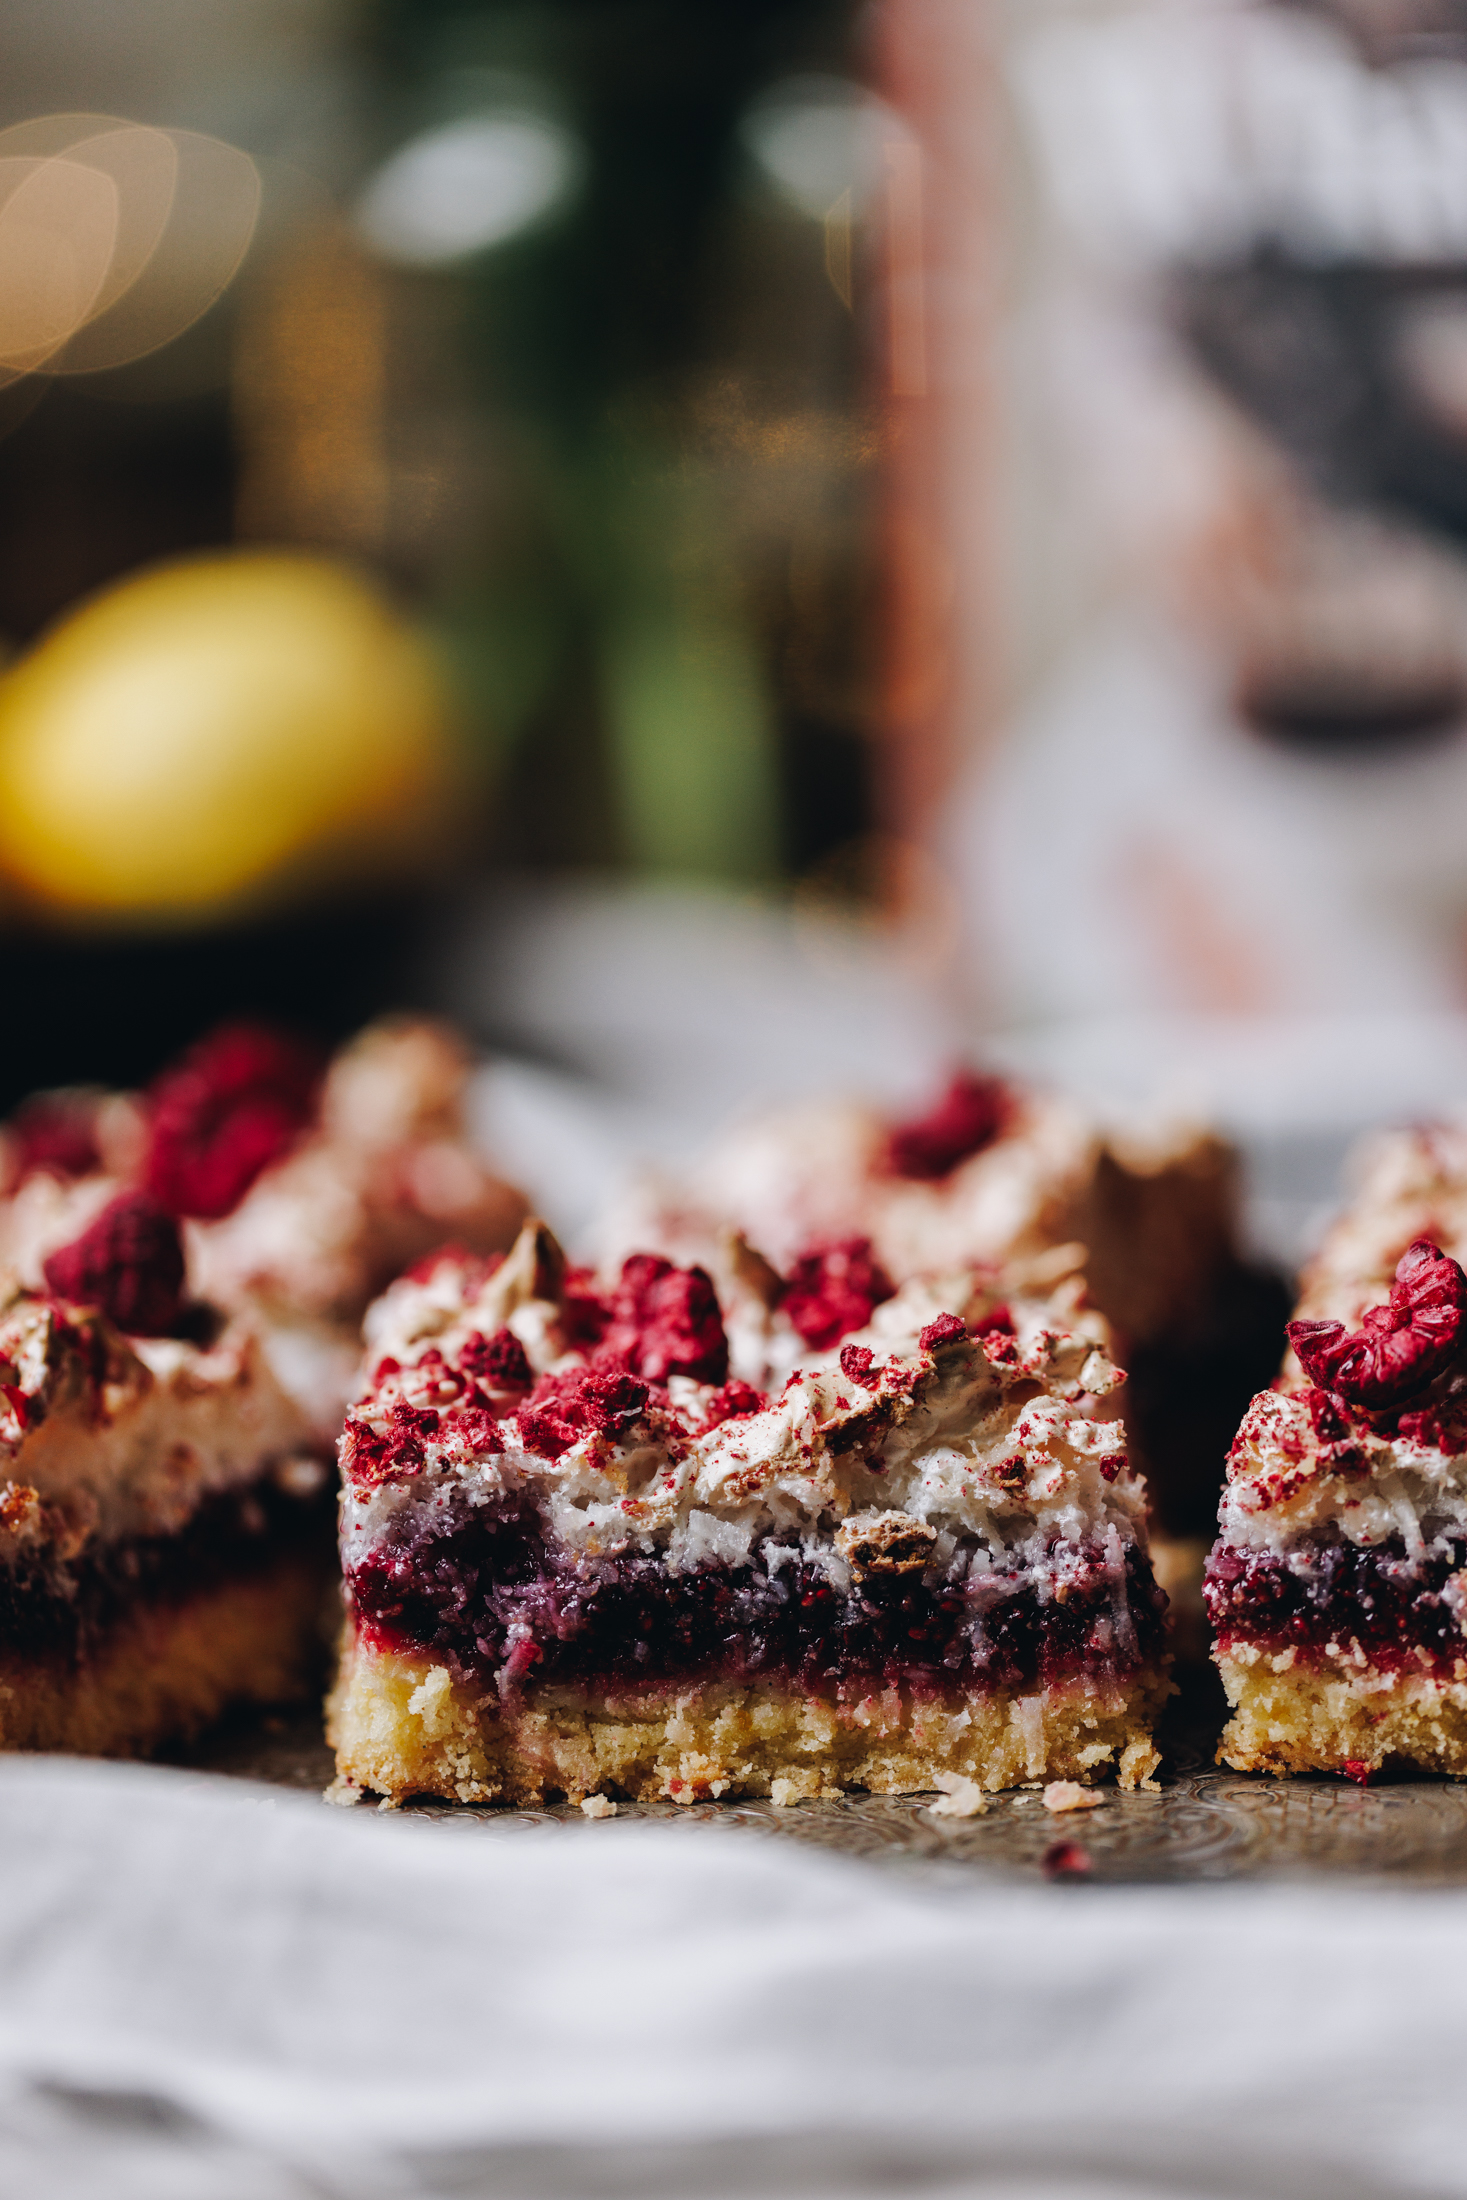
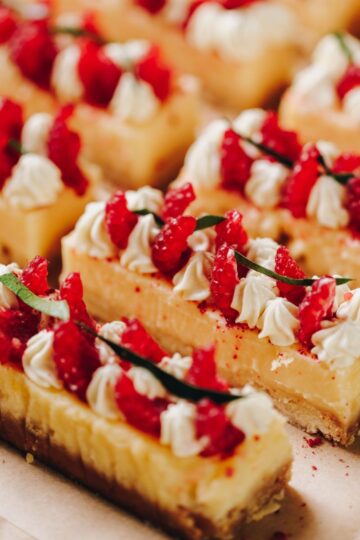
This is my Louise Cake Slice, where the flavours feel a little bit magical and a bite genuinely feels like sunshine ☀️. It’s the classic slice with a twist — featuring a buttery coconut base, a thick raspberry chia jam centre, and a dreamy coconut meringue topping. It’s sweet, tangy, and comforting all at once, with layers that make every bite special. What could be better than that? Nothing, I say — nothing! Let’s bake.
If you love classic slice recipes, try my Peanut Butter Weetbix Slice recipe or Chocolate Raspberry Brownies next.
Why you will love this Louise Cake Slice:
I have no idea who Louise is — but how did she end up getting credit for one of the most divine slices of all time? 🤷♀️ Maybe we should call this one “The Naomi Slice” instead… but I’ll let you be the judge.
This recipe comes from the Whānaukai Cookbook and has been a long-time favourite. It’s a classic Louise cake slice made with a buttery coconut base, raspberry chia jam filling, and a light meringue topping. Simple ingredients, but absolutely unforgettable.
More delicious slices to try:
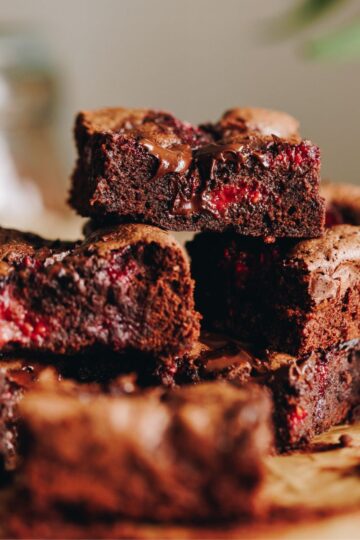
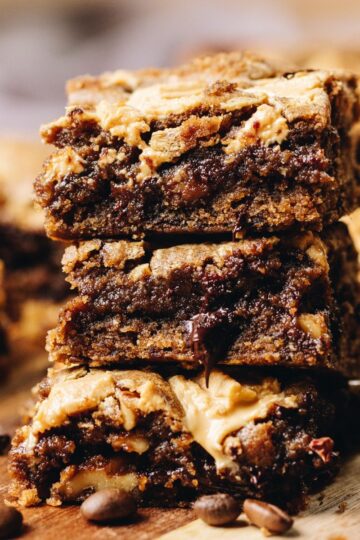
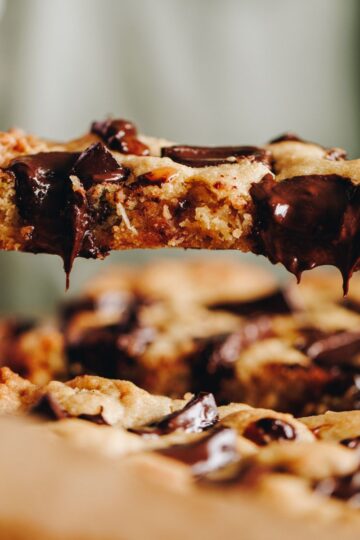
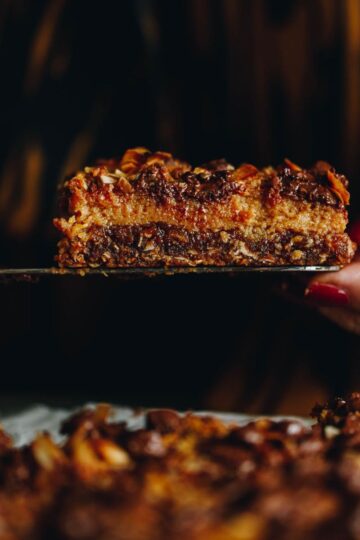
If you love easy nostalgic slice recipes, you’ll also enjoy my Peanut Butter Weetbix Slice recipe — chewy, rich, and perfect for a quick homemade bake. Or try my Chocolate and Raspberry Brownie recipe for a fudgy chocolate raspberry dessert slice or the Chocolate Raspberry Marshmallow Brownie when you want something extra indulgent.
Videography and photography by Sarah Henderson.
Ingredients:
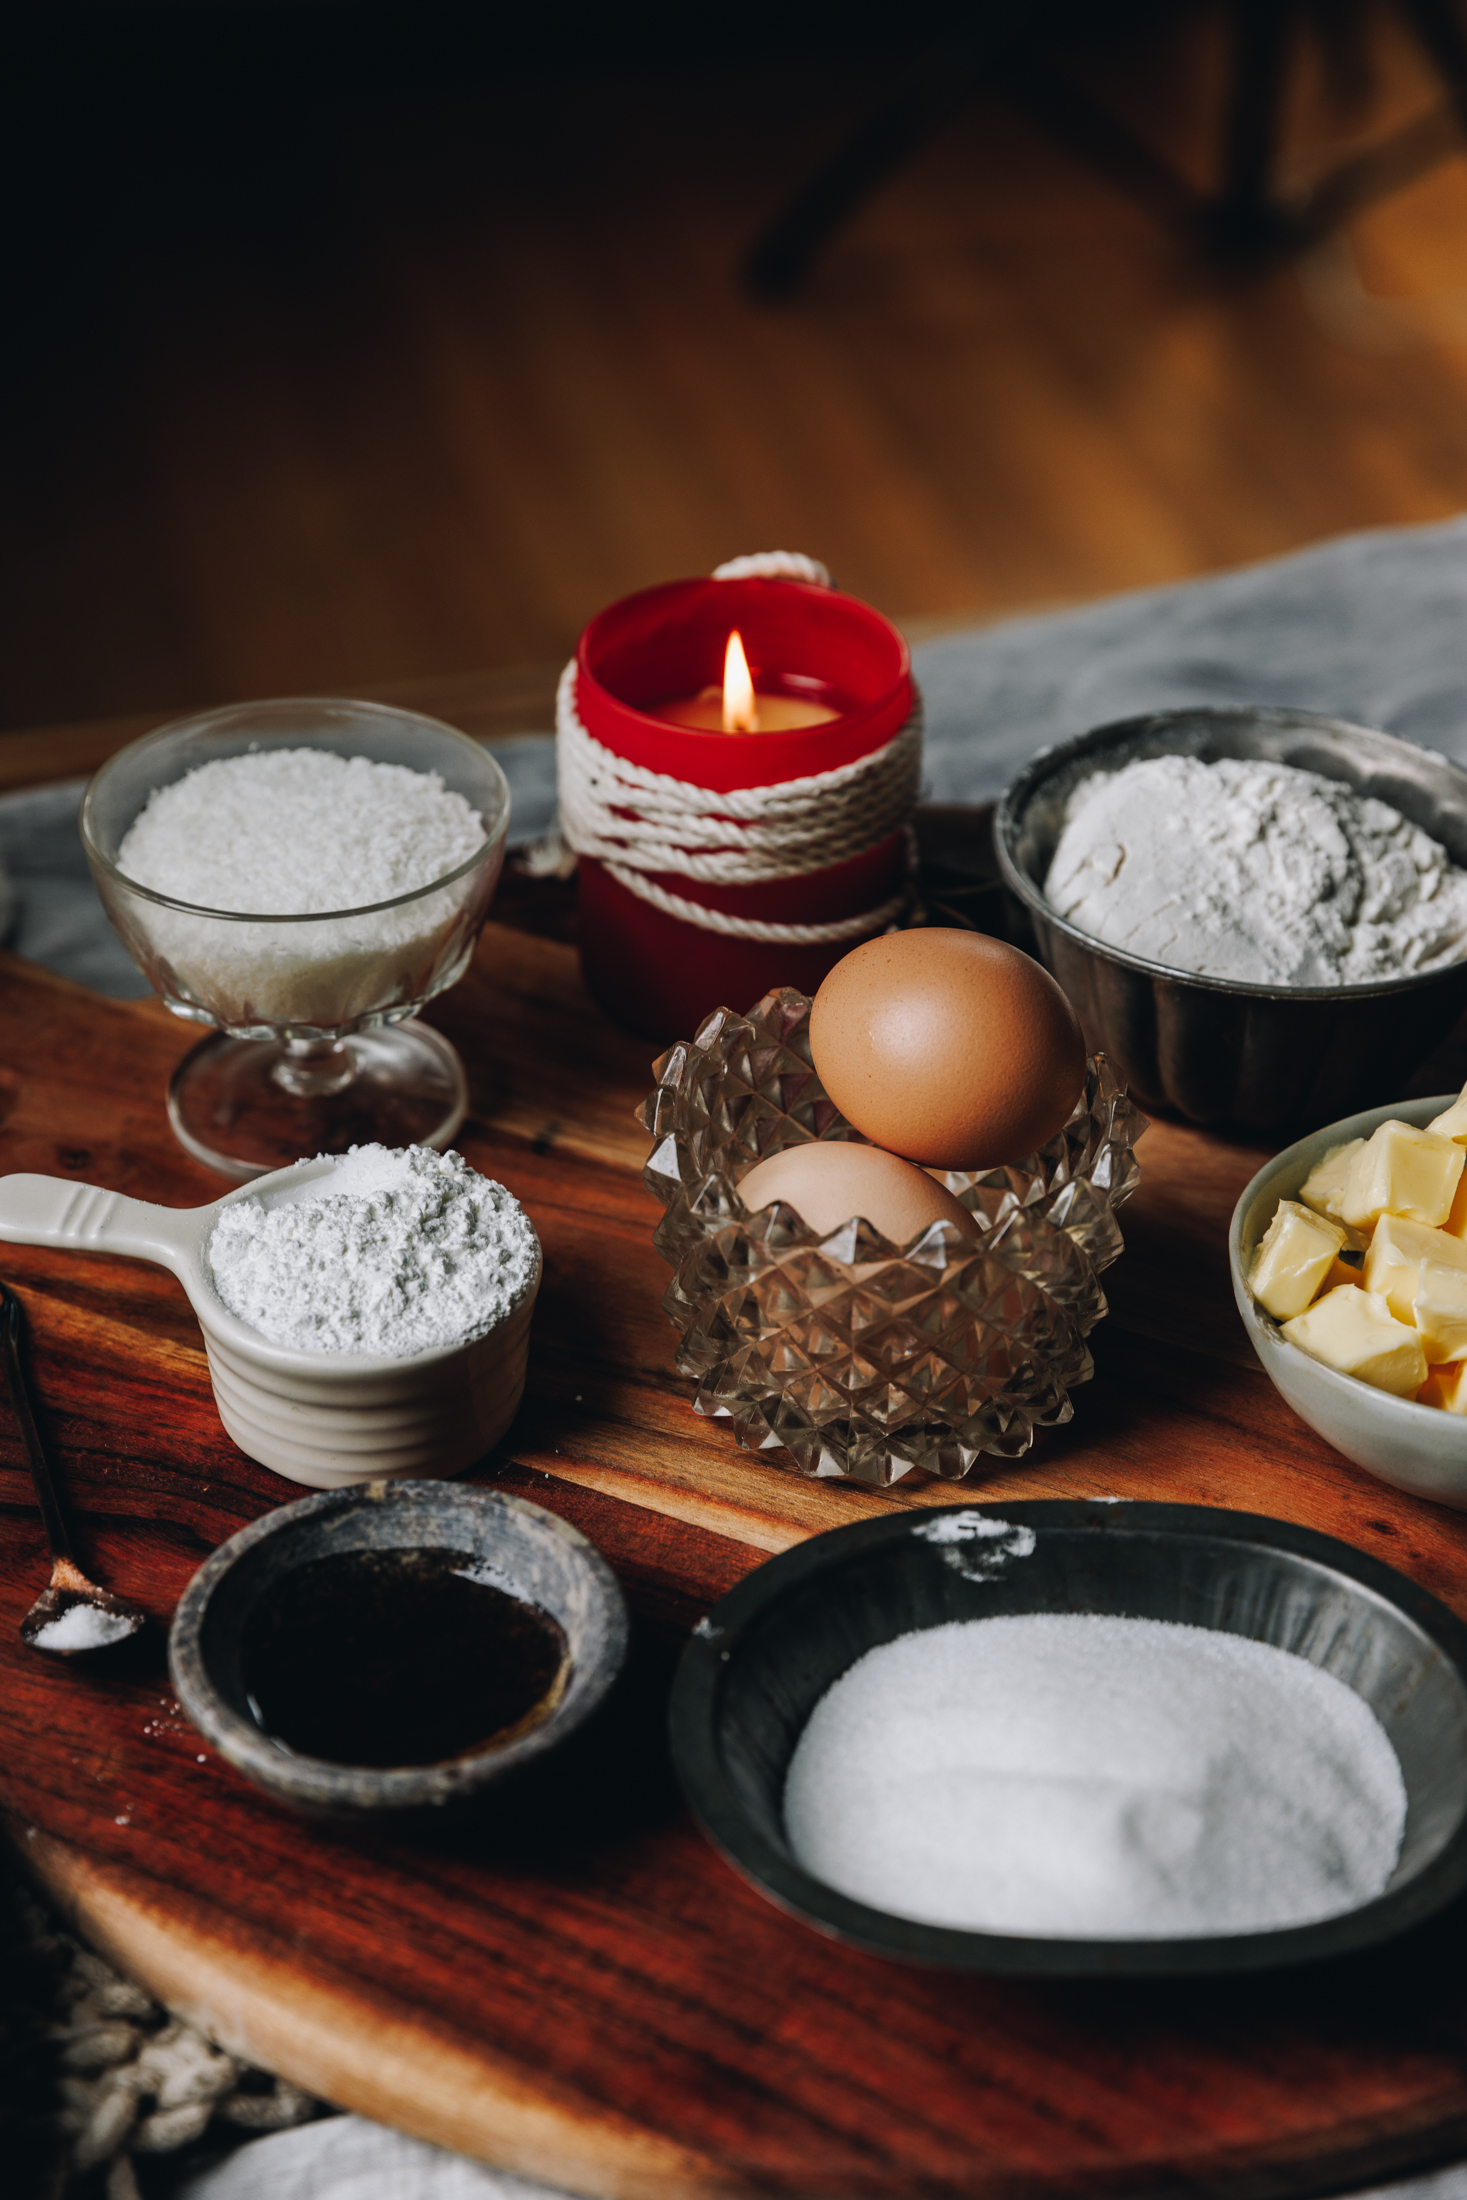
- Butter: Salted pata (butter) is better in my humble opinion because of the deep flavour but unsalted works.
- Eggs: I always use free-range hēki (eggs) but use what you have.
- White sugar: I prefer huka one (caster sugar) in this recipe because of its gentle flavour which compliments the lemon and raspberries.
- Flour: High grade or plain flour can be used here.
- Raspberry Jam: My speedy Chia Seed Raspberry Jam is perfect in this recipe because it is bright and not too sweet.
- Lemons: Use fresh rēmana (lemons) for this slice so the kiri (zest) can be used in the base and the wai (juice) in the jam.
- Coconut: I prefer desiccated in the base and meringue as it keeps the texture delicate but if you prefer shredded, go for it.
HOW TO MAKE THIS DREAMY SLICE:
Note: The full recipe card with the full list of ingredients, instructions and step by step video are found at the bottom of this page.
1. Preheat the Oven:
Pre-heat the oven to 170 °C,.
2. Prepare the Tin:
Line a 20 x 30 cm tin with high sides with baking paper.
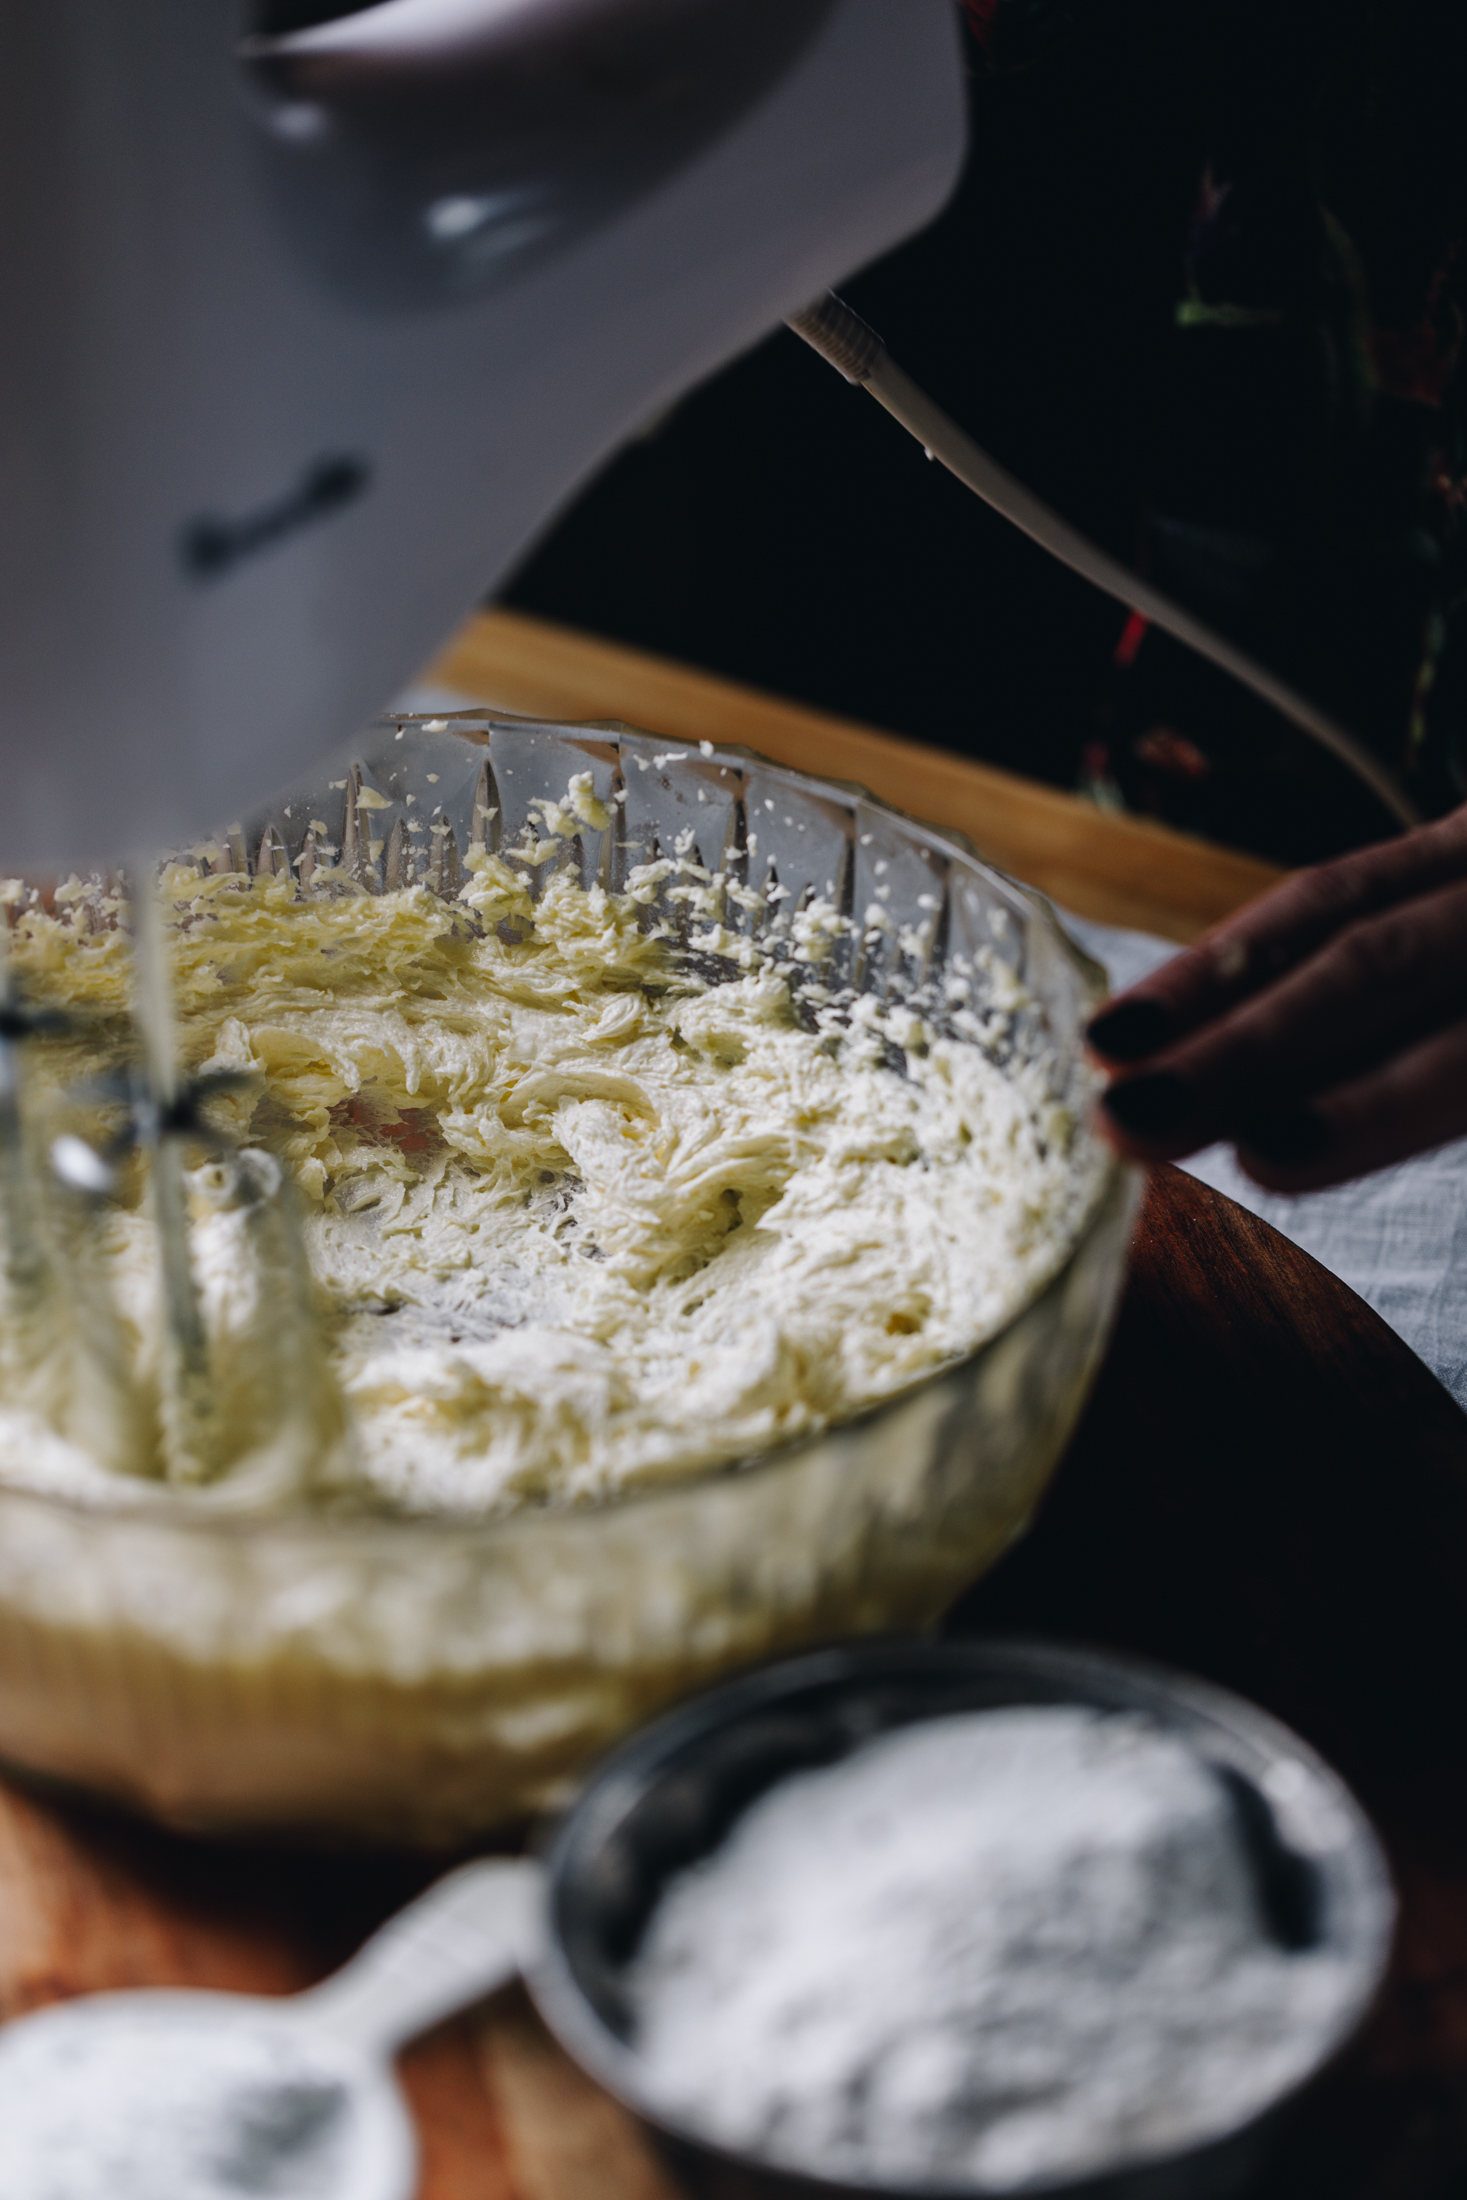
3. Whip the Ingredients:
Add pata kūteretere (softened butter) and huka one (caster sugar) to a medium bowl and whip on high for 5 minutes.
The mixture is ready when it is pale colour and fluffy in texture.
Add in the tōhua hēki (egg yolks), wanira (vanilla), tote (salt) and grate in the kiri rēmana (lemon zest).
Whip for another 2 minutes on high until everything is light and fluffy.
4. Add the Dry Ingredients:
Add the puehu kānga (cornflour) and puehu parāoa (flour) in to the butter mixture.
Mix well with a spatula until it all comes together.
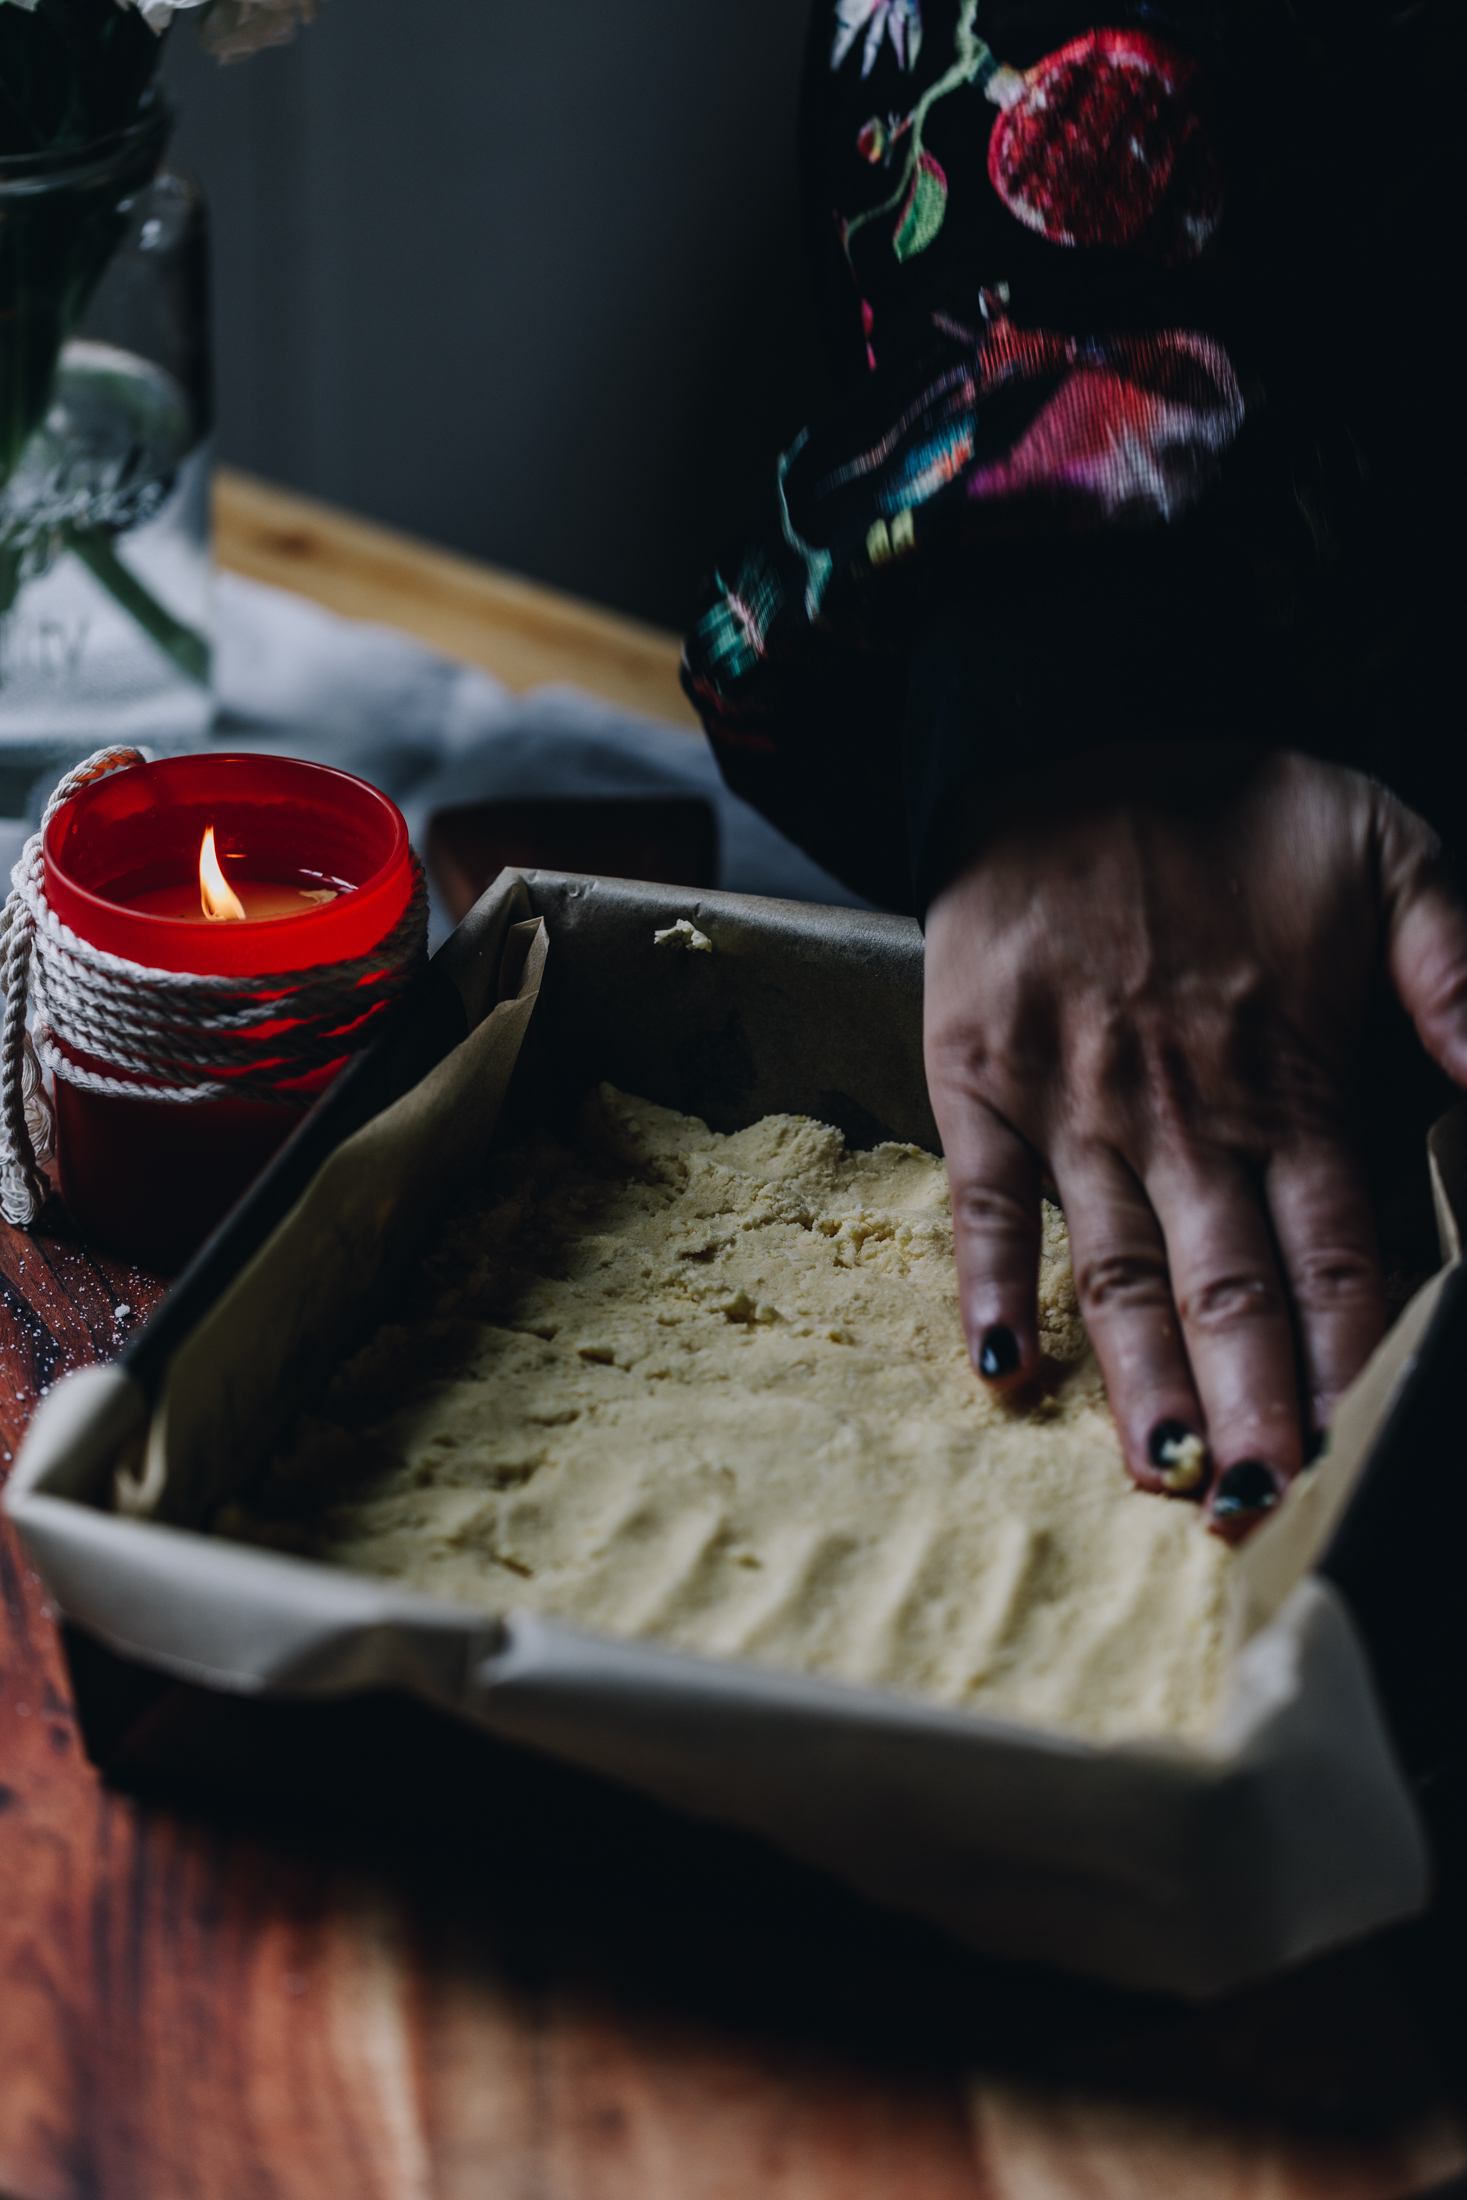
5. Press it in to the Tin:
Add into the prepared tin, press it evenly with your hands or a spatula until flat.
6. Bake the Base:
Bake for 20 minutes until it is golden.
As the base bakes, make the chia jam.
7. Make the Chia Raspberry and Lemon Jam:
Make the Chia Seed Raspberry and Lemon Jam as per instructions.
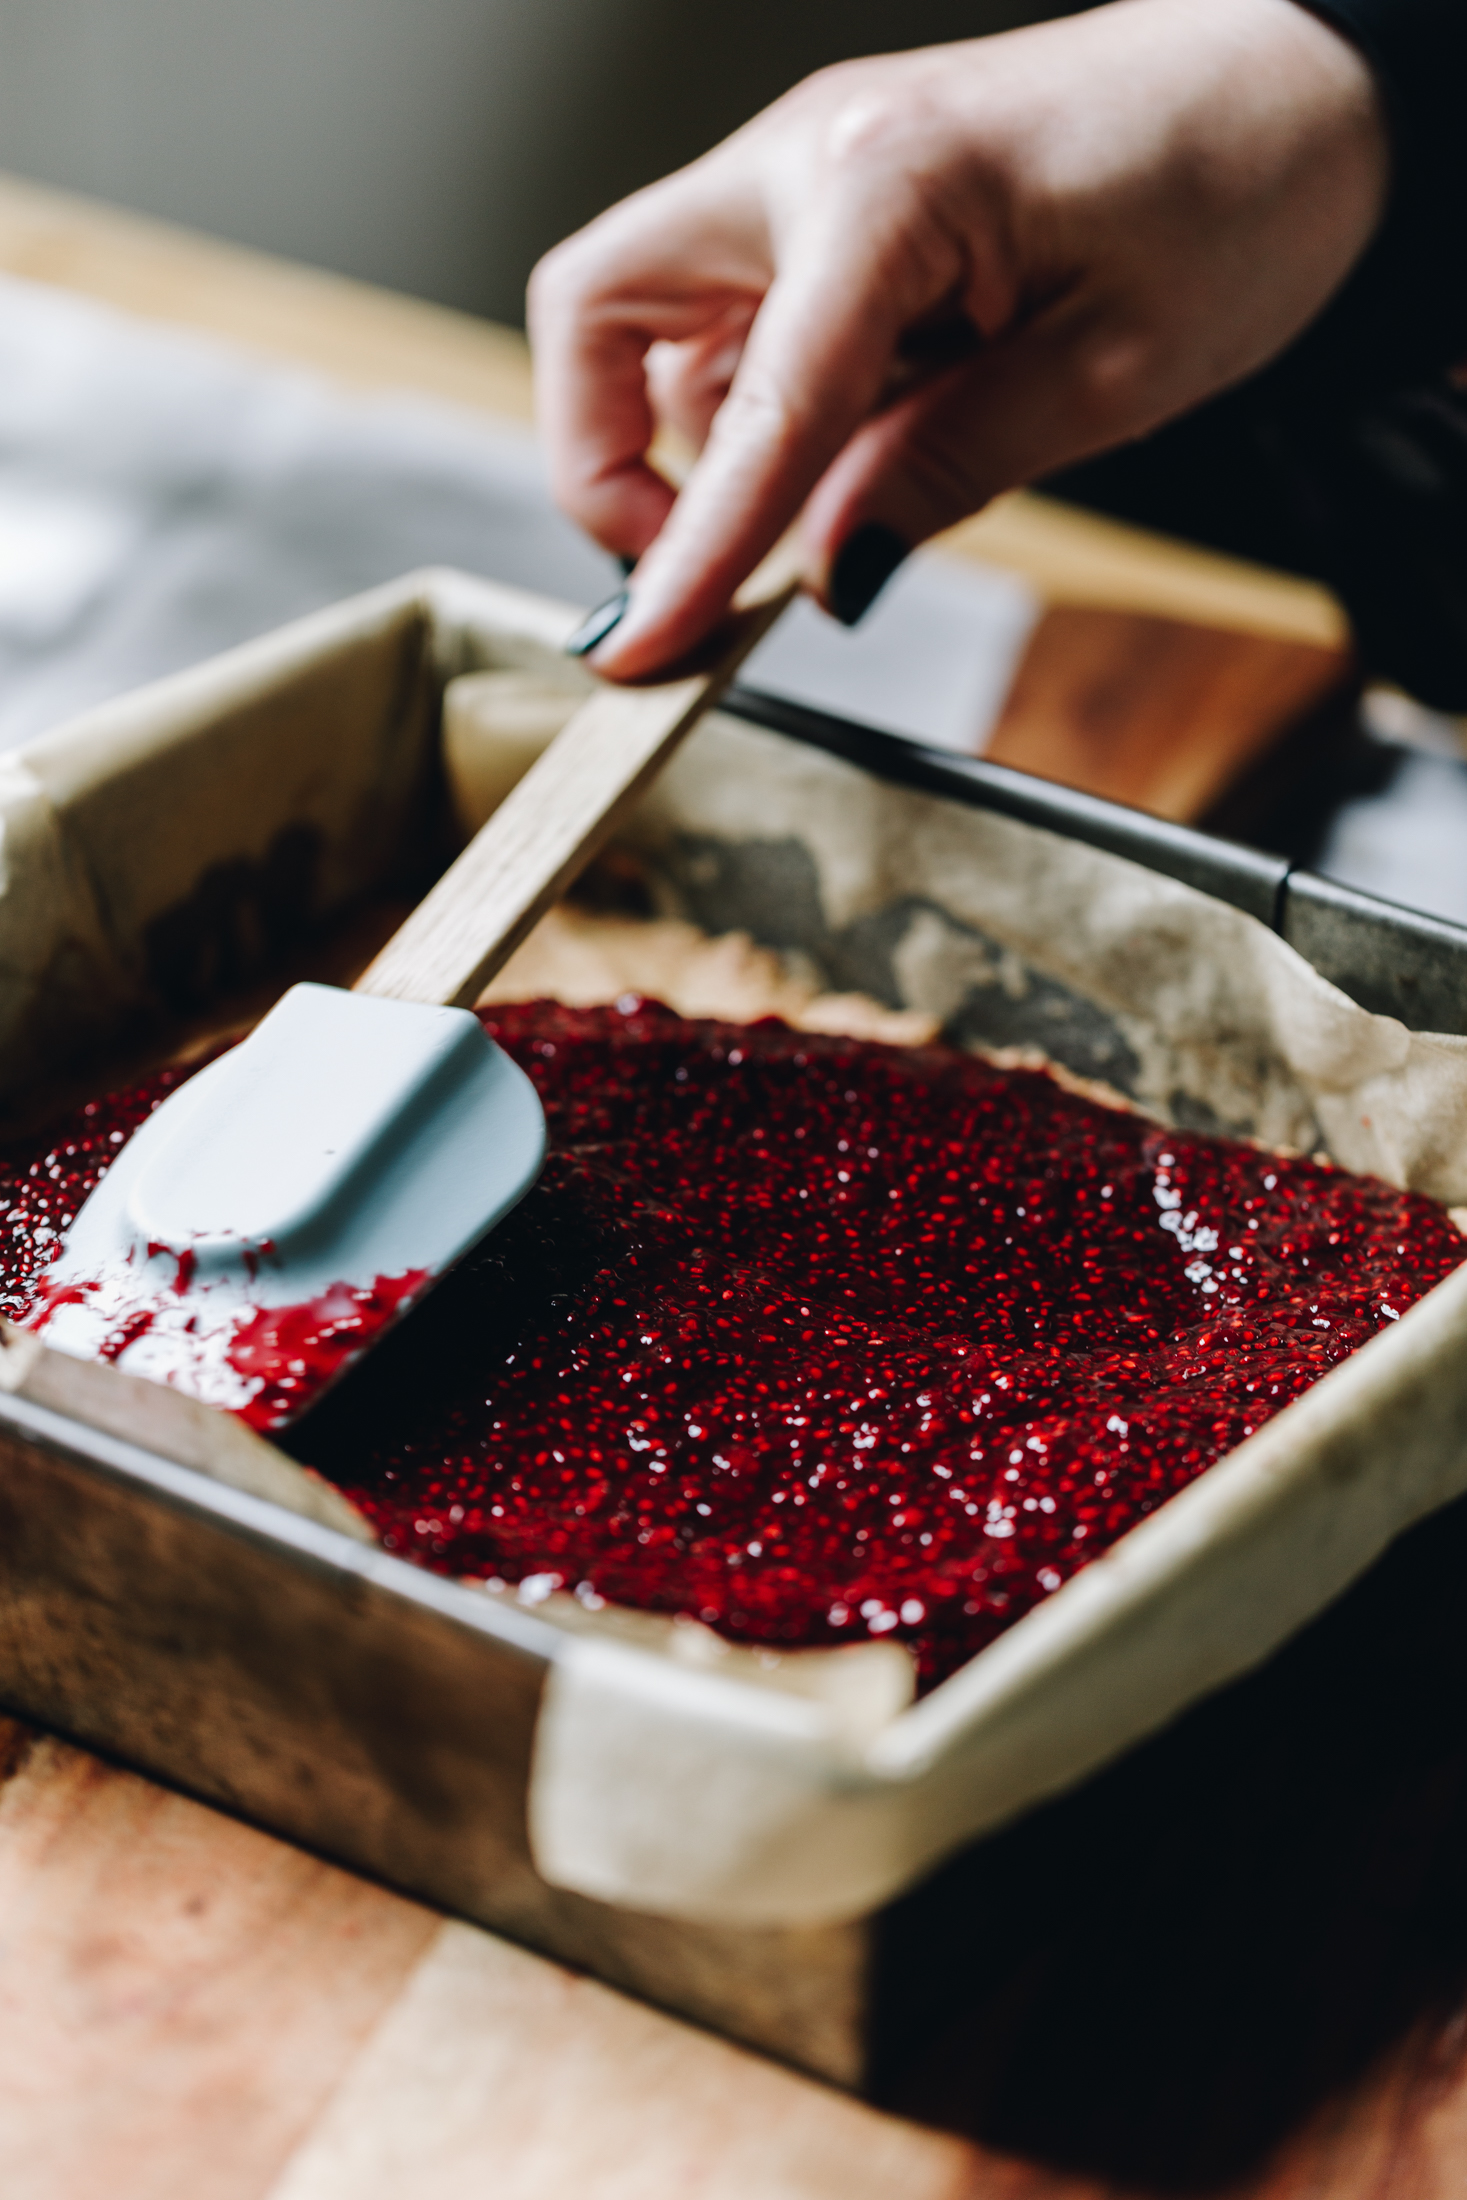
8. Unite the Base and Jam
As soon as the base comes out of the oven, spread the tiamu (jam) all over the base and allow it to the thicken from the heat.
Leave it to the side as you make the merenge (meringue).
9. Heat the Water for the Meringue Topping:
Pour around 4cm of water in to the bottom of a medium pot. Bring it to simmer on a low heat, you don't want a wild boil here, just a smooth simmer.
Take a heatproof bowl and sit it on top of the pot of simmering water. The bottom of the bowl must not touch the water.
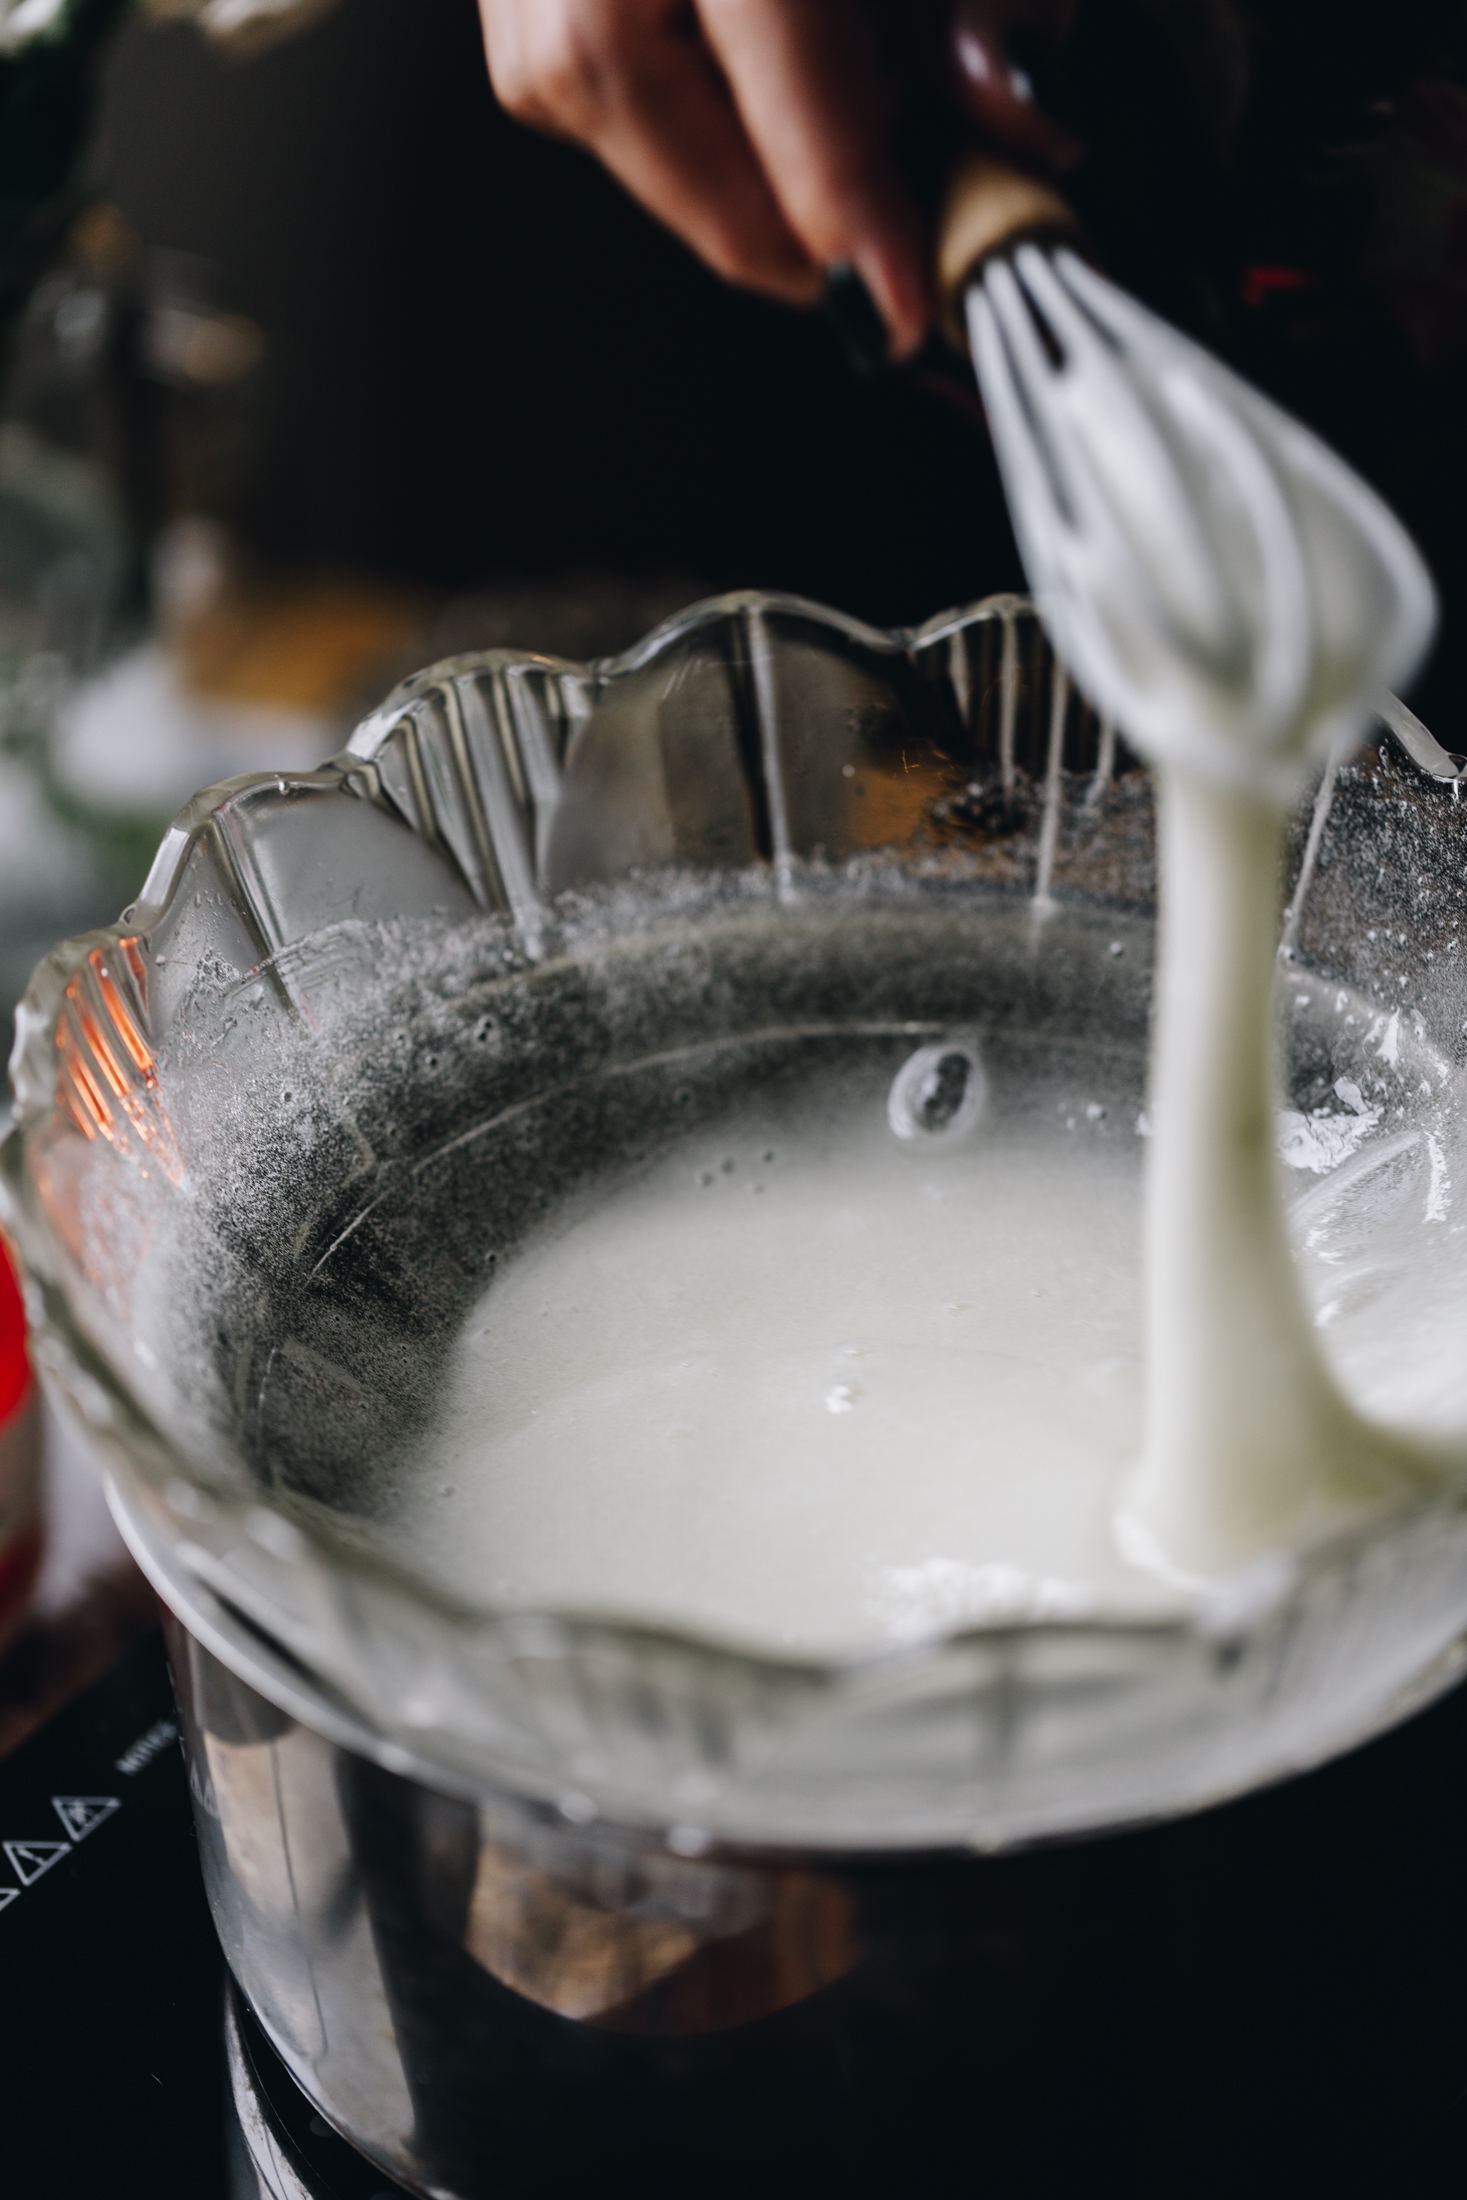
10. Add the Egg Whites and Sugar:
Add the kahu hēki (egg whites), huka one (caster sugar) and kirīmi tāta (cream of tartar) in to the bowl. Continuously whisk the mixture until it warms the mixture in the bowl.
If you are using a sugar thermometer bring the mixture to 45-50 °C. Otherwise you can keep it on the heat until it is warm to touch and the sugar is smooth when you rub it between your fingers. When the mixture is loose and runny, it is ready.
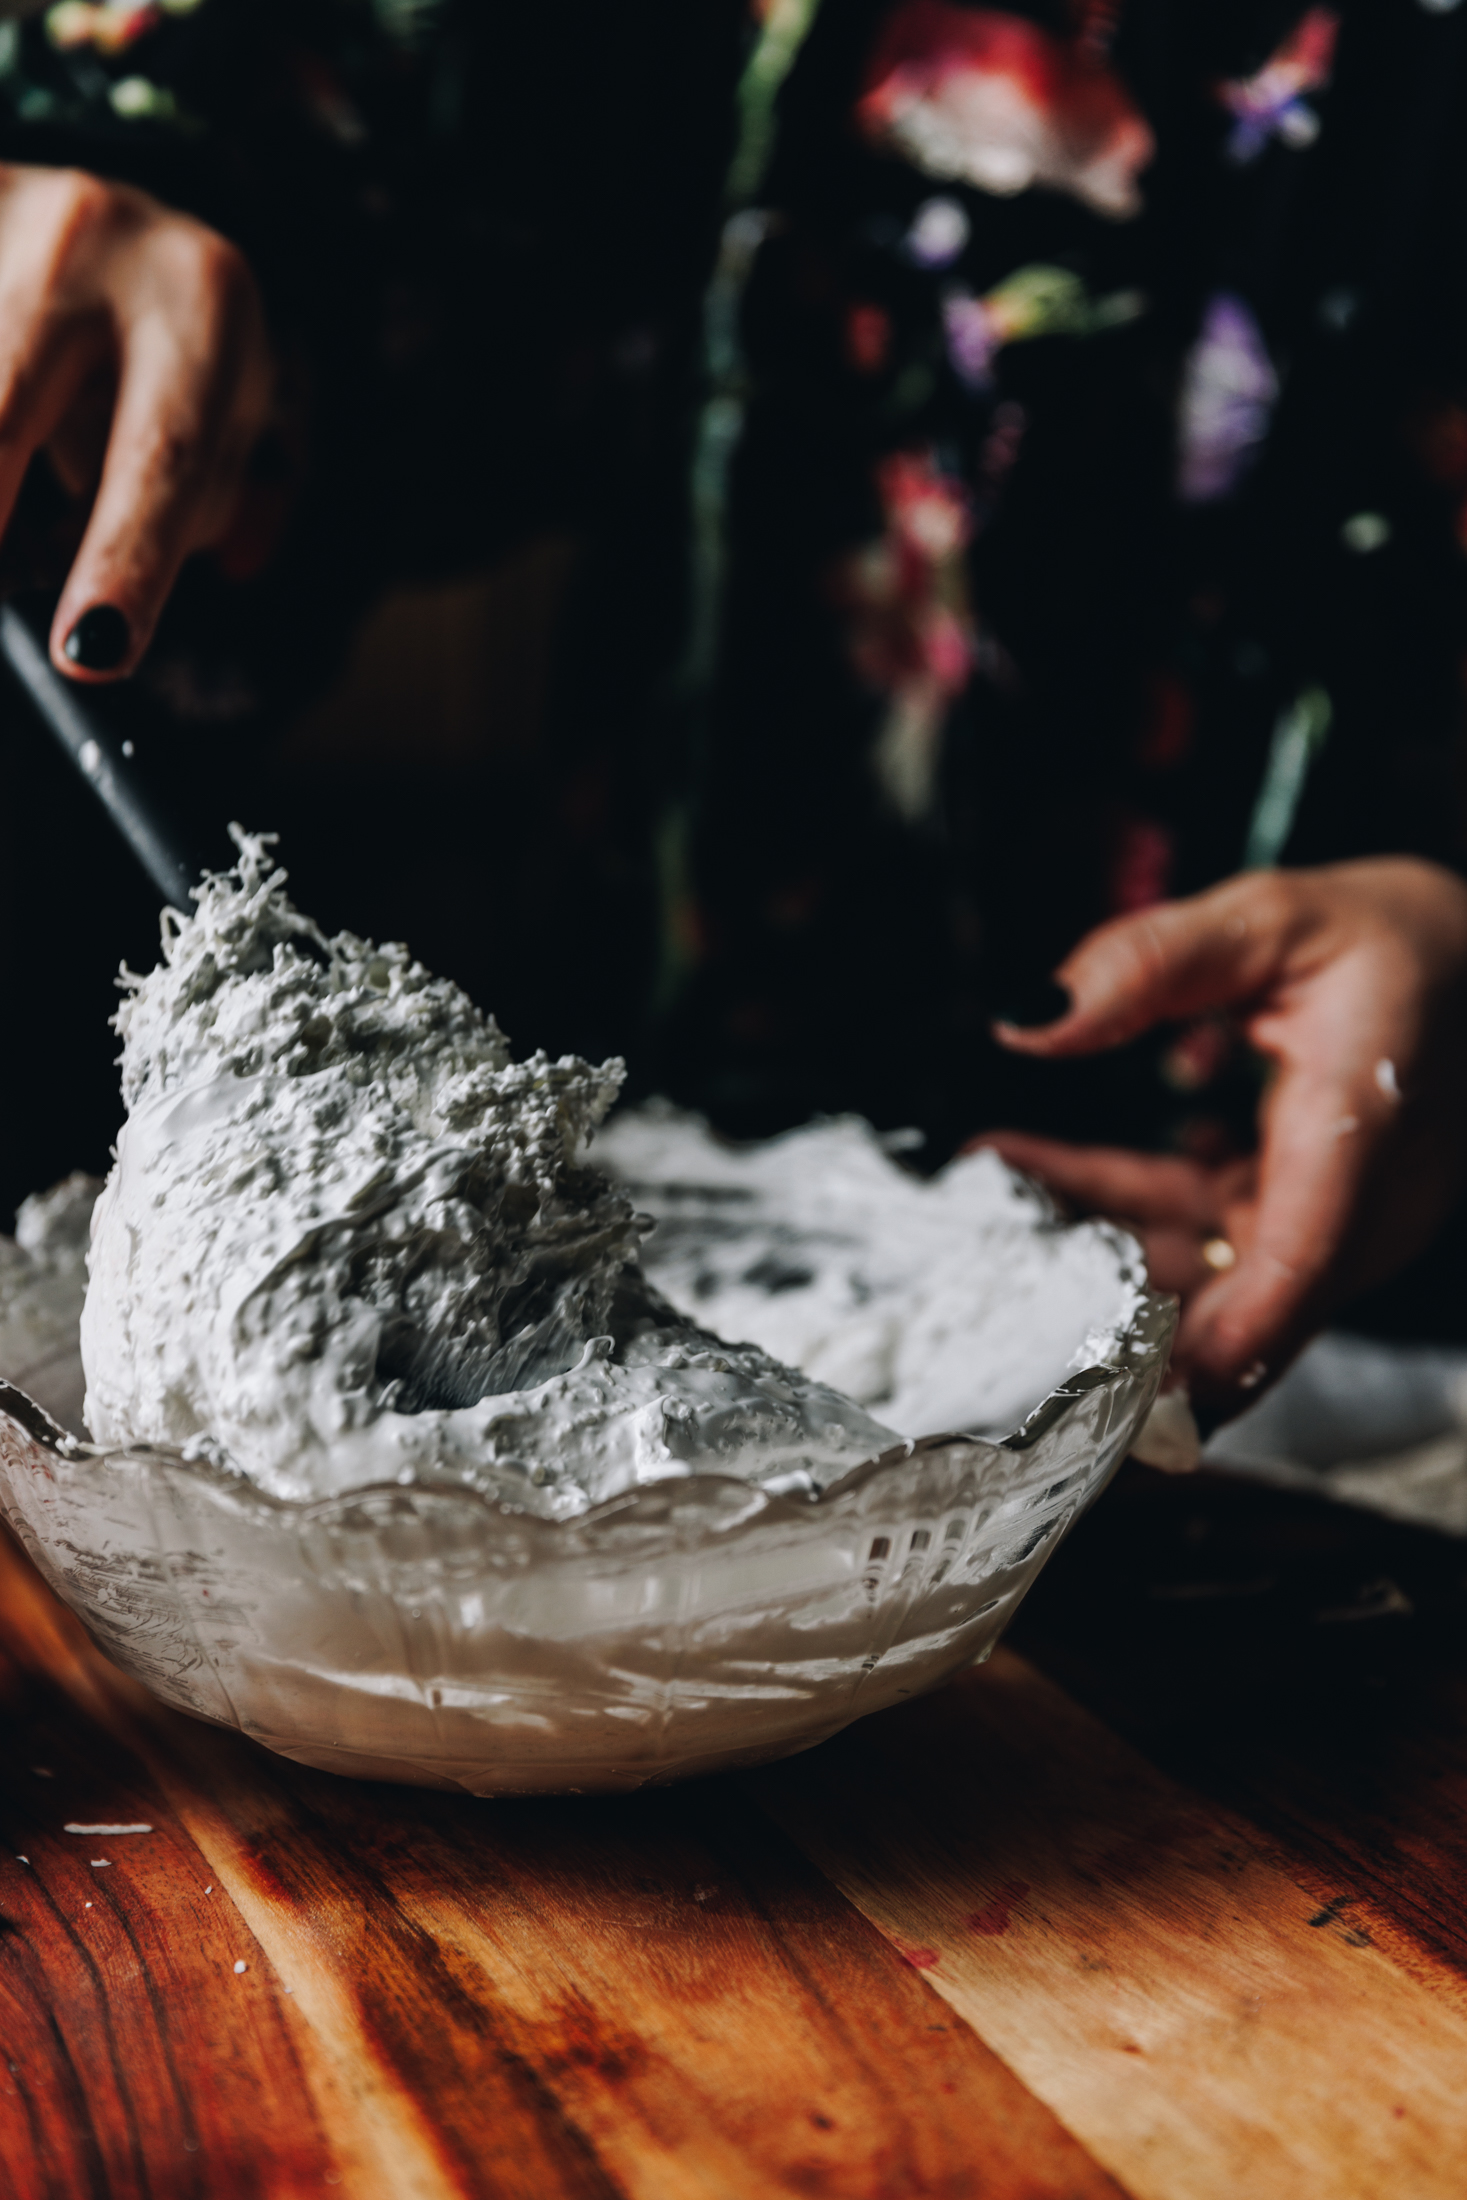
11. Whip the Egg Mixture:
Once it is ready, remove it from the heat and begin to whip on medium to high speed for 5 minutes or until you have reached stiff peaks.
12. Add the Coconut:
Fold through the kokonati pūtī (desiccated coconut) and spread or pipe it on top of the delicious jam.
13. Bake the Slice:
Return the slice to the oven and bake for 20 minutes until the meringue is toasted and set.
Allow to cool completely before slicing.
You are in for such a special eating experience.
Storing the Slice:
I prefer to keep this in a sealed container in the fridge for up to 5 days however this slice never lasts this long in our whānau (family).
Take a close look at these divine
Slice Recipes
A delicious hand held piece of aroha (love) in a few simple steps.

DID YOU ENJOY THIS RECIPE?
It would be so awesome if you could please leave a review/comment by clicking the “leave a comment” section at the top of the page.
I love seeing you all make my creations, so send a whakaahua (photo) or kiriata (video) to my Instagram and show me what you made. Let me know if you have any pātai (questions) too, I would love to help.

Louise Slice - Keke Rahipere me te Kokonati
Ingredients
Biscuit Layer - Paparanga Pihikete
- 170 g pata kūteretere (softened butter)
- ½ C (110 g) huka one (caster sugar)
- 2 tōhua hēki (egg yolks, reserve the egg whites for the topping)
- 1 teaspoon wanira (vanilla)
- Kini tote (pinch of salt)
- Kiri rēmana (Lemon zest, of 1 lemon)
- ¼ C (30 g) puehu kānga (cornflour)
- ½ C (40 g) kokonati pūtī (desiccated coconut)
- 1 C (150 g) puehu parāoa noa (plain flour)
Chia Raspberry Jam - Tiamu Rahipere Chia
- 1 quantity raspberry chia jam - tiamu rahipere chia
Meringue Topping - Paparanga Tāhungahuna
- 3 kahu hēki (egg whites)
- ¾ C (165 g) huka one (caster sugar)
- ½ teaspoon kirīmi tāta (cream of tartar)
- 1 ¼ C (100 g) kokonati pūtī (desiccated coconut)
Instructions
Preheat the Oven:
- Pre-heat the oven to 170 °C.
Prepare the Tin:
- Line a 20 x 30 cm tin with high sides with baking paper.
Whip the Ingredients:
- Add pata kūteretere (softened butter) and huka one (caster sugar) to a medium bowl and whip on high for 5 minutes. The mixture should be a pale colour and fluffy in texture.
- Add in the tōhua hēki (egg yolks), wanira (vanilla), tote (salt) and grate in the kiri rēmana (lemon zest). Whip for another 2 minutes on high.
Add the Dry Ingredients:
- Add the puehu kānga (cornflour) and puehu parāoa (flour). Mix well with a spatula until it all comes together.
Press it in to the Tin:
- Add into the prepared tin, press it evenly with your hands or a spatula.
Bake the Base:
- Bake for 20 minutes until it is golden. As the base bakes, make the chia jam.
Make the Chia Raspberry and Lemon Jam:
- Make the Chia Seed Raspberry and Lemon Jam as per instructions.
Unite the Base and Jam
- As soon as the base comes out of the oven, spread the tiamu (jam) all over the base and allow to the thicken from the heat. Leave to the side as you make the merenge (meringue).
Hea the Water for the Meringue Topping:
- Pour around 4cm of water in to the bottom of a medium pot. Bring it to simmer on a low heat, you don't want a wild boil here, just a smooth simmer.
- Take a heatproof bowl and sit it on top of the pot of simmering water. The bottom of the bowl must not touch the water.
Add the Egg Whites and Sugar:
- Add the kahu hēki (egg whites), huka one (caster sugar) and kirīmi tāta (cream of tartar) in to the bowl. Continuously whisk the mixture as it warms in the bowl.
- If you are using a sugar thermometer bring the mixture to 45-50 °C. Otherwise you can keep it on the heat until it is warm to touch and the sugar is smooth when you rub it between your fingers. The mixture will be loose and runny.
Whip the Egg Mixture:
- Once it is ready, remove the heat and begin to whip on medium to high speed for 5 minutes or until you have reached stiff peaks.
Add the Coconut:
- Fold through the kokonati pūtī (desiccated coconut) and spread or pipe it on top of the delicious jam.
Bake the Slice:
- Return to the oven and bake for 20 minutes.
- Allow to cool completely before slicing. You are in for such a special eating experience.
Storing the Slice:
- I prefer to keep this in a sealed container in the fridge for up to 5 days however this slice never lasts this long in our whānau (family).
Video
Expert advice:
Louise Cake Slice texture:
For the best texture in this Louise Cake Slice, make sure you take the time to properly whip the pata (butter) and huka (sugar). This step helps create a lighter slice by incorporating air and ensuring the sugar fully dissolves into the butter.
Making Swiss Meringue:
When using Swiss meringue, the biggest success factor is gentle heat control. The bowl should sit above simmering water without touching it — you want steam to warm the kahu hēki (egg whites), not direct heat from the water. This prevents overcooking and helps create a stable meringue that holds its shape when baked.
Swiss meringue is ideal for baking because it produces a smooth, glossy texture and a more stable result than raw-egg meringue methods. Once whipped, it should be thick, shiny, and hold firm peaks before being spread onto the slice.
Variations:
Swap the fruit filling:
If you don’t have raspberries, you can easily swap the filling for strawberry jam, boysenberry jam, or a mixed berry chia jam. If you are using a store bought version though, reduce the total amount to 1 cup because it is naturally sweeter.
Change the topping:
Instead of Swiss meringue, you can use my simple French meringue recipe which requires no heating. I find the French meringue slightly less reliable but it will still work.
Storage:
Refrigeration:
Store the keke papatahi (slice) in an airtight container in the fridge for up to 2-3 days. The meringue holds its shape best when chilled, making this a great make-ahead option for gatherings or lunchboxes.
Freezing:
I would not recommend freezing this slice as the meringue will begin to lose its texture.
Frequently asked questions:
Yes — this slice is ideal for making a day in advance. The layers set well in the fridge and the flavour improves as it rests.
This usually happens if the egg white and sugar mixture wasn’t heated enough or if the bowl touched the simmering water. Make sure the sugar is fully dissolved before whipping, it should feel to touch.
Yes. A thick store-bought raspberry jam works perfectly. Choose one with a firm texture so it holds it shape when baked.

Judith Chalmers
Best receipe ever. Made this just so good. Everybody needs to buy her book. It’s amazing
Naomi Toilalo WhānauKai
Woo hoo Judith - so glad you have made it! Thank you for your awesome support!
Judith Chalmers
Great receipts in her book. Love them
Naomi Toilalo WhānauKai
Thank you Judith - you make me so happy! Ngā mihi e hoa!
Kelz
Talk about delicious! I did use boysenberries as couldn't find raspberries, and still so reka! Also, the whanau absolutely loved it, will defs make again (with rasp this time lol).
Kia pai to mahi!
Naomi Toilalo WhānauKai
Yes Kelly, that is so wonderful to hear. I love the idea of it with boysenberries though, that sounds delicious! E mihi ana!
Janina
Made this beautiful slice twice this week! Thank you for the recipe! Stunning 🤩
Naomi Toilalo WhānauKai
Yessss! I love to hear that - I am so glad you are enjoying it!
Tyler Blades
Oh my word! I made this for a family gathering and it got demolished! Came home and made some more so hubby and I can have it to ourselves! Sooooo good.
Naomi Toilalo WhānauKai
Oh Tyler, I thought I had replied to you but it didn't come up! This story made me smile from ear to ear, the fact that you went home and made some again was just so amazing. Thank you for the awesome feedback!
Chelsea
Absolutely delicious! I didn’t have raspberries so ended up roasting some plums and making a chia seed jam from them. The base is so moreish - not dry like a lot of slice bases.
Looking forward to making it again with the original raspberry jam; very scrummy!
Naomi Toilalo WhānauKai
Ohhh that is so cool! So, how did the chia jam go with plums? Did it still thicken well? I love that idea - I feel like I am learning so much from reading your reviews, you are so clever. E mihi ana Chelsea - thank you for your amazing feedback.
Carilyn Trice
This is the best Louise Slice recipe, the raspberry chia jam adds a lovely tartness! I only used the 2 egg whites for the meringue, was still yum & I got lots of compliments. Thank you Naomi for your wonderful recipes 💖
Naomi Toilalo WhānauKai
Thank you so much Carilyn - I'm so glad you enjoyed this recipe. I love the chia jam too!
Ngā mihi, Naomi