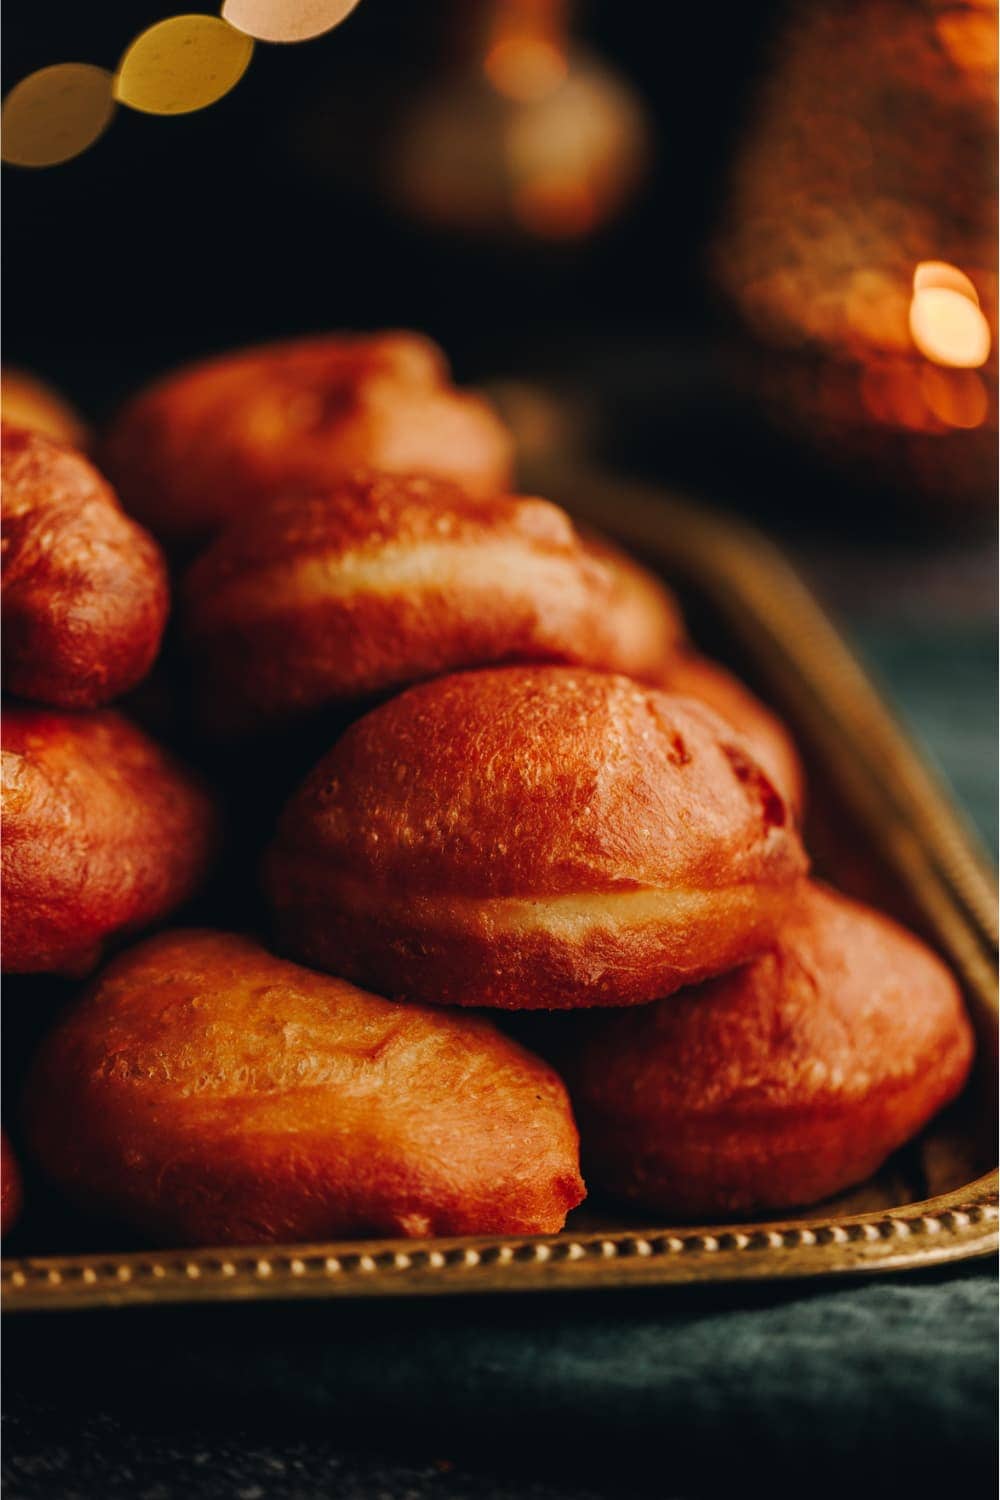
This light and fluffy fry bread recipe is a simple New Zealand favourite that’s crisp on the outside and soft inside. Made with basic pantry ingredients, it’s quick to prepare and perfect served warm with butter, golden syrup, or savoury toppings. How do you eat them? Let me know in the comments.
Why You’ll Love This Fry Bread:
There are so many techniques and styles when it comes to making parāoa parai (fry bread). For many of us, there are Aunty's or whānau (family) members who have passed down their tried and true recipe so if that is you, stick with that, I get it! My only critique is that some can have a tough dough and the texture can be a bit chewy. Mine are fluffy inside and golden on the outside and use kai (ingredients) that are already in your pantry. This is traditional, Aotearoa (NZ)-style comfort food at its best.
More sweet dough Recipes:
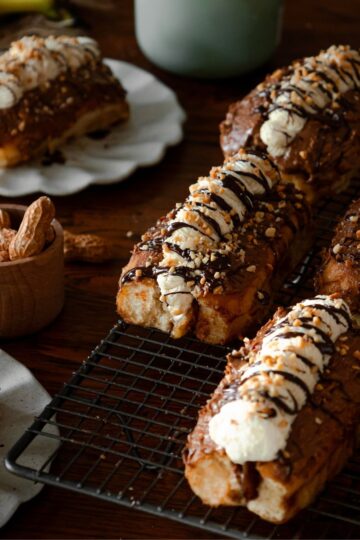
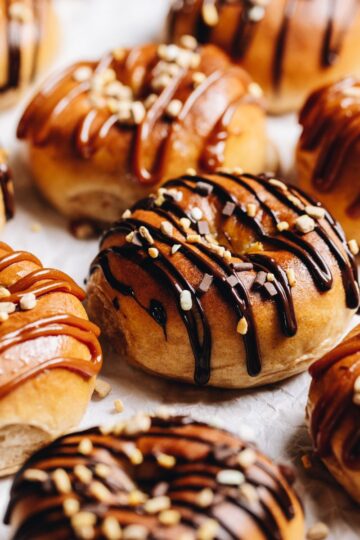
If you love sweet bread, then you must try my Chocolate Stuffed Fry Bread. These have gooey chocolate hidden inside them and are rolled in huka hinamona (cinnamon sugar). Maybe you want a sticky cinnamon scroll? Then my Sticky Maple Cinnamon Scrolls are perfect and I have an Overnight Maple Cinnamon Scroll version too.
Videography and photography by Sarah Henderson.
Ingredients:

- Milk: I prefer full fat milk but trim will also work.
- Sugar: Use huka hāura (brown sugar), huka mā (white sugar), mīere (honey) or marahihi māpere (maple syrup). All of them will work in this recipe.
- Instant yeast: Use īhi horo (instant yeast) in this recipe for efficient rising. If you are using Surebake or Breadmaker's yeast, double the amount.
- High grade flour: Always use puehu parāoa kounga (high grade flour) in bread recipes for the fluffiest result.
- Butter: Use salted pata (butter) or swap it for the same amount of oil.
- Salt: I use Himalayan salt, if you are using iodised table salt, half this amount.
- Oil: Use Rice Bran oil or an oil with a high smoke point for the best frying experience.
How to make this delicious recipe:
Note: The full recipe card with the full list of ingredients, instructions and step by step video are found at the bottom of this page.
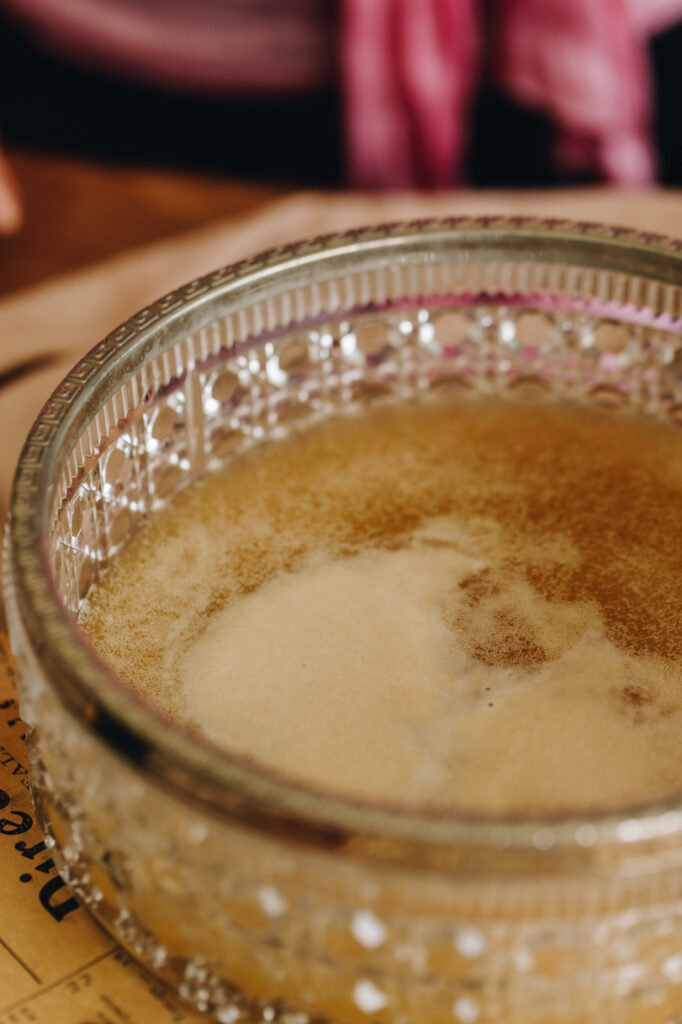
1. Activate the īhi (yeast):
Add the miraka (milk), wai wera (hot water) and sweetener in to a large bowl. Stir until the sweetener has dissolved. Sprinkle over the īhi horo (instant yeast) and stir it again with a whisk.
If you are using instant yeast, leave it for 5 minutes until the yeast has floated to the top.
If you are using surebake yeast, leave for 10 minutes until the yeast has floated to the top and is slightly floaty.
The īhi (yeast) has activated when it has floated to the top, like the picture shows.
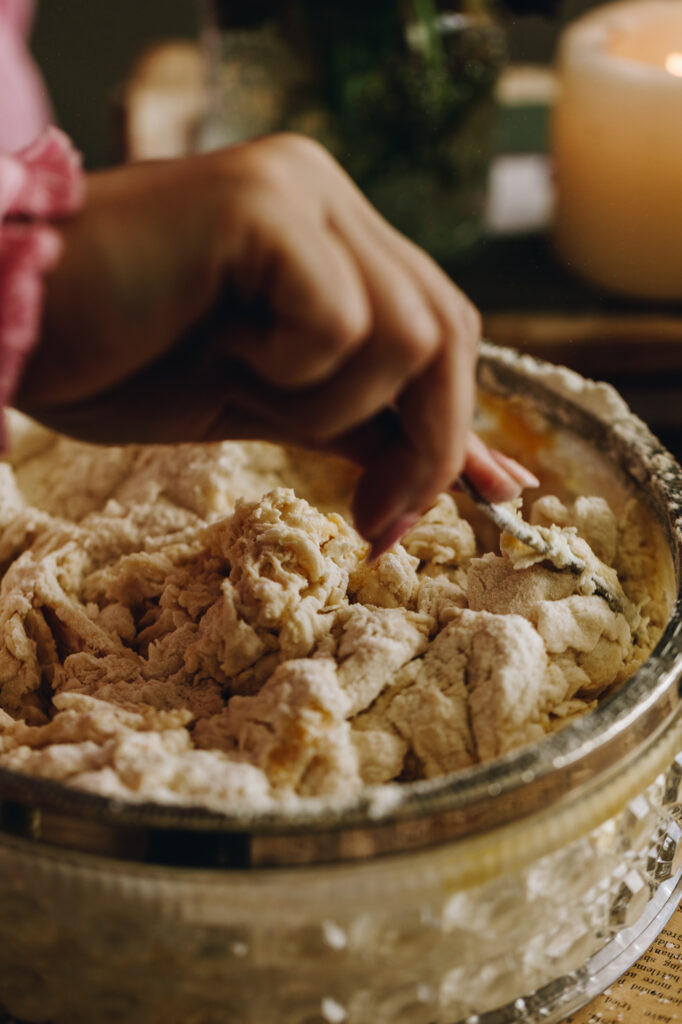
2. Combine the ingredients:
Add the puehu parāoa (flour), pata kua rewaina (melted butter) or noni (oil) and tote (salt) in to the yeast mixture.
Using a bread and butter knife, mix everything together until a rough dough forms.
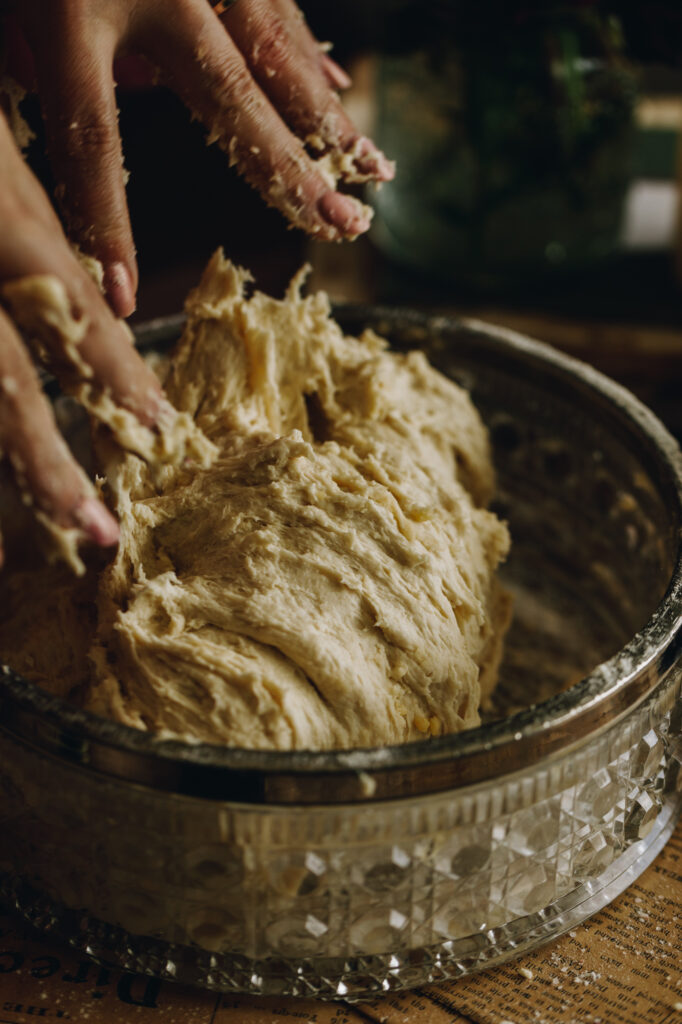
3. Knead the Light and Fluffy Fry Bread dough:
There are 3 options for activating the gluten in the dough. Choose which one you prefer:
Option 1 - Knead in a Stand Mixer:
Using the dough hook attachment, knead the dough on low to medium speed for 3-4 minutes in a stand mixer.
Option 2 - Knead it all by hand (prepare for sticky dough goodness).
Tip the dough on to a lightly floured bench and knead the dough by hand. Watch the video for reference as I use a slightly different style of kneading here.
If you are kneading it by hand, it will be sticky but try not to add extra flour.
Knead for 4 to 5 minutes until the dough is stretchy. You can also keep the dough in the bowl and knead it in the bowl if you prefer.
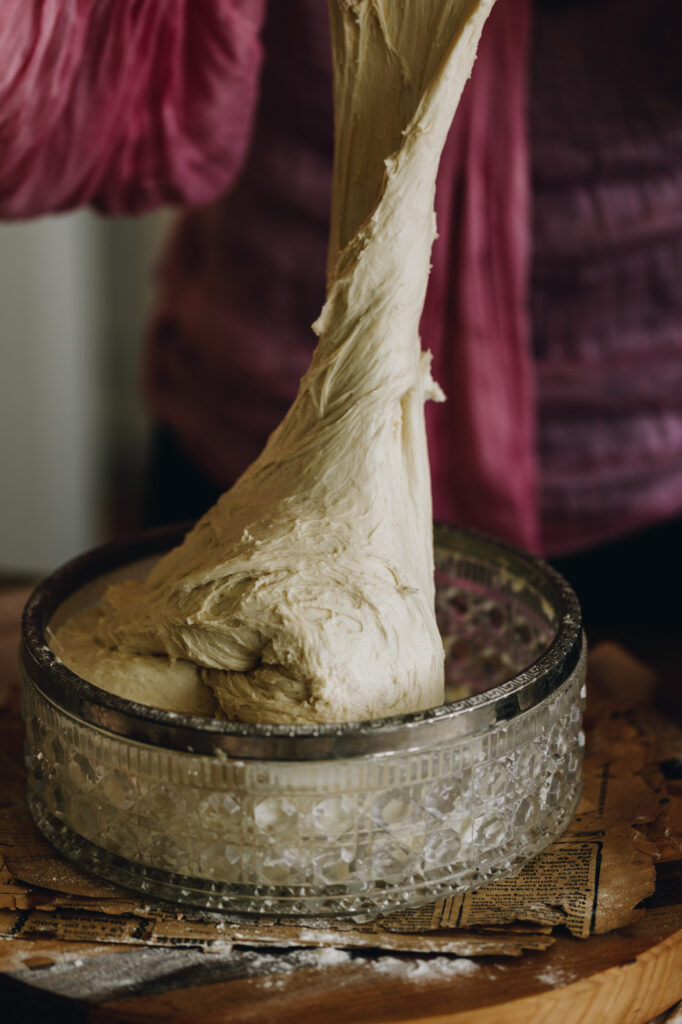
Option 3: Stretch and fold.
Stretch and fold the dough by pulling the dough from the side of the bowl, stretching it high in the air and then placing it in the centre. Turn the bowl a quarter turn and repeat that process 50 times.
This should take about 2 minutes. Reference the video for a visual aid.
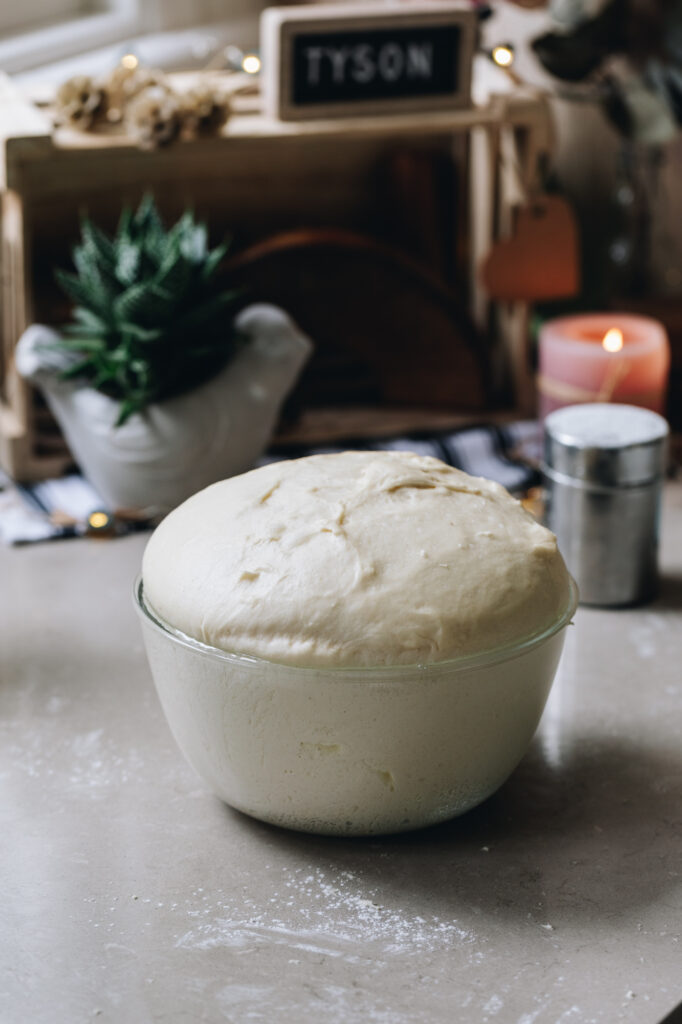
4. The First rise:
Once you have completed one of the methods above i.e, the kneading or stretch and folding, place the dough in a clean bowl.
Cover it with a tea towel and leave it in on the bench.
Allow the dough to rise for 60 minutes.
You don't want it in a super hot place or direct heat when the dough is rising as this may cause the yeast to over activate.
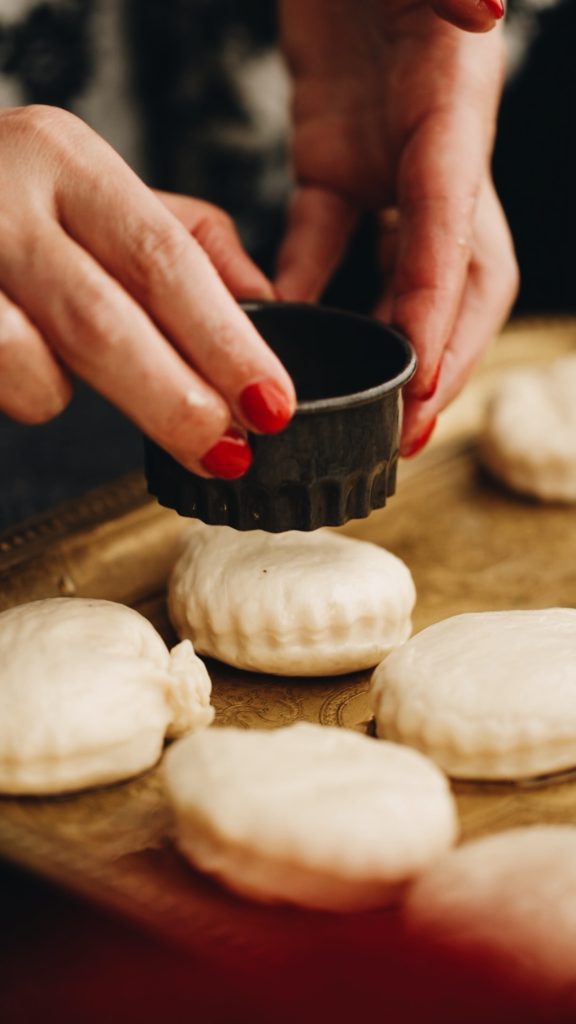
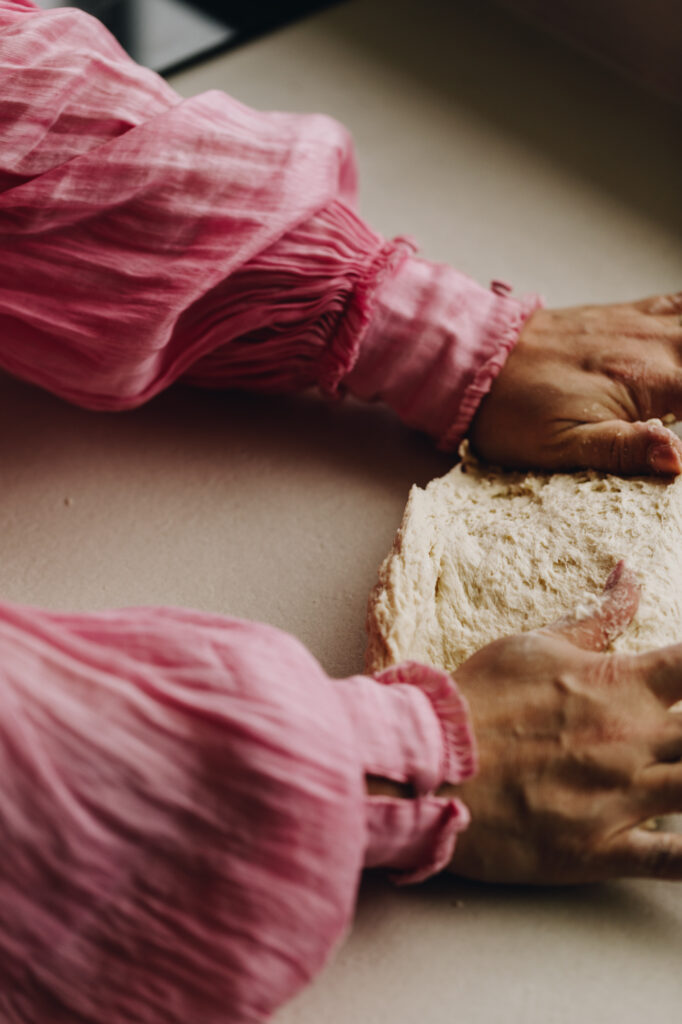
5. Shape the dough:
Lightly oil a bench and tip out the risen dough. Deflate any big bubbles with your hands and then press out the dough until it is 3 cm thick.
Cut the pokenga (dough) into squares or use a 8 cm cookie cutter to cut out 18 round shapes.
Mould any dough scraps back in to roughly 3 cm thick and cut them out, making sure you use all of the dough.
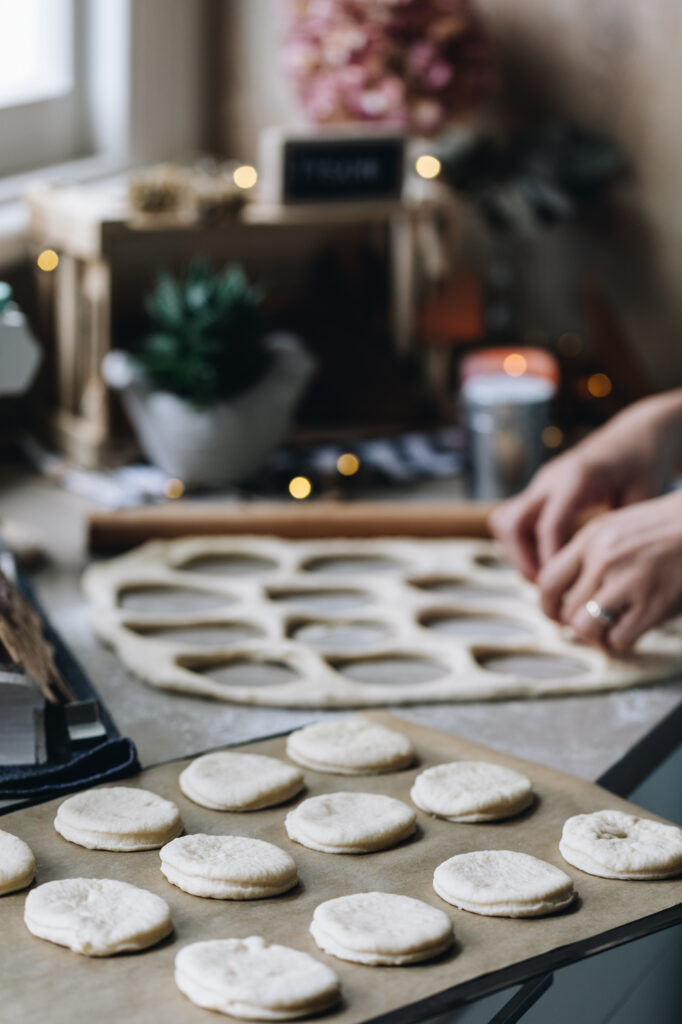
6. The Second Rise:
Spread out the cut pieces out on the bench with around 3 cm of space between each one to allow them to rise.
Rise them for 10 - 15 minutes in the summer months because the yeast tends to be a bit more active.
Leave to rise for 15 – 25 minutes in the colder months as the yeast is a bit slower to rise.
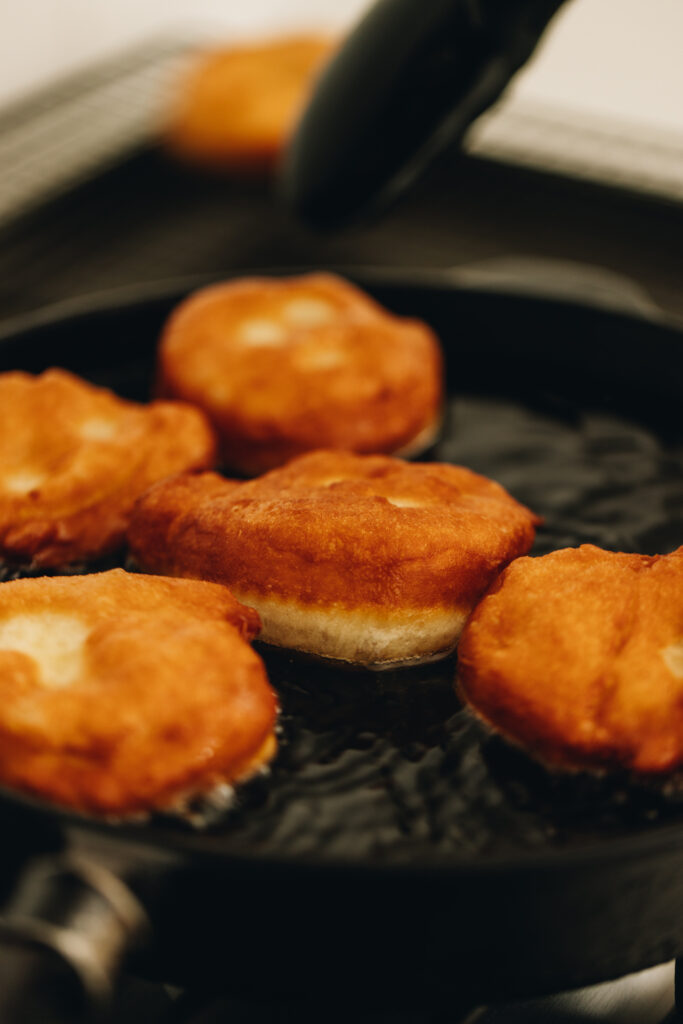
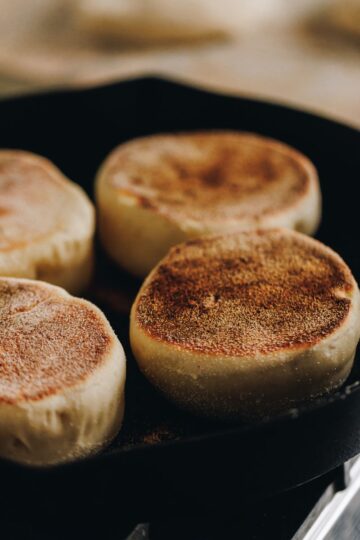
7. Fry the Light and Fluffy Fry Bread:
For frying tips, check the recipe card below.
5 minutes before the rising time is up, heat the noni (oil) to 165 °C.
Now add 3 - 5 parāoa parai (fry bread) at a time, frying for 2-3 minutes on each side.
Remove them from the noni (oil) and shake off any excess oil before place them on a cooling rack.
8. Eat the Light and Fluffy Fry Bread.
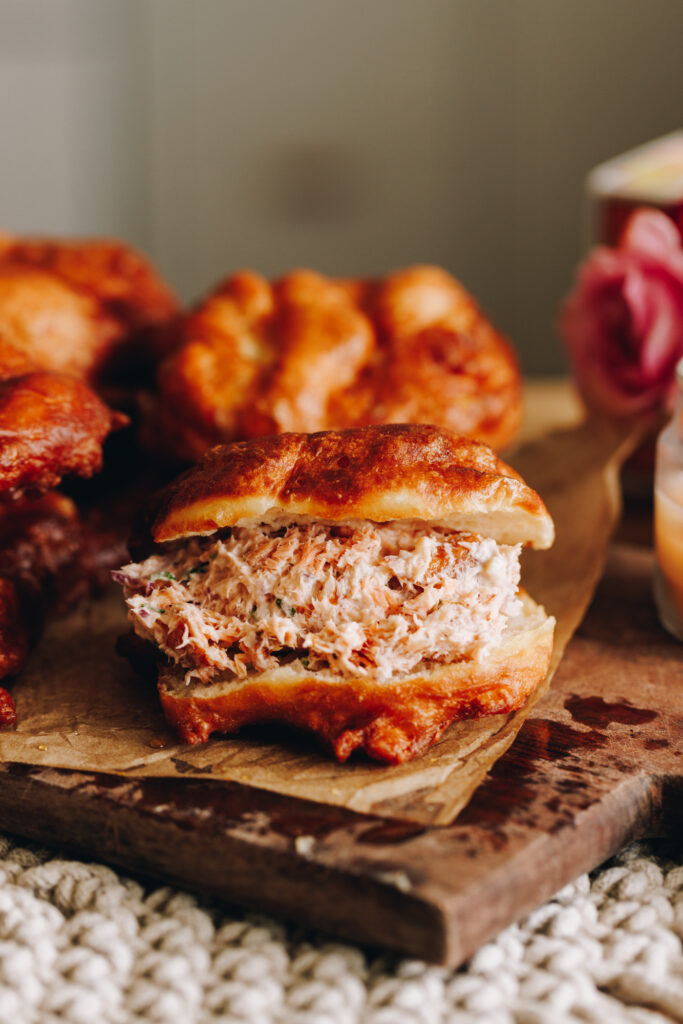
I love to eat these with hāmana (salmon), kirīmi tīhi (cream cheese), aniana whero (red onions) and a few greens.
However, many love them with pata (butter) and mīere kōura (golden syrup).
You can also roll them in cinnamon sugar like I do with my Chocolate Stuffed Fry Bread.
There are so many ways to enjoy these delicious morsels of fried goodness but they are always at their best when are they still warm and freshly fried.
Feel like more? Check out these
Bread Recipes
Fill your kainga (home) with the fragrance of homemade bread.

DID YOU ENJOY THIS RECIPE?
It would be so awesome if you could please leave a review/comment by clicking the “leave a comment” section at the top of the page.
I love seeing you all make my creations, so send a whakaahua (photo) or kiriata (video) to my Instagram and show me what you made. Let me know if you have any pātai (questions) too, I would love to help.

Light and Fluffy Fry Bread - Parāoa Parai
Equipment
- 1 x Cast iron pan, heavy based pot or a deep fryer
- 1 x Thermometer (is helpful but not essential)
Ingredients
The Dough - Te Pokenga
- ½ C (125 ml) miraka (milk)
- 1 C (250 ml) wai wera (hot water, from the tap)
- 2 tablespoon huka (sugar, either brown or white) This can also be swapped for maple syrup or honey.
- 2 teaspoon (6 g) īhi horo (instant yeast or 4 teaspoon (12 g) of Surebake/Breadmakers yeast)
- 3 ⅓ C (500 g) puehu parāoa kounga (high grade flour)
- 30 g pata kua rewaina (melted butter, cooled slightly). This can be swapped for the same amount of oil.
- 1 ½ tsp tote (salt, fine). I use Himalayan salt here, if you are using iodised table salt, half this amount.
- 1 L noni (oil, rice bran or something similar)
Instructions
Activate the Yeast:
- Add the miraka (milk), wai wera (hot water) and sweetener in to a large bowl. Stir until the sweetener has dissolved.
- Sprinkle over the īhi horo (instant yeast) and stir it with a whisk until it is all mixed in.
- If you are using instant yeast, leave it for 5 minutes until the yeast has floated to the top. If you are using surebake yeast, leave for 10 minutes until the yeast has floated to the top and is slightly floaty.
Combine the Ingredients:
- Add the puehu parāoa (flour), pata kua rewaina (melted butter) and tote (salt). Using a bread and butter knife, mix everything together until a rough dough forms.
Knead the Dough - 3 options to choose from.
- There are three options for kneading the dough so choose which one you prefer. The main goal is to not add extra flour to the dough to keep it light. So choose the option that will help you achieve that.
Option 1: Knead in a Stand Mixer
- Using the dough hook attachment, knead the dough on low - medium speed for 3-4 minutes.
Option 2: Knead by hand (prepare for sticky dough goodness)
- Tip the dough on to a lightly floured bench. Watch the video for reference as I use a slightly different style of kneading here. If you are kneading it by hand, it will be sticky but try not to add extra flour. Knead for 4-5 minutes. You can also keep the dough in the bowl and knead it in the bowl if you prefer.
Option 3: Stretch and fold.
- Stretch and fold the dough by pulling the dough from the side of the bowl, stretching it high in the air and then placing it in the centre. Turn the bowl a quarter turn and repeat that process 50 times.This should take about 2 minutes. Reference the video for a visual aid.
The First Rise:
- Once you have completed one of the methods above i.e, the kneading or stretch and folding, place the dough in a clean bowl. Cover with a tea towel and leave it in on the bench. Note: You don't want it in a super hot place or direct heat or the yeast will over activate and weird things can happen.
- Rise for 60 minutes.
Shape the dough:
- Lightly oil a bench and tip out the risen dough. Deflate any big bubbles with your hands and then press out the dough until it is 3 cm thick.
- Cut the pokenga (dough) into squares or use a 8 cm cookie cutter to cut out 18 round shapes. Mould any dough scraps back in to roughly 3 cm thick and cut them out, making sure you use all of the dough.
The Second Rise:
- Spread out the cut pieces out on the bench with around 3 cm of space between each one to allow them to rise. Rise them for 10 -15 minutes in the summer months because the yeast tends to be a bit more active. Rise them for 15 – 25 minutes in the colder months as the yeast seems to be a bit slower.
Frying Tips:
- I prefer a cast iron pan here as it retains the heat in an even way but use what you have an adjust as you go.
- If the oil starts over heating, remove from the heat for a minute or so to bring the heat down. If you don't have a thermometer, eye ball it. Test the oil with a wooden spoon. Place the handle in the oil and when rapid bubbles appear around it, it is ready. As a guide, if one side of the fry bread browns before a minute of being in the oil, it is too hot and may result in the middle being under cooked.
- My stove top has the highest heat of 9, I heat the oil on number 7 and turn it up or down according to how hot the oil seems.
Fry the Light and Fluffy Fry Bread:
- 5 minutes before the rising time is up, heat the noni (oil) to 165 °C.
- Test one piece of the risen fry bread to gauge if your oil is at the right point. If the tester fries well for 2 minutes on each side, the oil is ready. If not, give the oil a couple more minutes to heat up.
- Now add 3 - 5 parāoa parai (fry bread) at a time, frying for 2-3 minutes on each side.
- Remove them from the noni (oil) and shake off any excess oil before place them on a cooling rack.
Eat and Enjoy:
- Eat them as you wish and let me know how you enjoy eating them!I love them with hāmana (salmon), kirīmi tīhi (cream cheese), aniana whero (red onions) and a few greens.
Video
Expert Tips:
Activating Yeast:
Always give the yeast enough time to activate before adding the dry ingredients. The yeast will float to the top and it will be slightly foamy when it is ready.
Kneading the Dough:
Activating the gluten in this parāoa parai (fry bread) dough is what will make the dough light and fluffy once it is fried. I have given you three options to achieve this so however you tackle it. All of them work and as long as the dough is being stretched and pulled in some way, it will work.
If you are using hand kneading technique, take the time to watch the video first as it is somewhat different to how I usually knead. This is again due to the amount of liquid in the dough but it super fun to do, embrace the sticky goodness.
Adding extra flour:
Do not add more flour to the dough. I know this is tempting but when the dough is higher in hydration (has more liquid in it), the final product will be light and crispy.
Cooking with Oil:
Heat the noni (oil) to 165 °C before frying. If you don't have a thermometer, test the oil with a wooden spoon. Place the handle in the oil and when bubbles rapid bubbles appear around it, it is ready.
If the oil starts over heating, remove from the heat for a minute or so to bring the heat down.
As a guide, if one side of the fry bread browns before one minute of being in the oil, it is too hot and may result in the middle being under cooked. Watch it carefully and adjust as you go.
Different Variations to try:
Sweet version:
Serve with pata (butter), mīere (honey), or mīere kōura (golden syrup). I also have this delicious Chocolate Stuffed Fry Bread version too. It is so delicious.
Savoury version:
Top with kirīmi tīhi (cream cheese), hāmana (salmon, I prefer smoked), aniana whero (red onion) and a squeeze of wai rēmana (lemon juice). They are also perfect as a side dish to your favourite hupa (soups) and chowders.
Extra fluffy version:
Let dough rest slightly longer, for around 10 - 15 minutes extra before frying.
Storage Tips:
It is always, always going to be best served warm, freshly fried and in to your hot little hands. However you can cool them down, wrap them in a tea towel and store them in a container for a day or so. Warm them up in an oven or air fryer to bring the dough back to life.
Frequently Asked Questions:
This can be for a number of reasons. The first one is adding extra puehu parāoa (flour) in to the recipe, the more you add, the denser it will be. Try following the measurements exactly and I promise they won't be dense. Also, make sure the rising time is stuck to unless it is cold in your kitchen. If so, increase the rising times by 10 - 15 minutes to boost the rising of the dough.
I prefer to use Rice Bran oil but any neutral flavoured oil will work well.
Āe (yes), feel free to swap the miraka (milk) for a third of a cup of wai aromahana (lukewarm water).

Tess
So yum!! Just made these, so delicious and a very easy to follow recipe! Kids inhaled them hot with butter! Going to try your coconut buns next 😋 thankyou!
Naomi Toilalo WhānauKai
Tess, that makes me so happy! How good are they and yay, I just know you will love the Pani Popo too!
Shell
Kia ora, Tino reka 😋
Naomi Toilalo WhānauKai
Woo hoo - ka rawe e hoa.
Ka nui te mihi ki a koe i tēnei arotakenga (thank so much for this review).
Naomi
Carl Wright
Best recipe I've come across. They're awsome!
Naomi Toilalo WhānauKai
Wow - what an amazing review Carl, thank you so much!
Āku mihi, Naomi
Miranda Shackell
Amazing golden fluffy pillows of deliciousness 🙌
Naomi Toilalo WhānauKai
I couldn't have come up with a better way to describe them if I tried! Thanks so much Miranda!
Taryn Jasmin Patrix
This is an amazing recipe ! Being south african it reminds us of Vetkoek but brings a little of our New Zealand journey to our home too.
Taryn Jasmin Patrix
This is an amazing recipe ! Being south african it reminds us of Vetkoek but brings a little of our New Zealand journey to our home too.
Naomi Toilalo WhānauKai
That is so beautiful. Yes, so many cultures have their own version of fry bread and different techniques aye, that is so cool. So glad you enjoyed this version too.
Ruta
This recipe is so easy to follow and the bread came out so beautifully. My husband and I enjoyed them with jam after dinner. Thank you so much Naomi for this recipe, the best Maori bread I've ever tasted ****
Naomi Toilalo WhānauKai
Kia ora - wow, that is such an amazing review to read, thank you much Ruta! With jam sounds perfect. So glad you and your hubby enjoyed them!
Tarnz Natana-Weller
Kia ora e hoa, I'm not a great baker! In fact, everything I make is either burn't, hard, and flat. I thought I'd give your recipe a go much to the displeasure of my whānau who are usually the taste testers to my disasters. Far out, you made me a rock star in the kitchen : ) I've been asked to make more today. Thank you for your easy to follow recipe and the video too!
Naomi Toilalo WhānauKai
Kia ora Tarnz, wow this is the coolest feedback. I am so glad that this recipe was a hit with all your whānau and you were a rockstar in the kitchen. That is so epic. Ngā mihi nui, Naomi
Teneil
What a beautiful beautiful dough this was to work with. The result? The fluffiest softest frybread I’ve ever made. I will continue to use this recipe for the rest of my life lol I sound dramatic but it’s that good. Last night I made another batch and used a smaller cookie cutter and added half a teaspoon of choc chips to the centre and rolled them up. Tossed in icing sugar after the fry and they were delicious. Thankyou for this.
Naomi Toilalo WhānauKai
Tēnā koe Teneil, what a fantastic review to read. That is so awesome to hear how much you loved it and I love your remix of the recipe too. Ngā mihi, Naomi
Tere
Pretty neat recipe! My cuzzie keeps bragging about his fried bread being unbeatable 🤦♂️ I'll give yours a try and will hopefully shut him up 😂
For a snack I just eat it with butter strawberry jam or golden syrup with a hot mug of tea, if I'm feeling especially cheffy and connoisseurish, I'll make some raw fish, palusami or a hot beef stew 🍲
Bookmarked!
Thanks for sharing.
Naomi Toilalo WhānauKai
Ha ha love this - the fry bread recipes are always in contention aye. So stoked you enjoyed this one and I love all the combinations you have - they all sounds delicious.
Kae
Ataahua kai! First time making fry bread and wow. Made them with a little white sugar and a swirl of maple syrup. Doubled the recipe and they're all gone! We used to have jam on them always. These ones - just cut open and popped on some butter. Pure heaven.
Naomi Toilalo WhānauKai
Yessss Kate - yummmm? I feel like fry bread now! Thanks for the feedback!
Genz Roberts
Tried a couple weeks ago and after how many failed attempts my whanau love them so il be doing some more tonight for us Thankyou ❤️🙏
Naomi Toilalo WhānauKai
This is amazing thanks so much for the amazing review.
So glad that you and your whānau love them, that makes me so happy.