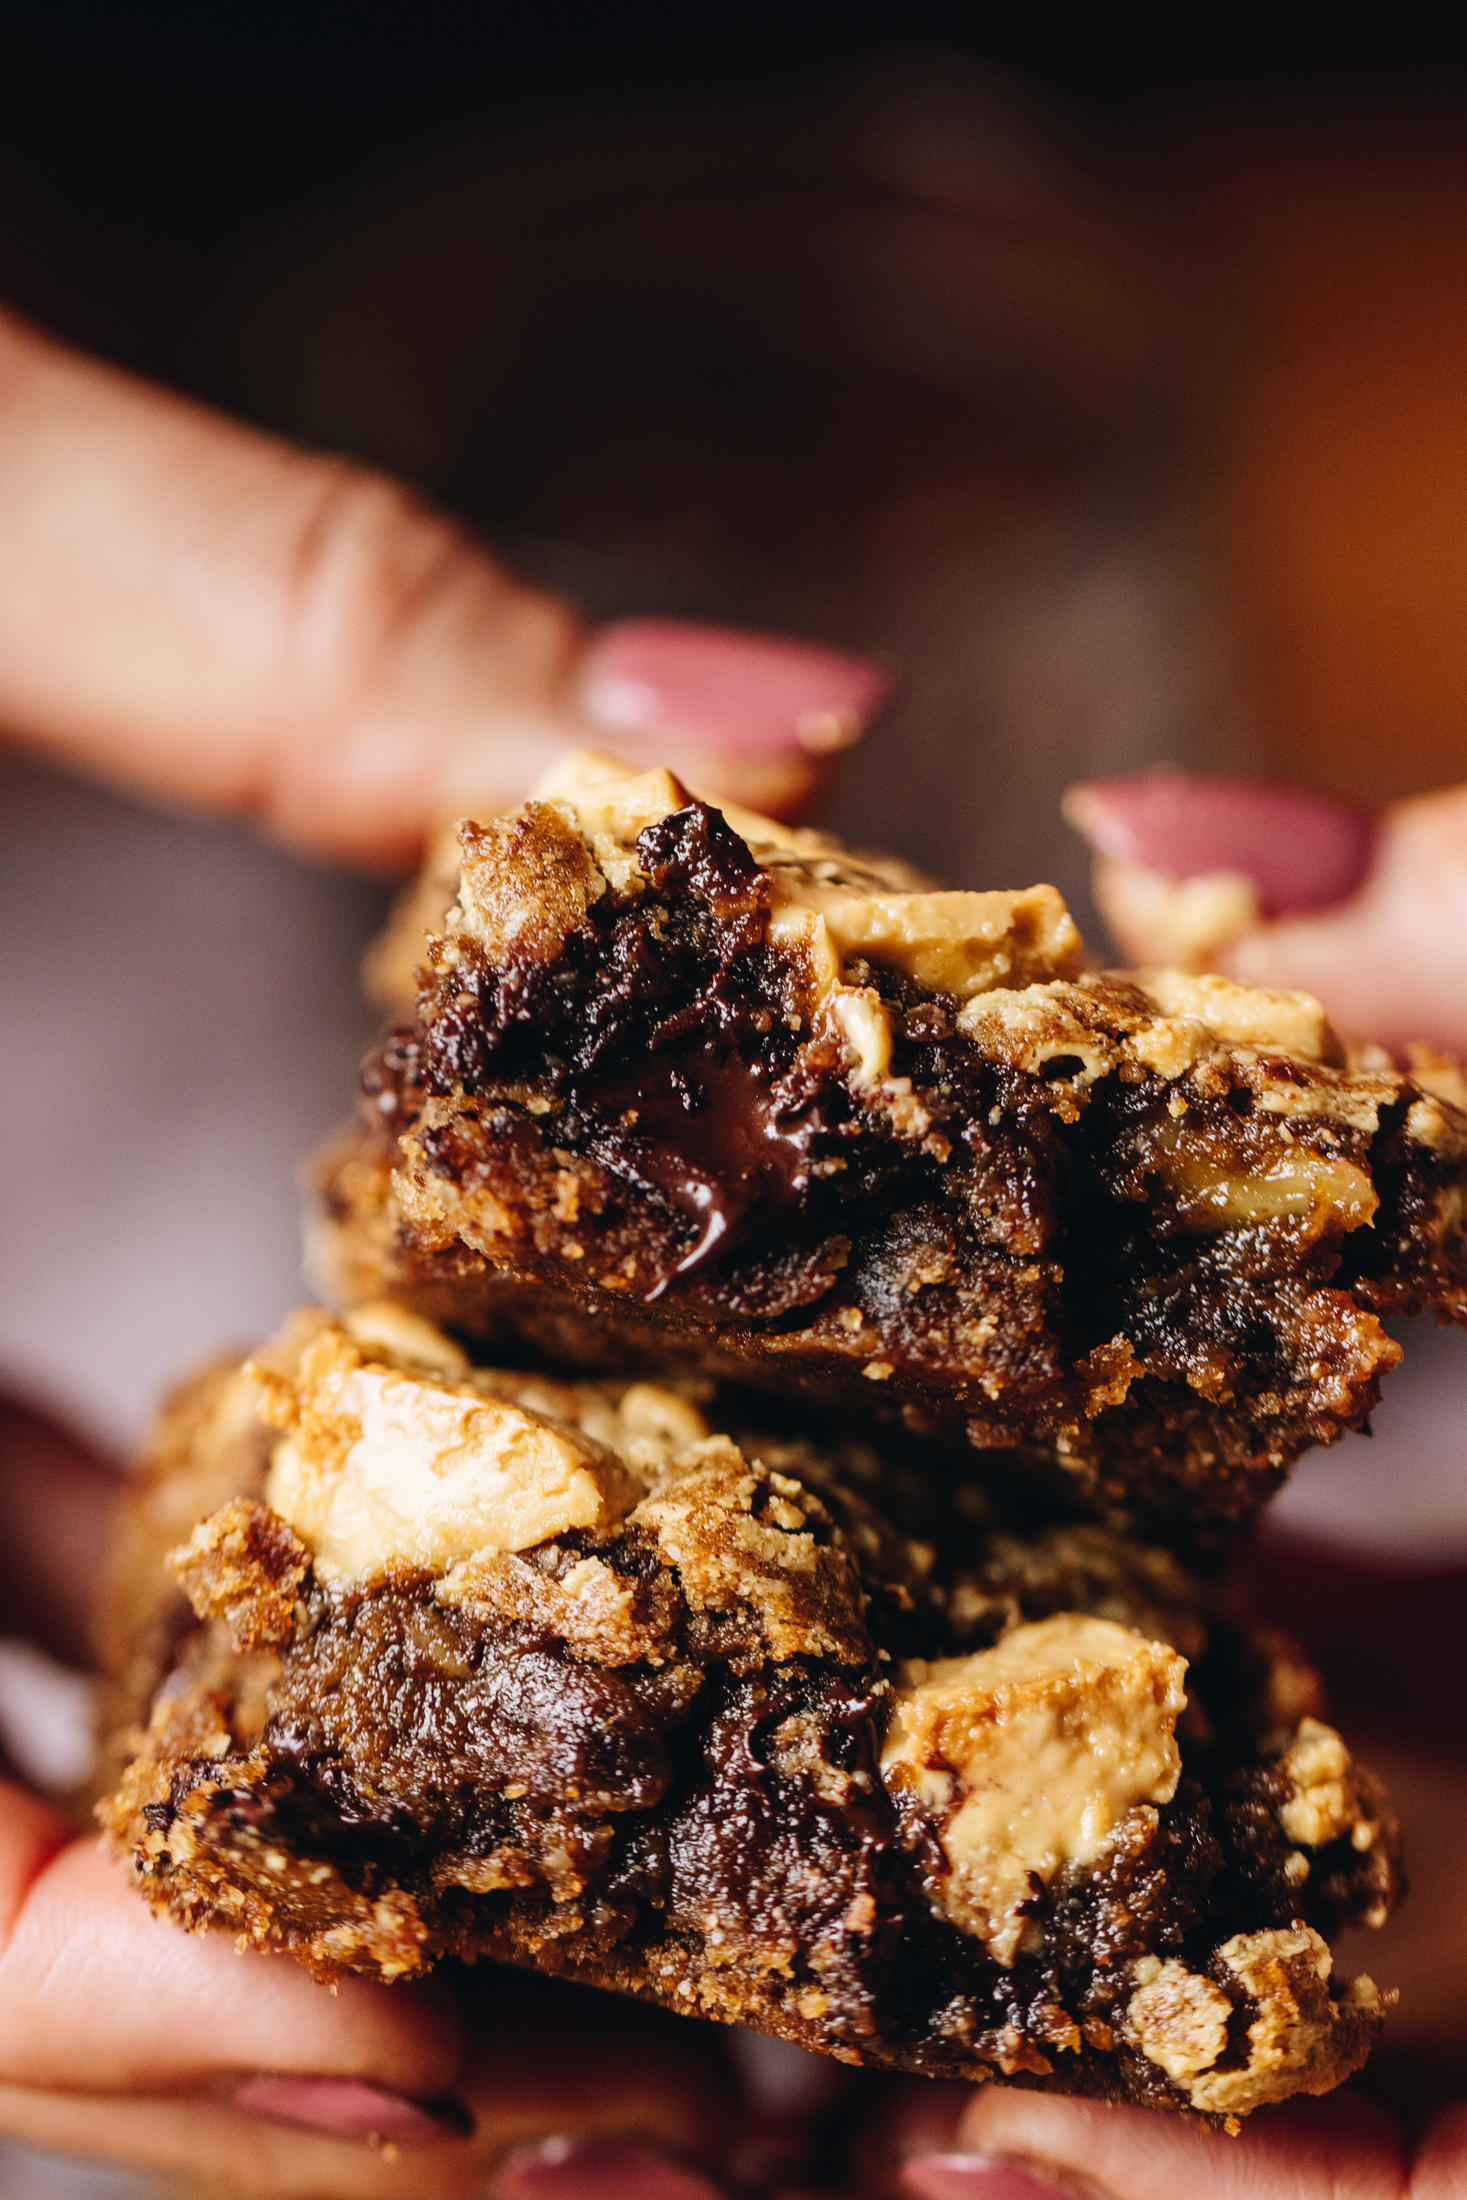
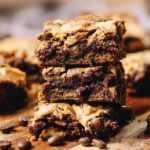
These fudgy coffee chocolate chunk blondies with walnuts are rich and are packed with delicious layers of flavour. Filled with chunks of dark and white chocolate and lightly scented with coffee, they are simple to make and come together in no time at all. Use your favourite chocolate for an easy twist on the recipe — let’s get baking!
Why you will love these Coffee Chocolate Chunk Blondies:
This recipe is everything I love about baking — gooey tiakarete (chocolate), crunchy wōnati (walnuts), and a coffee-scented batter. It combines sweet and savoury notes in every bite for the most delicious flavour combination. I love to eat it warm or top it with my Brown Butter Buttercream Frosting.
When I say this recipe has been tested many times, I am not exaggerating! But every batch was worth it because I know you are going to love these fudgy blondies as much as I do. Let me know if you make them!
More delicious slices to try:
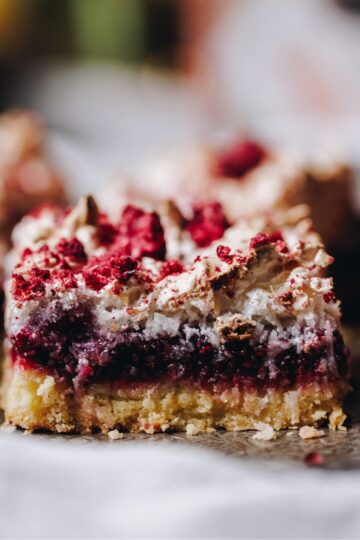
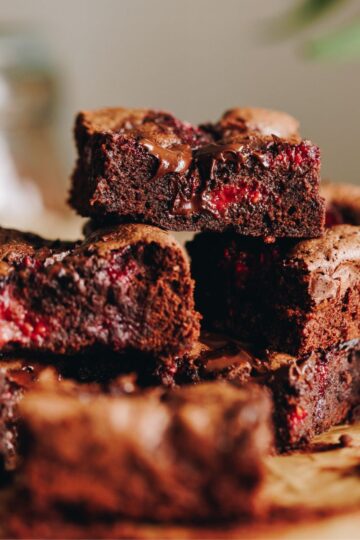
If you love gooey chocolate slices, then you need to try my Chocolate and Raspberry Brownie or its fancy cousin, Chocolate Raspberry Brownie with Marshmallow.
Prefer no-bake slices instead? Then this Peanut Butter Weetbix Slice or Peanut Butter Rice Bubble Slice will be perfect for you.
Videography and photography by Sarah Henderson.
Ingredients:
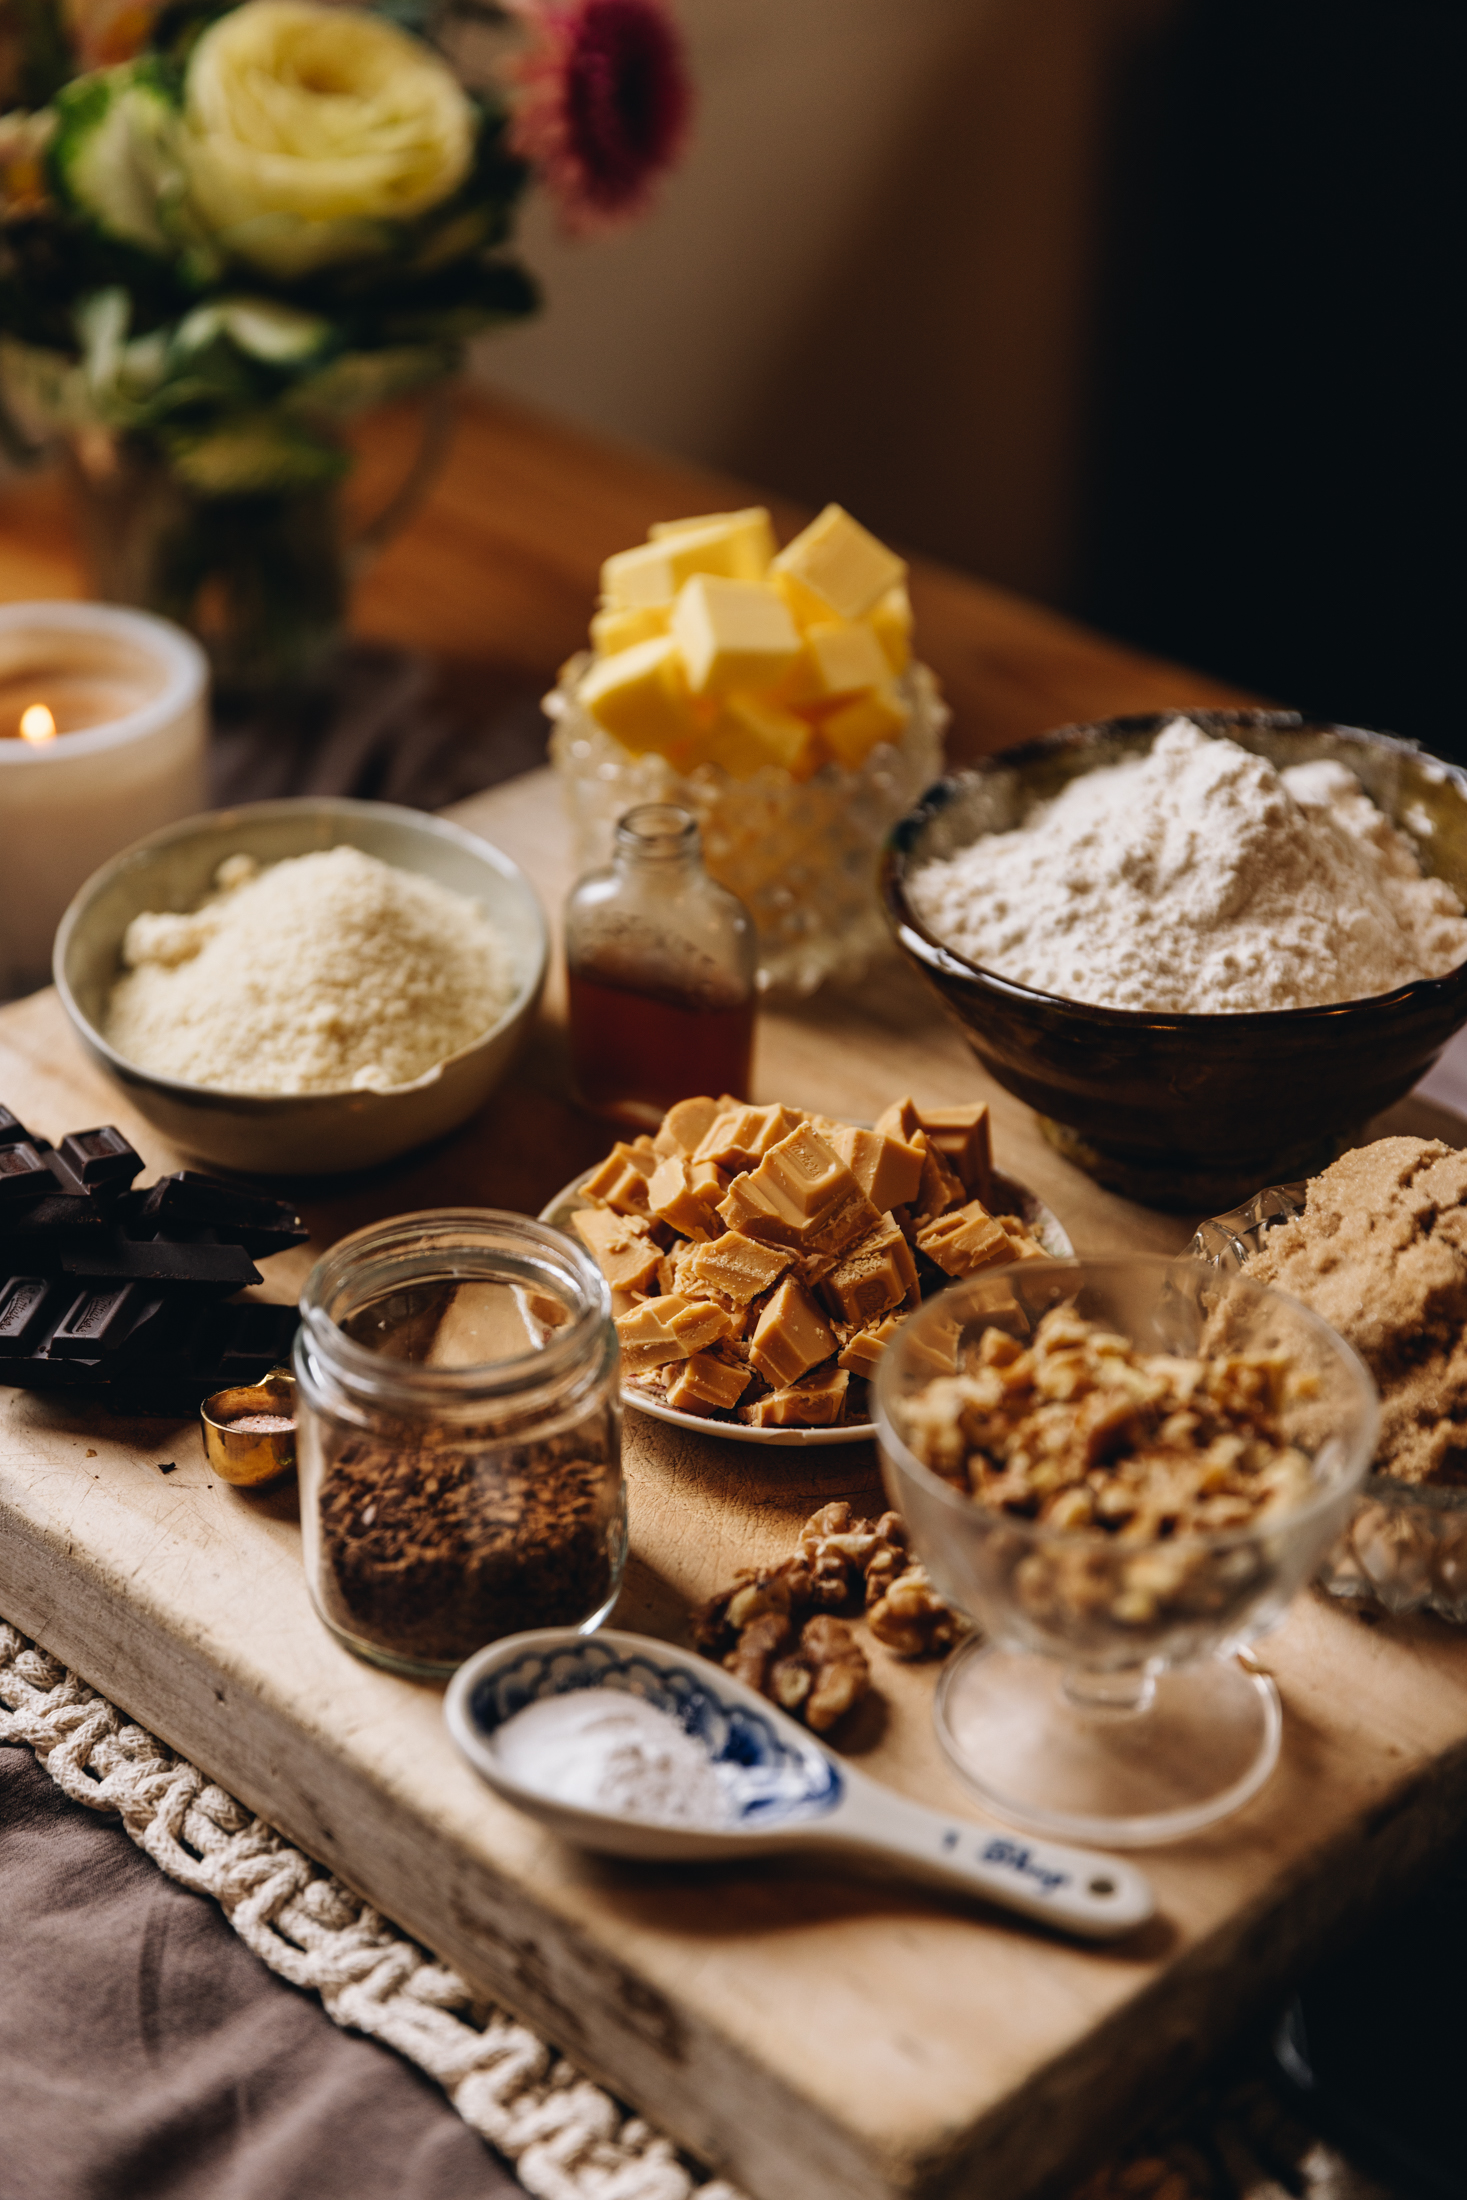
- Butter: Use salted or unsalted pata (butter) in this recipe, I prefer salted.
- Walnuts: Wōnati (walnuts) compliment coffee perfectly but they can be swapped for pecan nuts or omitted all together.
- Brown sugar: Huka hāura (brown sugar) is best for its caramel flavour in the blondie.
- Coffee: Use a good quality paura kawhe (coffee powder) or espresso in this blondie. I prefer the flavour of espresso but the coffee powder works too.
- Chocolate: I use a mixture of dark and caramelised white chocolate but choose what chocolate you prefer.
How to make this delicious Coffee Blondie:
Note: The full recipe card with the full list of ingredients, instructions and step by step video are found at the bottom of this page.
1. Preheat the Oven:
Preheat the oven to 170 °C bake setting or 160 °C fan bake setting.
Grease a 20 cm x 20 cm tin with high sides with butter.
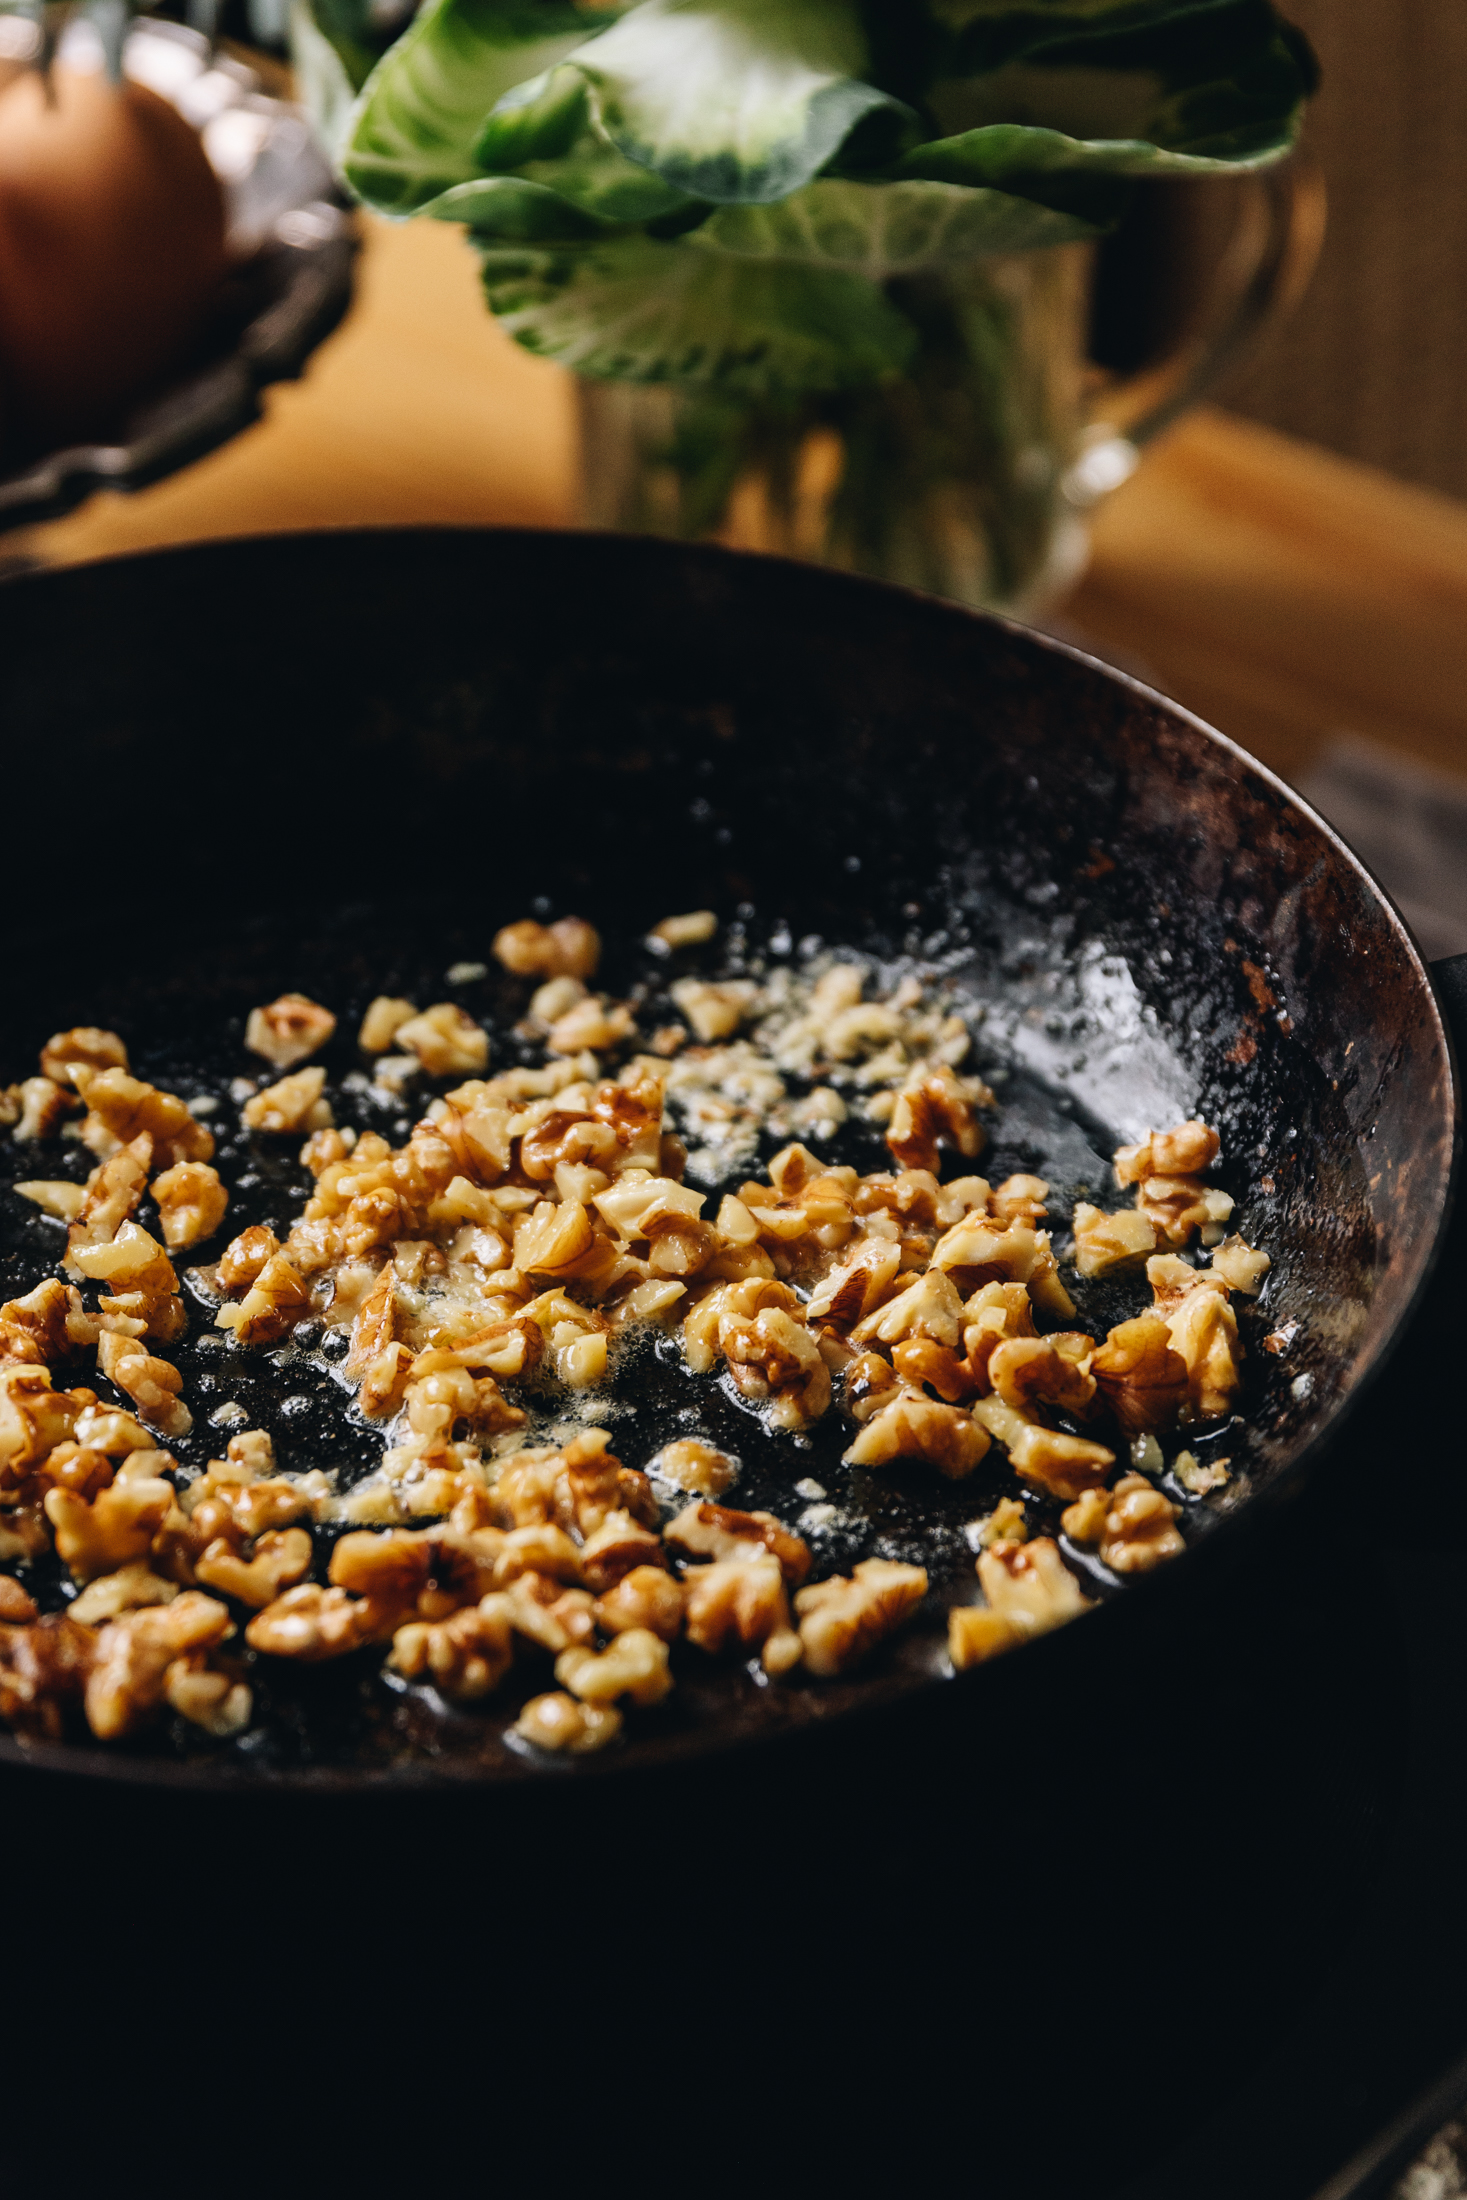
2. Toast the Walnuts:
If you want a deep toasty flavour in the blondie, toast the wōnati (walnuts). Skip this step if you are not bothered.
Add the wōnati (walnuts) to a dry pan and gently toast over low - medium for a few minutes until golden and fragrant. Tip them on to a small plate to cool.
3. Mix the Butter and Eggs:
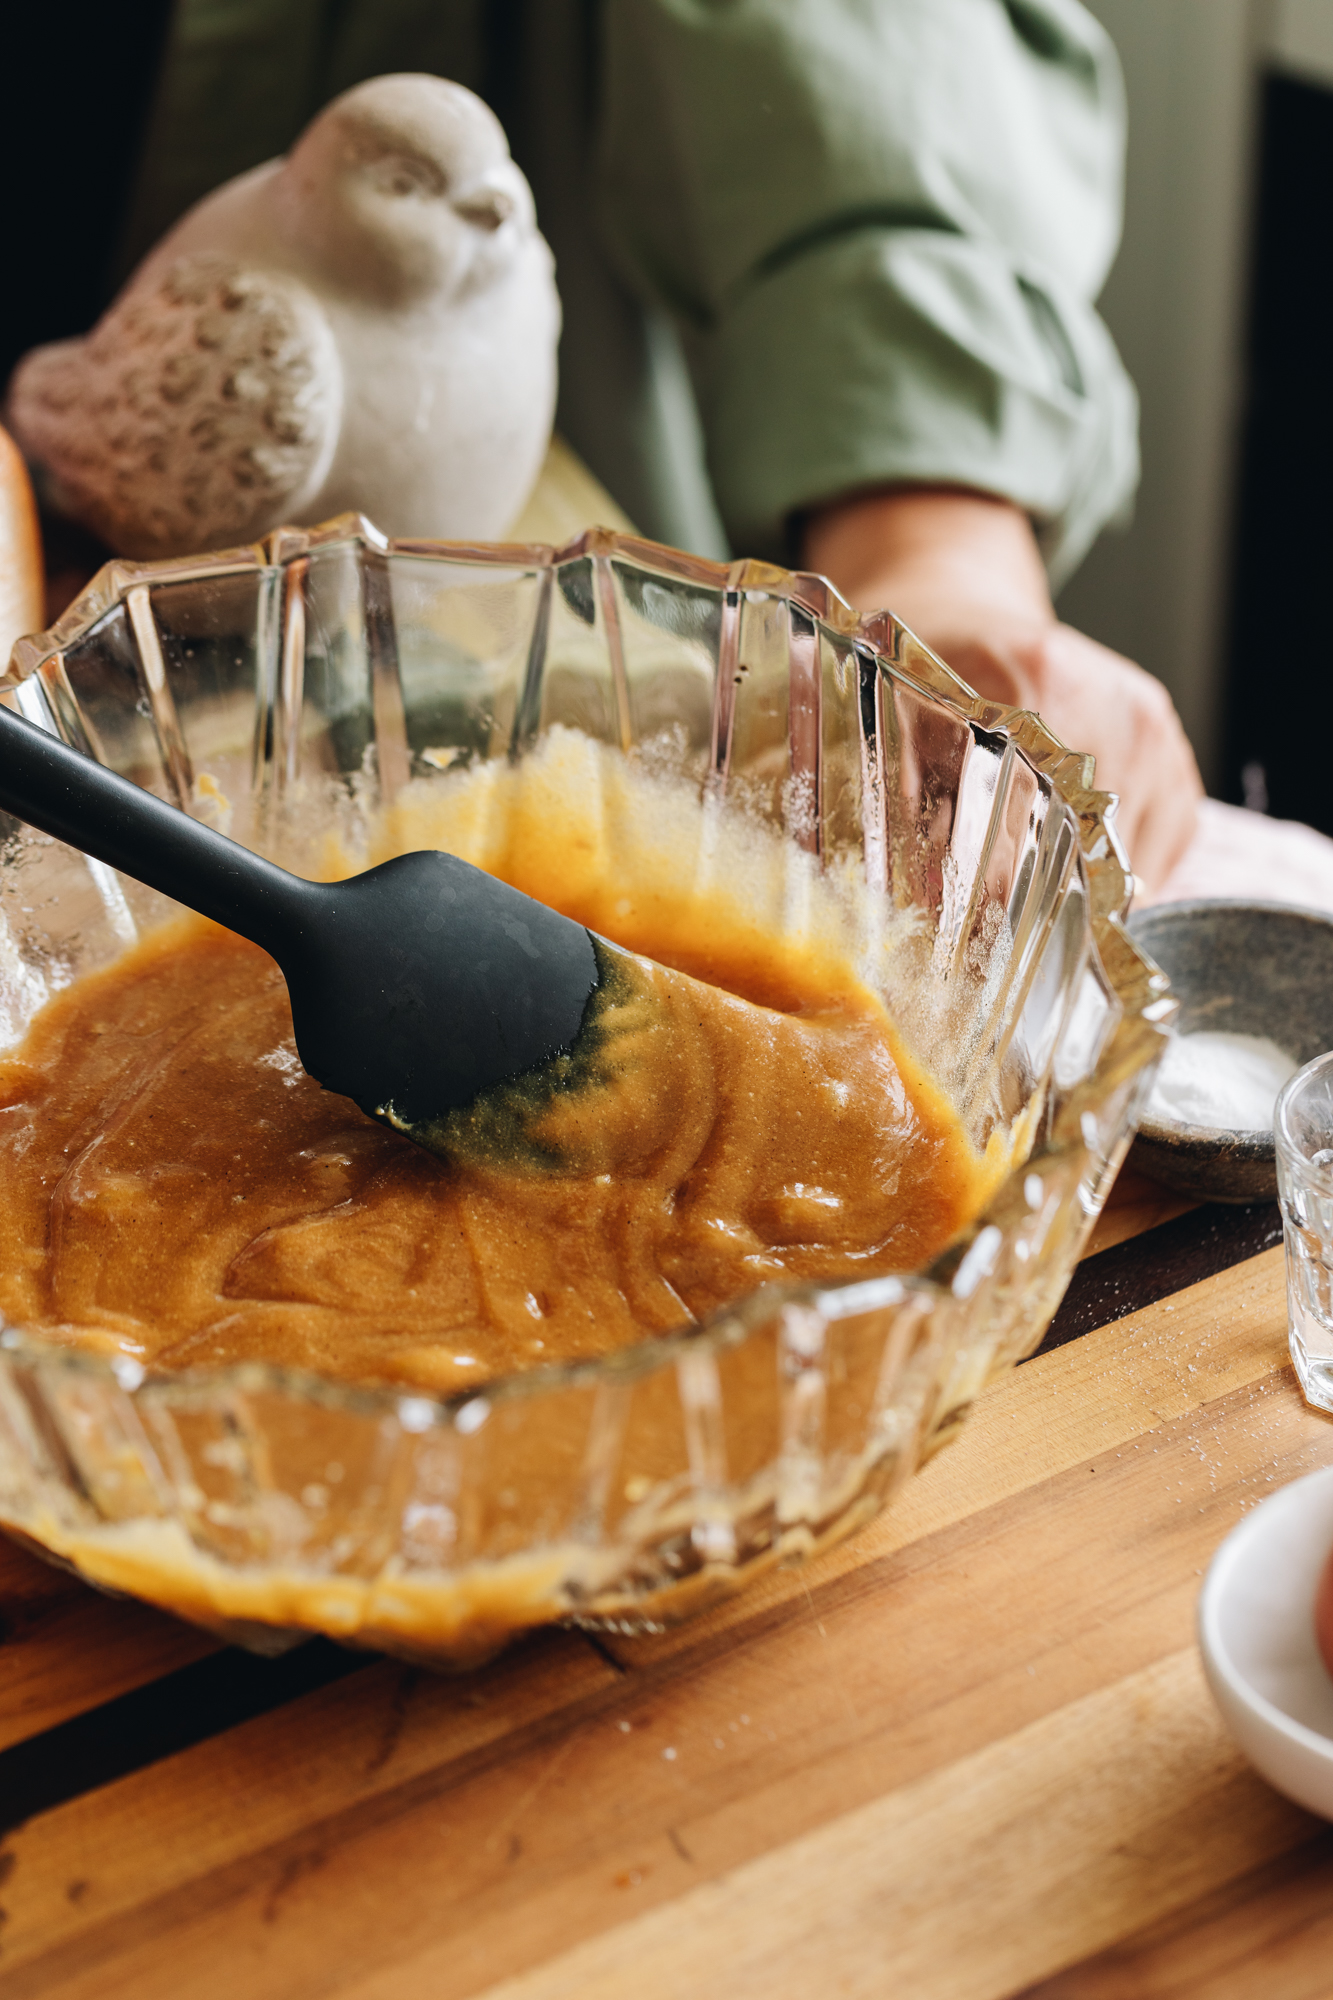
Add all of the pata (butter) to the pan used to toast the walnuts. Gently melt it and remove from the heat.
Pour the pata kua rewaina (melted butter) in to a medium sized bowl. Add the huka hāura (brown sugar) and tote (salt) in to the pata (butter). Koheria kia māene (whisk it until smooth).
If you can't hold your finger in the mixture, leave it to cool for 5 minutes.
Add both of the hēki (eggs) and stir until just combined with a whisk, for 10 - 15 seconds. Do not over-whip the hēki (eggs) at this point as too much air in the batter can lead to a cakey blondie.
4. Add the Dry Ingredients:
Add in the puehu parāoa (flour), pēkana paura (baking powder) and hinamona (cinnamon).
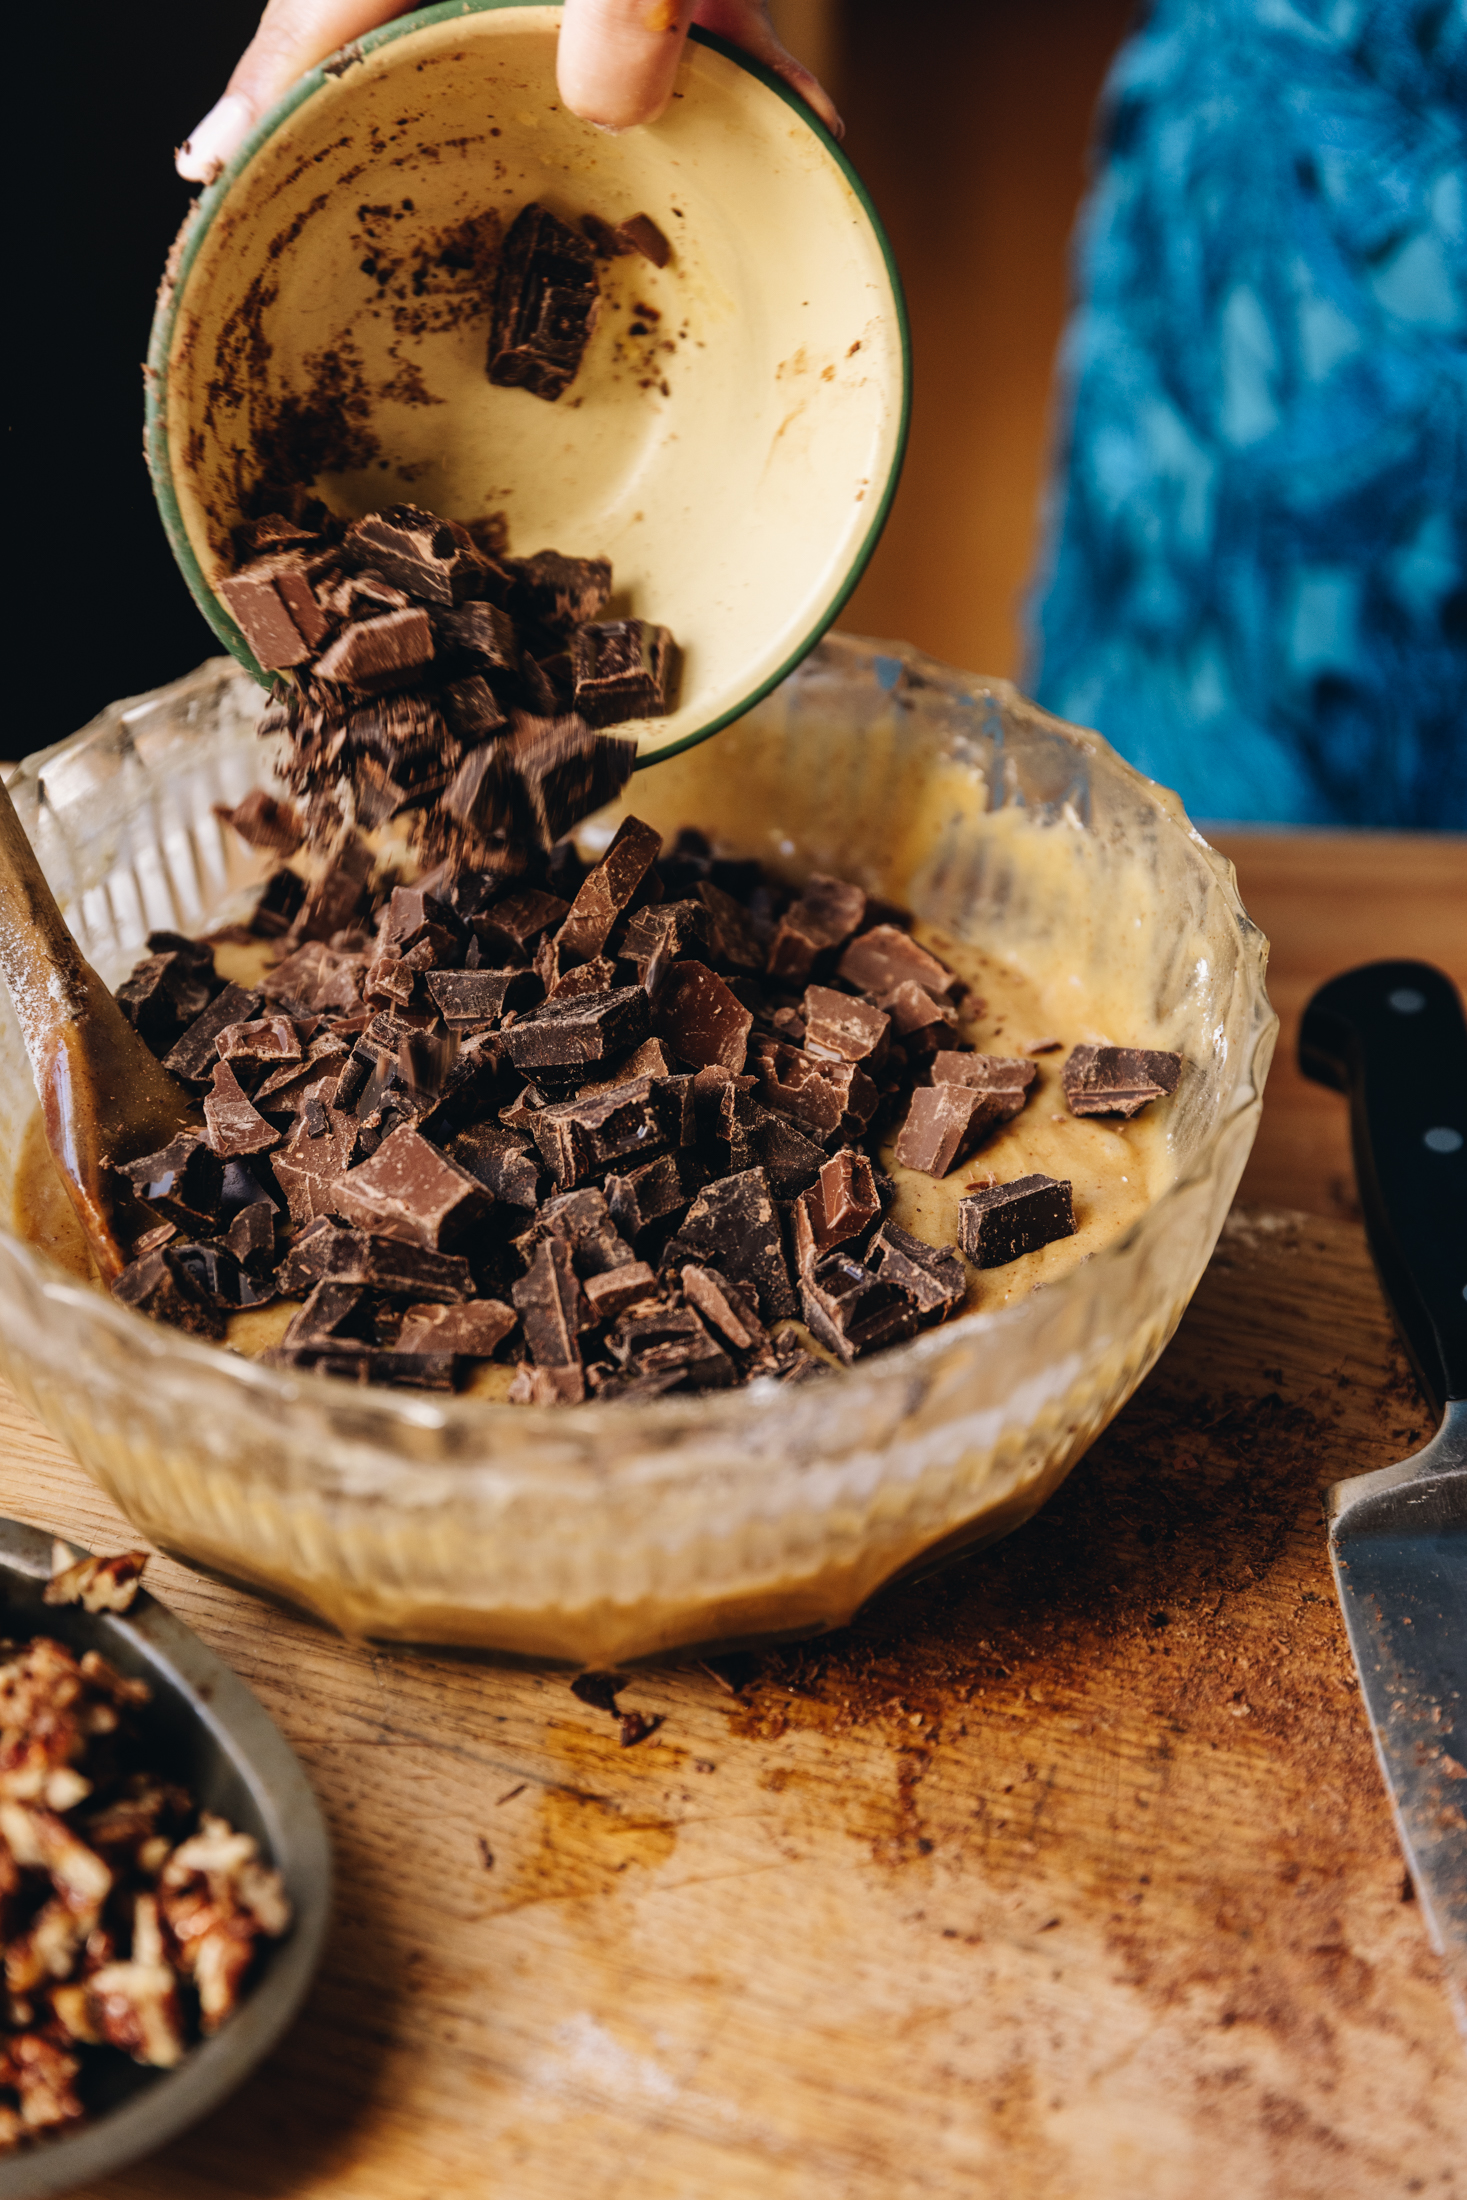
Dissolve the paura kawhe (coffee powder) in to the wai wera (hot water) or make the espresso. Add it to the dry ingredients along with wanira (vanilla), chopped tiakarete parauri (dark chocolate) and cooled wōnati (walnuts).
Gently fold it all together with a spatula just until the mixture is combined. It is better to under mix than over mix at this point.

5. Bake the Coffee Chocolate Blondie:
Pour the batter in to the lined tin and top with the tiakarete mā (white chocolate).
Bake for 23 minutes, rotating the tin halfway through for an even bake.
After 23 minutes, check the blondie — it should be just slightly soft to the touch in the centre but not overly wet or gooey.
If it’s still very underbaked, return it to the oven, switch the heat off, and leave it inside with the door closed for a further 5 minutes before checking again. This gentle finish helps it set without over-baking.
6. Serve the Coffee Blondie Warm:
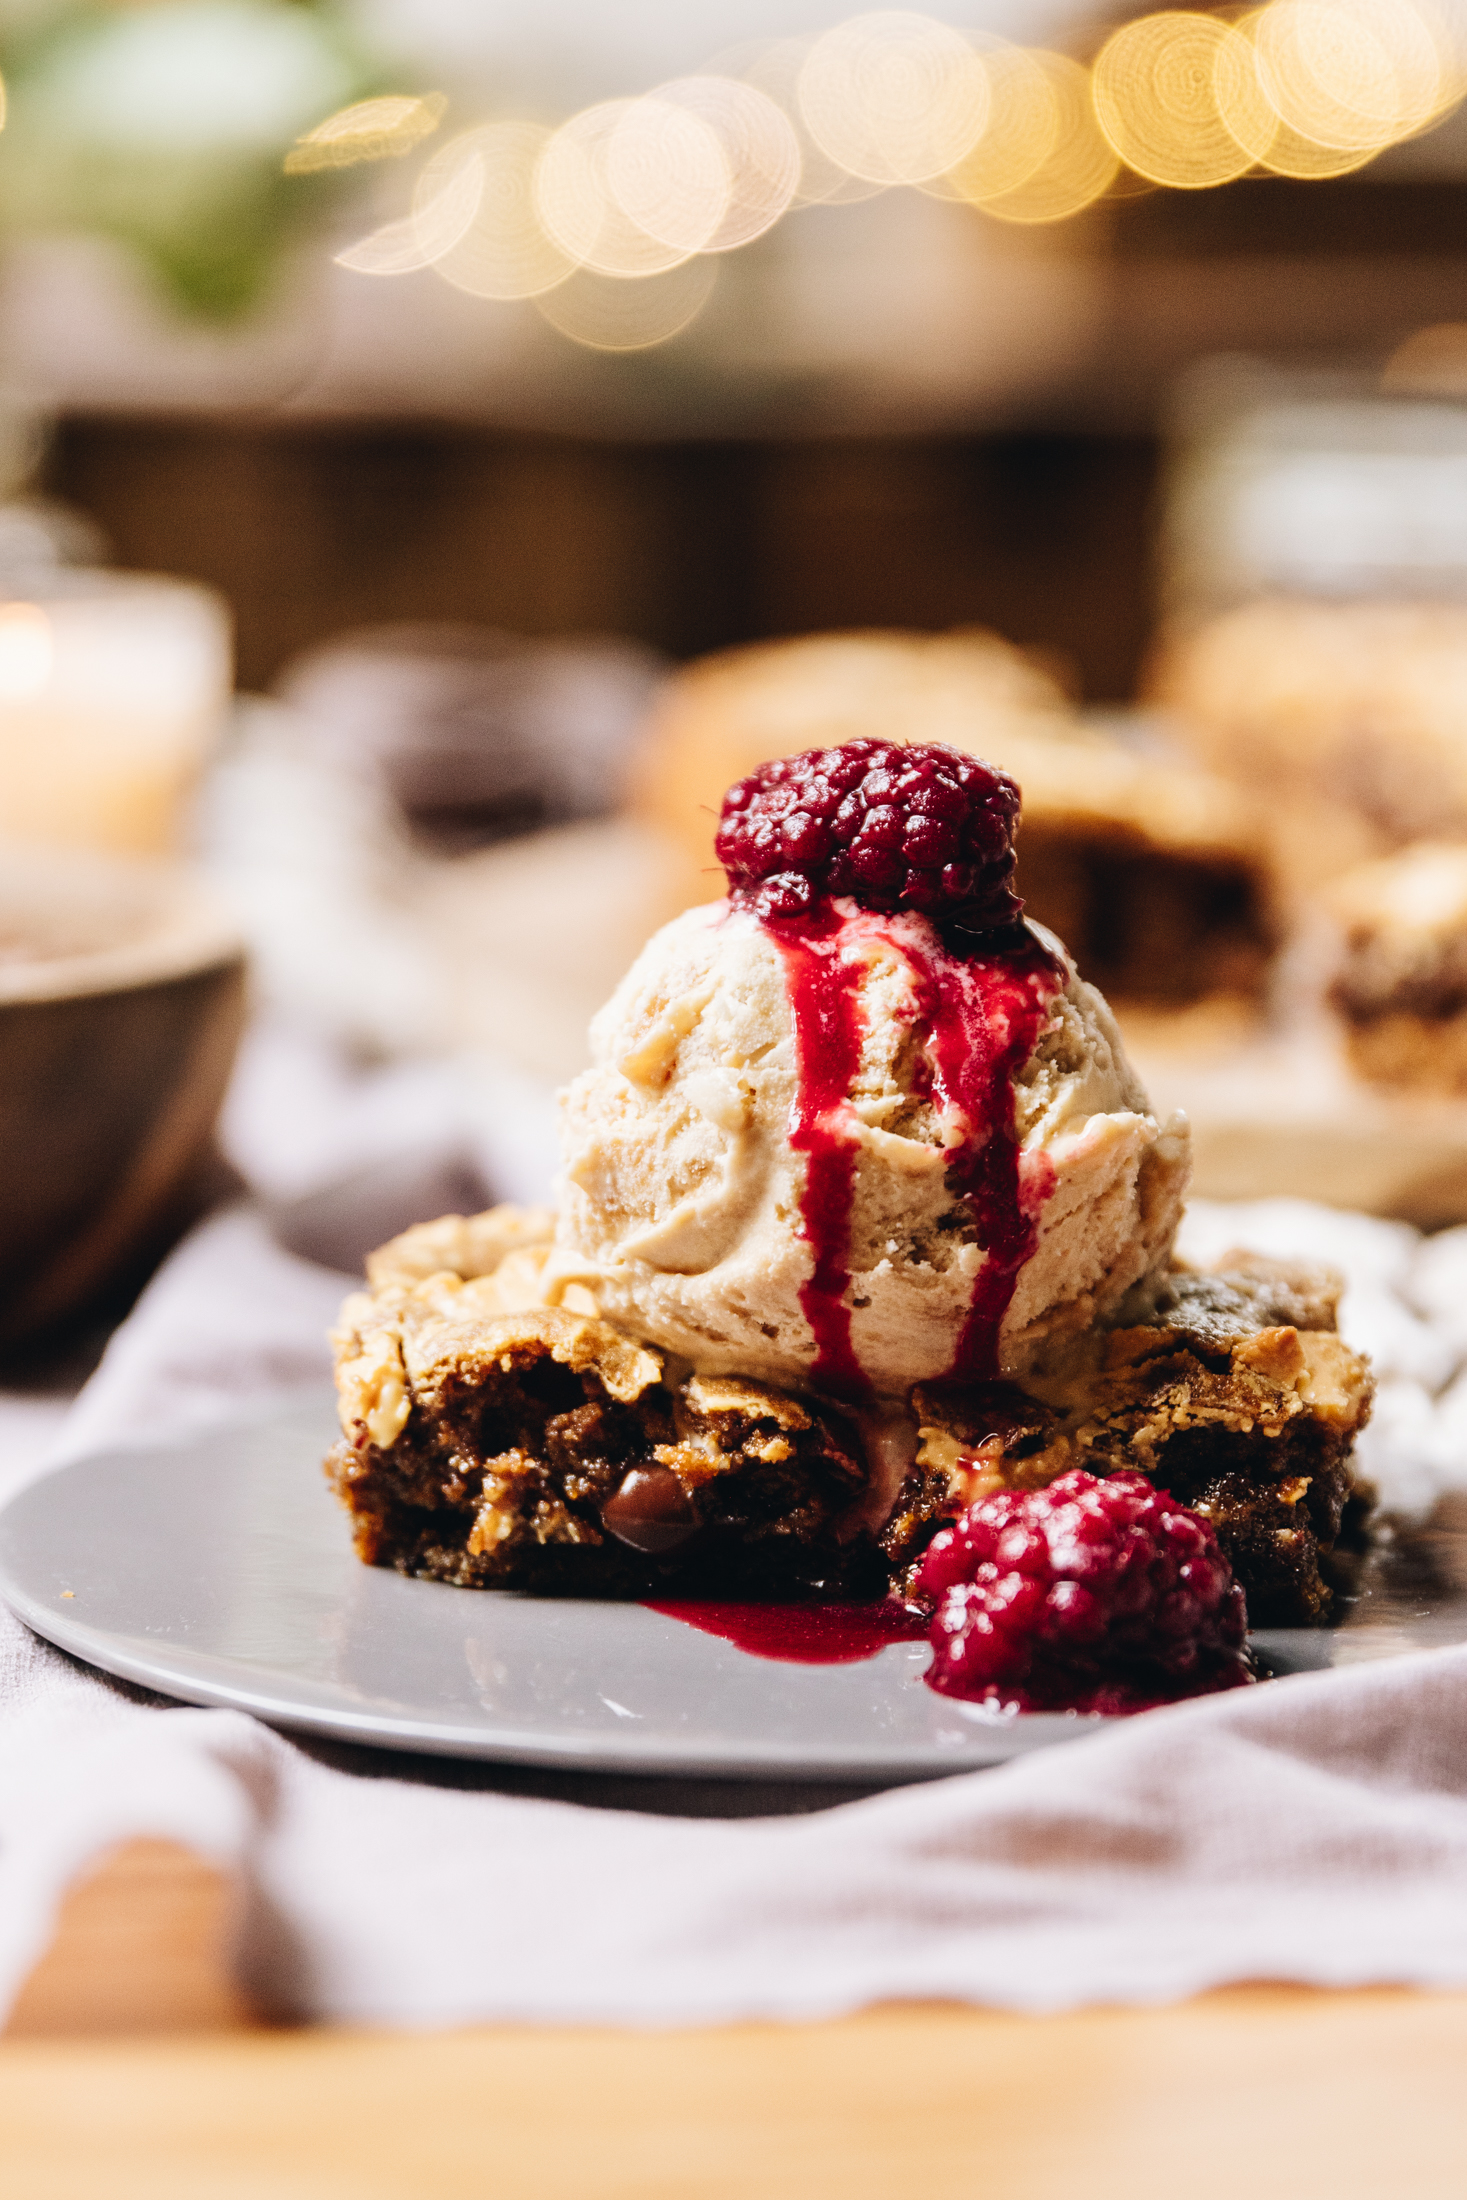
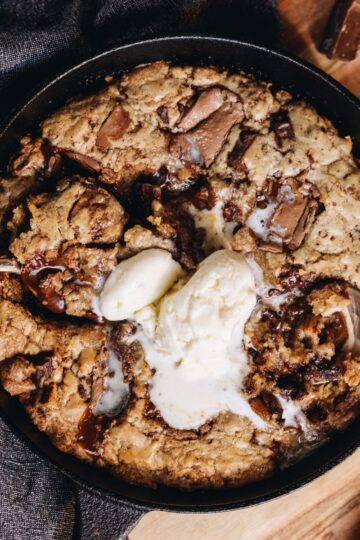
Once the blondie has cooled in the tin for 15 minutes, cut in to slices and serve with aihikirīmi (ice cream) and canned poihanapere (boysenberries) for a delicious dessert.
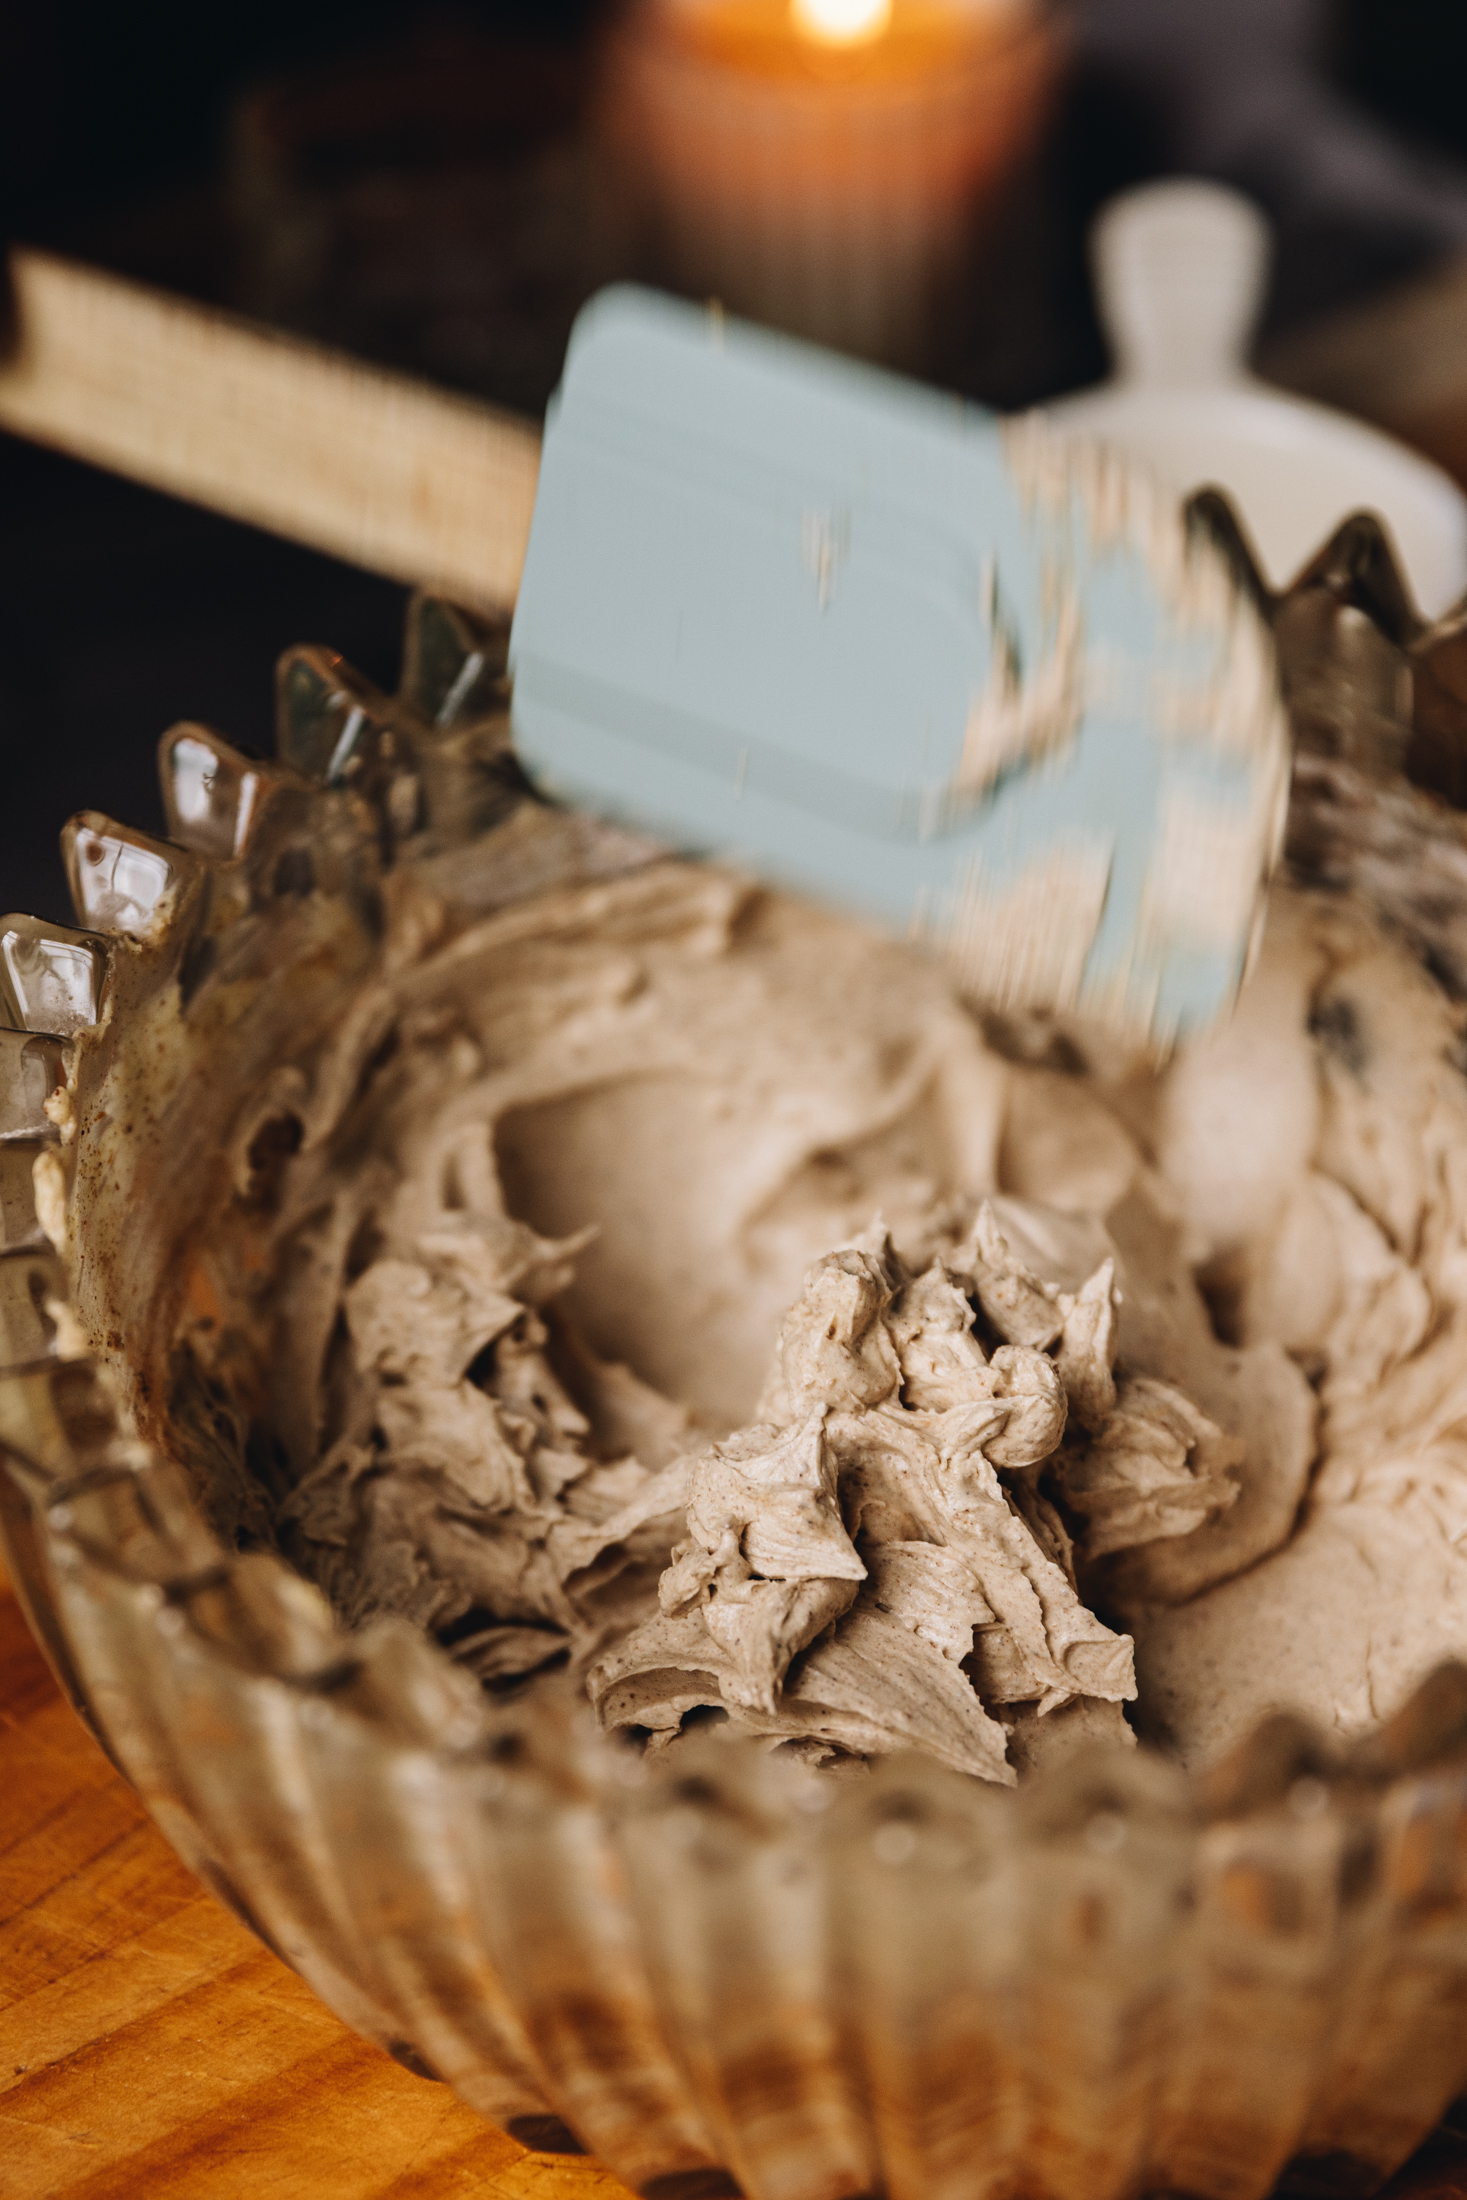
7. Make the Brown Butter Buttercream:
If you want to decorate the cooled blondie like I did, make one batch of my Brown Butter Buttercream Frosting.
8. Decorate the Coffee Blondie:
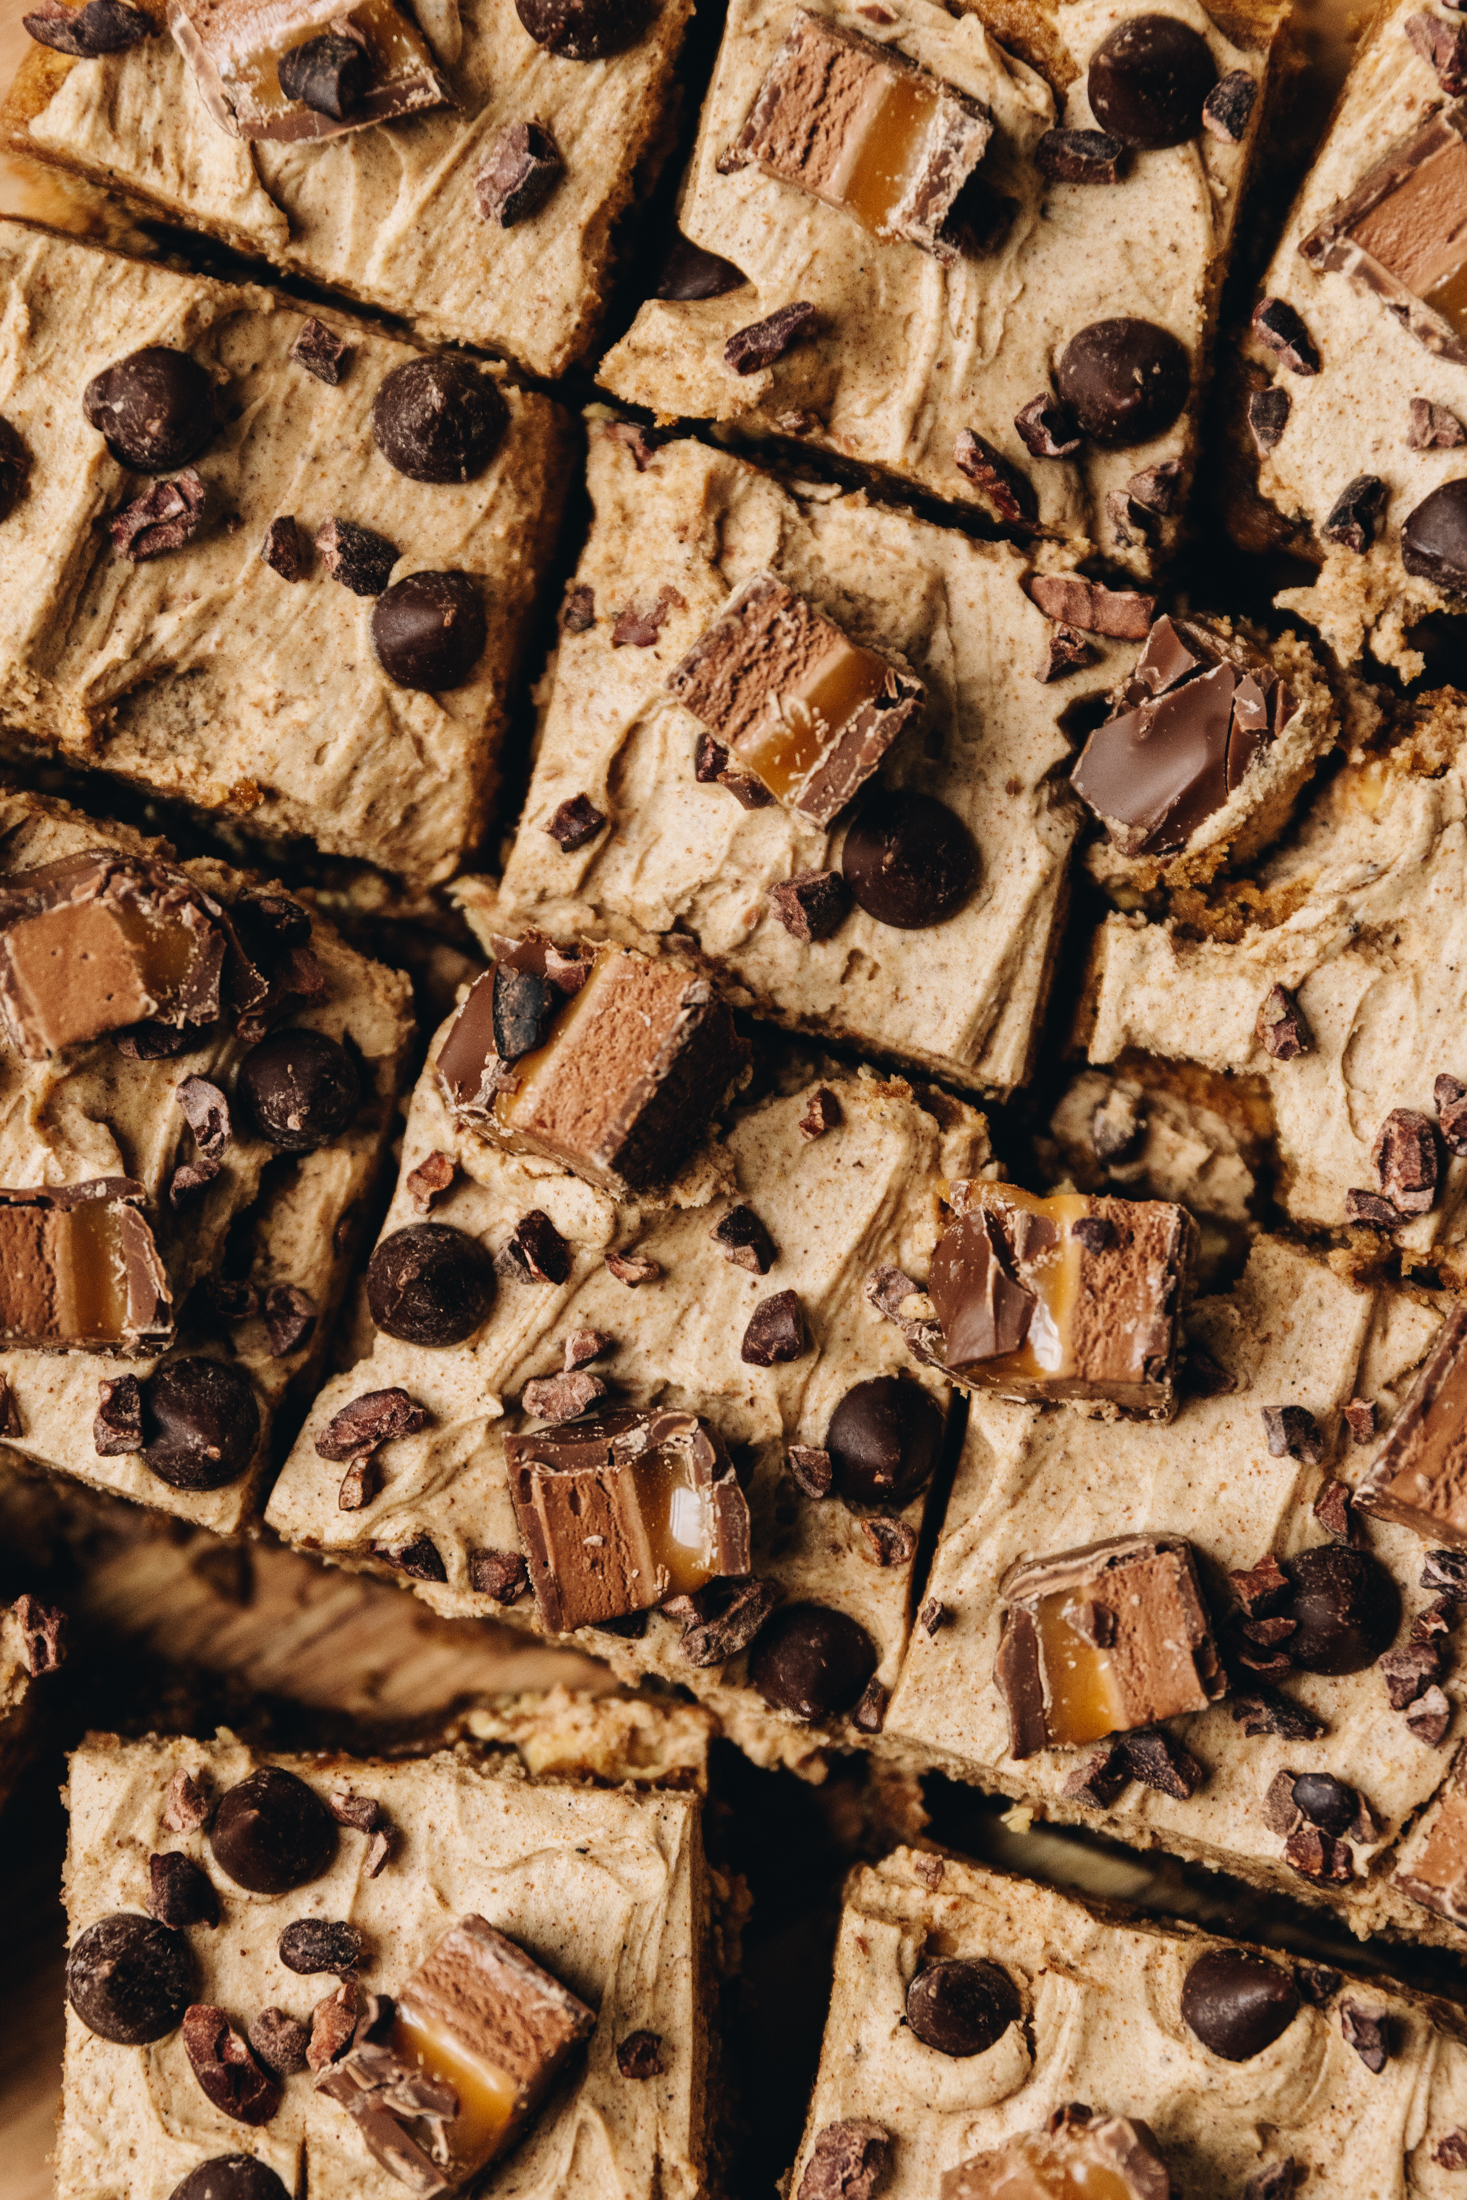
Once the buttercream is made spread it on to the cooled, uncut brownie.
Top with small slices of mars bar and a handful each chocolate drops and cacao nibs.
Store the Blondie:
This delicious blondie will keep well in a sealed container for up to five days. It is also delicious warmed up to return the goo factor to the tiakarete (chocolate).
Take a look at all of our
Slice Recipes
These delicious morsels of goodness can brighten any day!

DID YOU ENJOY THIS RECIPE?
It would be so awesome if you could please leave a review/comment by clicking the “leave a comment” section at the top of the page.
I love seeing you all make my creations, so send a whakaahua (photo) or kiriata (video) to my Instagram and show me what you made. Let me know if you have any pātai (questions) too, I would love to help.
Keke Kawhe me te Tiakarete - Coffee Chocolate Blondies
Equipment
- 1 x 20 cm x 20 cm baking tin with 4cm high sides.
Ingredients
The Coffee Blondie - Te Keke Kawhe
- ½ C (70 g) wōnati kua tapahia (chopped walnuts)
- 160 g pata (butter)
- 1 C (200 g) huka hāura (brown sugar)
- ¼ teaspoon tote (salt, fine)
- 2 hēki wawaenga (medium eggs, size 7)
- 1 C (150 g) puehu parāoa noa (plain flour)
- ¼ teaspoon pēkana paura (baking powder)
- ½ tsp hinamona kuoro (ground cinnamon)
- 2 tablespoon paura kawhe (coffee powder) or a triple shot of espresso
- 1 tablespoon wai wera (hot water) - only used if you are using
- 1 tablespoon wanira
- 170 g tiakarete (chocolate) - I used a mix of 50% and caramelised white but use what you like.
Brown Butter Buttercream - Pani Reka Pata Parauri (Optional):
- 1 quantity Brown Butter Buttercream Frosting
- 110 g pata (butter)
- 3 tablespoon puehu huka (icing sugar)
- 1 teaspoon wanira (vanilla)
- ½ tsp hinamona kuoro (ground cinnamon, optional)
The Decorations - Ngā Whakarākei
- 6 - 8 chocolate covered caramels
- Handful chocolate drops
- Handful Cacao nibs
Instructions
Preheat the Oven:
- Preheat the oven to 170 °C bake setting or 160 °C fan bake setting.
- Grease a 20 cm x 20 cm tin with high sides with butter.
Toast the Walnuts:
- If you want a deep toasty flavour in the blondie, toast the wōnati (walnuts). Skip this step if you are not bothered.
- Add the wōnati (walnuts) to a dry pan and gently toast over low - medium for a few minutes until golden and fragrant. Tip them on to a small plate to cool.
Mix the Butter and Eggs:
- Add all of the pata (butter) to the pan used to toast the walnuts. Gently melt it and remove from the heat.
- Pour the pata kua rewaina (melted butter) in to a medium sized bowl. Add the huka hāura (brown sugar) and tote (salt) in to the pata (butter).
- Koheria kia māene (whisk it until smooth). If you can't hold your finger in the mixture, leave it to cool for 5 minutes.
- Add both of the hēki (eggs) and stir until just combined with a whisk, for 10 - 15 seconds. Do not over-whip the hēki (eggs) at this point as too much air in the batter can lead to a cakey blondie.
Add the Dry Ingredients:
- Add in the puehu parāoa (flour), pēkana paura (baking powder) and hinamona (cinnamon).
- Dissolve the paura kawhe (coffee powder) in to the wai wera (hot water) or make the espresso. Add it to the dry ingredients along with wanira (vanilla), chopped tiakarete parauri (dark chocolate) and cooled wōnati (walnuts).
- Gently fold it all together with a spatula just until the mixture is combined. It is better to under mix than over mix at this point.
Bake the Coffee Chocolate Blondie:
- Pour the batter in to the lined tin and top with the tiakarete mā (white chocolate).
- Bake for 23 minutes, rotating the tin halfway through for an even bake. After 23 minutes, check the blondie — it should be just slightly soft to the touch in the centre but not overly wet or gooey.
- If it’s still very underbaked, return it to the oven, switch the heat off, and leave it inside with the door closed for a further 5 minutes before checking again. This gentle finish helps it set without overbaking.
Serve the Coffee Blondie Warm:
- Once the blondie has cooled in the tin for 15 minutes, cut in to slices and serve with aihikirīmi (ice cream) for a delicious dessert.
Make the Brown Butter Buttercream:
- If you want to decorate the blondie like I did, make one batch of my Brown Butter Buttercream Frosting.
Decorate the Coffee Blondie:
- Once the buttercream is made spread it on to the cooled, uncut brownie. Top with chocolate caramels, and a handful each chocolate drops and cacao nibs.
Store the Blondie:
- This delicious blondie will keep well in a sealed container for up to five days. It is also delicious warmed up to return the goo factor to the tiakarete (chocolate).
Video
Expert Tips for the best Coffee Chocolate Chunk Blondies:
Don’t Skip Cooling the Butter:
After melting the pata (butter), make sure it cools slightly before adding the huka hāura (brown sugar). If it’s too hot, it can cook the hēki (eggs) and affect the texture of your blondie.
Toast the Walnuts for Maximum Flavour:
Toasting the wōnati (walnuts) is optional, but definitely recommended. It deepens their flavour and adds a delicious nuttiness that complements the tiakarete (chocolate) and coffee beautifully.
Don’t Overmix the Eggs:
Once the hēki (eggs) are added, mix only until just combined. Overmixing at this stage adds too much air, which can make your blondie more cakey rather than dense and fudgy.
Gentle Folding is Key:
When adding the dry ingredients, fold the mixture gently until just combined. Overworking the batter will develop the gluten in the puehu parāoa (flour) and change the final texture. Trust me, after many trials I have learnt this is super important.
Slightly Underbake for Gooey Centres:
The blondie should look a little underdone in the centre when you remove it from the oven. It will continue to set as it cools, giving you that signature fudgy texture. Just trust the process here.
Variations:
Swap the Nuts:
If you don’t have wōnati (walnuts), try nati pēkani (pecans), hānati (hazelnuts), or even aramona (almonds) for a different flavour profile. If nuts are not your thing, leave them out completely.
No Coffee Version:
Simply leave out the paura kawhe (coffee powder) or kawhe (coffee) for a classic chocolate walnut blondie.
Storage
Store the blondie in a sealed airtight container at room temperature for up to 4 days, or in the fridge for up to 5 days.
To bring back the gooey texture, warm individual slices in the microwave for 10–15 seconds before serving.
You can also freeze slices (without buttercream) for up to 2 months and reheat as you want.
Frequently Asked Questions:
This usually happens if the eggs were overmixed or too much air was incorporated into the batter. Mix gently once the hēki (eggs) are added for a maximum of 15 seconds and stir, rather than whip.
Yes. The kawhe (kawhe) enhances the chocolate flavour but can be left out for a traditional blondie if you want. I also often make this for my kids do I use a decaf espresso which works so well.
That’s exactly what you want. The blondie continues to set as it cools, creating a soft, fudgy texture.
Karawhiua - go for it! This blondie keeps well for several days and actually tastes even better the next day as the flavours develop.
Kāore (no), but it elevates the flavour so I highly recommend it.
Yes. Freeze in airtight containers or wrapped slices for up to 2 months. Thaw before serving or warming.

Leave a Review