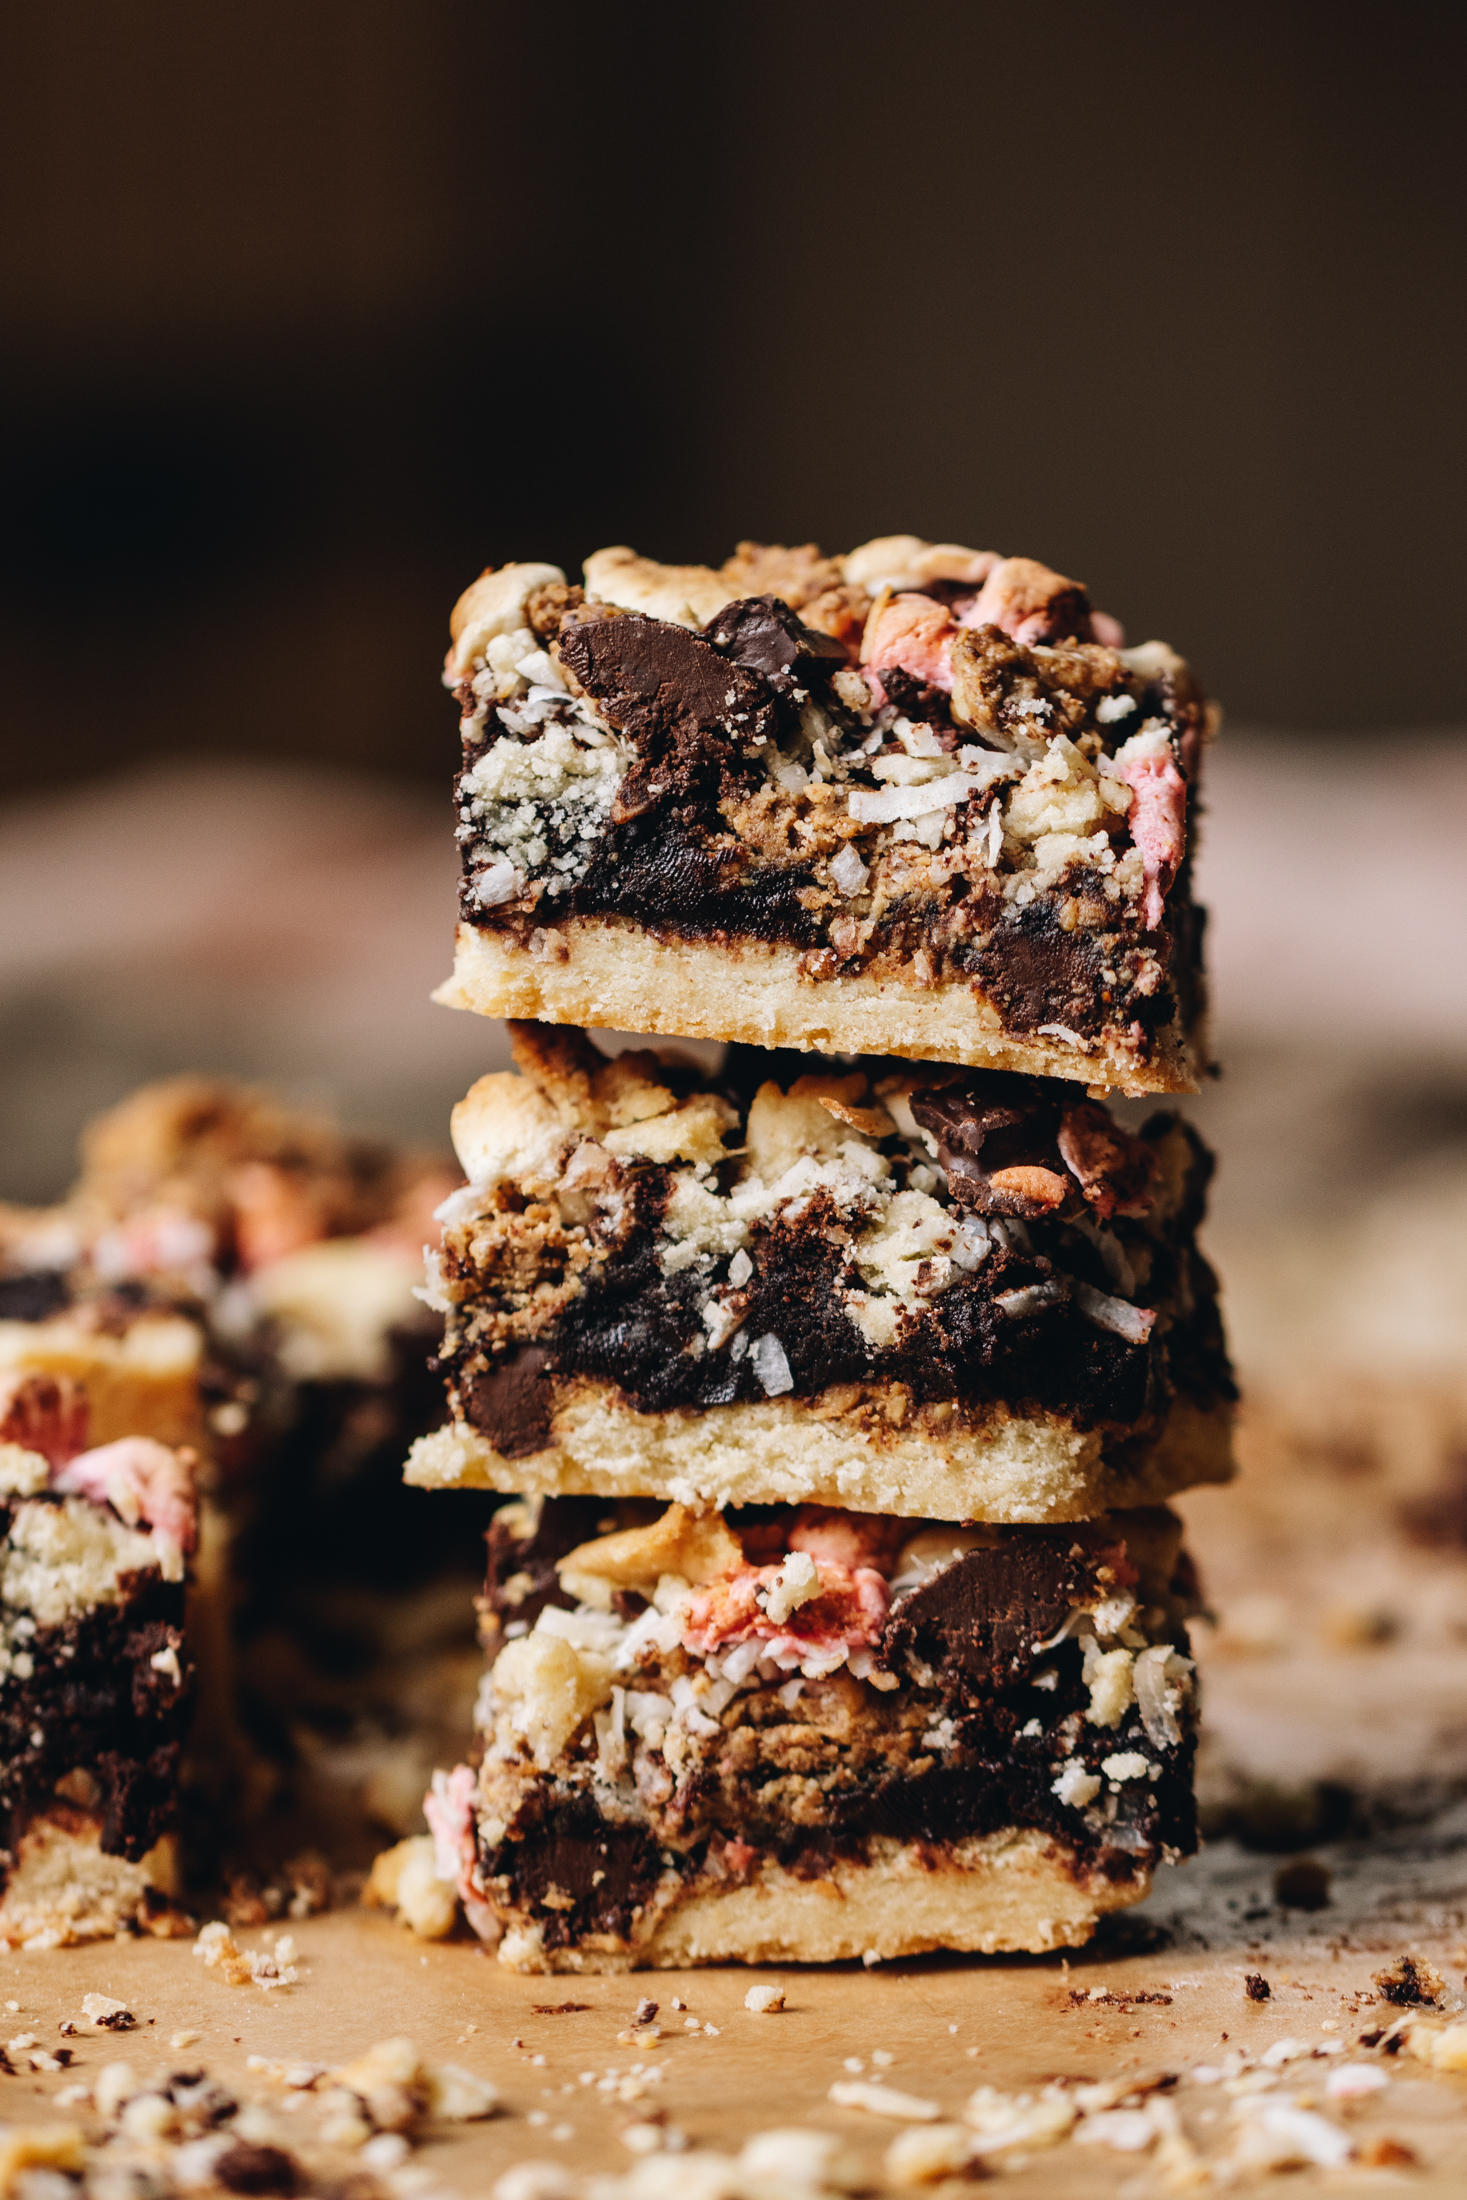
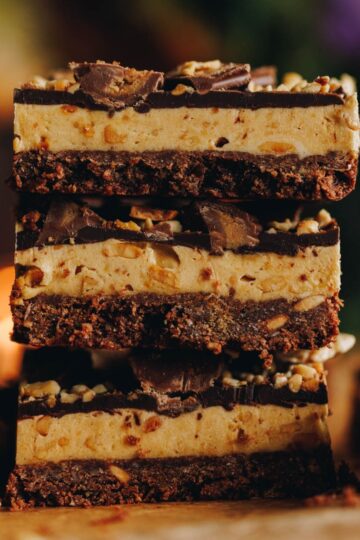
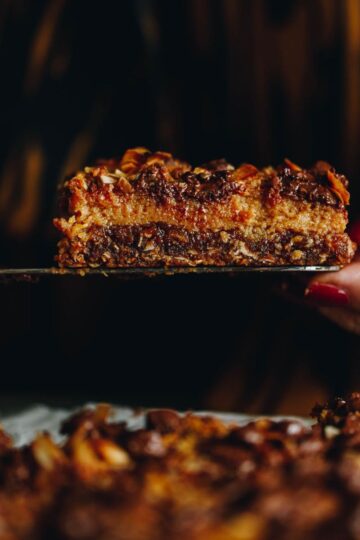
This Brookie slice unites two of our favourite things. It starts with a chocolate chunk cookie dough that is baked in to the base. Then a gooey brownie is added on top with marshmallows, peanut butter and coconut for a textural overload. The result is a delightful slice of different textures and flavours that you can swap to your liking.

This Brookie Slice is a whānau favourite. I don't always get on board with food trends but a slice that combines chocolate chip cookies and brownie is always going to be good. This is such a good recipe to make with tamariki (children) too! Me tākaro tātou (let's play)!
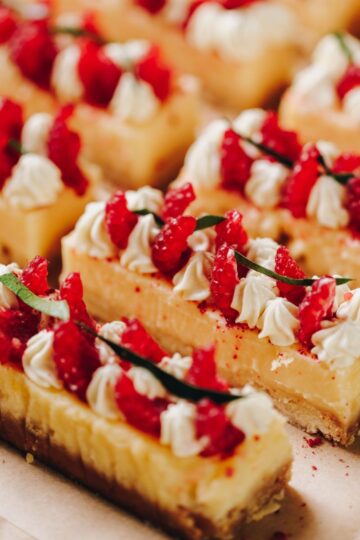
More Slices to try:
Check out my Lemon Bars or Louise Slice with Chia Jam because they are both elegant and delicious at the same time. Are you making a treat for a big gathering? Then this Oaty Caramel Slice is for you! 🎉
Videography and photography taken by Sarah Henderson.
Ingredient tips for the Brookie Slice:
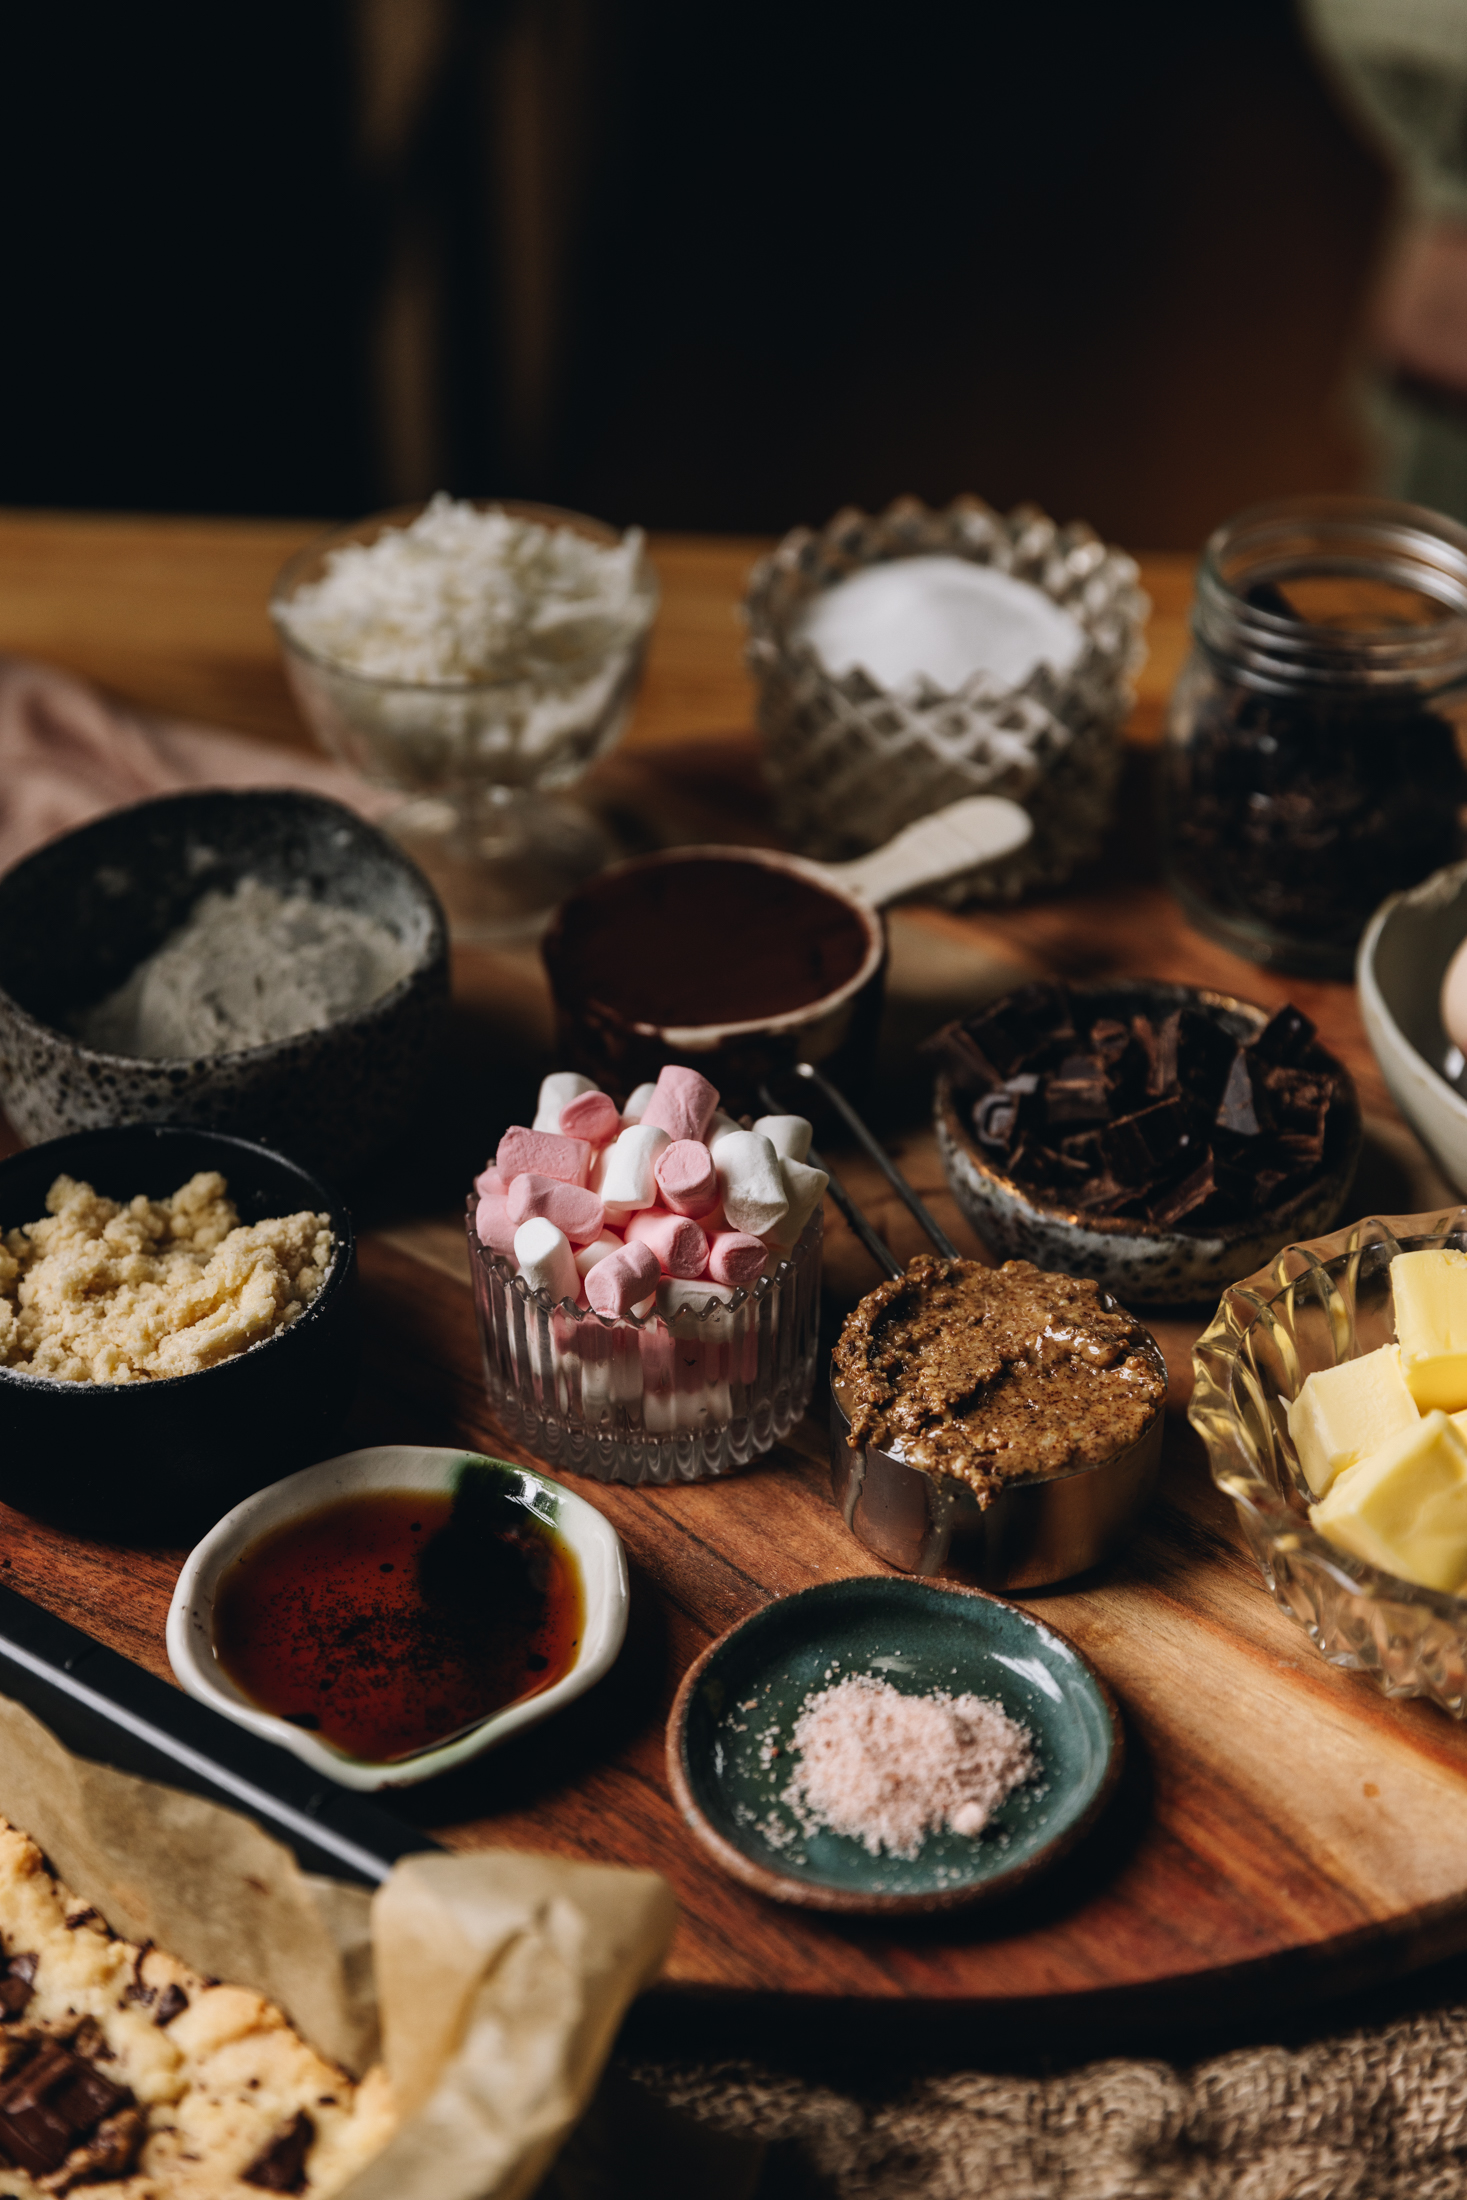
- Butter: I prefer salted pata (butter) because of the deep flavour but unsalted works.
- White sugar: I use huka one (caster sugar) in this recipe but if you prefer huka hāura (brown sugar), go for it.
- Flour: Plain or high grade flour both work in this recipe.
- Nut Butter: I add this on to the base and the topping because I am addicted to pata pīnati (peanut butter) but it can be omitted completely if you want.
- Chocolate: I prefer tiakarete parauri (dark chocolate) but use what you love.
- Eggs: I always use free-range hēki (eggs) but use what you have.
- Cocoa: I used to be a big advocate of only using dutch processed cocoa but the price has hiked up these days so use what you have.
- Marshmallows: Both mini or chopped normal sized ones work for the topping but they are not your vibe, don't use them.
- Coconut: The kokonati (coconut) on top is just a textural addition and can be omitted if you want.
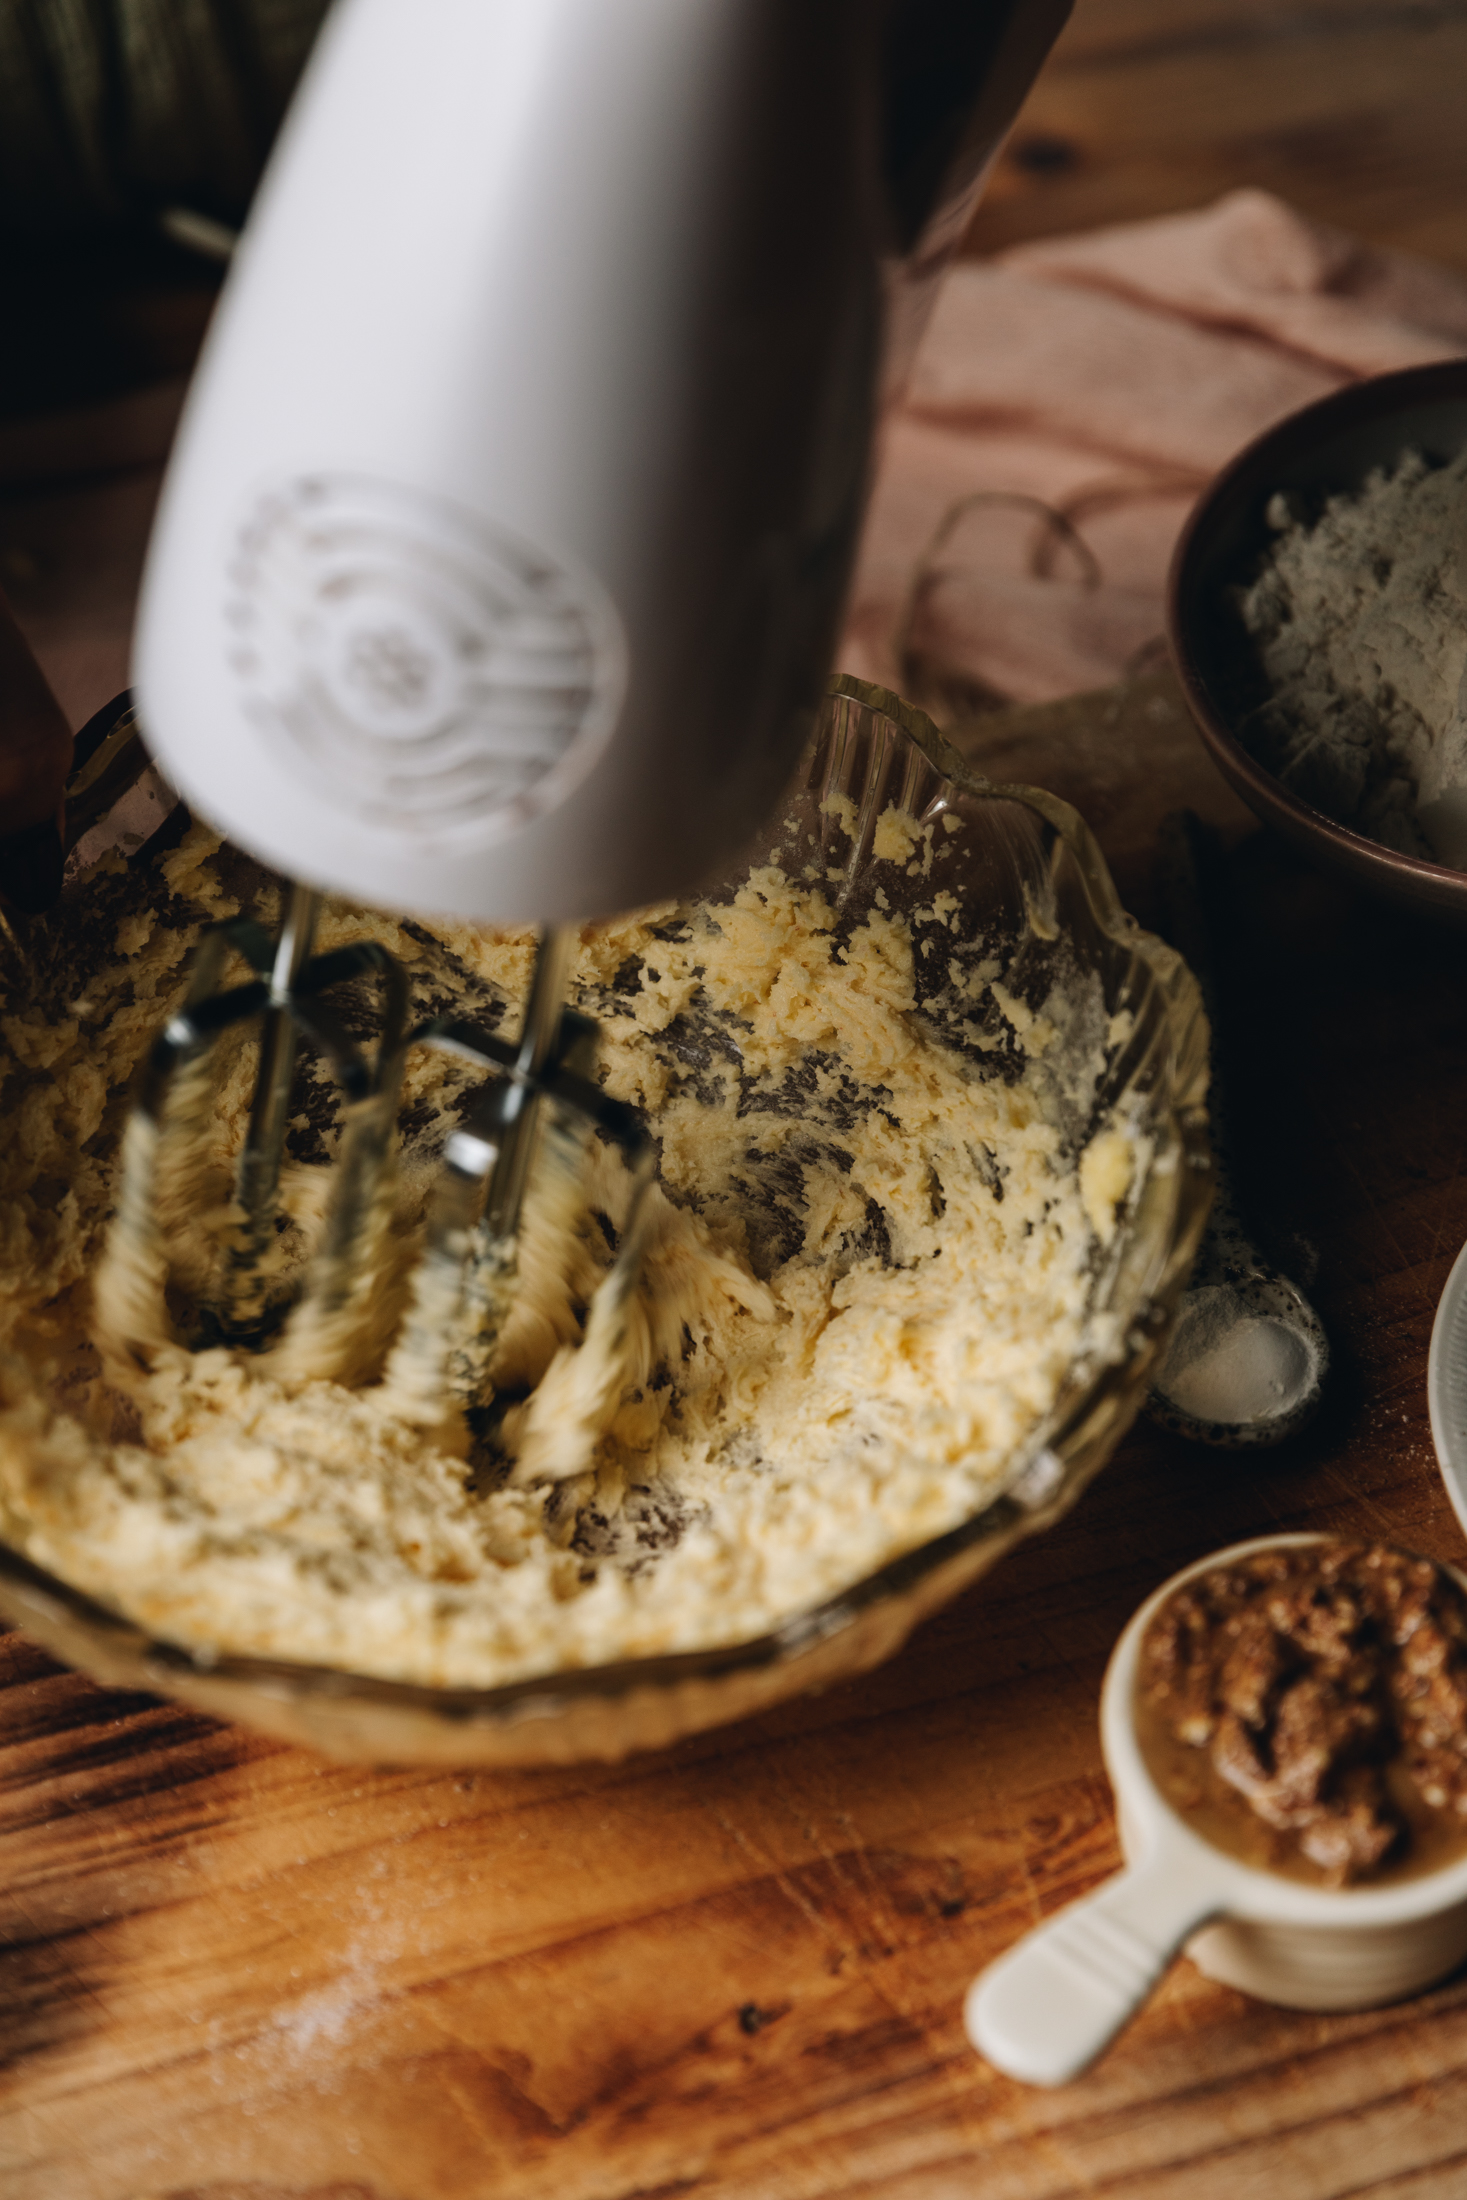
EXPERT ADVICE:
Take the time to whip the pata (butter) and huka (sugars) for the specified time when making the biscuit base. This will ensure a nice rise to the slice and give the sugars time to dissolve into the butter.
STEP BY STEP INSTRUCTIONS FOR THE BROOKIE SLICE:
Note: The full recipe card with the full list of ingredients, instructions and step by step video are found at the bottom of this page.
1. Preheat the Oven:
Preheat the oven to 170 °C bake setting or 160 °C fan bake setting.
Line a 20 cm square slice tin with baking paper.
2. Whip the Butter and Sugar:
Add the pata kūteretere (softened butter), huka one (caster sugar), tote (salt) and wanira (vanilla) to a medium bowl.
Whip on high speed for 5 minutes until light and fluffy in colour and texture.
3. Combine the Whipped Butter and Dry Ingredients:
Add the puehu parāoa (flour) and pēkana paura (baking powder). Whakawhenumia (combine it together) until a soft dough forms.
Spread the mixture in to the prepared baking tin and press it until flat.
4. Add the Chocolate:
Chop the tiakarete (chocolate) in to large chunks and press in to the top of the dough. Then add teaspoons of the pata nati (nut butter) in to the gaps if you are using it.
5. Bake the Cookie Base:
Bake the paparanga pihikete (biscuit layer) for 15 minutes in the preheated oven.
Remove it from the oven and set aside as you make the brownie layer.
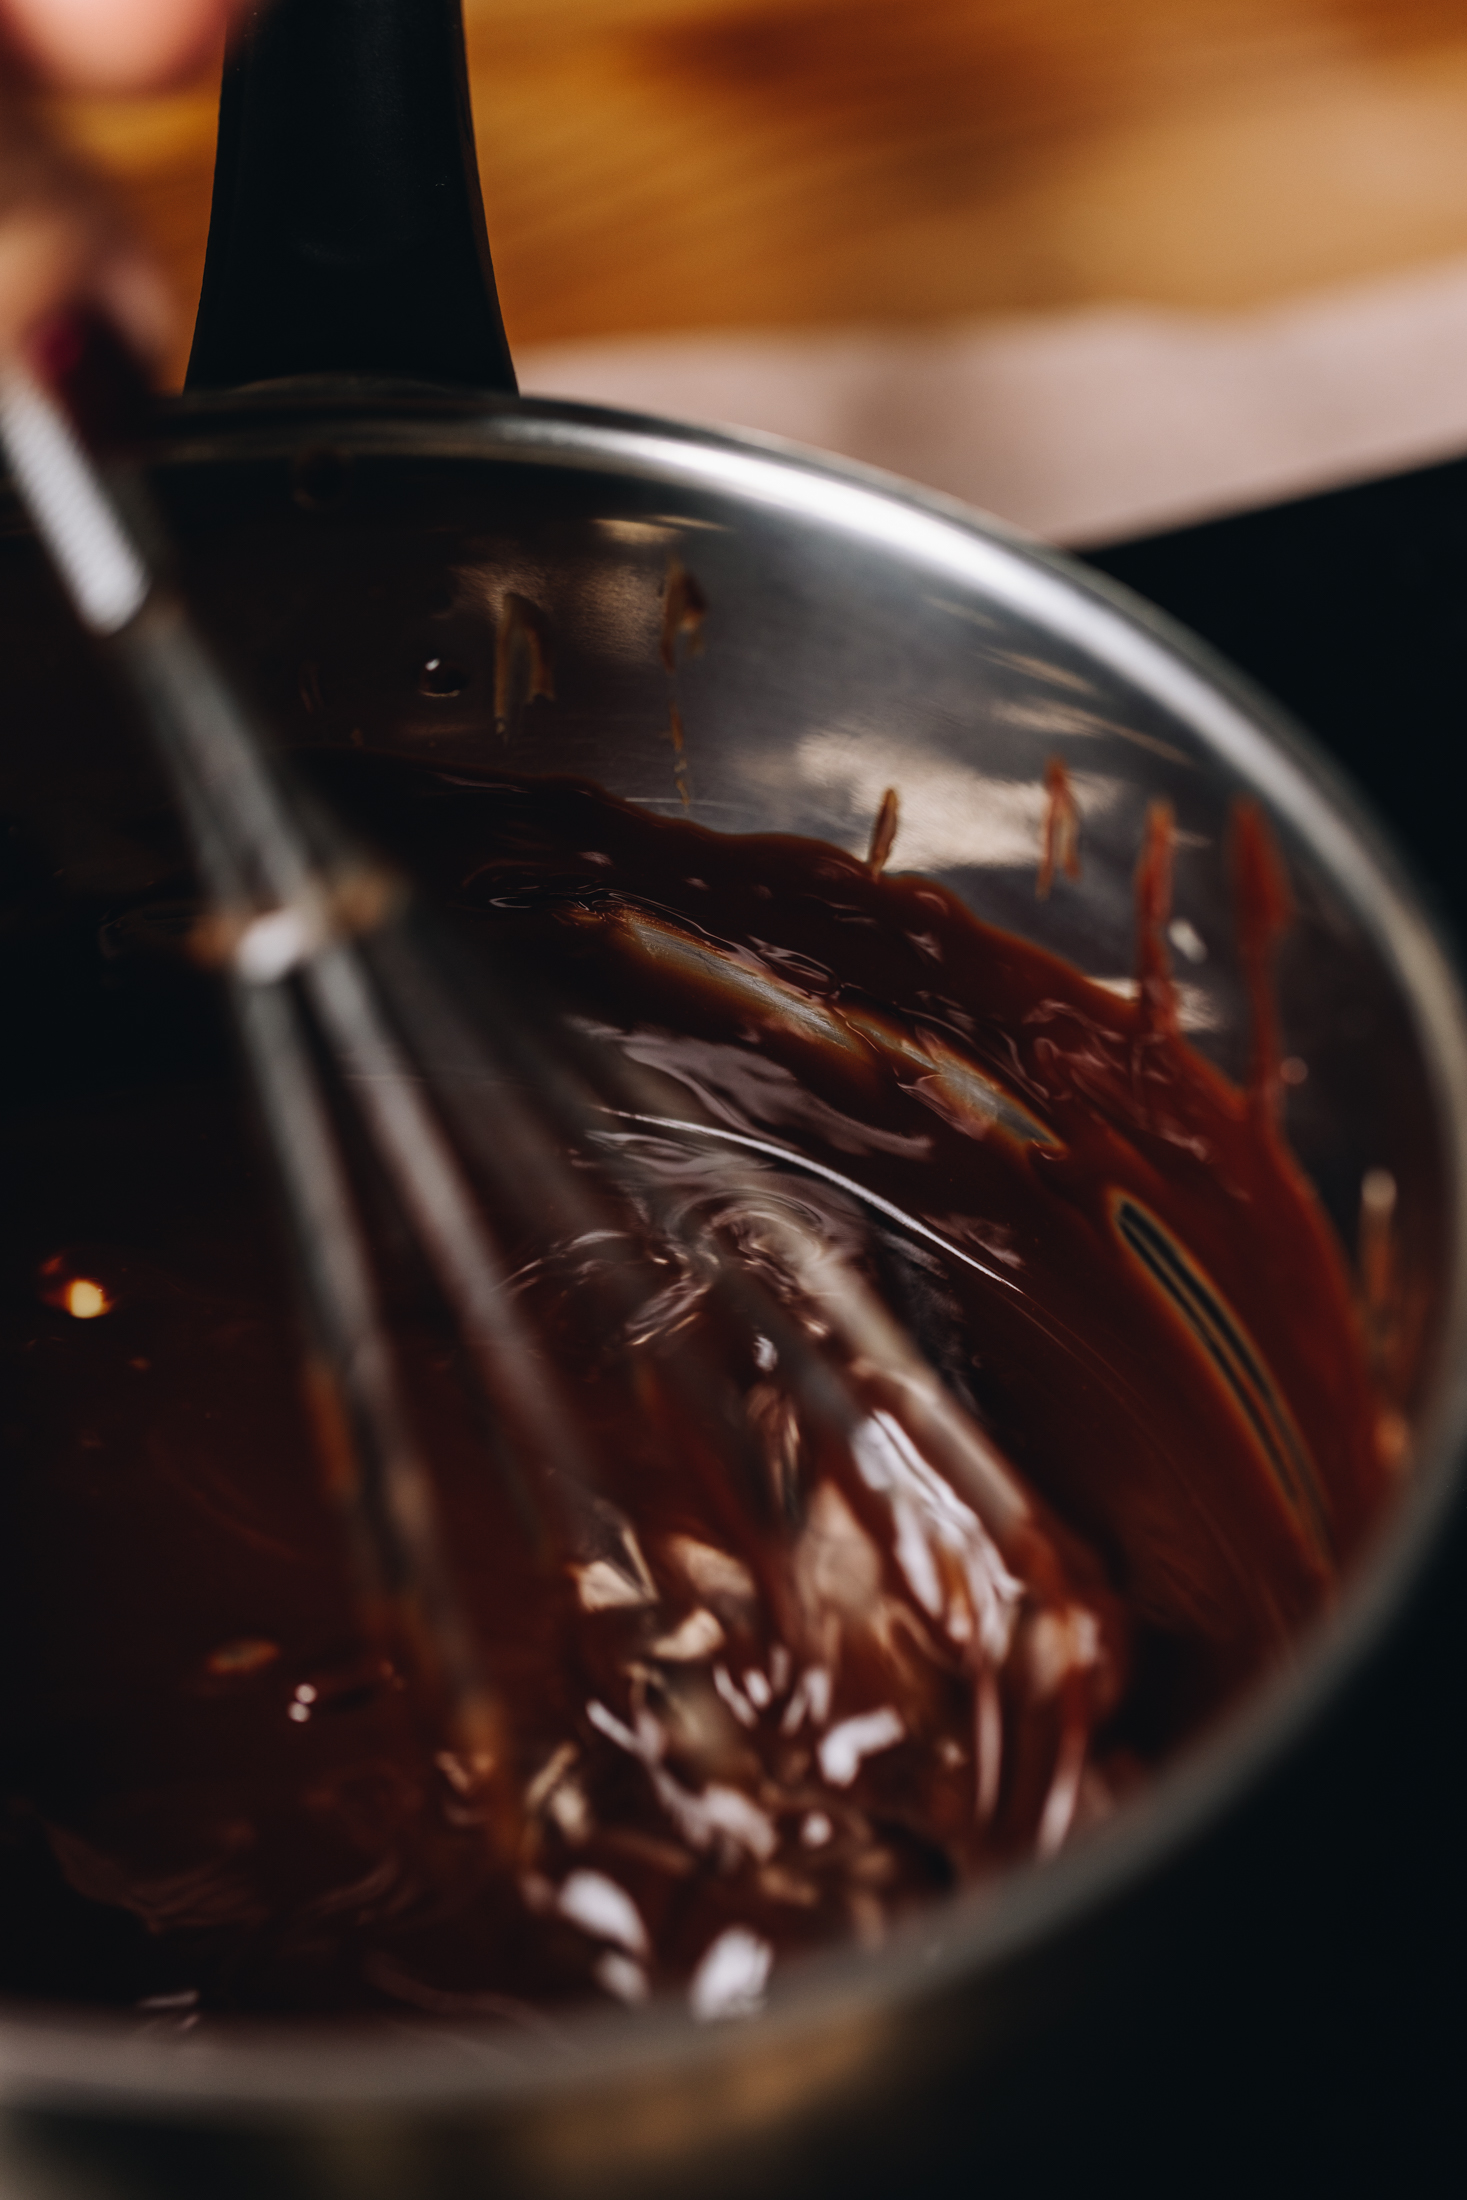
6. Melt the Chocolate Mixture:
Add the tiakarete (chocolate), pata (butter) and tote (salt) in to a small pot and then gently melt it over low heat.
Remove it from the heat and allow to cool for 5 minutes.

7. Whip the Eggs and Sugar:
Add the hēki (eggs), huka one (caster sugar) and wanira (vanilla) in to a medium sized bowl.
Whip it on medium - high speed for 3 minutes until the mixture is light in colour and fluffy in texture.
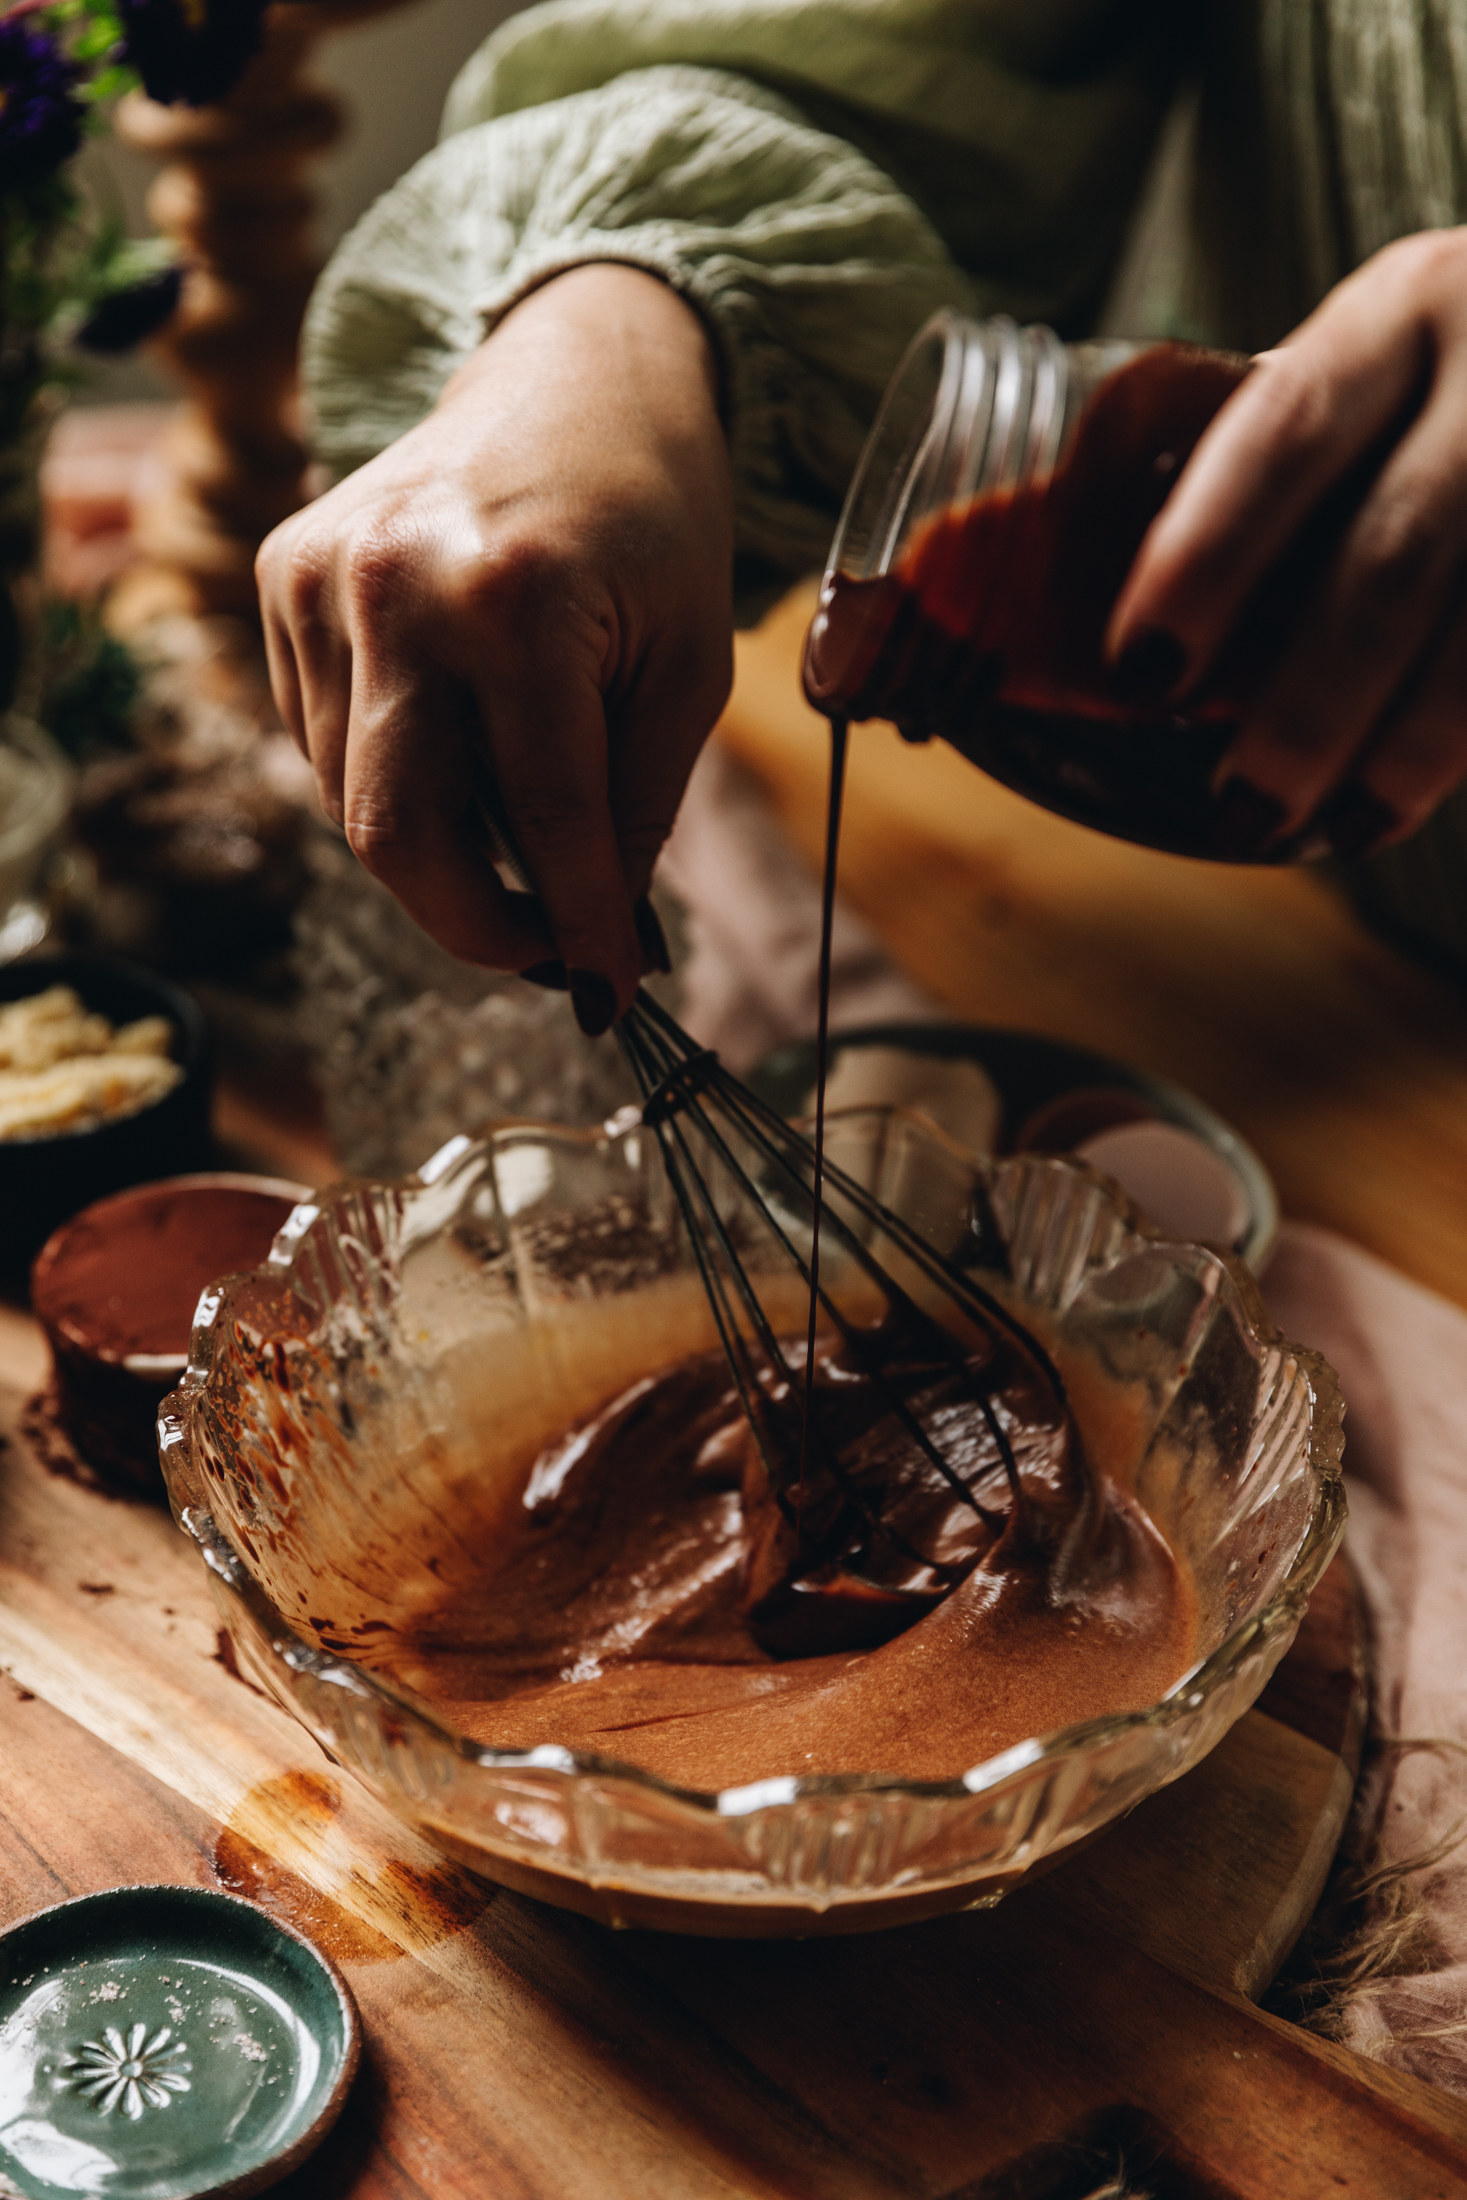
8. Combine the Eggs and Chocolate:
Slowly pour in the cooled ranunga tiakarete (chocolate mixture) as you continue to whip on medium speed.
Stop whipping once all the tiakarete (chocolate) is incorporated.
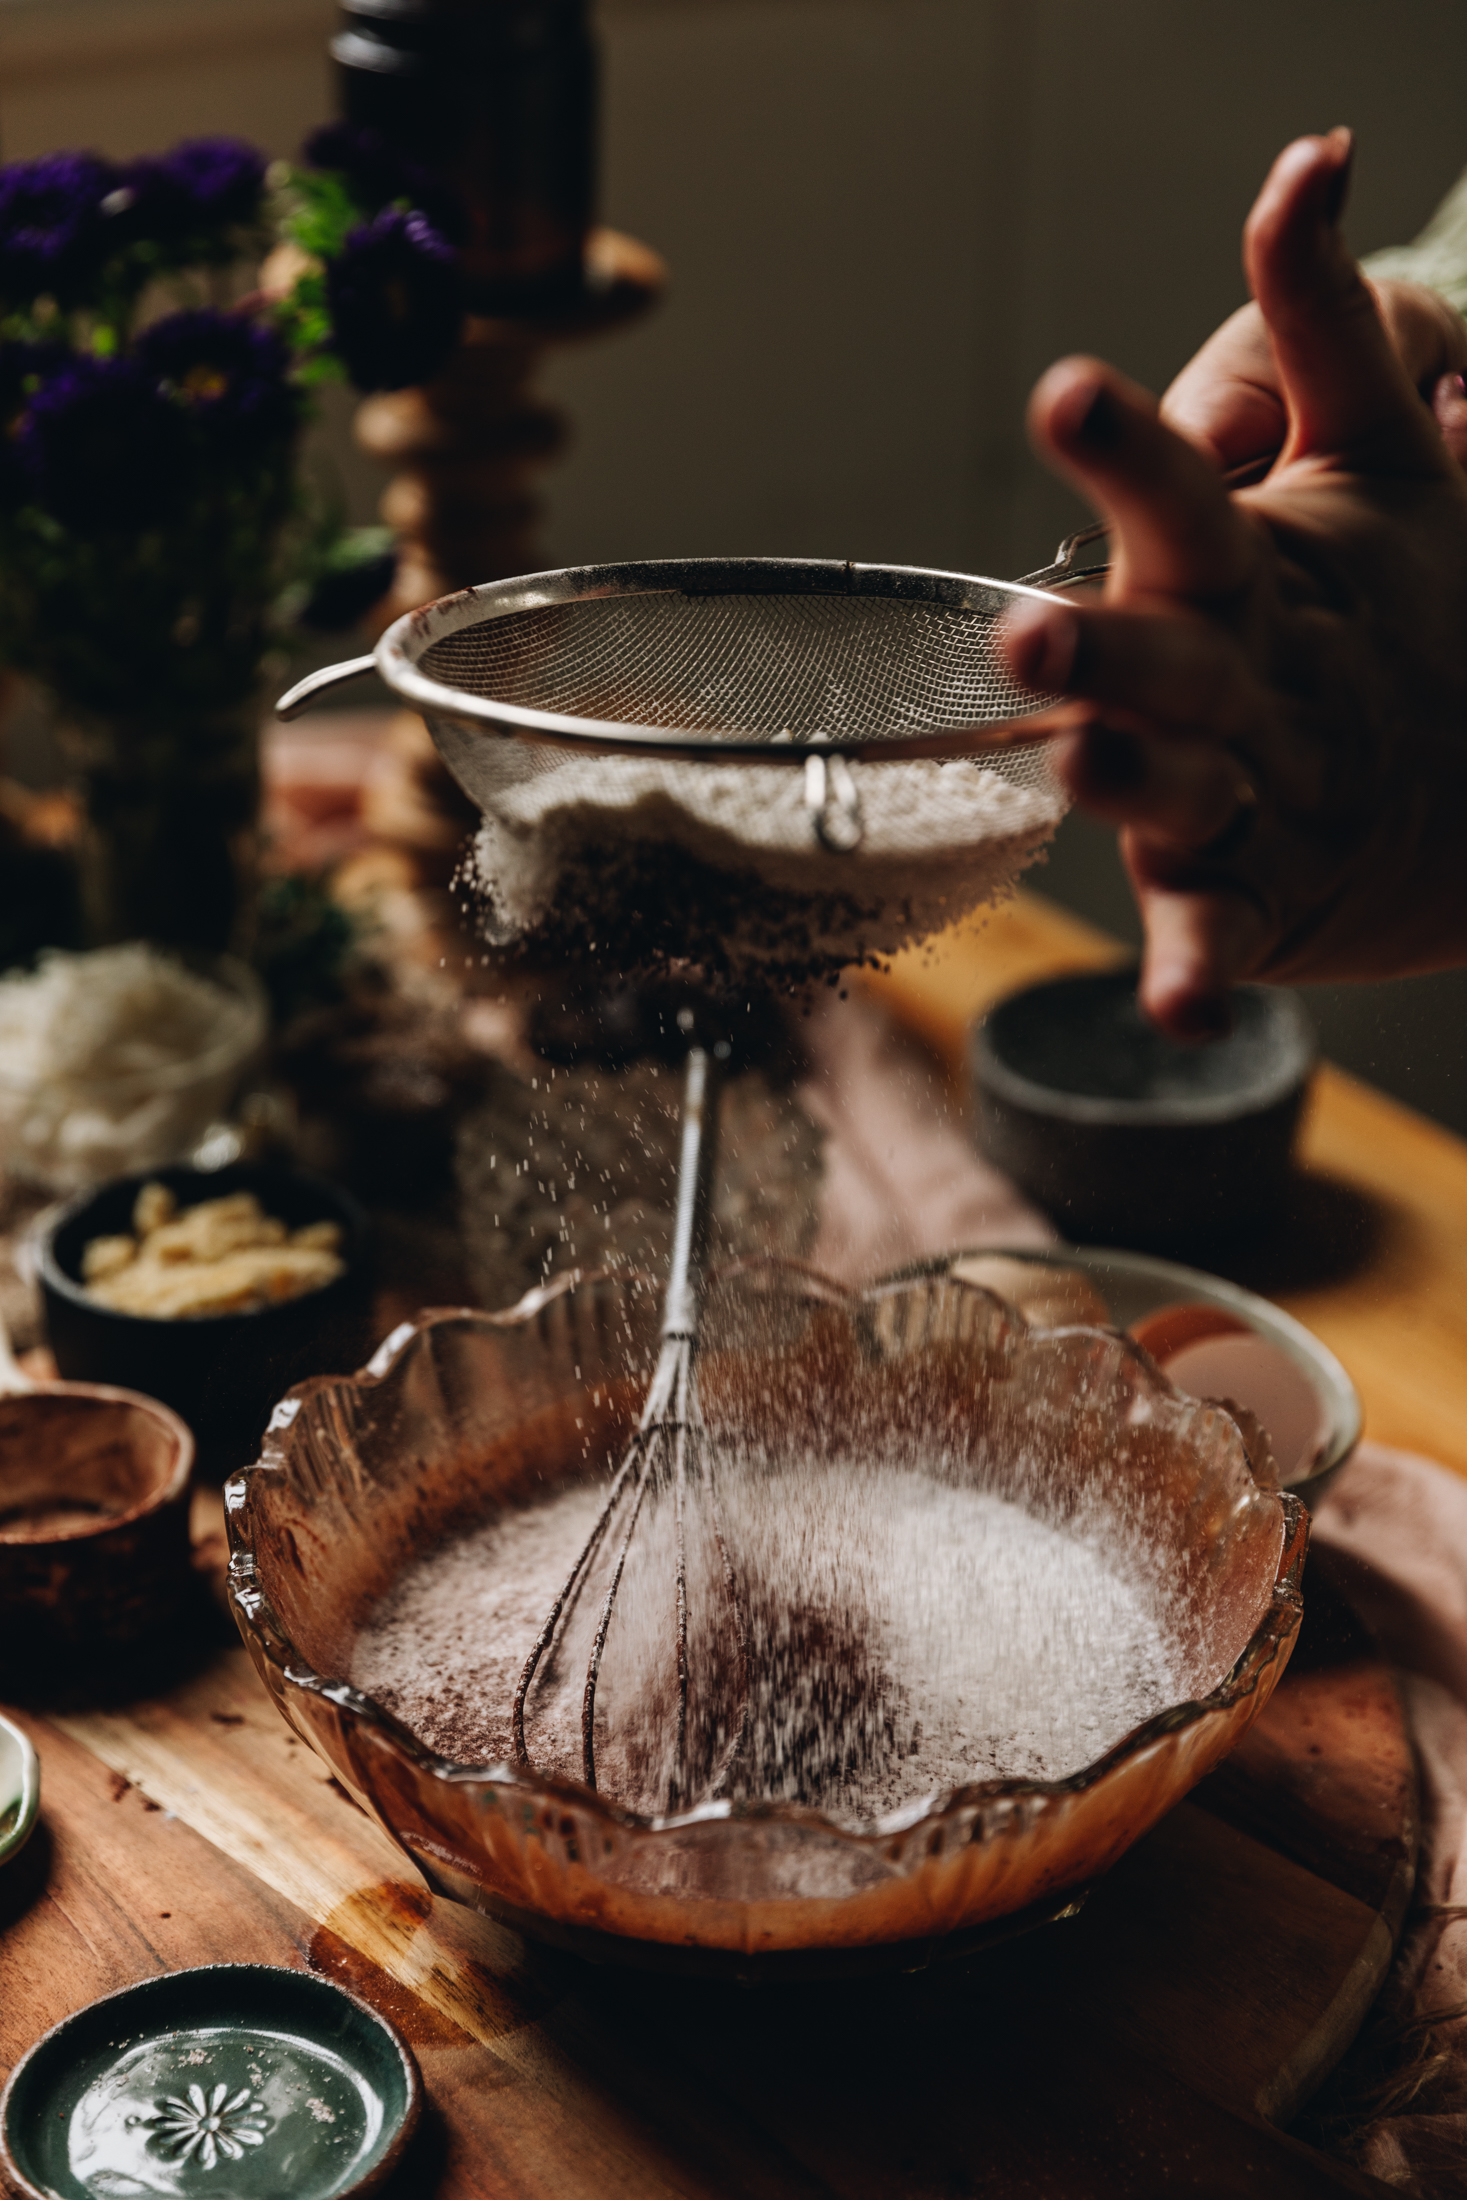
9. Add the Dry Ingredients:
Sift the kōkō (cocoa), puheu parāoa (flour) and pēkana paura (baking powder) straight in to the chocolate egg mixture.
Stir it with a whisk just until it is all incorporated and no more.
10. Add it to the Biscuit Base:
Pour it on top of the paparanga pihikete (biscuit layer) and smooth it out.
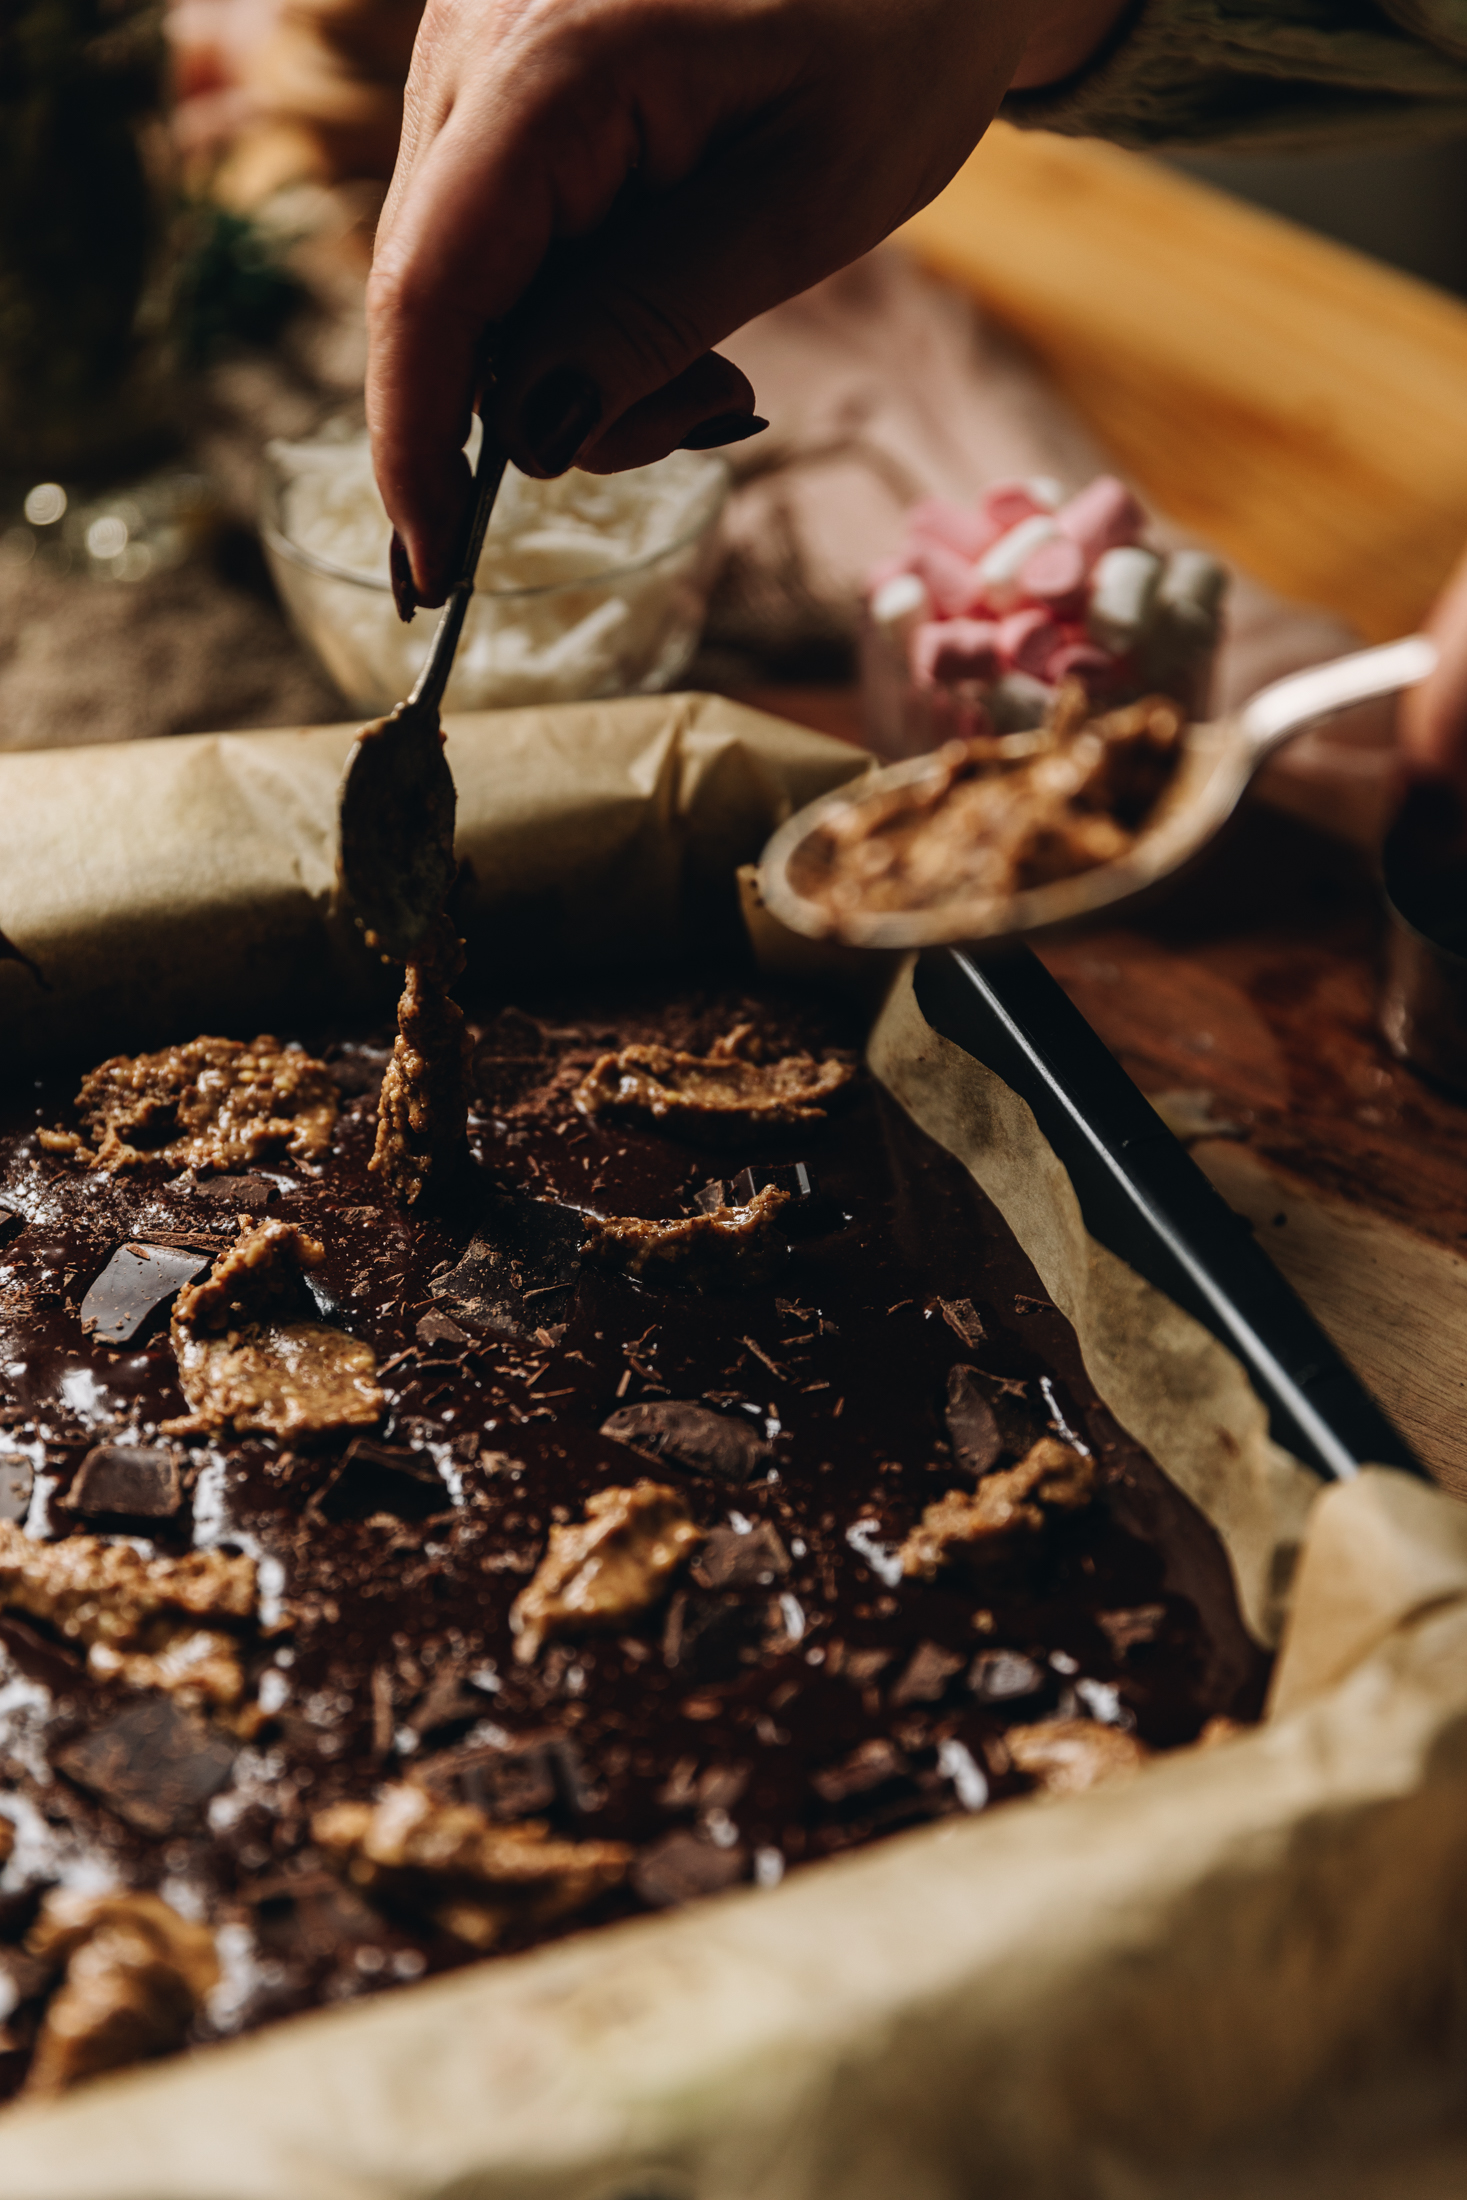
11. Decorate the top of the Brookie Slice:
Then add the remaining tiakarete (chocolate) and pata nati (nut butter), dividing it evenly on top.
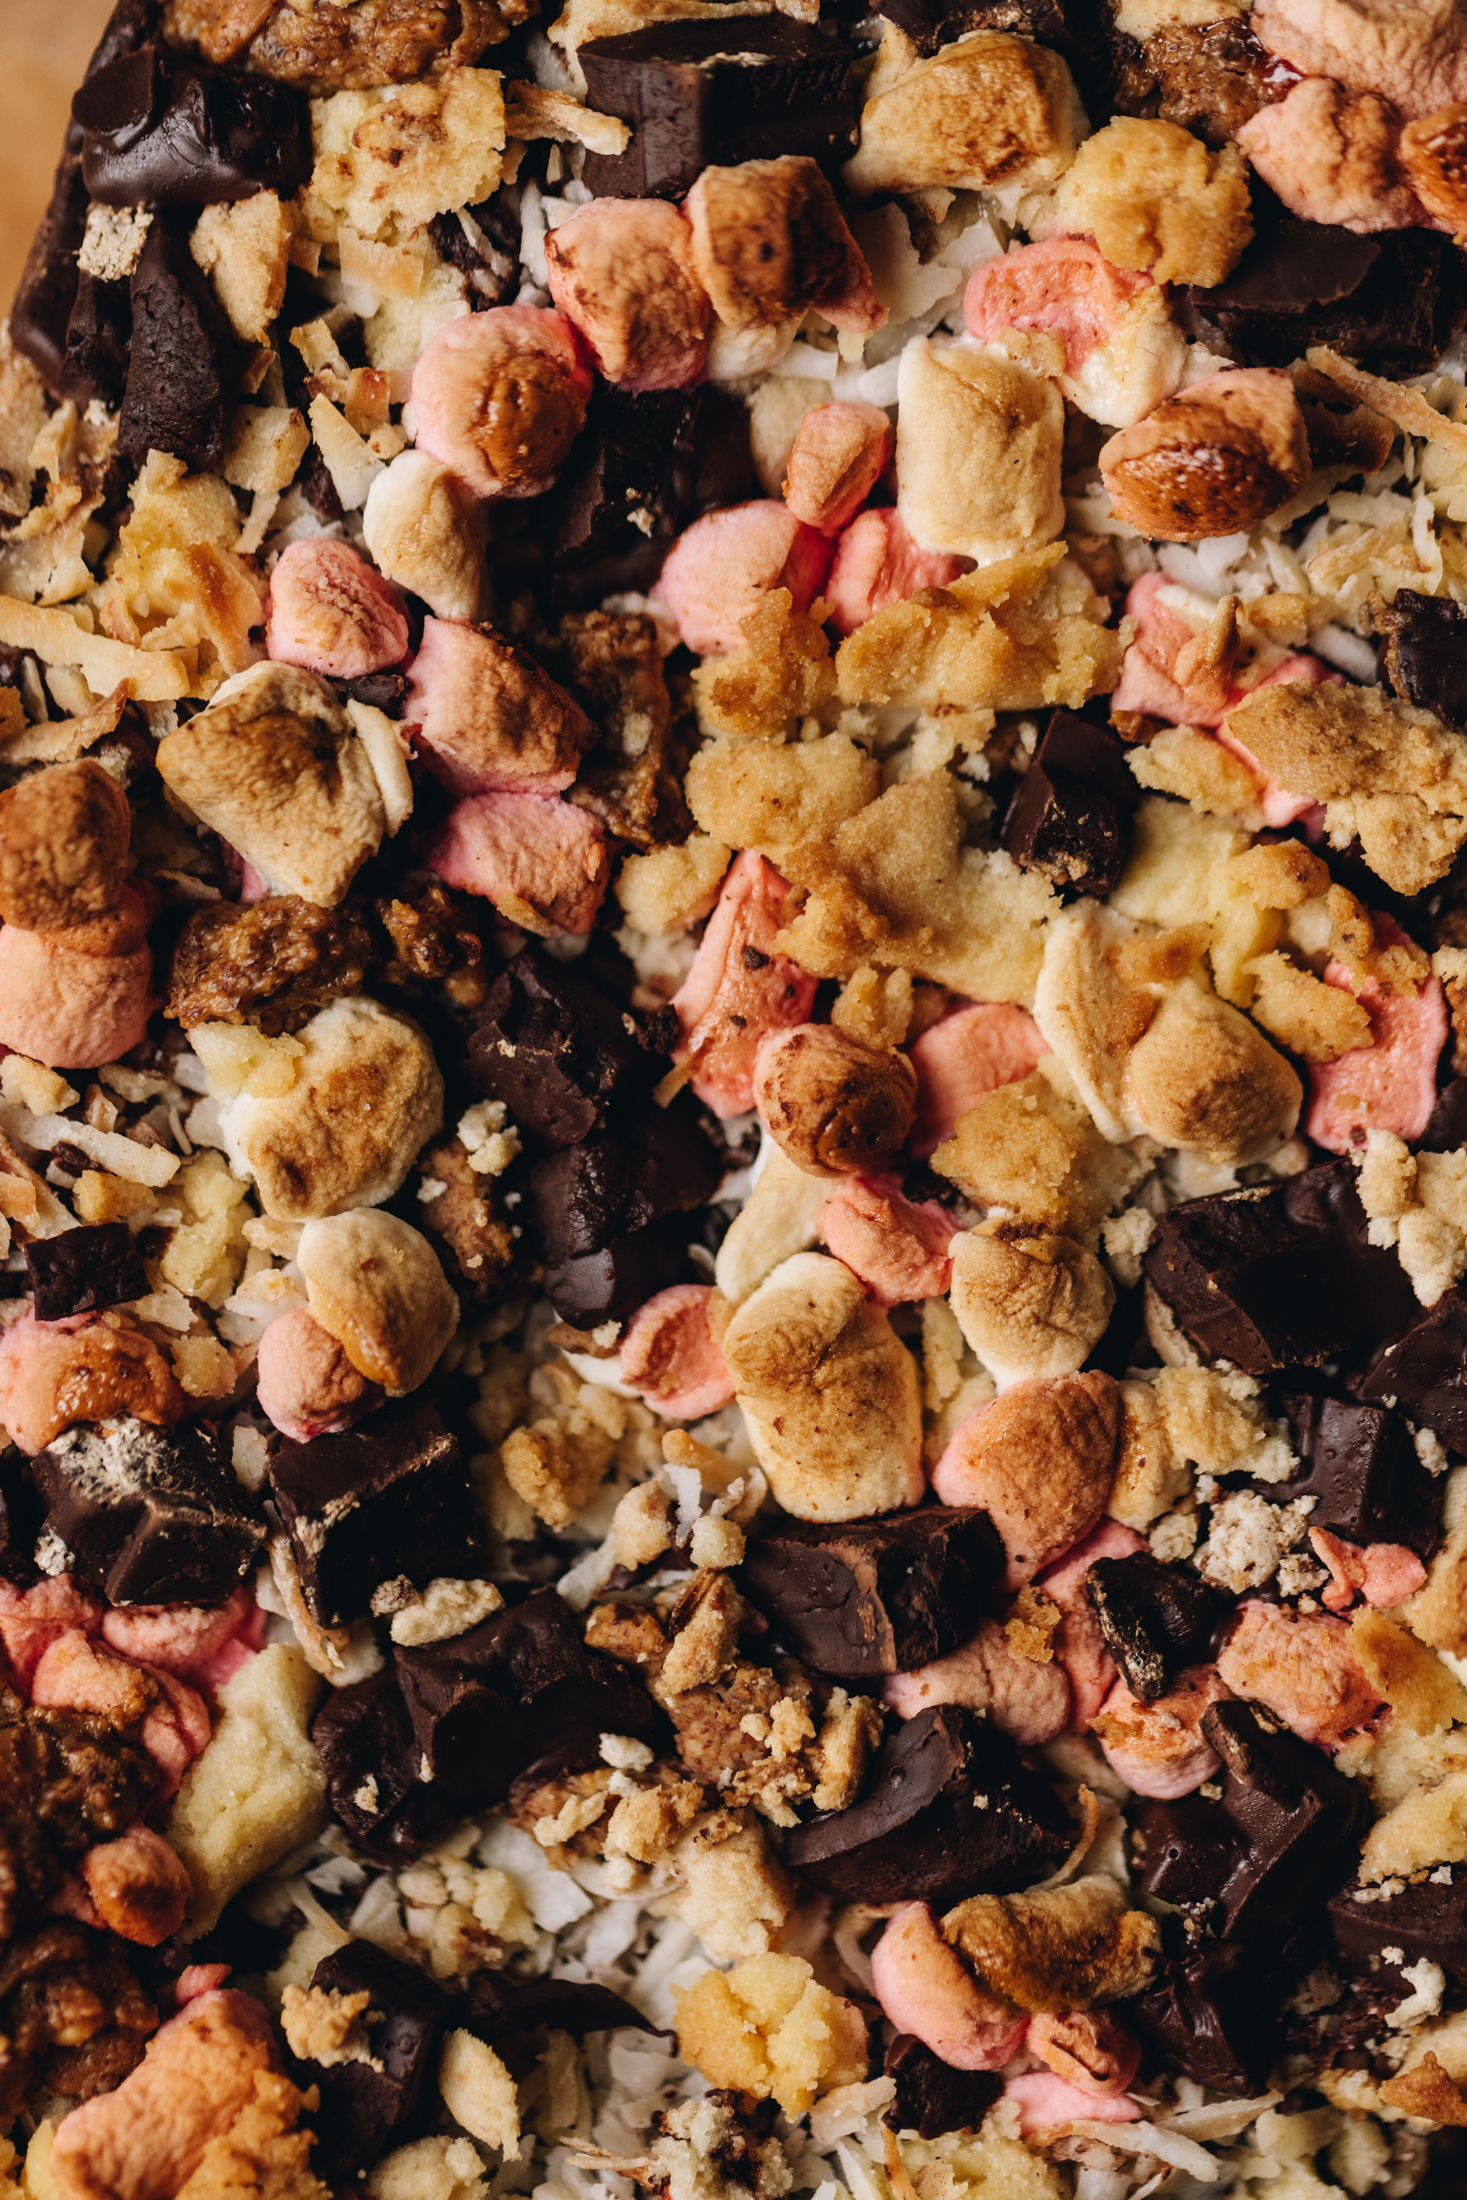
Sprinkle over the kokonati (coconut) and māngohe (marshmallows) until the slice becomes a textural explosion.
12. Bake the Brookie Slice:
Bake in a 160 degree oven for 25 minutes until golden and glorious.
Remove it from the oven and allow it to sit for 10-15 minutes in the tin before slicing in to delicious pieces.
Store the Slice:
This will keep well in a sealed container for up to a week.
But wait, there's more...
Slice Recipes
These slices of goodness are perfect for every occasion.

DID YOU ENJOY THIS RECIPE?
It would be so awesome if you could please leave a review/comment by clicking the “leave a comment” section at the top of the page.
I love seeing you all make my creations, so send a whakaahua (photo) or kiriata (video) to my Instagram and show me what you made. Let me know if you have any pātai (questions) too, I would love to help.
Brookie Slice - Keke Tapatahi Pihikete Me Te Keke Tiakarete
Equipment
- 1 x 20 cm Slice tin or Cake Tin
Ingredients
The Biscuit Layer - Te Paparanga Pihikete
- 120 g pata kūteretere (softened butter)
- ½ C (110 g) huka one (caster sugar)
- ½ teaspoon tote (salt, fine)
- 1 teaspoon (5 ml) wanira (vanilla)
- 1 ¼ C (185 g) puehu parāoa noa (plain flour)
- ½ teaspoon pēkana paura (baking powder)
- 80 g tiakarete parauri (dark chocolate, 50%)
- ¼ C (65 g) pata nati (nut butter, any nut butter will work). This is optional and can be removed if you want.
The Brownie Layer - Te Paparanga Keke Tiakarete
- 100 g tiakarete parauri kua tapahia (chopped dark chocolate)
- 80 g pata (butter)
- ½ teaspoon tote (salt, fine)
- 2 hēki iti (small eggs, size 6)
- ⅔ C (145 g) huka one (caster sugar)
- 1 teaspoon (5 ml) wanira (vanilla)
- ⅓ C (35 g) kōkō (cocoa)
- ½ C (75 g) puehu parāoa noa (plain flour)
- 1 teaspoon pēkana paura (baking powder)
- 70 g tiakarete parauri kua tapahia (chopped dark chocolate)
Decorations - Ngā Whakarākei (all optional)
- 3 tbsp pata nati (nut butter)
- ¾ - 1 C māngohe iti (mini marshmallows)
- ¼ C (20 g) kokonati (coconut)
Instructions
Preheat the Oven:
- Preheat the oven to 170 °C bake setting or 160 °C fan bake setting.
- Line a 20 cm square slice tin with baking paper.
Whip the Butter and Sugar:
- Add the pata kūteretere (softened butter), huka one (caster sugar), tote (salt) and wanira (vanilla) to a medium bowl.
- Whip on high speed for 5 minutes until light and fluffy in colour and texture.
Combine the Whipped Butter and Dry Ingredients:
- Add the puehu parāoa (flour) and pēkana paura (baking powder). Whakawhenumia (combine it together). Once a soft dough forms it is ready.
- Spread the mixture in to the prepared baking tin.
Add the Chocolate:
- Chop the tiakarete (chocolate) in to large chunks and press in to the top of the dough. Add teaspoons of the pata nati (nut butter) in to the gaps if you are using it.
Bake the Cookie Base:
- Bake the paparanga pihikete (biscuit layer) for 15 minutes in the preheated oven.
- Once it is golden, remove it from the oven and set aside as you make the brownie layer.
Melt the Chocolate Mixture:
- Add the tiakarete (chocolate), pata (butter) and tote (salt) in to a small pot and melt gently over low heat.
- Remove it from the heat and allow to cool for 5 minutes.
Whip the Eggs and Sugar:
- Add the hēki (eggs), huka one (caster sugar) and wanira (vanilla) in to a medium sized bowl.
- Whip it on medium - high speed for 3 minutes until the mixture is light in colour and fluffy in texture.
Combine the Eggs and Chocolate:
- Slowly pour in the cooled ranunga tiakarete (chocolate mixture) as you continue to whip on medium speed.
- Once all the tiakarete (chocolate) is incorporated, stop whipping.
Add the Dry Ingredients:
- Sift the kōkō (cocoa), puheu parāoa (flour) and pēkana paura (baking powder) straight in to the chocolate egg mixture.
- Stir it with a whisk just until it is all incorporated and no more.
Add it to the Biscuit Base:
- Pour it on top of the paparanga pihikete (biscuit layer).
Decorate the top of the Brookie Slice:
- Add the remaining tiakarete (chocolate) and pata nati (nut butter), dividing it evenly on top.
- Sprinkle over the kokonati (coconut) and māngohe (marshmallows).
Bake the Brookie Slice:
- Bake in a 160 degree oven for 25 minutes.
- Remove it from the oven and allow it to sit for 10-15 minutes in the tin before slicing in to delicious pieces.
Store the Slice:
- This will keep well in a sealed container for up to a week.

Leave a Review