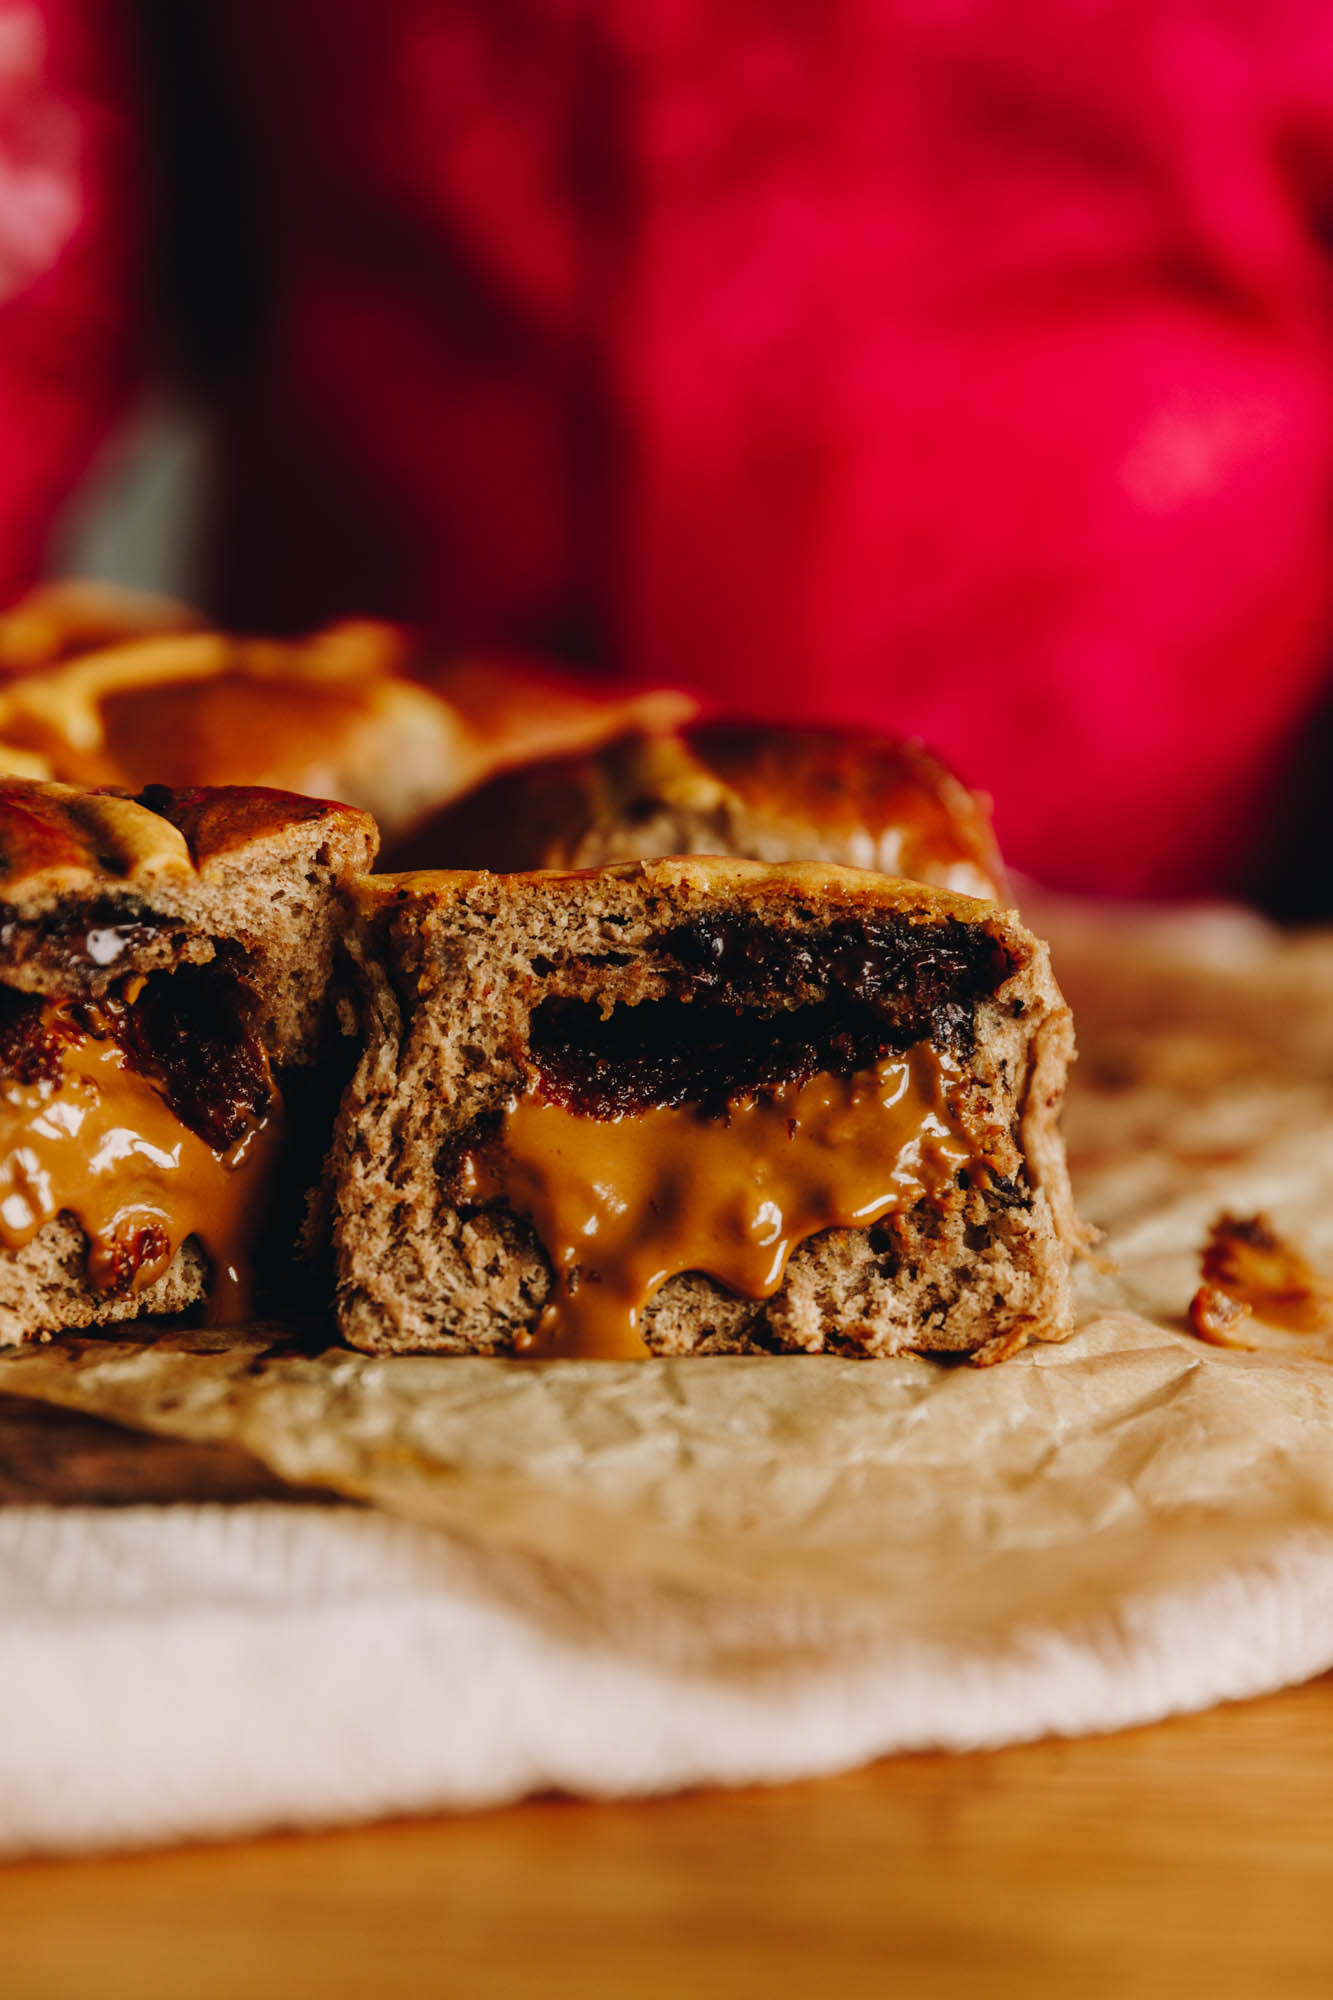
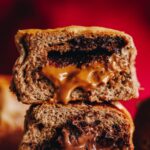
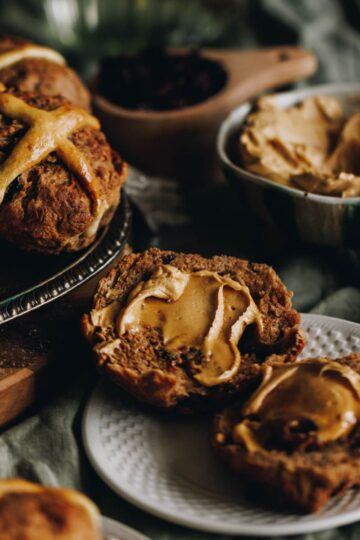
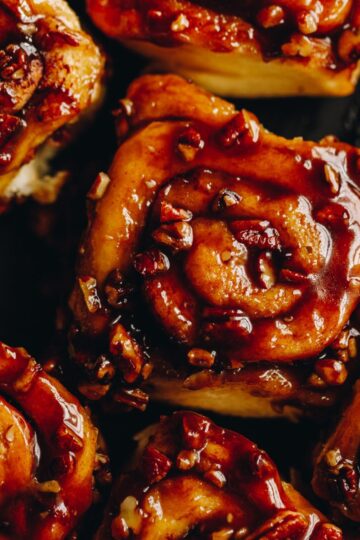
Did you know that Biscoff, spices and chocolate are the most beautiful combination? I didn't either until I developed these Biscoff Hot Cross Buns and I was blown away. They are super fluffy, spiced hot cross buns with dark chocolate chunks and a gooey Biscoff centre. Need I say more? Kia tunu tātou (let's bake)!

These Biscoff Hot Cross Buns are so divine. Hot Cross Buns are superior when made from scratch and eaten warm from the oven. These ones have Biscuit spread baked in to the centre, resulting in a gooey, spiced centre that is just divine. The idea of having it as a treat at Aranga (Easter) once a year makes it super special. So, join me as we embark on an Easter flavour sensation.
Not a Biscoff Fan?
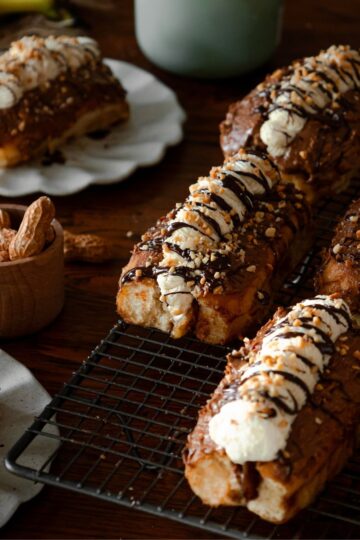
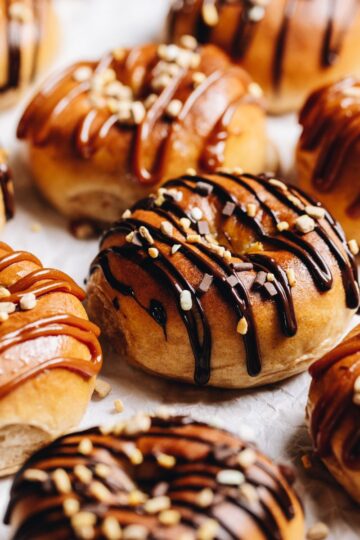
No worries at all, try my Nutella Hot Cross Buns. If you need another option of bread goodness, then my Spiced Hot Cross Buns might be more up your alley. Or what about a Braided Chocolate Chip Bread to feed the whānau (family)?
Videography and photography by Sarah Henderson.
Ingredient Tips for these Biscoff Hot Cross Buns:
- Milk: I prefer full-fat milk in this recipe but lite will work too.
- Brown Sugar: Use huka hāura (brown sugar) for the caramel vibes but swap it for huka one (caster sugar) if need be.
- Instant yeast: Use īhi horo (instant yeast) in this recipe for efficient rising. If you are using Surebake or breadmakers yeast, double the amount.
- High grade flour: Always use puehu parāoa kounga (high grade flour) in bread recipes because it yields the fluffiest result.
- Spices: Use all of the spices to develop a rich spice flavour.
- Butter: I prefer to use salted butter in my baking but feel free to use unsalted.
- Dark Chocolate: I use dark chocolate chunks for the depth of flavour but if you prefer milk chocolate, use that. Replace it with chocolate drops if you want but I find they can be a bit sweet.
- Biscuit Spread: Use smooth Biscuit spread for the ultimate goo factor.
- Maple Syrup: If need be, replace the marahihi māpere (maple syrup) with 3 tablespoons of honey or apricot jam for the simple glaze.
Expert Tips:
A lot of huka (sugar) is added in to the liquids before activating the īhi (yeast). So, stir the huka (sugar) really well until the sugar has dissolved. If it is not dissolved properly, it can stop the īhi (yeast) from activating properly.
Always give the yeast enough time to activate before adding the dry ingredients. The yeast will float to the top and it will be slightly foamy when it is ready.
Follow the kneading times as they are written because the gluten needs to develop properly. If you need some more tips, check out this How to Knead Dough post.
When hand kneading use the palm of your hands, not your fingers. The dough and hands get much stickier when it is worked like that, so work those palms in to the dough.
Do not add too much extra flouring when you knead the dough because the buns will become dense once they are baked.
Refrigerate the Biscoff before it is added to the buns otherwise it will be a sticky mess.
Use a tray that is as close to 25 cm x 35 cm as possible so the buns bake evenly. If the buns are close-ish together on the tray they will rise up, yielding a soft bun. If the tray is too large, the buns will rise outwards making them dry and flat rather than tall and fluffy.
STEP BY STEP INSTRUCTIONS FOR THE BISCOFF HOT CROSS BUNS:
Note: The full recipe card with the full list of ingredients, instructions and step by step video are found at the bottom of this page.

1. ACTIVATE THE YEAST:
Add the lukewarm miraka (milk aromahana), wai wera (hot water) and huka (sugar) in to a large bowl.
Stir it well until the sugar has dissolved.
Add the īhi horo (instant yeast) and mix it in well. Leave it for 5 minutes or so to activate. The īhi (yeast) will rise to the top and be slightly foamy when it is ready.
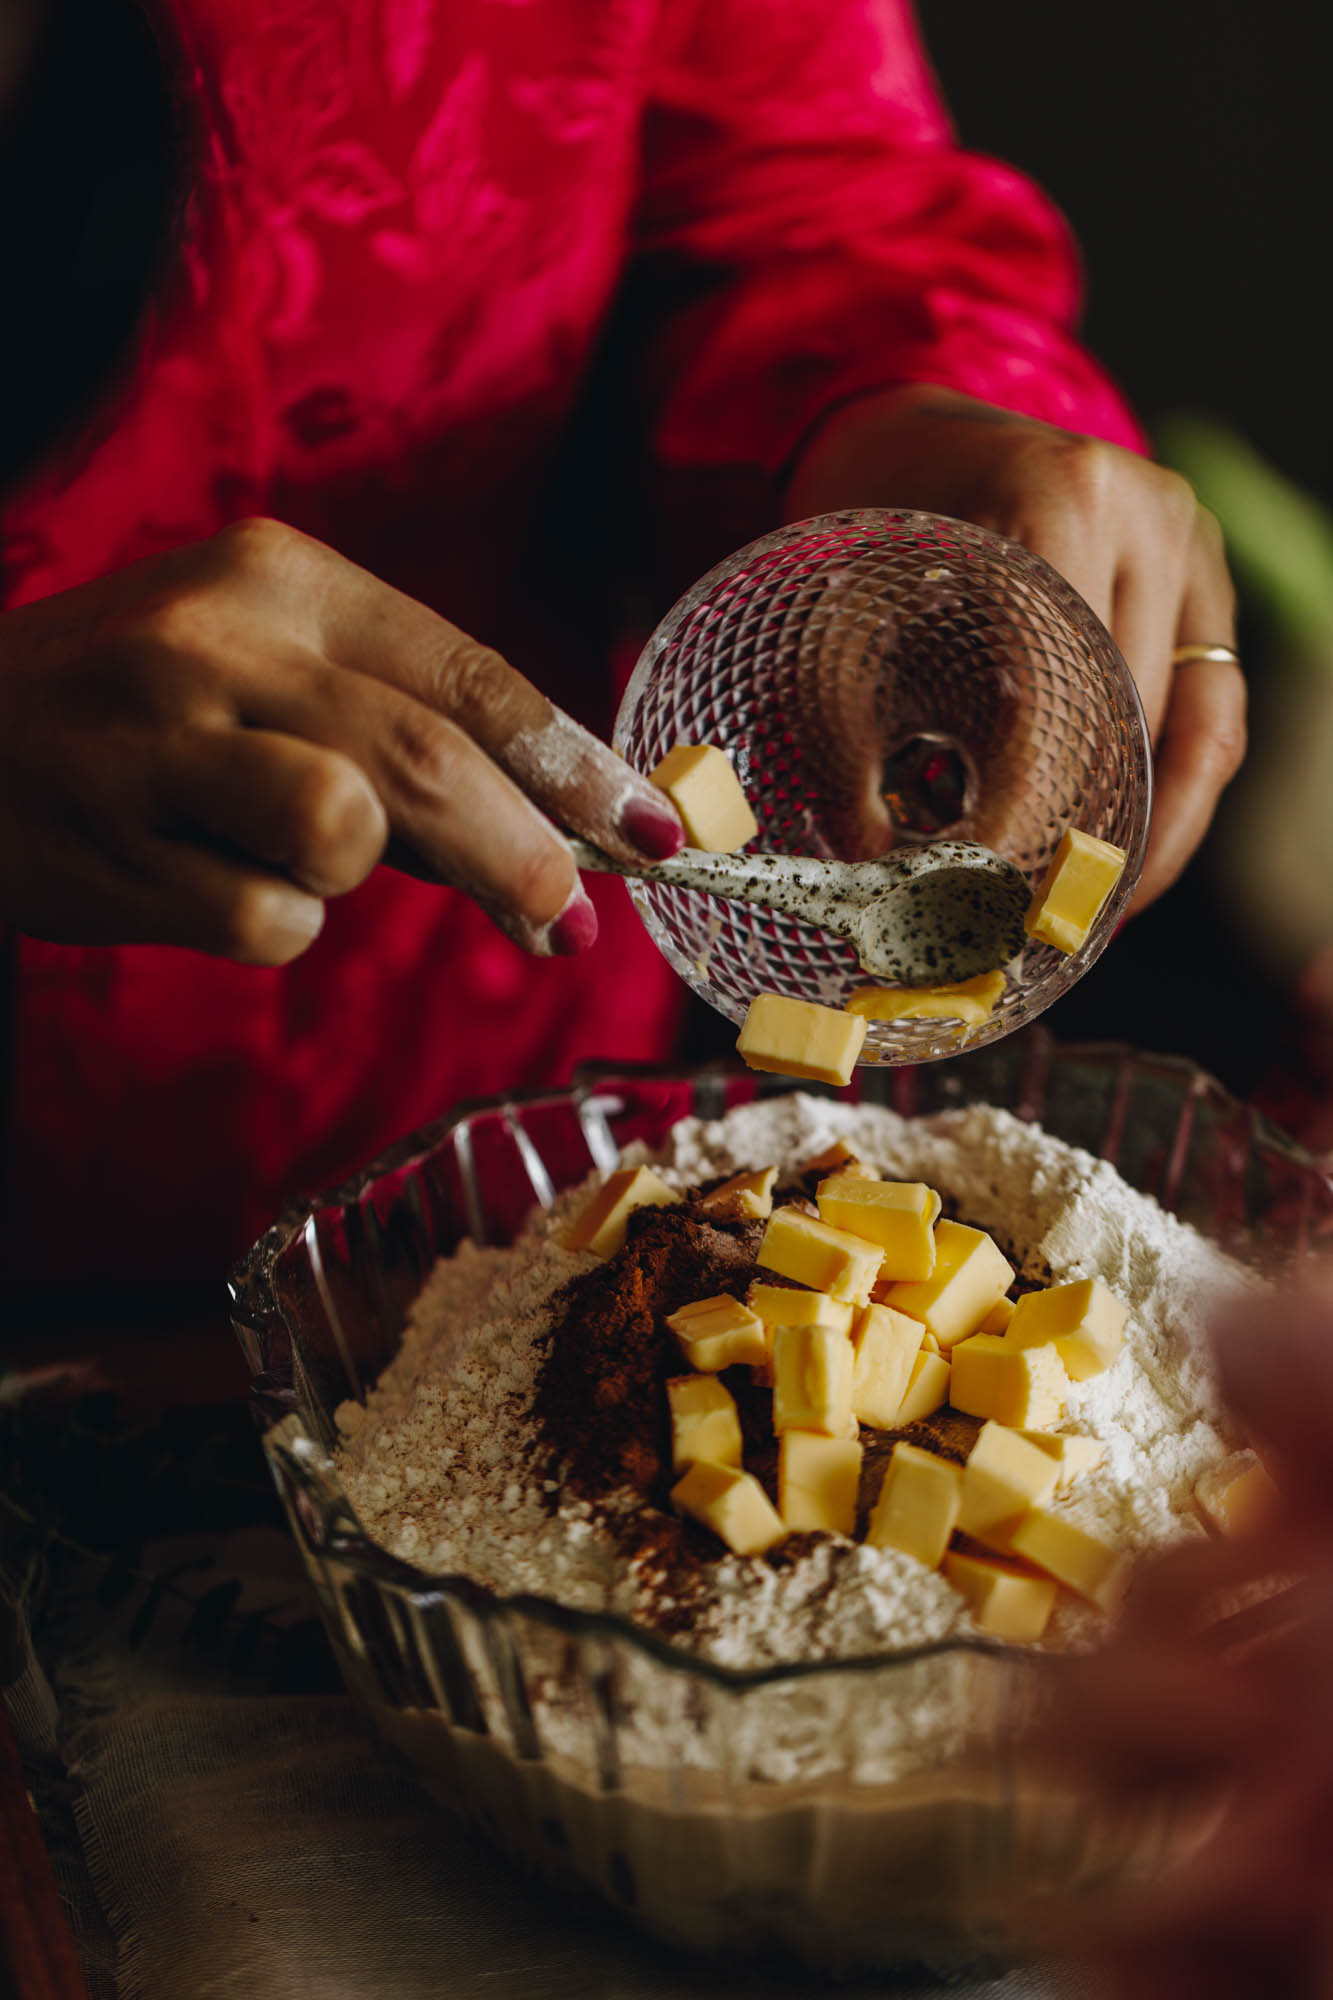
2. ADD THE REMAINING INGREDIENTS:
Add the puehu parāoa (flour), hēki (eggs), iho hūperei (vanilla), raukikini katoa (allspice), raukikini whakauruuru (mixed spice), hinamona (cinnamon), tote (salt) and pata (butter) in to the yeast mixture.
Stir it with a knife until a rough dough comes together.
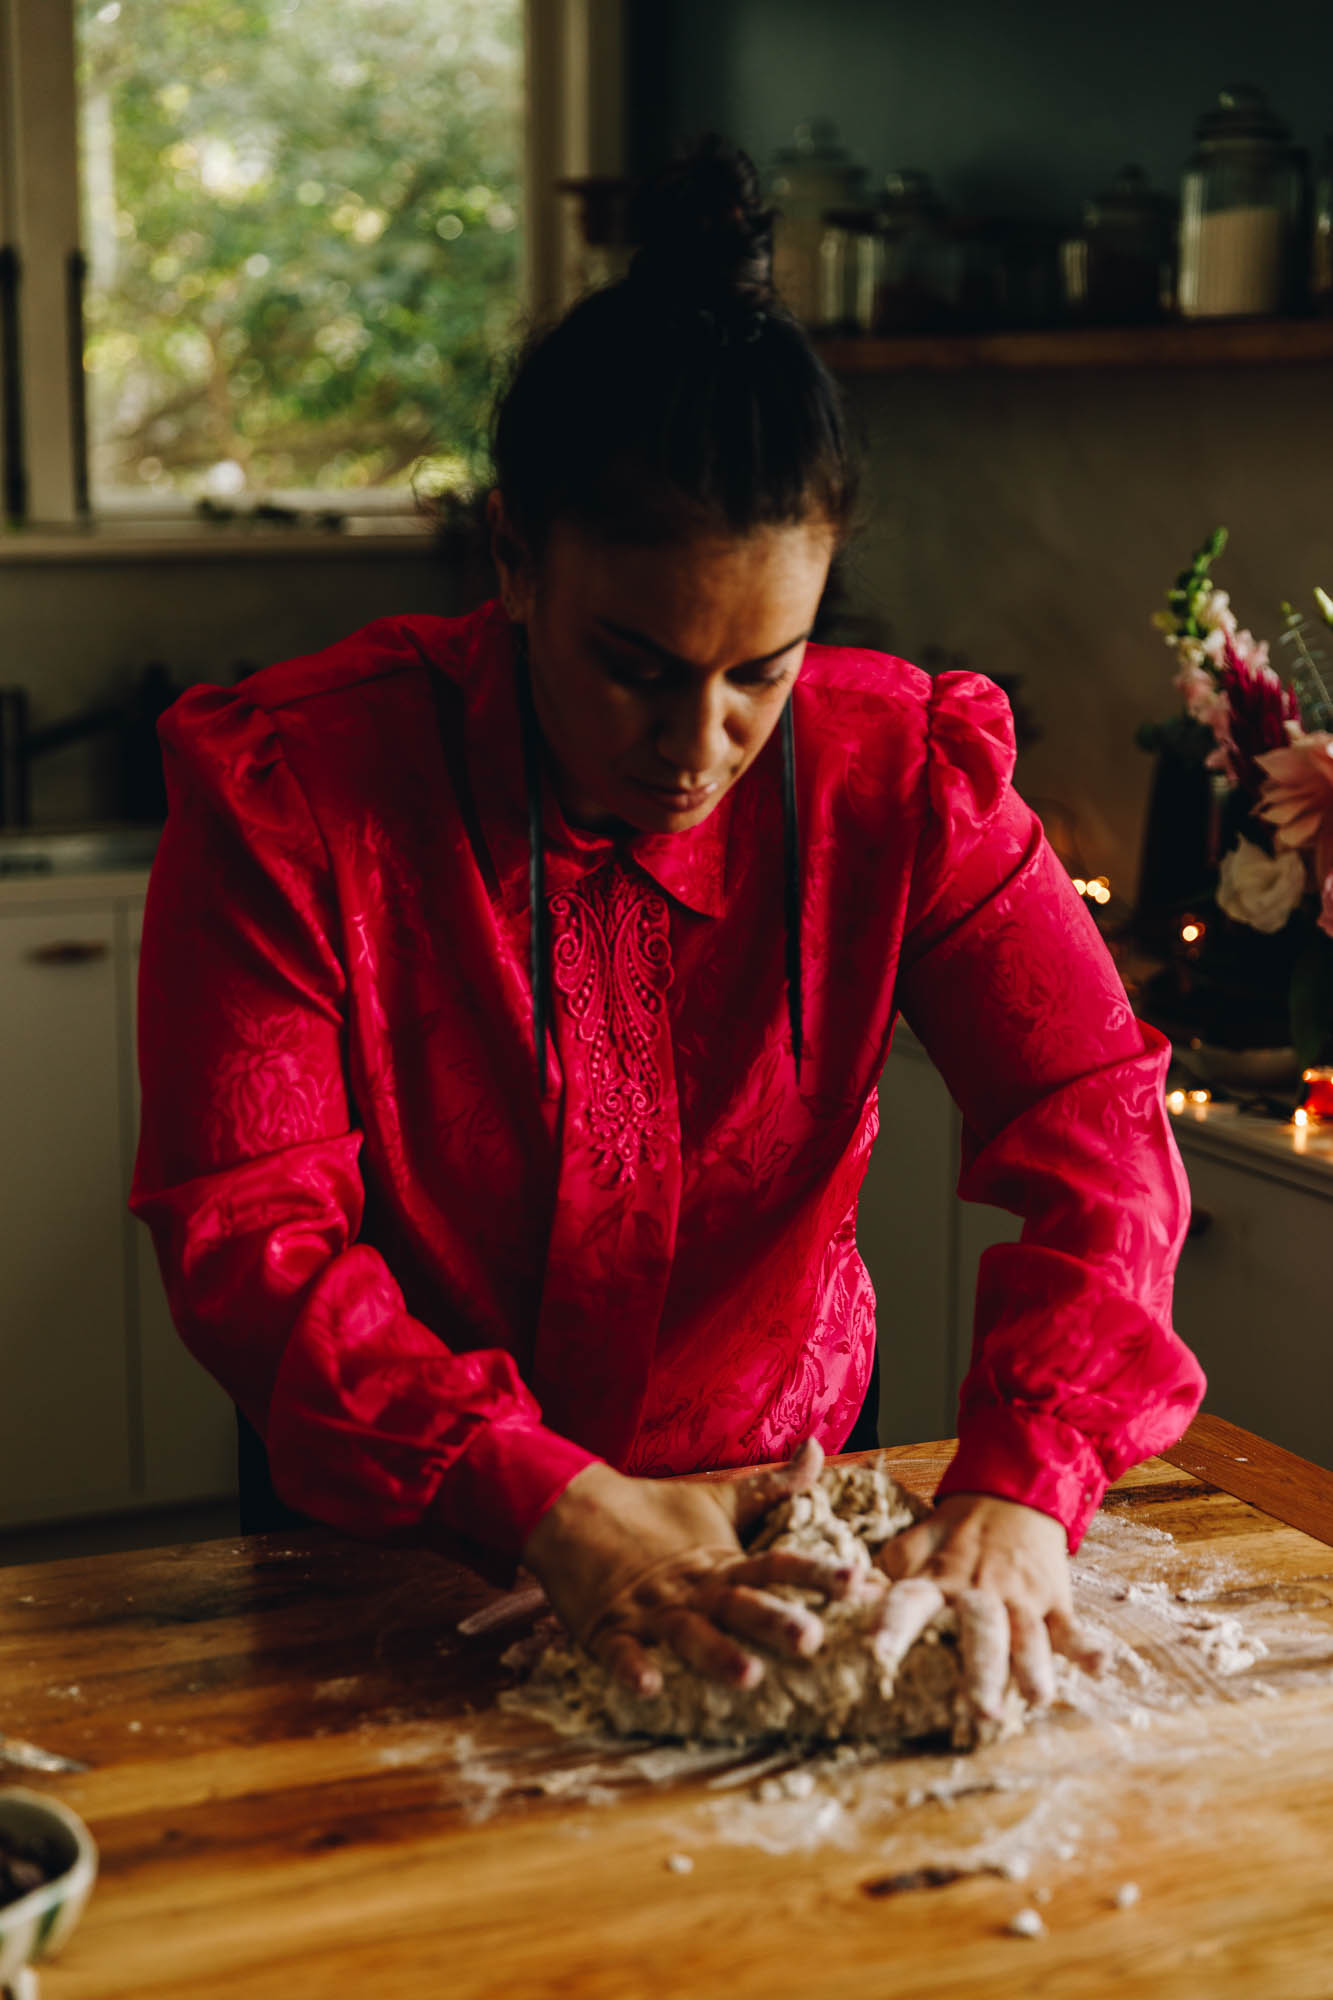
3. KNEAD THE DOUGH:
Knead the dough once the dough is roughly incorporated.
If you are using a mixer, place the dough in the mixing bowl. Using a dough hook, knead the dough for 10 minutes on low-medium speed.
If you are kneading by hand, add the dough to a lightly floured bench or table. Knead the dough with the palms of your hands (not with your fingers) for 12-14 minutes. Try not to add any extra flour when you are kneading.
Once the dough has reached the window pane test (see the video for reference), it is ready for the tiakarete (chocolate).
4. ADD THE CHOCOLATE:
Chop the tiakarete (chocolate) in to small chunks. Stretch the dough out to a rough rectangle. Sprinkle over the tiakarete (chocolate), fold it in from the edges and knead it until it is distributed well.
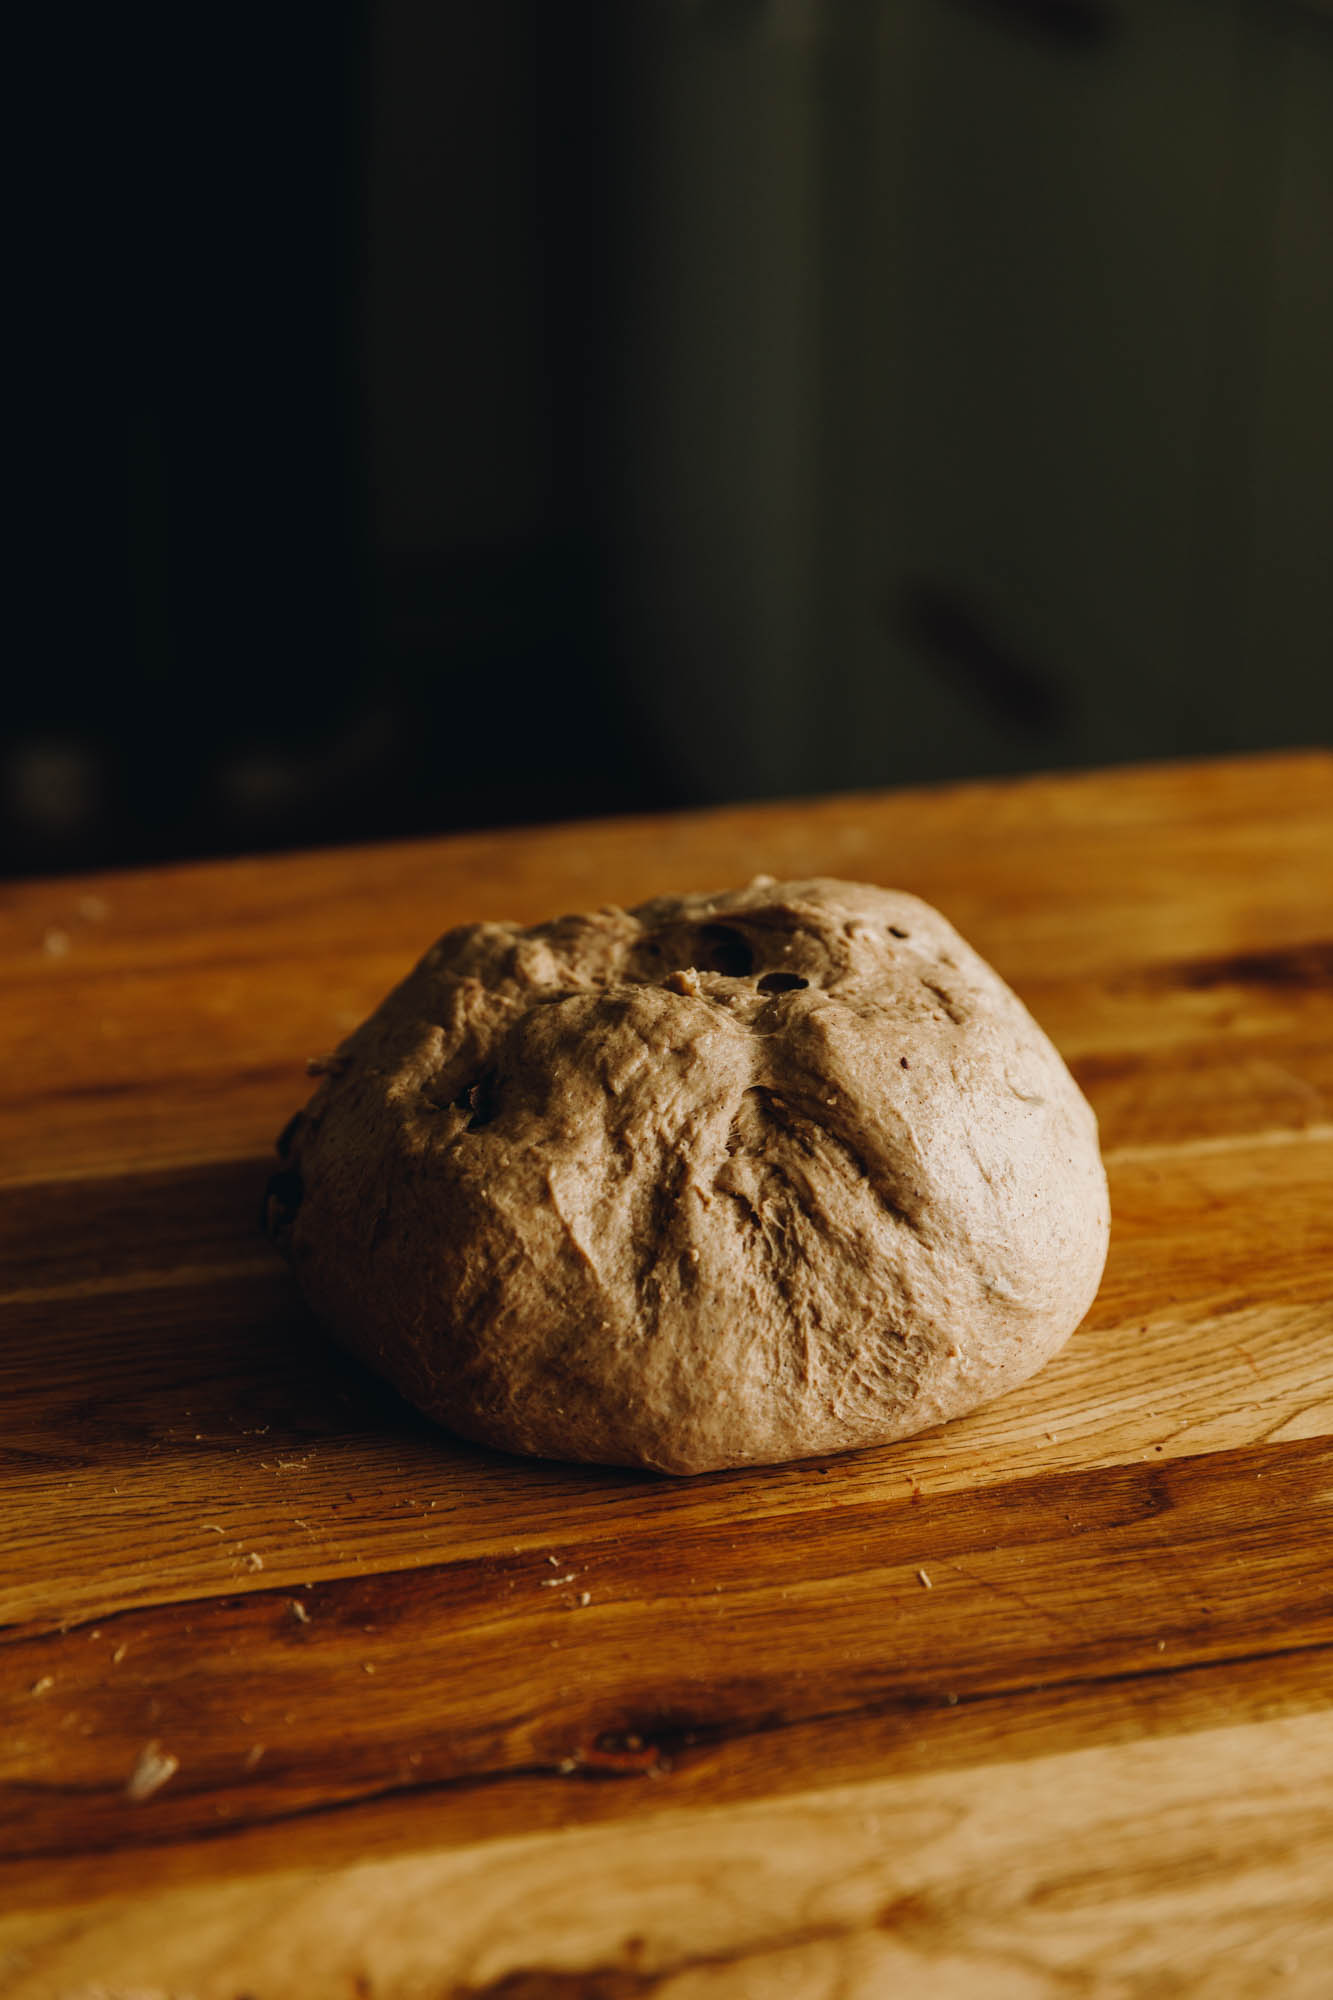
5. FIRST RISE:
Manipulate the dough in to a ball and add it to a large, clean bowl. Cover it with a tea towel or a bowl cover.
Leave it to rise for 1 ½ hours.
6. PREPARE THE BAKING TRAY:
Line a 25 cm x 35 cm tray with baking paper. Note: Try not to use a tray any bigger than this as this this size tray helps the buns rise close together, creating softer buns. Trust me, it makes a difference.
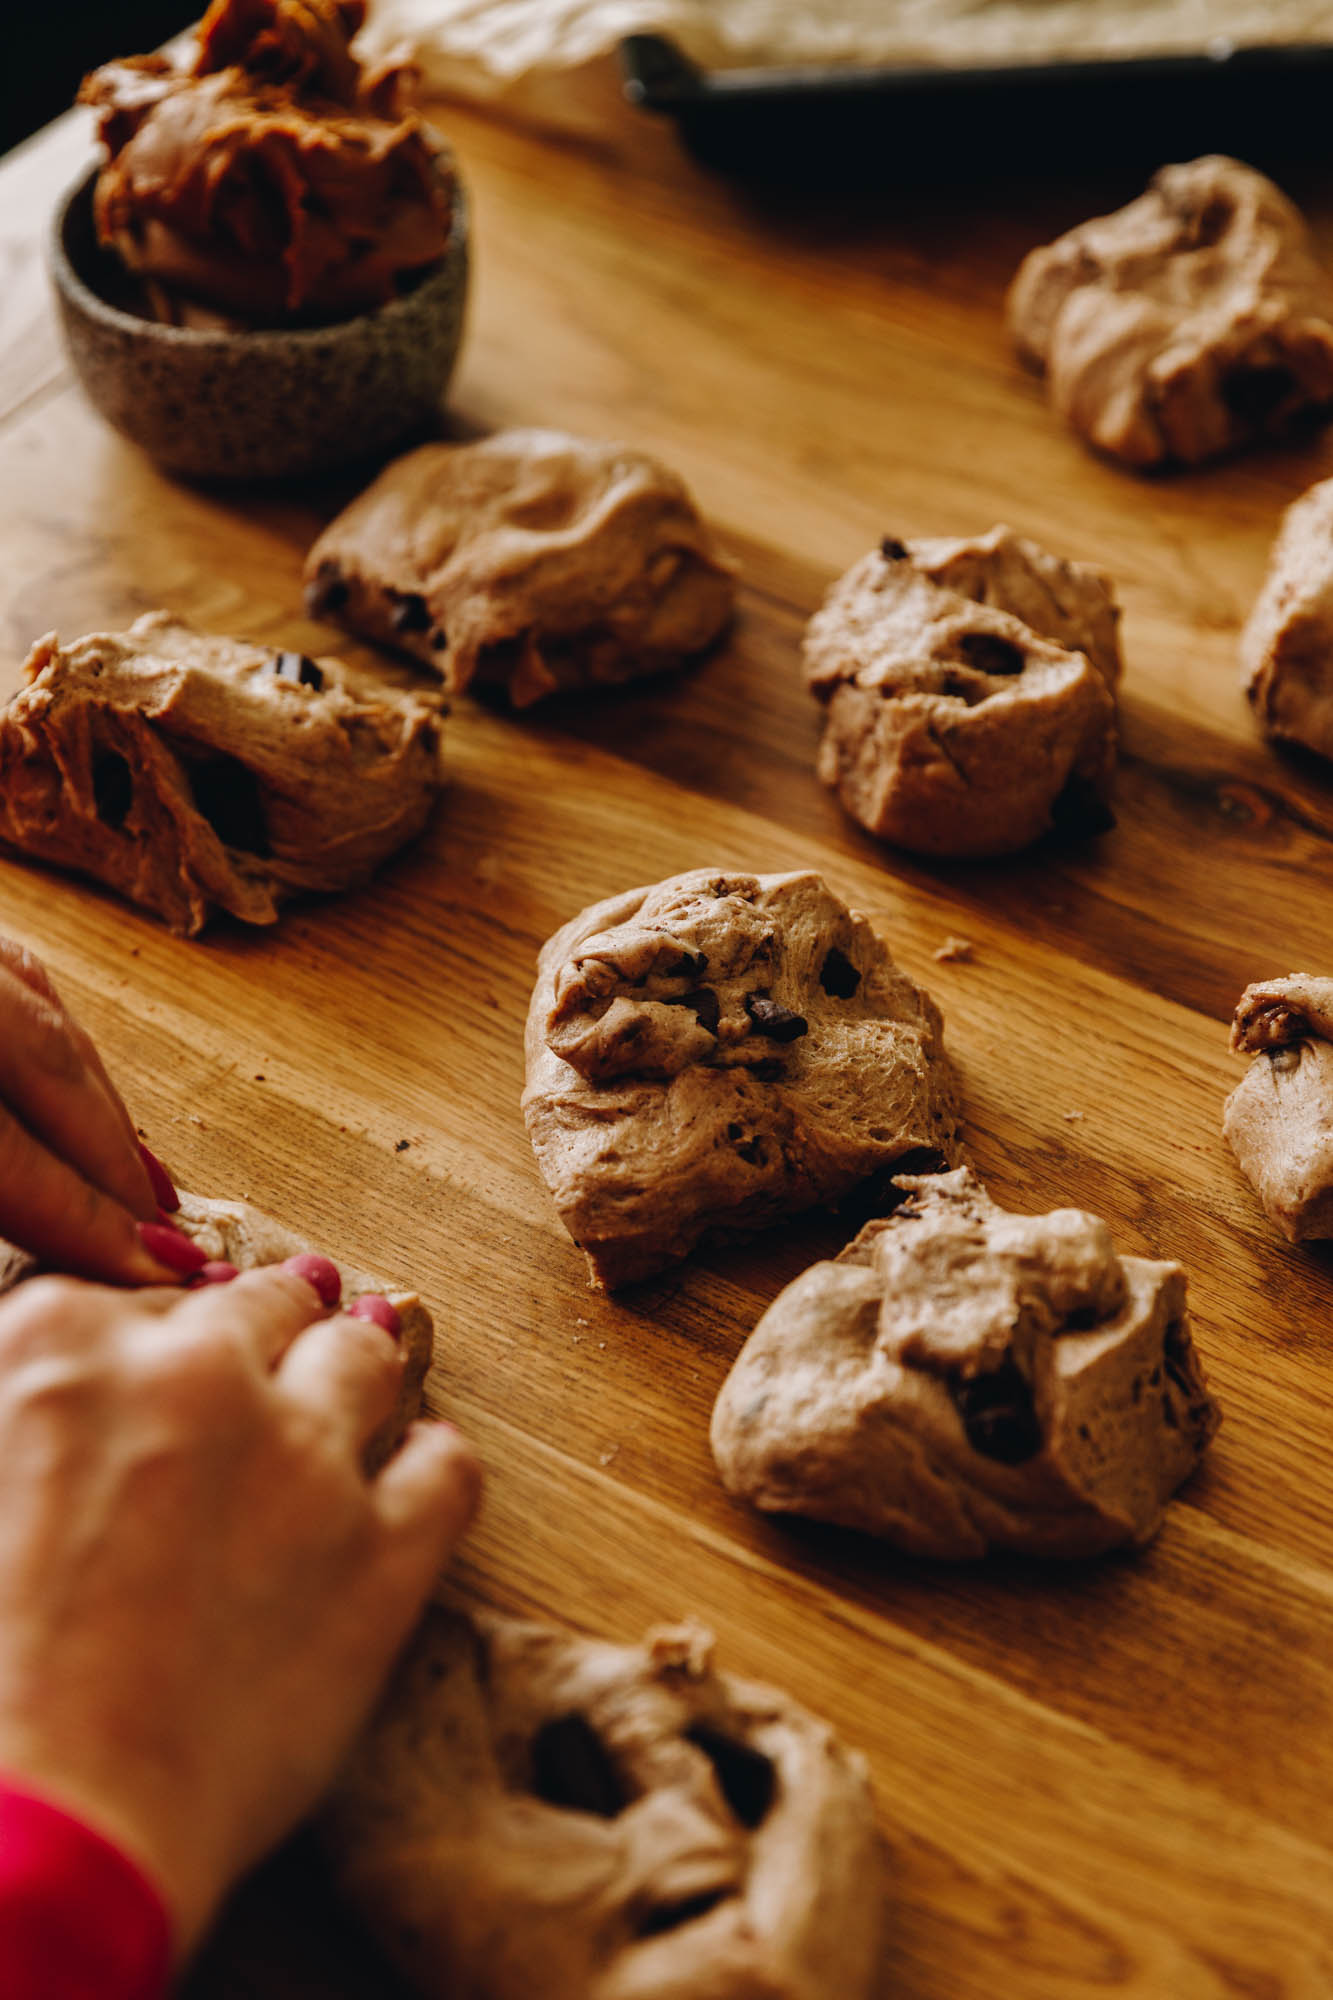
7. DIVIDE THE RISEN DOUGH:
Once the dough has doubled in size, tip it on to a bench and cut in to 12 equal pieces.
You can use a scale for accuracy here or you can eye ball it (which is what I often do).
8. Prepare the Biscoff:
Take the jar of chilled Biscoff and divide it in to 12 equal spoonful's. I use the whole jar, you can use less but this amount is perfect in my mind.
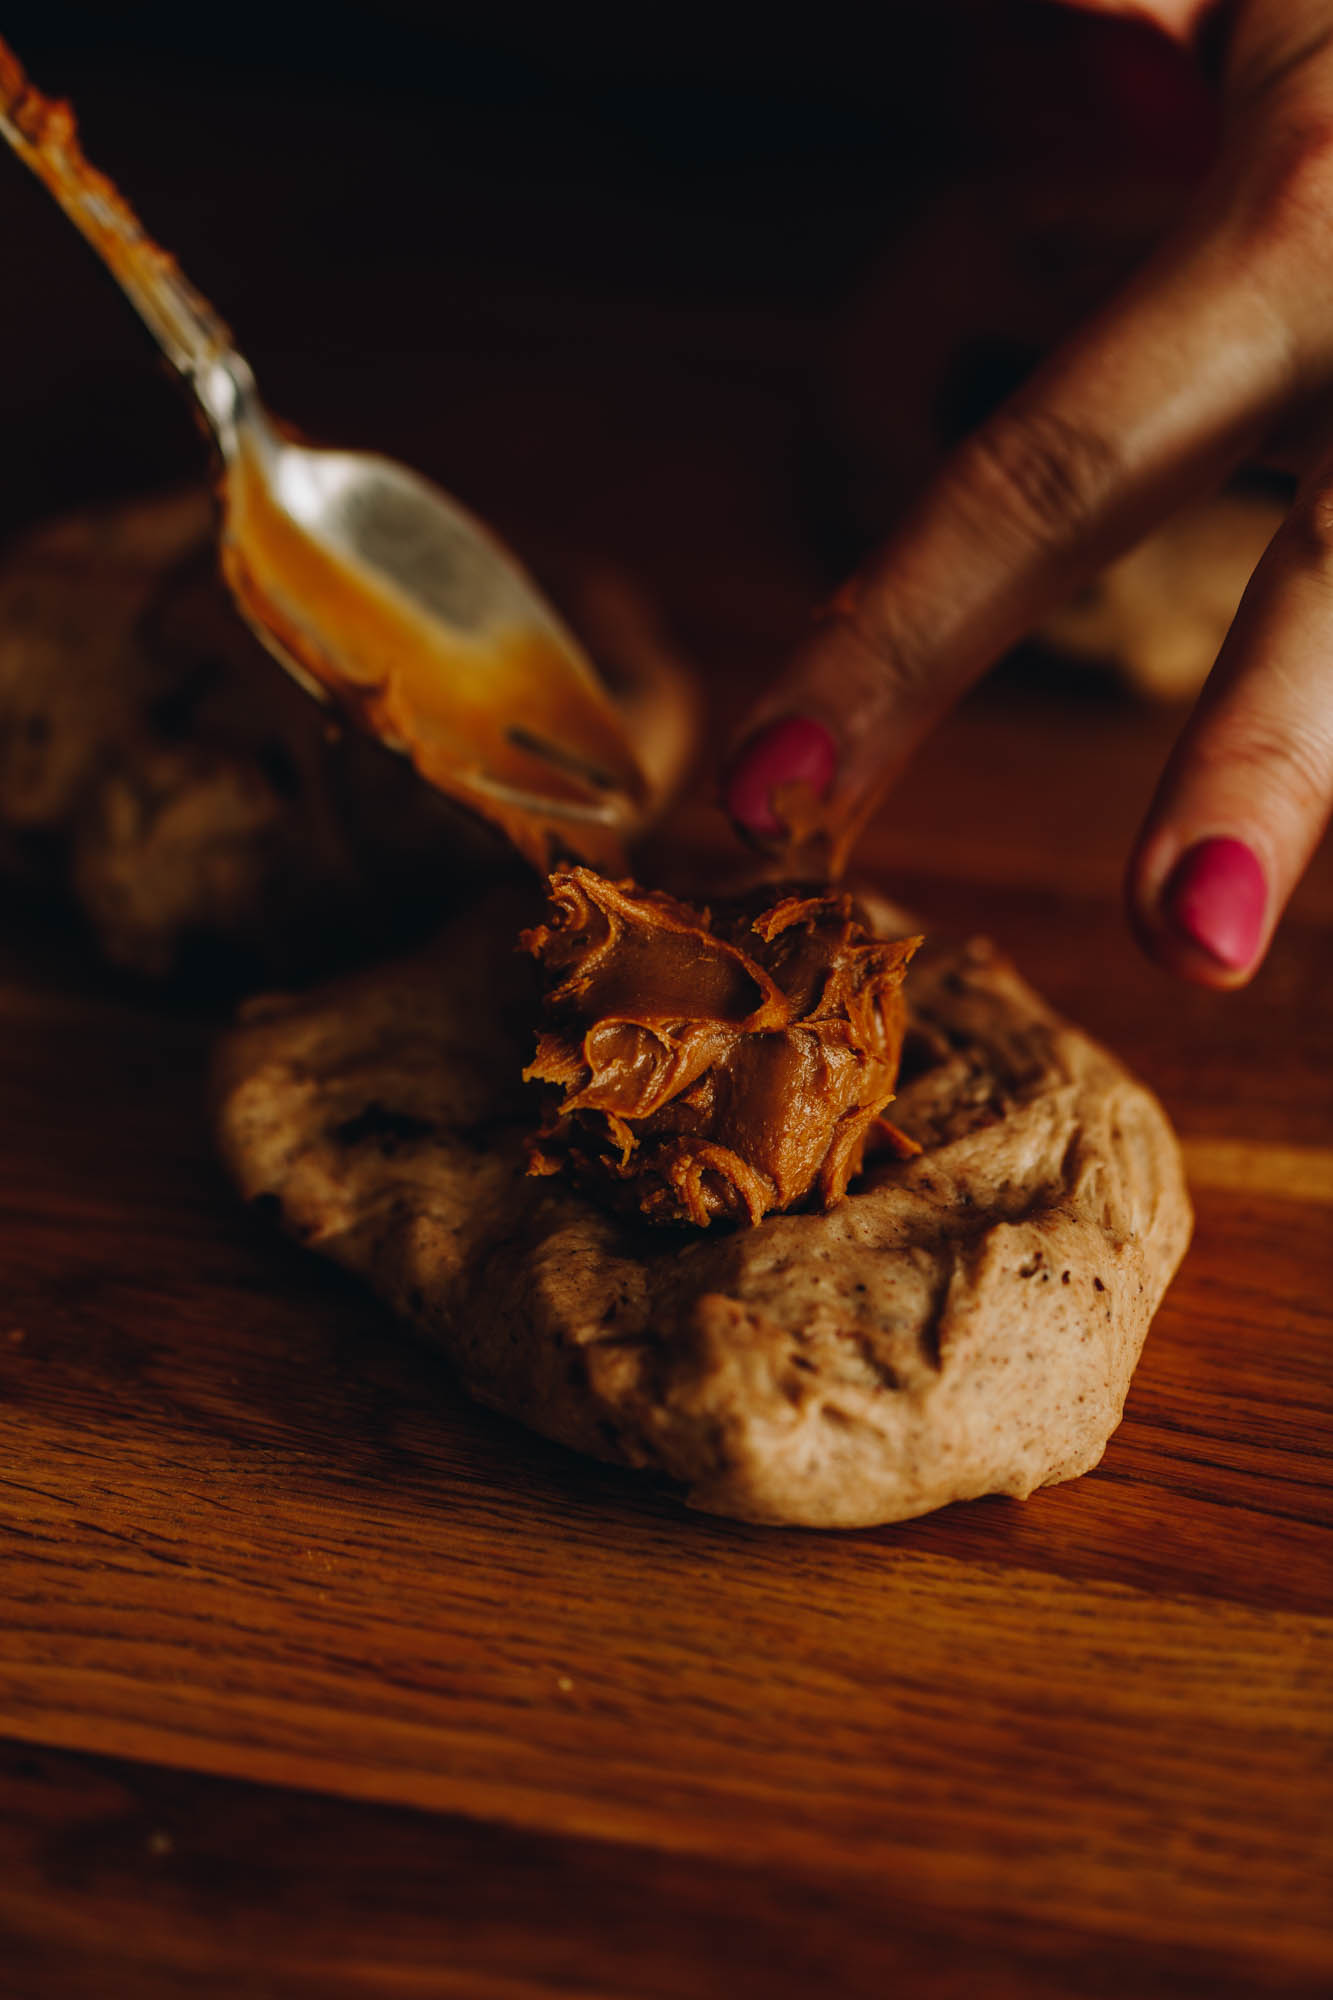
9. Stuff the Buns with Biscoff:
Note: Watch the video for assistance on how to create the buns.
Taking a piece of dough, gently press it out and place the Biscoff in the centre. Pull in the corners and pinch the seams together. Flip it over and gently shape the dough in to a round shape. Place it on to the tray. Continue this pattern with all 12 pieces.
10. SECOND RISE:
Once all the buns are prepared, cover them with a tea towel and rise for 55 minutes to an hour on the bench.
11. PREHEAT THE OVEN:
Preheat the oven to 175 °C bake setting or 165 °C fan bake setting.
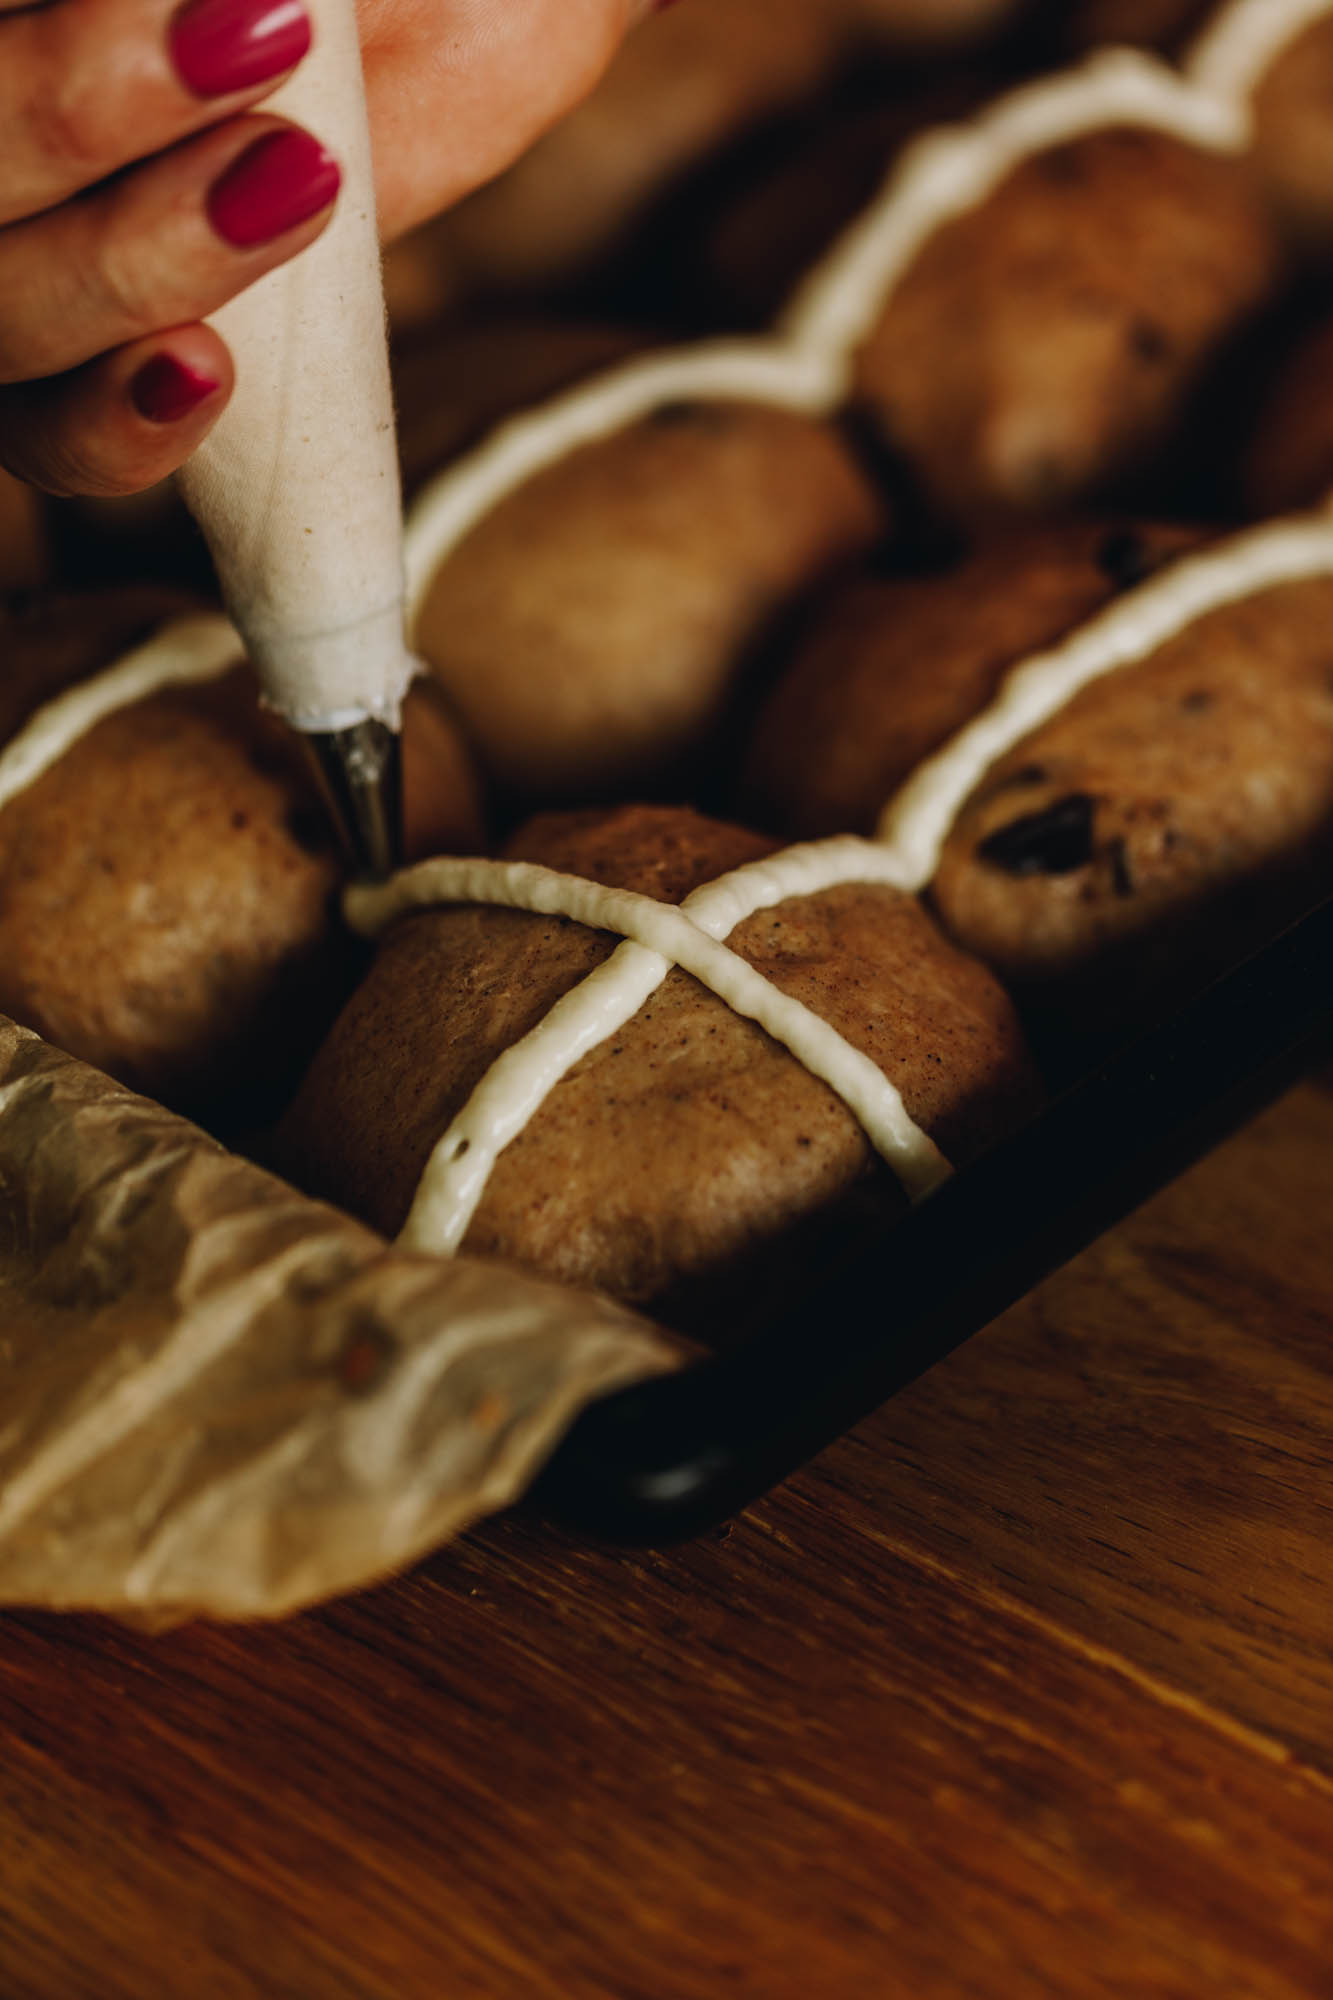
12. MAKE THE BATTER FOR THE CROSSES:
15 minutes before the rising time is up, make the rīpeka (crosses). Add puehu parāoa (flour), huka (sugar), pēkana paura (baking powder) and wai (water) in to a small bowl. Whakaranuhia kia māene (mix together until smooth).
13. PIPE ON THE CROSSES:
Add the mixture to a piping bag with a small, round piping tip. Pipe the crosses on to the risen buns. (Watch the video for a reference).
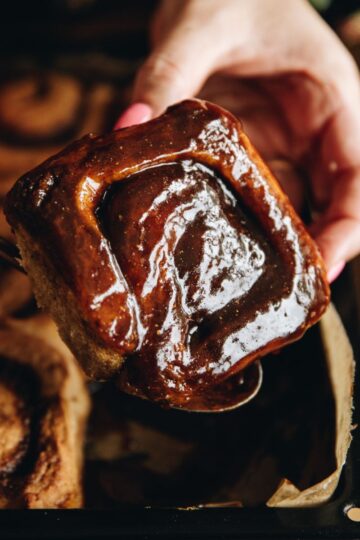
14. Bake the Biscoff Hot Cross Buns:
Once the rising time is up, slide them in to the oven.
Bake for 30 minutes and then check if they are cooked. If the buns spring back when pressed on the underside of the buns, they are ready. If they stay pressed in, bake for five more minutes.
15. PREPARE THE GLAZE:
As they bake prepare the simple mōhinuhinu (glaze).
Gently melt the pata (butter) in a small pot on the stove or in a small heat proof bowl in the microwave. Then stir through the marahihi māpere (maple syrup).
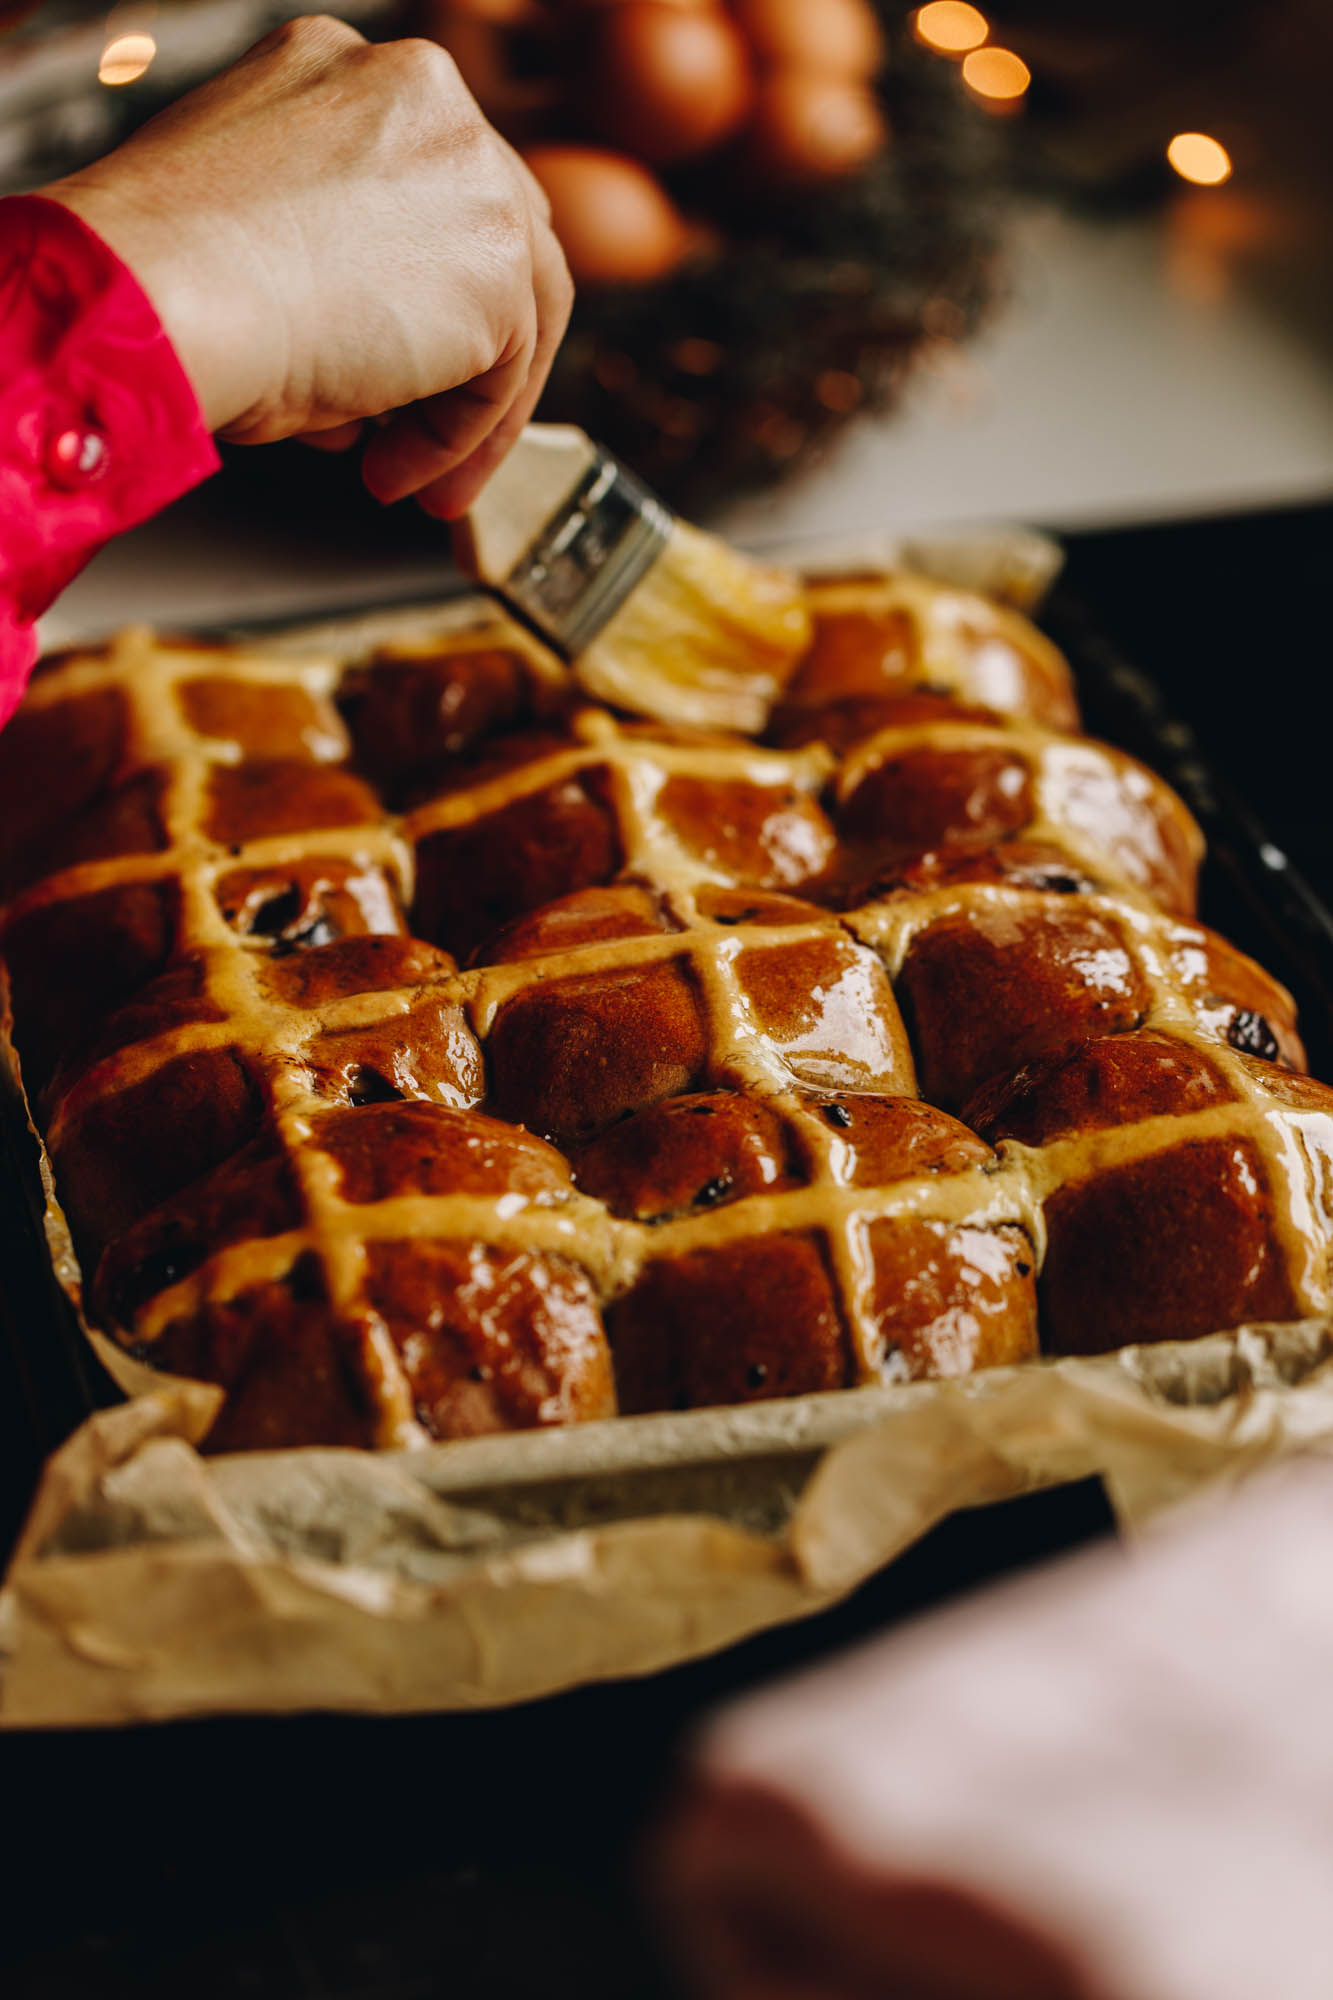
16. GLAZE THE BISCOFF HOT CROSS BUNS:
Remove the baked buns from the oven and brush the mōhinuhinu (glaze) all over with a pastry brush.
17. RETURN THE HOT CROSS BUNS TO THE OVEN:
Once they glazed, return the rohi (buns) to the oven, turn the oven off and leave them for an extra five minutes.
This helps the glaze go a little sticky and I highly recommend doing this stage.
Now they are ready to eat warm with your loved ones.

STORE THE BISCOFF HOT CROSS BUNS:
These are always going to be best eaten fresh from the oven. However, they can be stored in a plastic bag or container on the bench overnight. Slice them and toast them the next day or warm them in the microwave for 10 seconds.
Beyond a day, store them in a plastic bag and freeze for up to three months. Make sure to heat them to bring them back to life.
If Biscoff isn't your vibe, then try these Nutella Hot Cross Buns! 😍
There is more
Parāoa (Bread) Recipes
where that came from so have a squizz!


DID YOU ENJOY THIS RECIPE?
It would be so awesome if you could please leave a review/comment by clicking the “leave a comment” section at the top of the page.
I love seeing you all make my creations, so send a whakaahua (photo) or kiriata (video) to my Instagram and show me what you made. Let me know if you have any pātai (questions) too, I would love to help.
Hot Cross Buns Biscoff - Rohi Rīpeka me te Biscoff
Equipment
- 1 x 25 cm x 35 cm baking tray
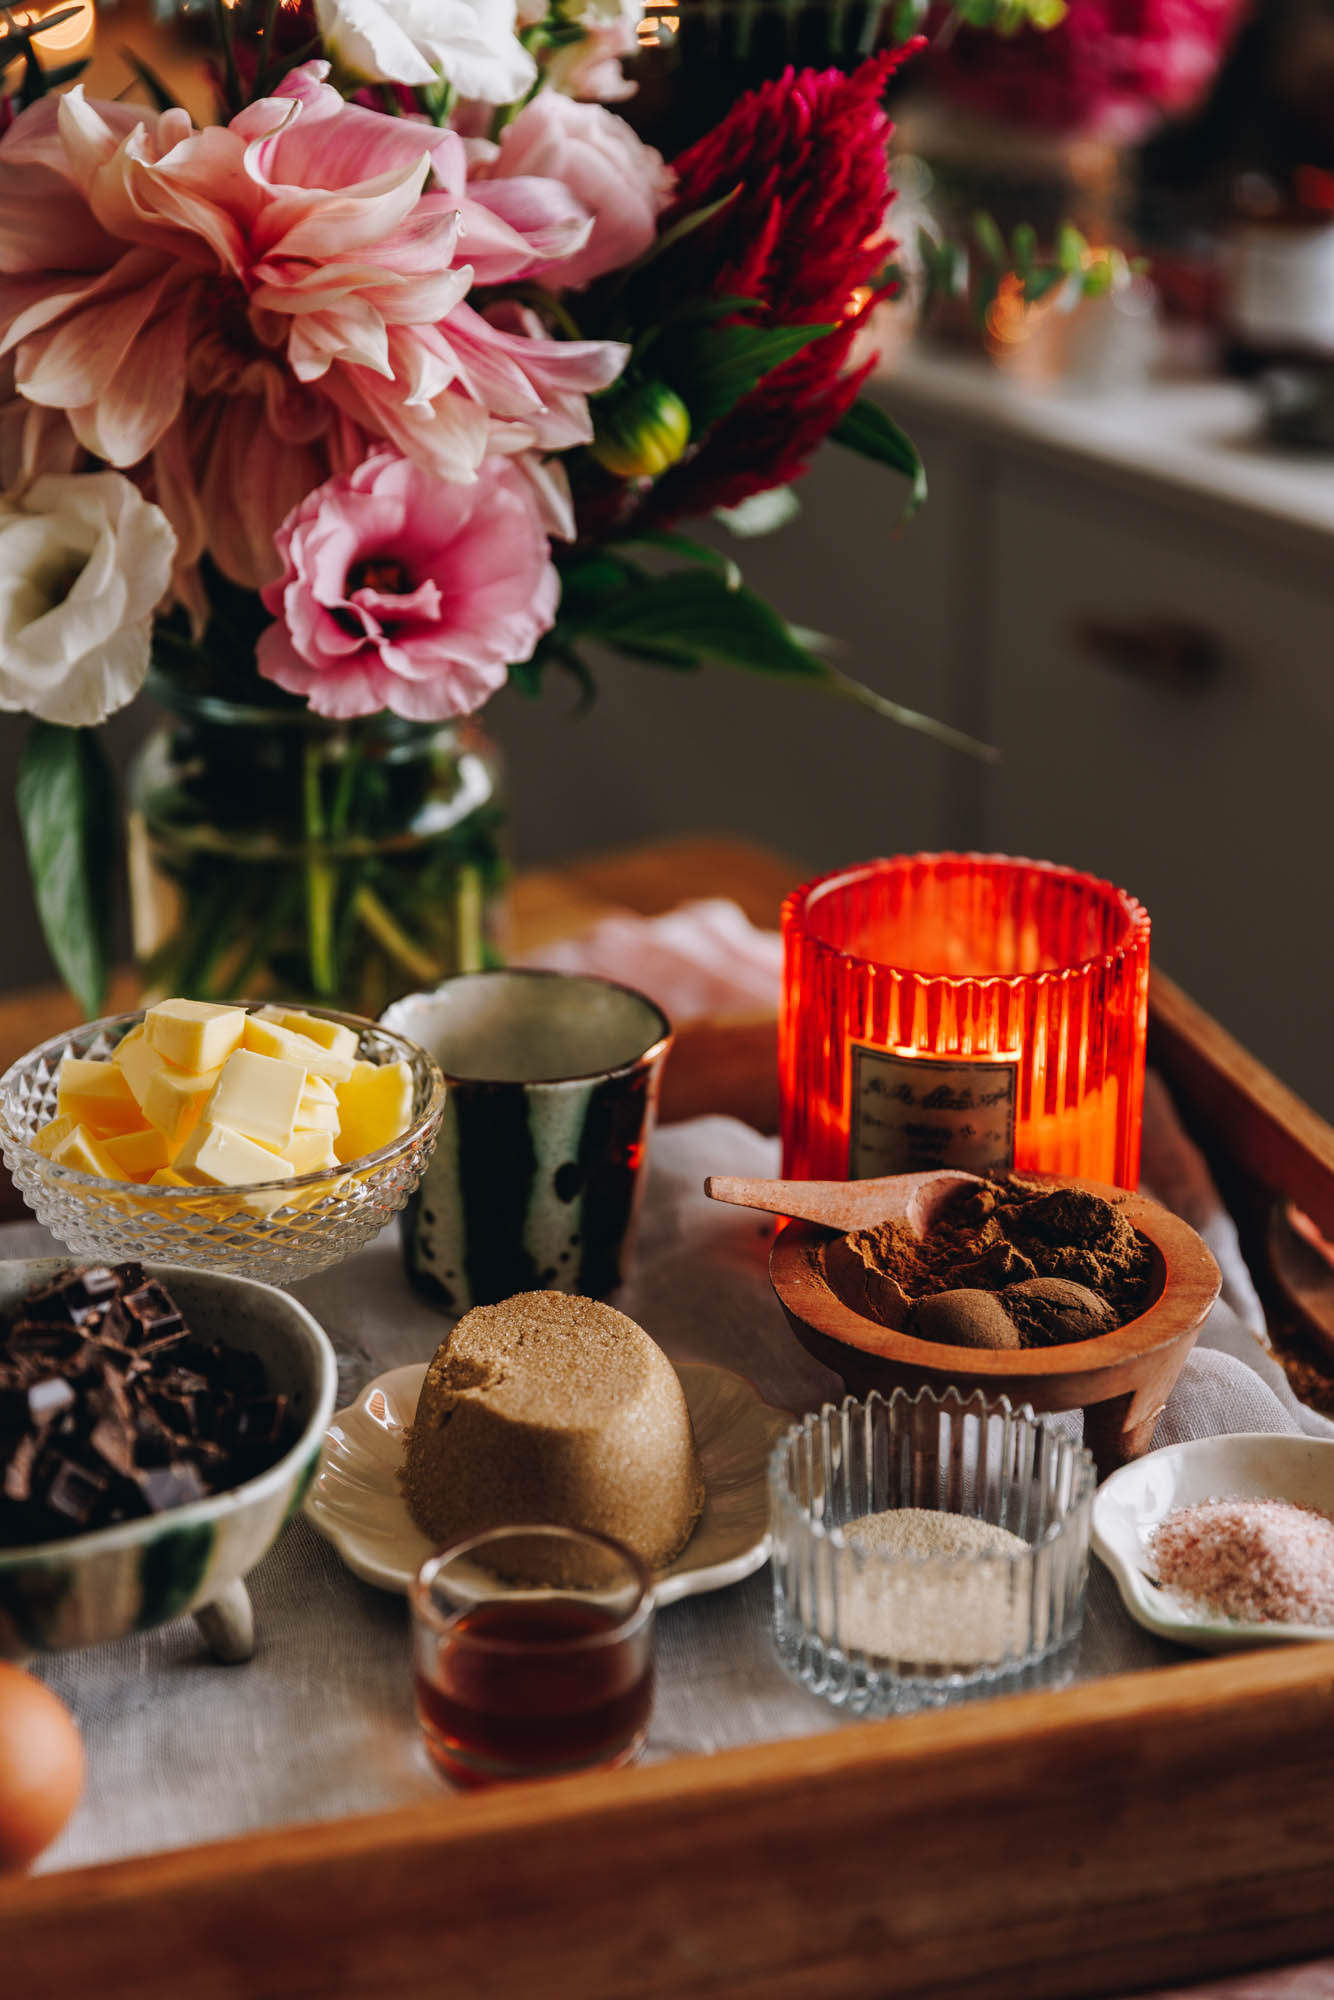
Ingredients
The Spiced Dough – Te Pokenga Raukikini
- ¾ C (185 ml) wai wera (hot water, from the tap)
- ¾ C + 1 tablespoon (200 ml) miraka aromahana (lukewarm milk)
- ½ C (90 g) huka hāura (brown sugar, tightly packed)
- 1 tablespoon + ¼ teaspoon (12 g) īhi horo (instant yeast)
- 4 ⅓ C (650 g) puehu parāoa kounga (high grade flour)
- 1 hēki (size 7)
- 1 tablespoon (15 ml) wanira
- 2 teaspoon raukikini katoa (allspice)
- 1 heaped tablespoon rau kikini whakauruuru (mixed spice)
- 1 tablespoon hinamona kuoro (ground cinnamon)
- 1 ½ teaspoon tote (salt, fine)
- 80 g pata kūteretere (softened butter)
- 160 g tiakarete parauri (dark chocolate, 50%). You can use chocolate drops here, I find them a bit sweet but up to you.
- 400 g smooth biscoff spread (chilled, keep in the fridge until needed)
The Crosses - Ngā Rīpeka
- ⅓ C (50 g) puehu parāoa kounga (high grade flour)
- 1 tablespoon huka (sugar, of any kind)
- 1 teaspoon pēkana paura (baking powder)
- 2 ½ tablespoon (35 ml) tablespoon wai (water)
The Glaze - Te Mōhinuhinu
- 30 g pata (butter)
- ¼ C marahihi māpere (maple syrup)
Instructions
Activate the Yeast:
- Add the lukewarm miraka (milk aromahana), wai wera (hot water) and huka (sugar) in to a large bowl. Stir it well until the sugar has dissolved.
- Add the īhi horo (instant yeast) and mix it in well. Leave it for 5 minutes or so to activate. The īhi (yeast) will rise to the top and be slightly foamy when it is ready.
Add the Remaining Ingredients:
- Add the puehu parāoa (flour), hēki (eggs), iho hūperei (vanilla), raukikini katoa (allspice), raukikini whakauruuru (mixed spice), hinamona (cinnamon), tote (salt) and pata (butter) in to the yeast mixture.
- Stir it with a knife until a rough dough comes together.
Knead the Dough:
- Once the dough is roughly incorporated, it is time to knead the dough.
- If you are using a mixer, place the dough in the mixing bowl. Using a dough hook, knead for 10 minutes on low-medium speed.
- If you are kneading by hand, add the dough to a lightly floured bench or table. Knead the dough with the palms of your hands (not with your fingers) for 12-14 minutes. Try not to add any extra flour when you are kneading.
- Once the dough has reached the window pane test (see the video for reference), it is ready for the tiakarete (chocolate).
Add the Chocolate:
- Chop the tiakarete (chocolate) in to small chunks.
- Stretch the dough out to a rough rectangle. Sprinkle over the tiakarete (chocolate), fold it in from the edges and knead it until it is distributed well.
First Rise:
- Manipulate the dough in to a ball and add to a large, clean bowl.
- Cover with a tea towel or bowl cover. Rise for 1 ½ hours.
Prepare the Baking Tray:
- Line a 25cm x 35cm tray with baking paper. Note: Use a tray as close to this size as possible because it helps the buns rise close together, creating softer buns. Trust me, it makes a difference.
Divide the Risen Dough:
- Once the dough has doubled in size, tip it on to a bench and cut in to 12 equal pieces. You can use a scale for accuracy here or you can eye ball it (which is what I often do).
Prepare the Biscoff:
- Take the jar of chilled Biscoff and divide it in to 12 equal spoonful's. I use the whole jar, you can use less but this amount is perfect in my mind.
Stuff the Buns with Biscoff:
- Note: Watch the video for assistance on how to create the buns. Notice I don't handle the dough too much or knead it again after it has risen. Taking a piece of dough, gently press it out and place the Biscoff in the centre. Pull in the corners and pinch the seams together. Flip it over and gently shape the dough in to a round shape. Place it on to the tray. Continue this pattern with all 12 pieces.
Second Rise:
- Once all the buns are in the tray, cover them with a tea towel.
- Rise for 55 minutes to an hour on the bench.
Preheat the Oven:
- Preheat the oven to 175 °C bake setting or 165 °C fan bake setting.
Make the Batter for the Crosses:
- 15 minutes before the rising time is up, make the rīpeka (crosses).
- Add puehu parāoa (flour), huka (sugar), pēkana paura (baking powder) and wai (water) in to a small bowl. Whakaranuhia kia māene (combine it until smooth).
Pipe on the Crosses:
- Add the mixture to a piping bag with a small, round piping tip.
- Pipe the crosses on to the risen buns. (Watch the video for a reference).
Bake the Biscoff Hot Cross Buns:
- Once the rising time is up, slide them in to the oven.
- Bake for 30 minutes and then check if they are cooked. If the buns spring back when pressed on the underside of the buns, they are ready. If they stay pressed in, bake for five more minutes.
Prepare the Glaze:
- As they bake prepare the simple mōhinuhinu (glaze).
- Gently melt the pata (butter) in a small pot on the stove or in a small heat proof bowl in the microwave. Then stir through the marahihi māpere (maple syrup).
Glaze the Biscoff Hot Cross Buns:
- Remove the baked buns from the oven and brush the mōhinuhinu (glaze) all over.
Return the Hot Cross Buns to the Oven:
- Return the rohi (buns) to the oven, turn the oven off and leave them for an extra 5 minutes. This helps the glaze go sticky.
- Now they are ready to eat.
Store the Biscoff Hot Cross Buns:
- These are always going to be best eaten fresh from the oven. However, they can be stored in a plastic bag or container on the bench overnight. Slice them and toast them the next day or warm them in the microwave for 10 seconds.
- Beyond a day, store them in a plastic bag and freeze for up to three months. Make sure to heat them to bring them back to life.
Video
Frequently Asked Questions:
It adds a delicious spiced flavour which complements all of the spices in the dough. It also works really with dark chocolate and creates a flavour bomb in your mouth.
Āe (yes) but I find the smooth one is much better in terms of texture in the rohi rīpeka (hot cross buns). All of the other textures are smooth and gooey so I think the smooth compliments that more.
No, it is encases inside the buns so all it does is become gooey and delicious. You will not be disappointed.
Yes, you can make the buns the day ahead and re-heat them in the oven or the air fryer the next day to bring them back to life. Store in a plastic bag once they have cooled down for one day only. Any time after that, add them to the freezer.

Annalise
This recipe was awesome! So easy to follow, the dough came out really nice for a novice dough maker and the spices, chocolate and biscoff all matched so well together! This will become an Easter tradition in our whare!
Naomi Toilalo WhānauKai
Tēnā koe Annalise, what an amazing review. I love the mix of the spices, chocolate and biscoff too. So glad it will become a tradition in your whānau! Ngā mihi nui.