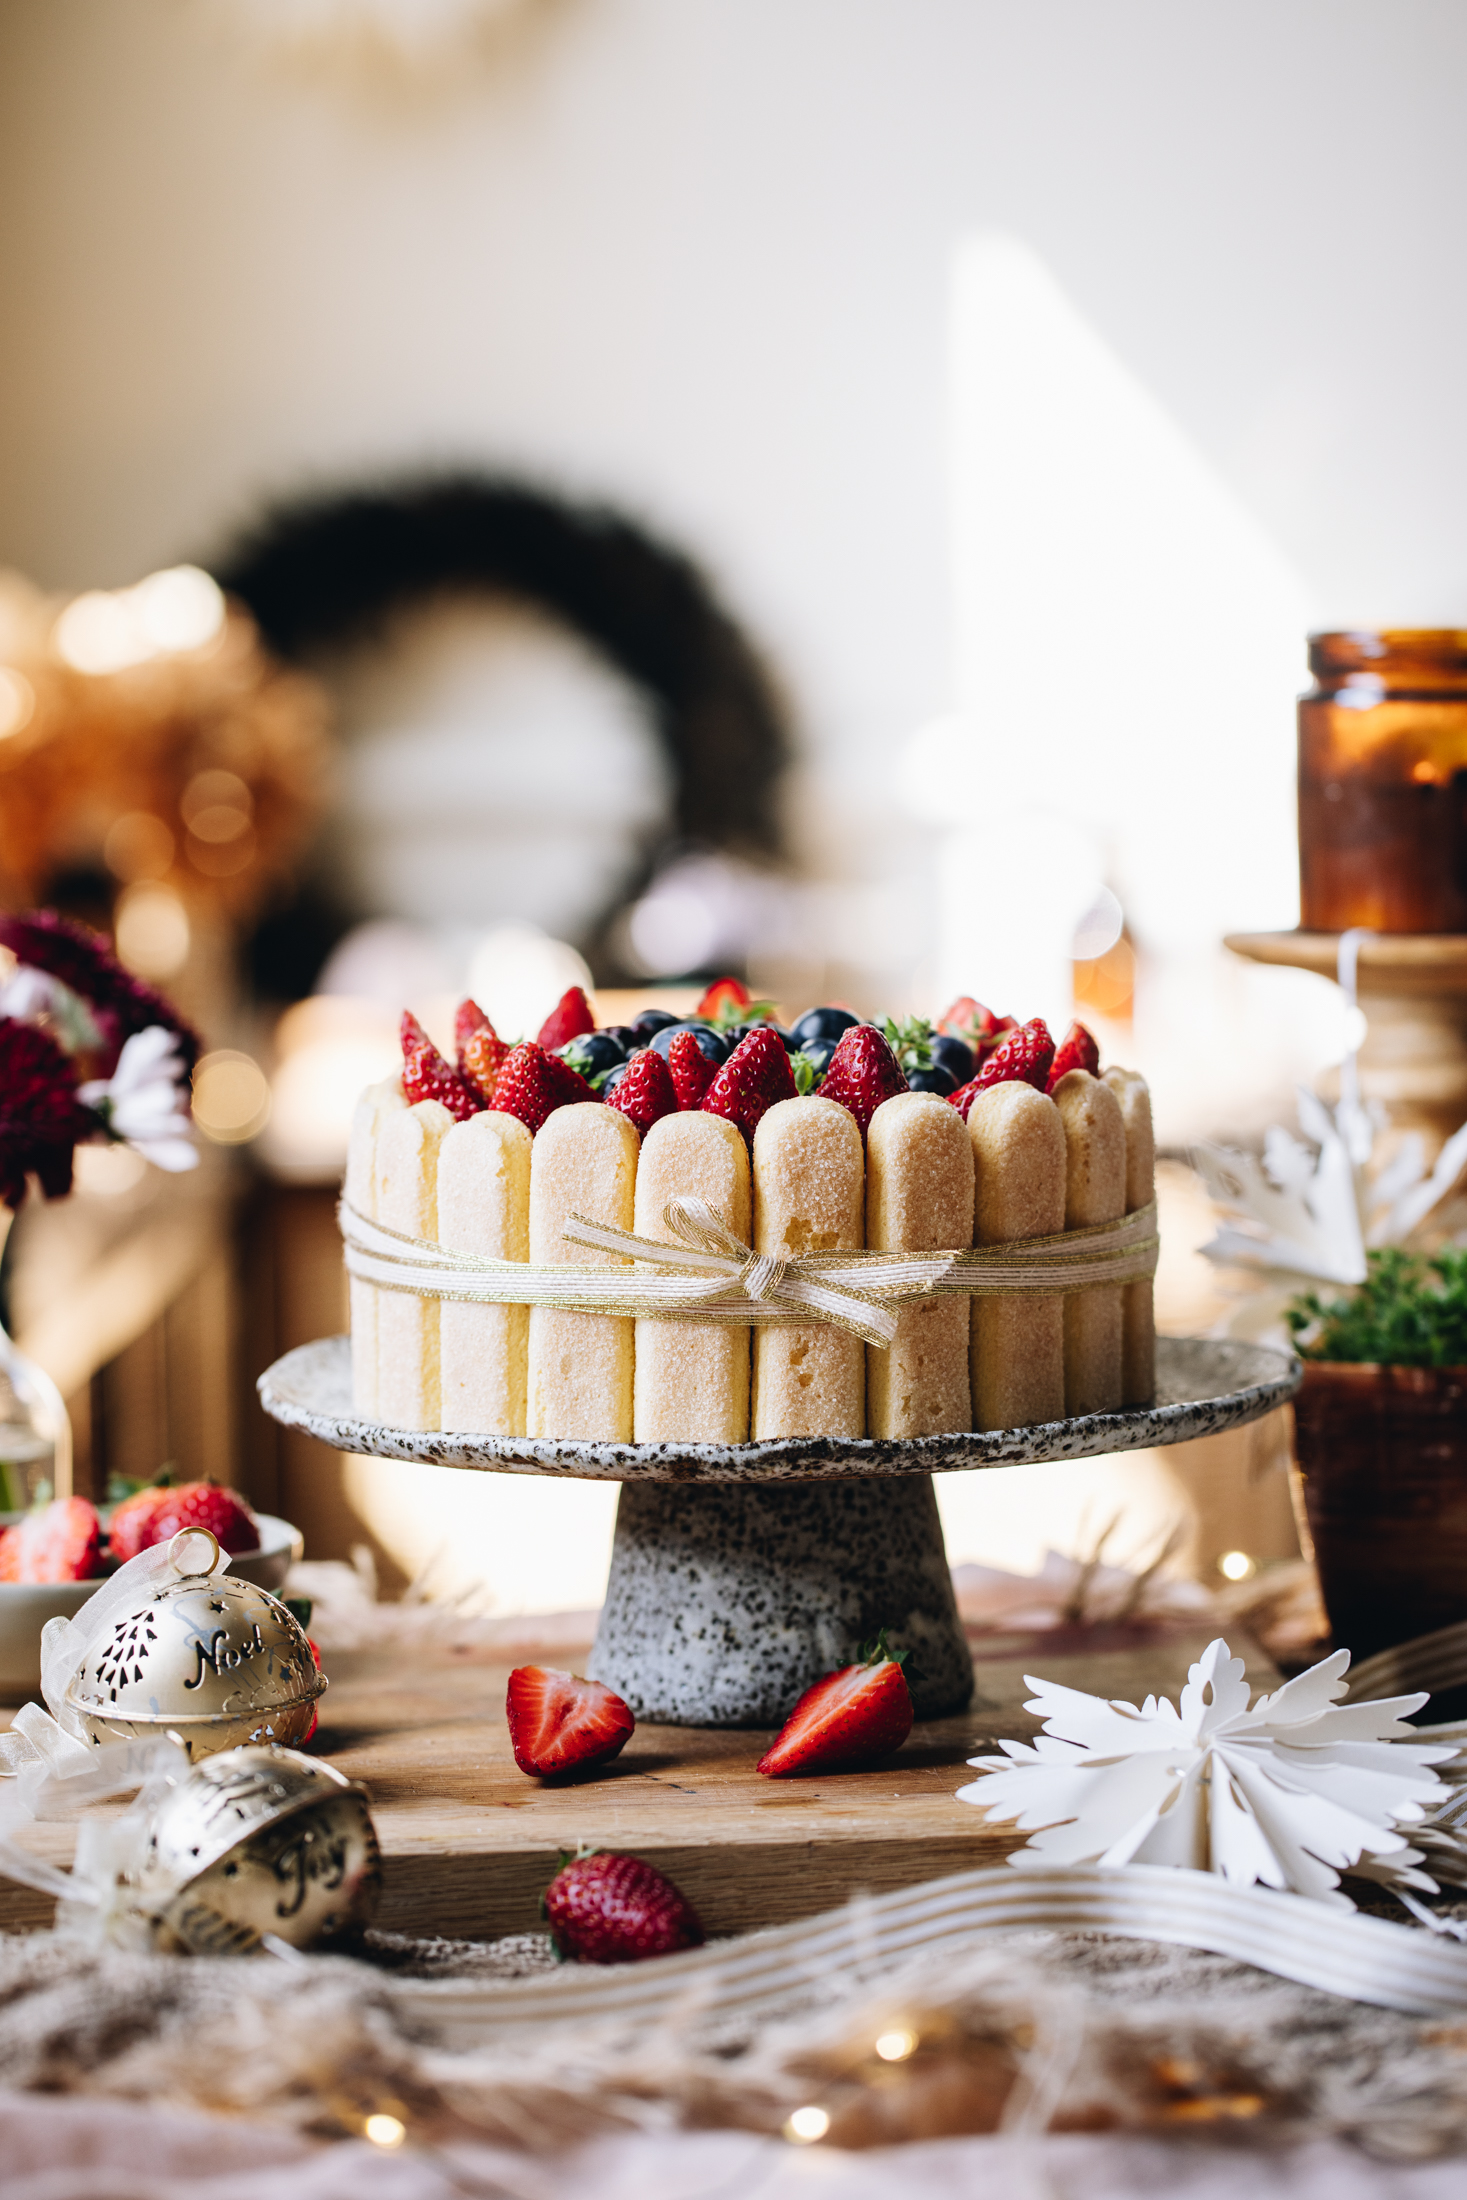
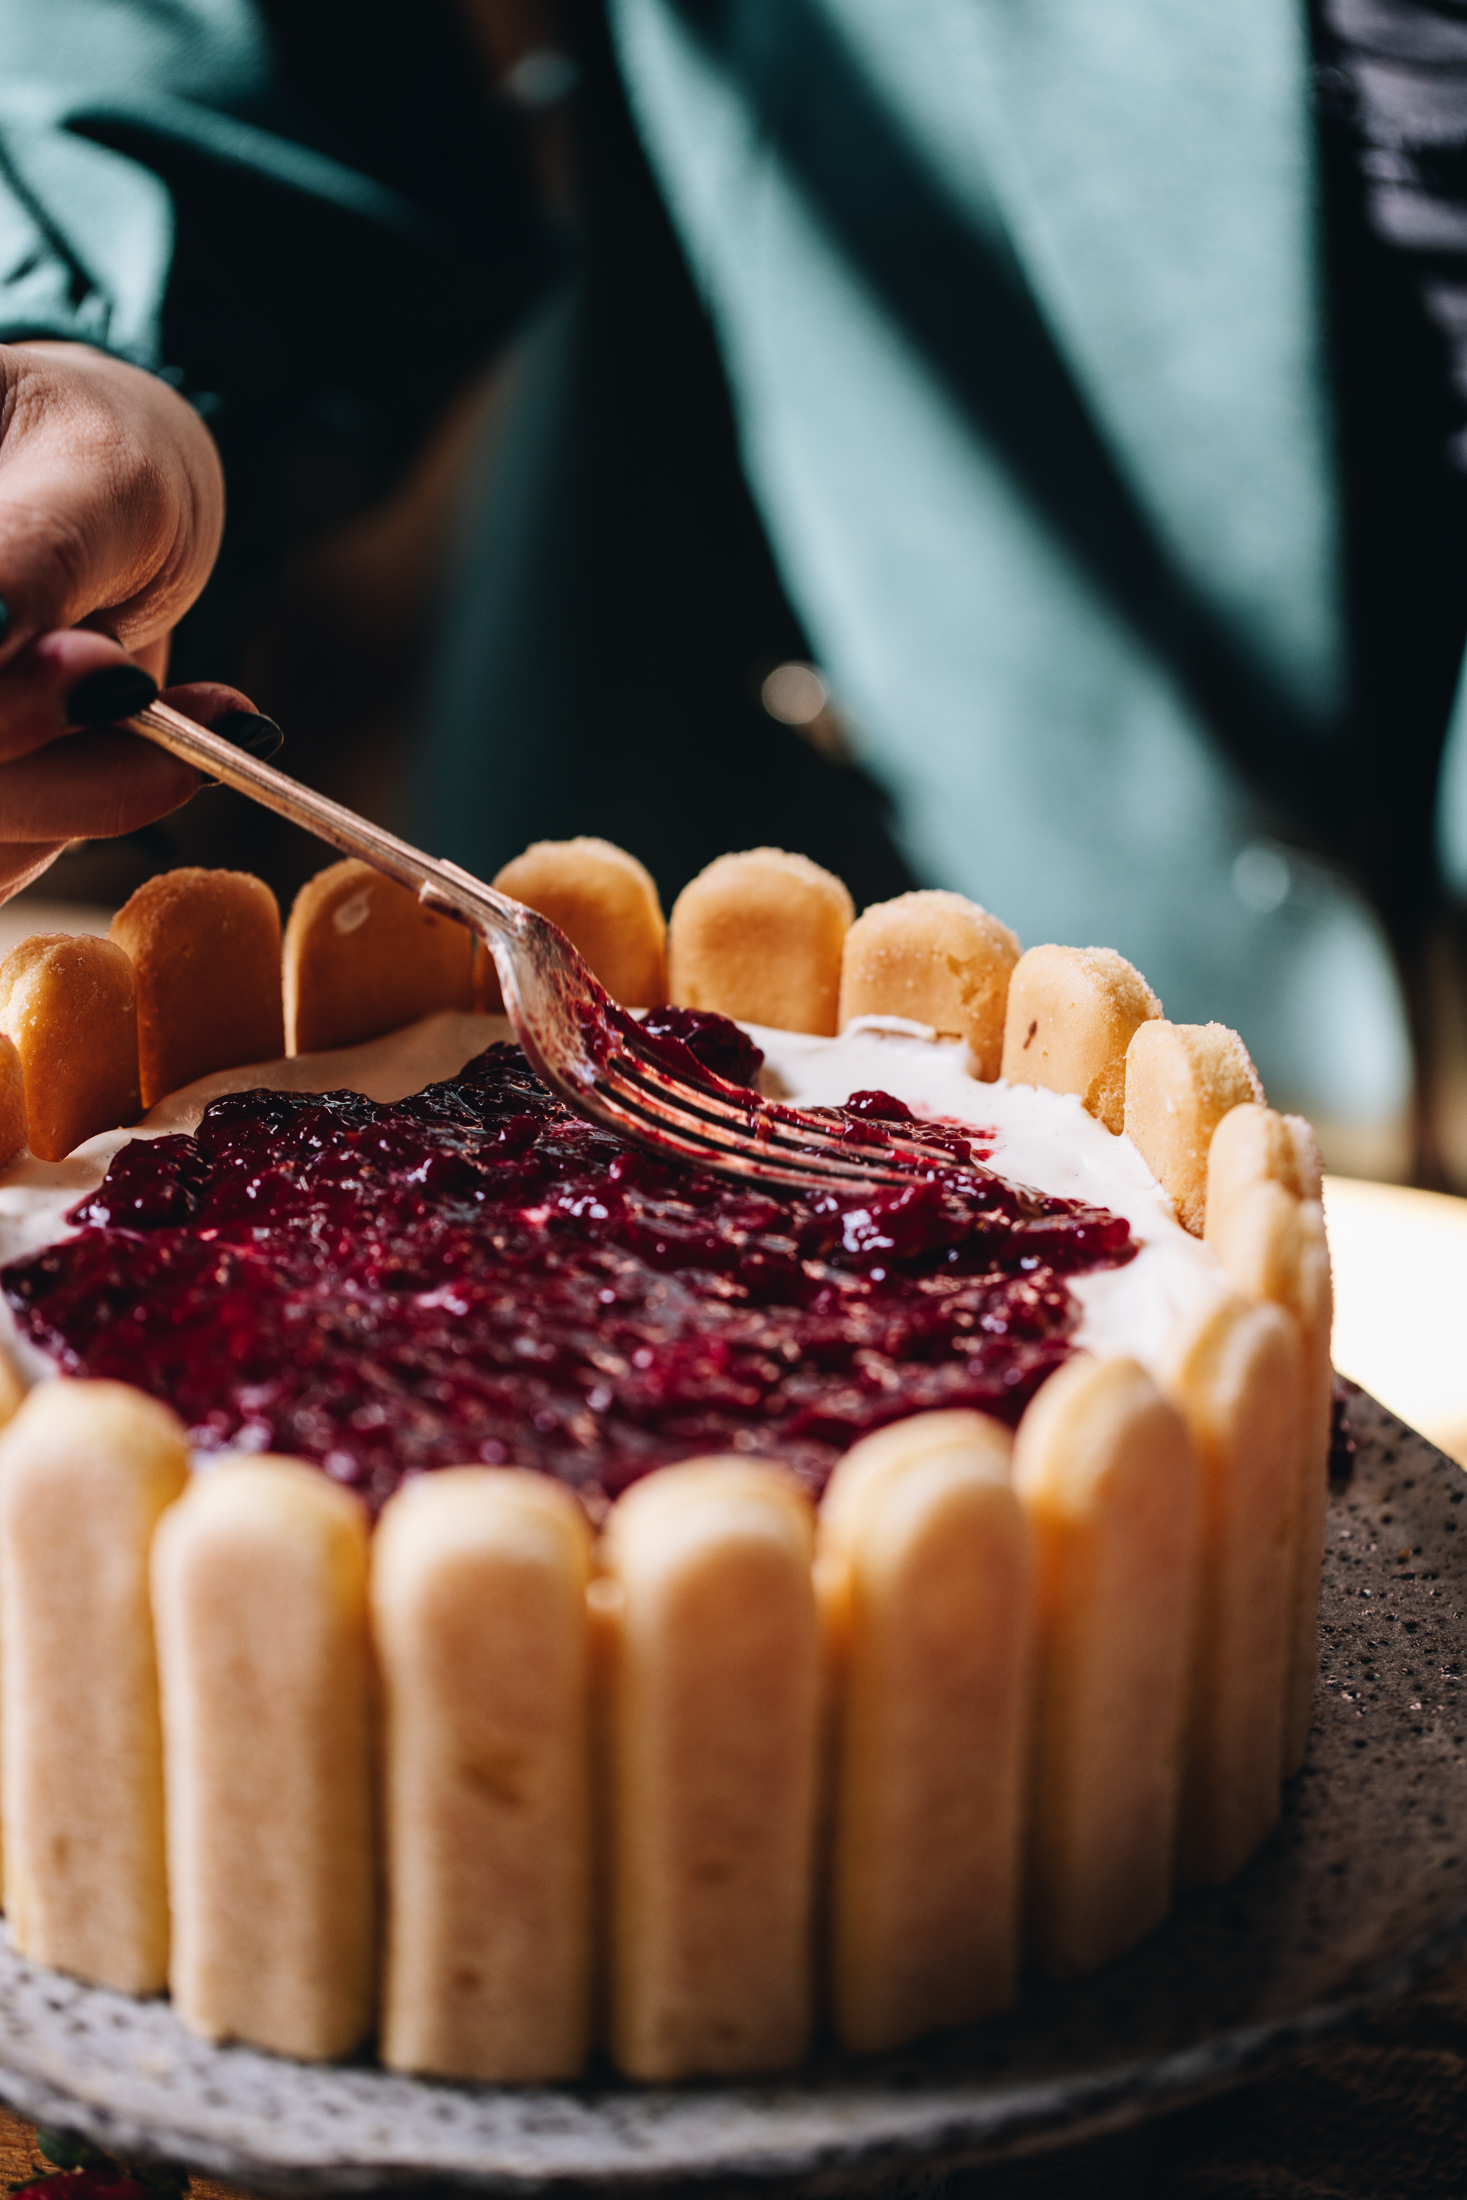
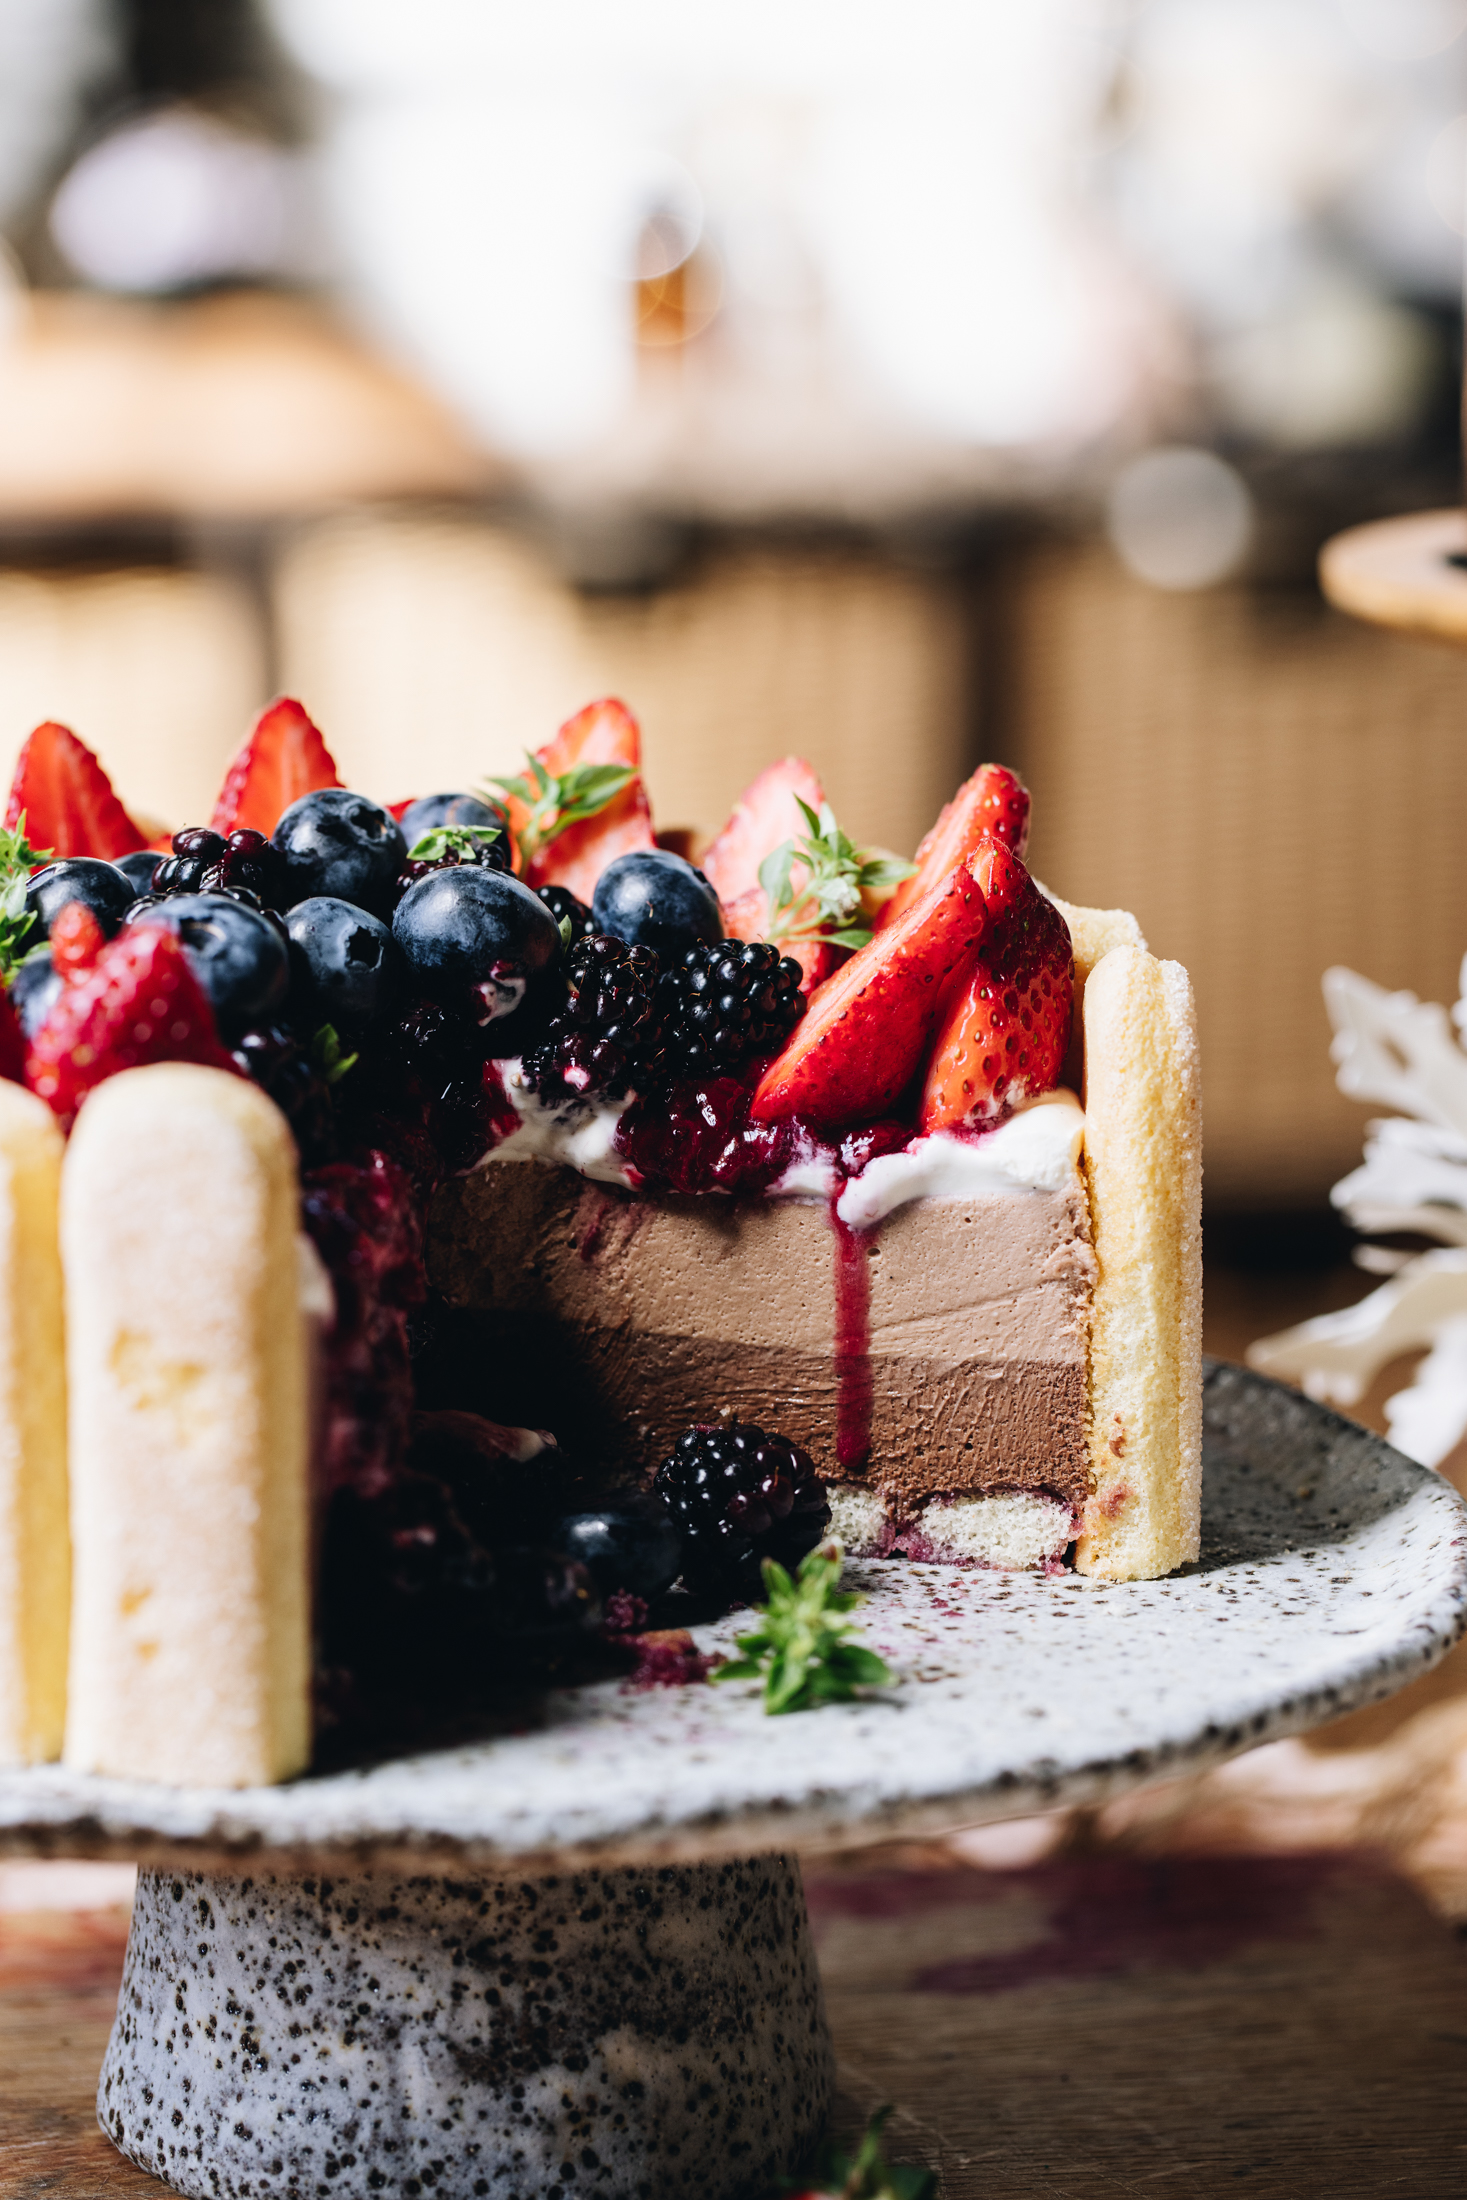
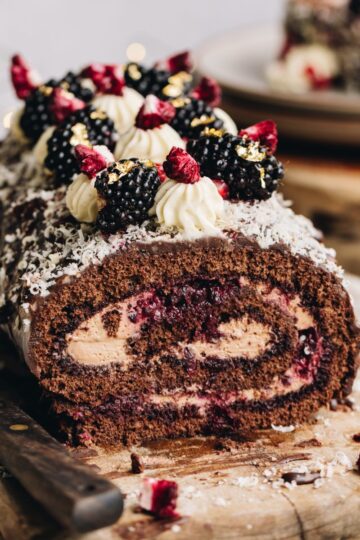
Do you want a stand out dessert that blows everyone away but you don't actually turn the oven on? Tau kē (awesome) because this No-bake Chocolate Charlotte Cake has everything you need and more. A milk and dark chocolate mousse is set in a cake tin, wrapped in lady fingers and topped with fresh fruit. Finally, it is tied up in a bow for the gift that it is. Don't walk, run to the kitchen and make this beauty to share for your next event.
I made this recipe a couple of years back, inspired from a similar cake I made when I was a contestant on The Great Kiwi Bake Off. During our challenge we had to make everything from scratch, including the lady fingers. They are actually super delicious homemade but not everyone wants to go that far. Nō reira (so), here is my Keke Hāriata (Charlotte Cake) in a simpler version.
More no-bake recipes to try:
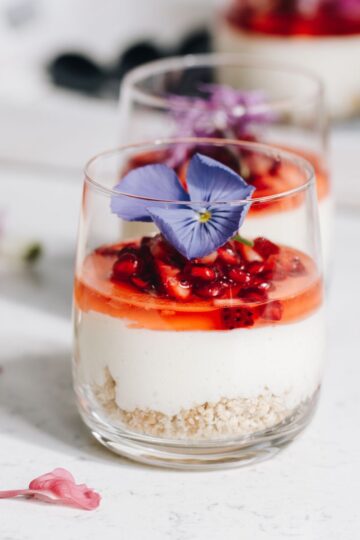
Do you want a no-bake cheesecake but with more of a citrus vibe? Try my Chilled Lemon and White Chocolate Cheesecake, it is so popular and is like eating the most incredible lemon ice cream. Another whānau (family) favourite that celebrates the flavours of pata pīnati (peanut butter) and tiakarete (chocolate) is my No-bake Peanut Butter Pie.
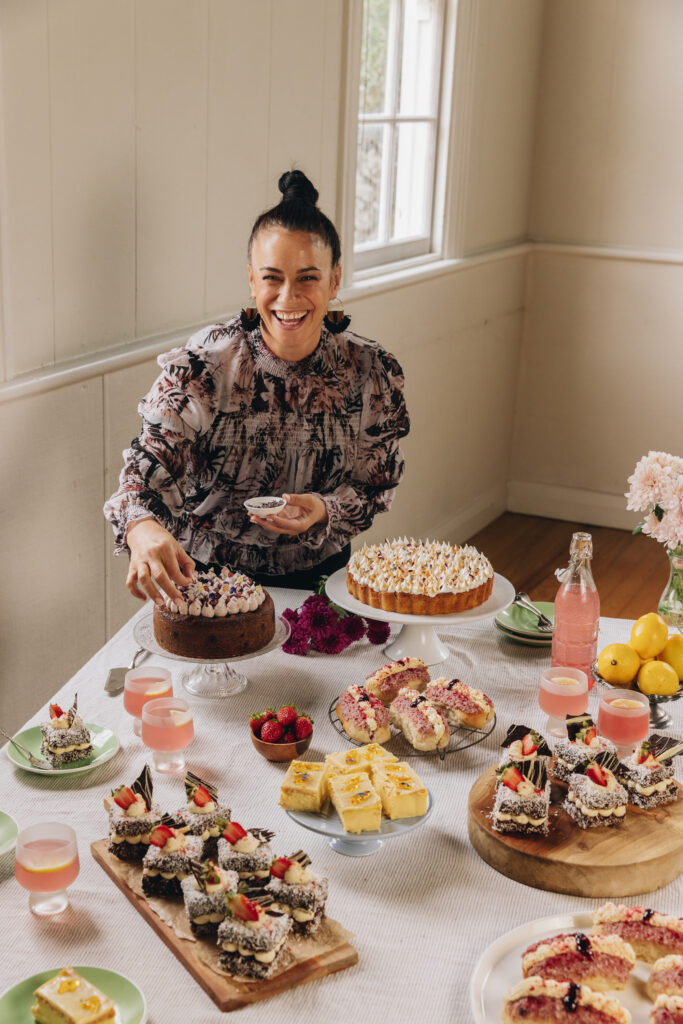
Videography and photography by Sarah Henderson.
INGREDIENT TIPS FOR THIS NO-BAKE CHOCOLATE Charlotte CAKE:
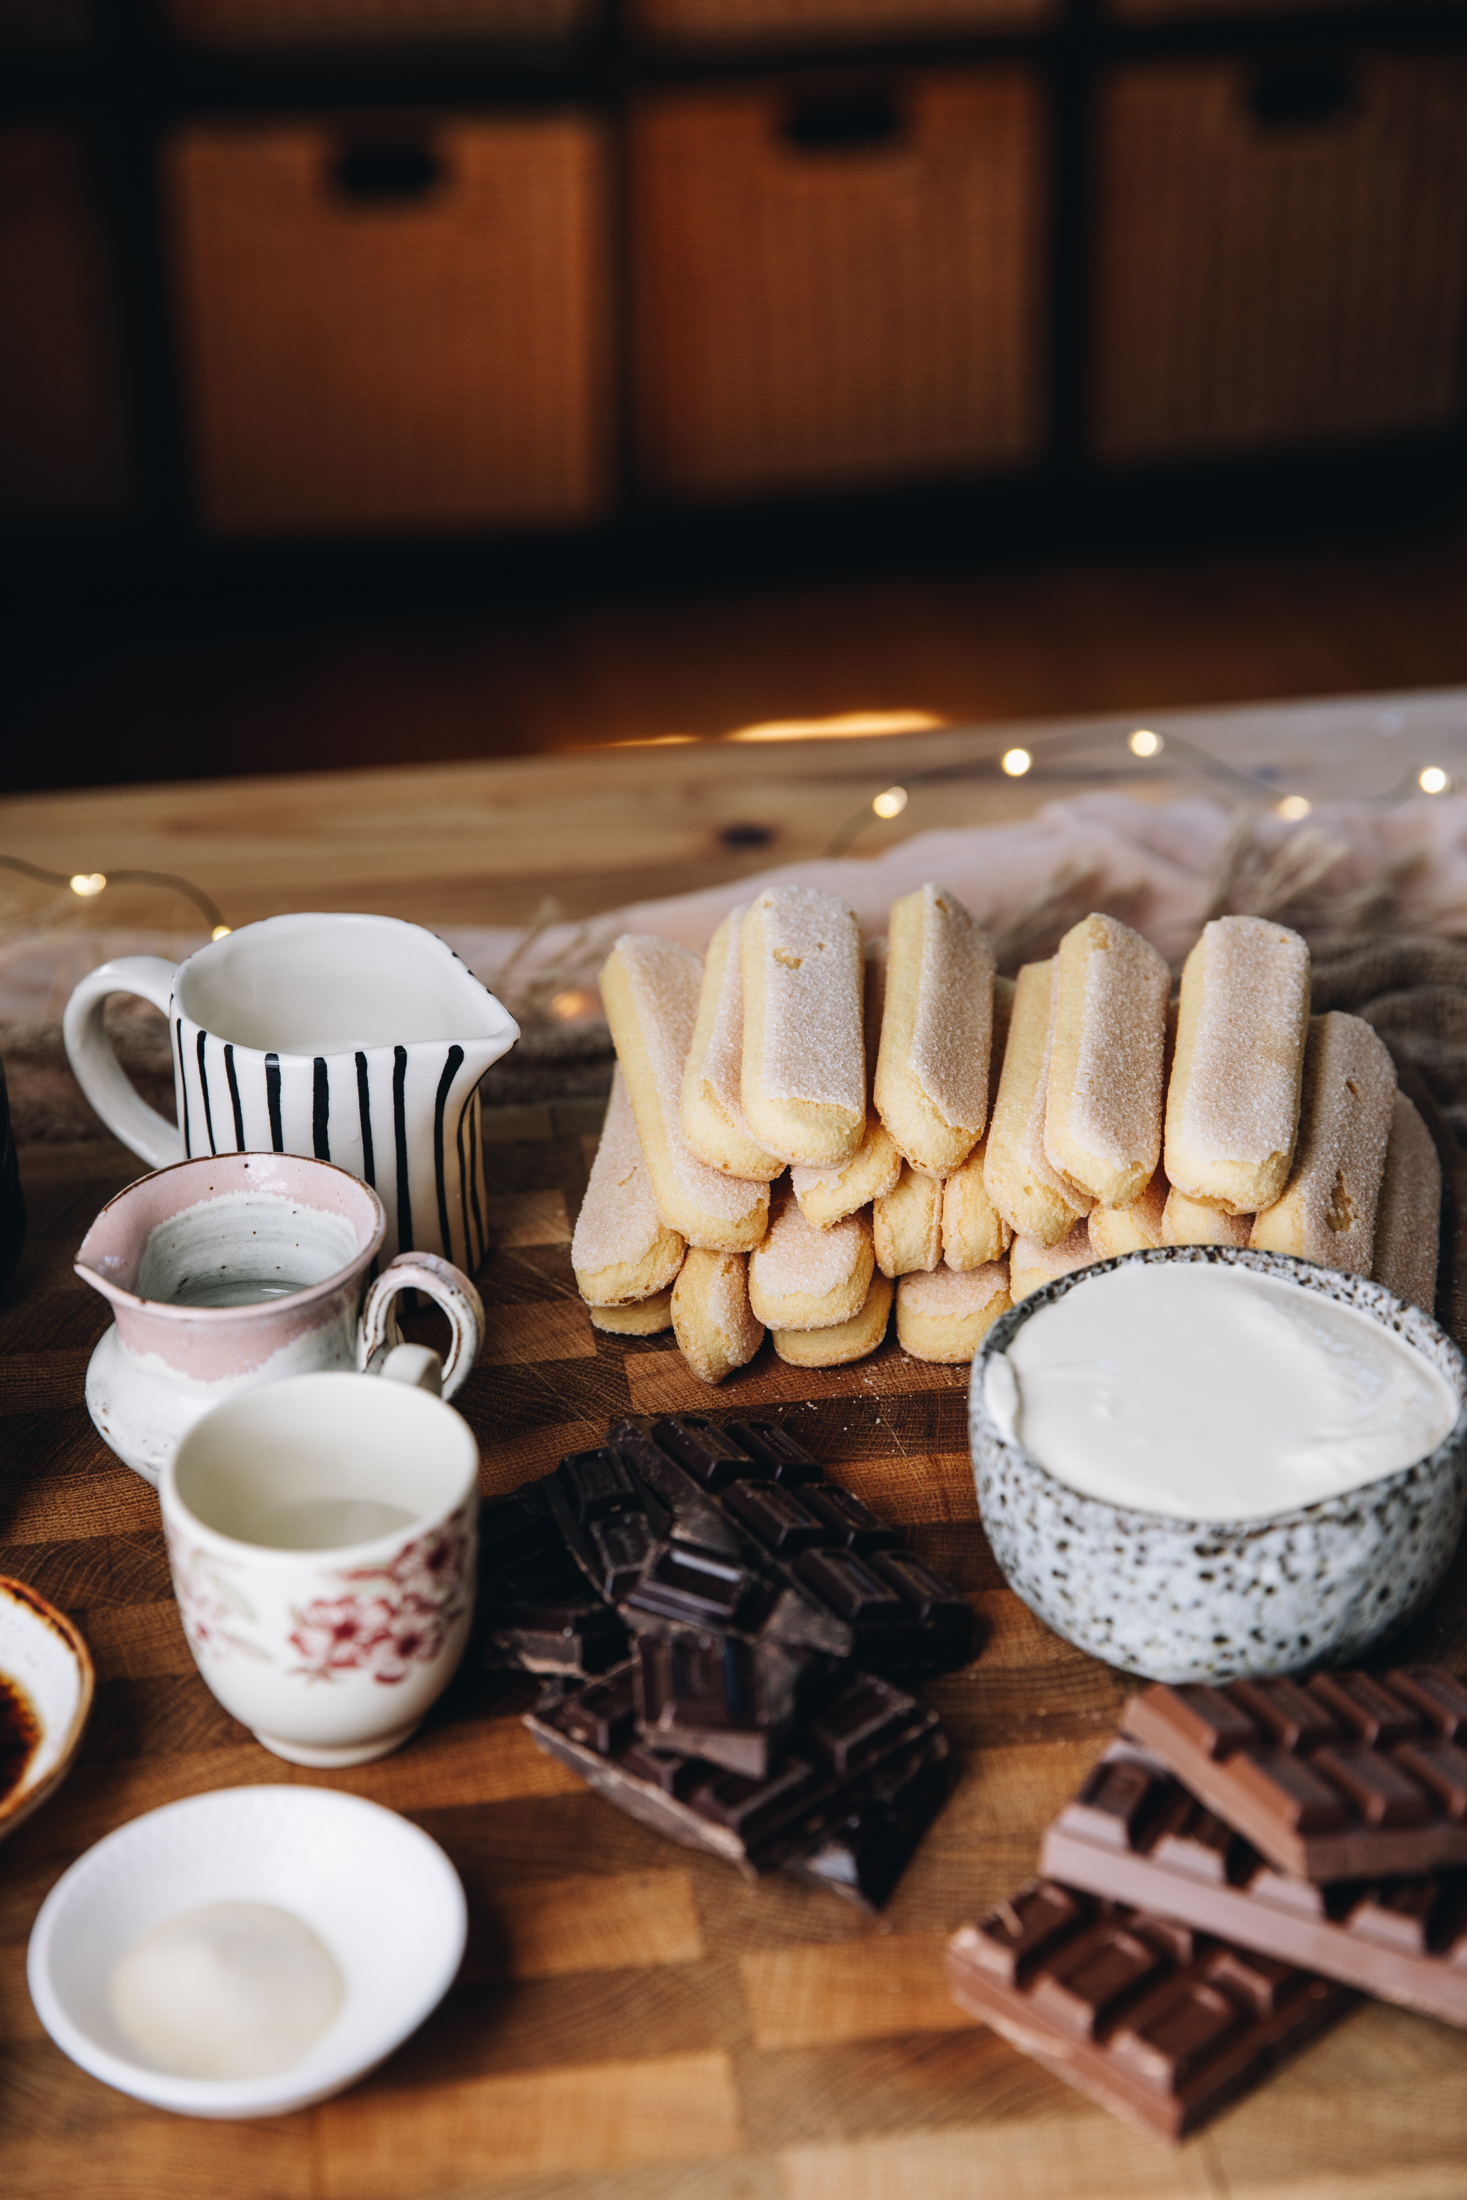
- Ladyfinger biscuits: These are essential to a Keke Hāriata (Charlotte Cake) because they make the fence that conceals all of the delicious goodness inside the cake.
- Canned Plums: I love using canned fruit in this recipe because it provides a cheats syrup for flavour and the hua (fruit) themselves as decoration. Use canned plums or boysenberries for the best flavour.
- Creme Fraiche: This adds a beautiful quality to the kirīmi tāwhiuwhiu (whipped cream) and also makes it super stable. It can also be swapped for mascarpone.
- Gelatine Powder: I prefer the Mr Rogers brand (if you live in NZ) as it has a great hold and a subtle smell.
- Dark Chocolate: As we are making a two tone keke (cake), make sure you use a dark chocolate for the bottom layer. I prefer 60% percent for this recipe.
- Milk Chocolate: Use a 33% milk chocolate for the best contrast of tiakarete (chocolate). Use good quality chocolates for the best results.
- Berries: Use the fresh berries that you love to use or leave them off if you want to.
Expert Advice:
When adding the wairanu paramu (plum syrup) to the ends of the Lady Fingers, do not soak them too much. They can go very mushy so just add enough to absorb the juice and drizzle a little bit extra on once they are in the cake tin.
I use a double boiler for melting both tiakarete (chocolate). This is the best way to stop the chocolate from burning because it uses steam to melt it gently. Tiakarete (chocolate) is expensive so if we treat it with care, nothing will get wasted.
Follow the steps in the order I have instructed. It may seem slightly out but I have set them out that way so the ingredients are cool enough when they are added.
Have fun with this recipe and decorate it however you want to. I decorated this Keke Hāriata (Charlotte Cake) with gusto but you don't have to. It is delicious with a touch of kirīmi (cream) and the canned fruit or you can bling it out with natures jewels like I did.
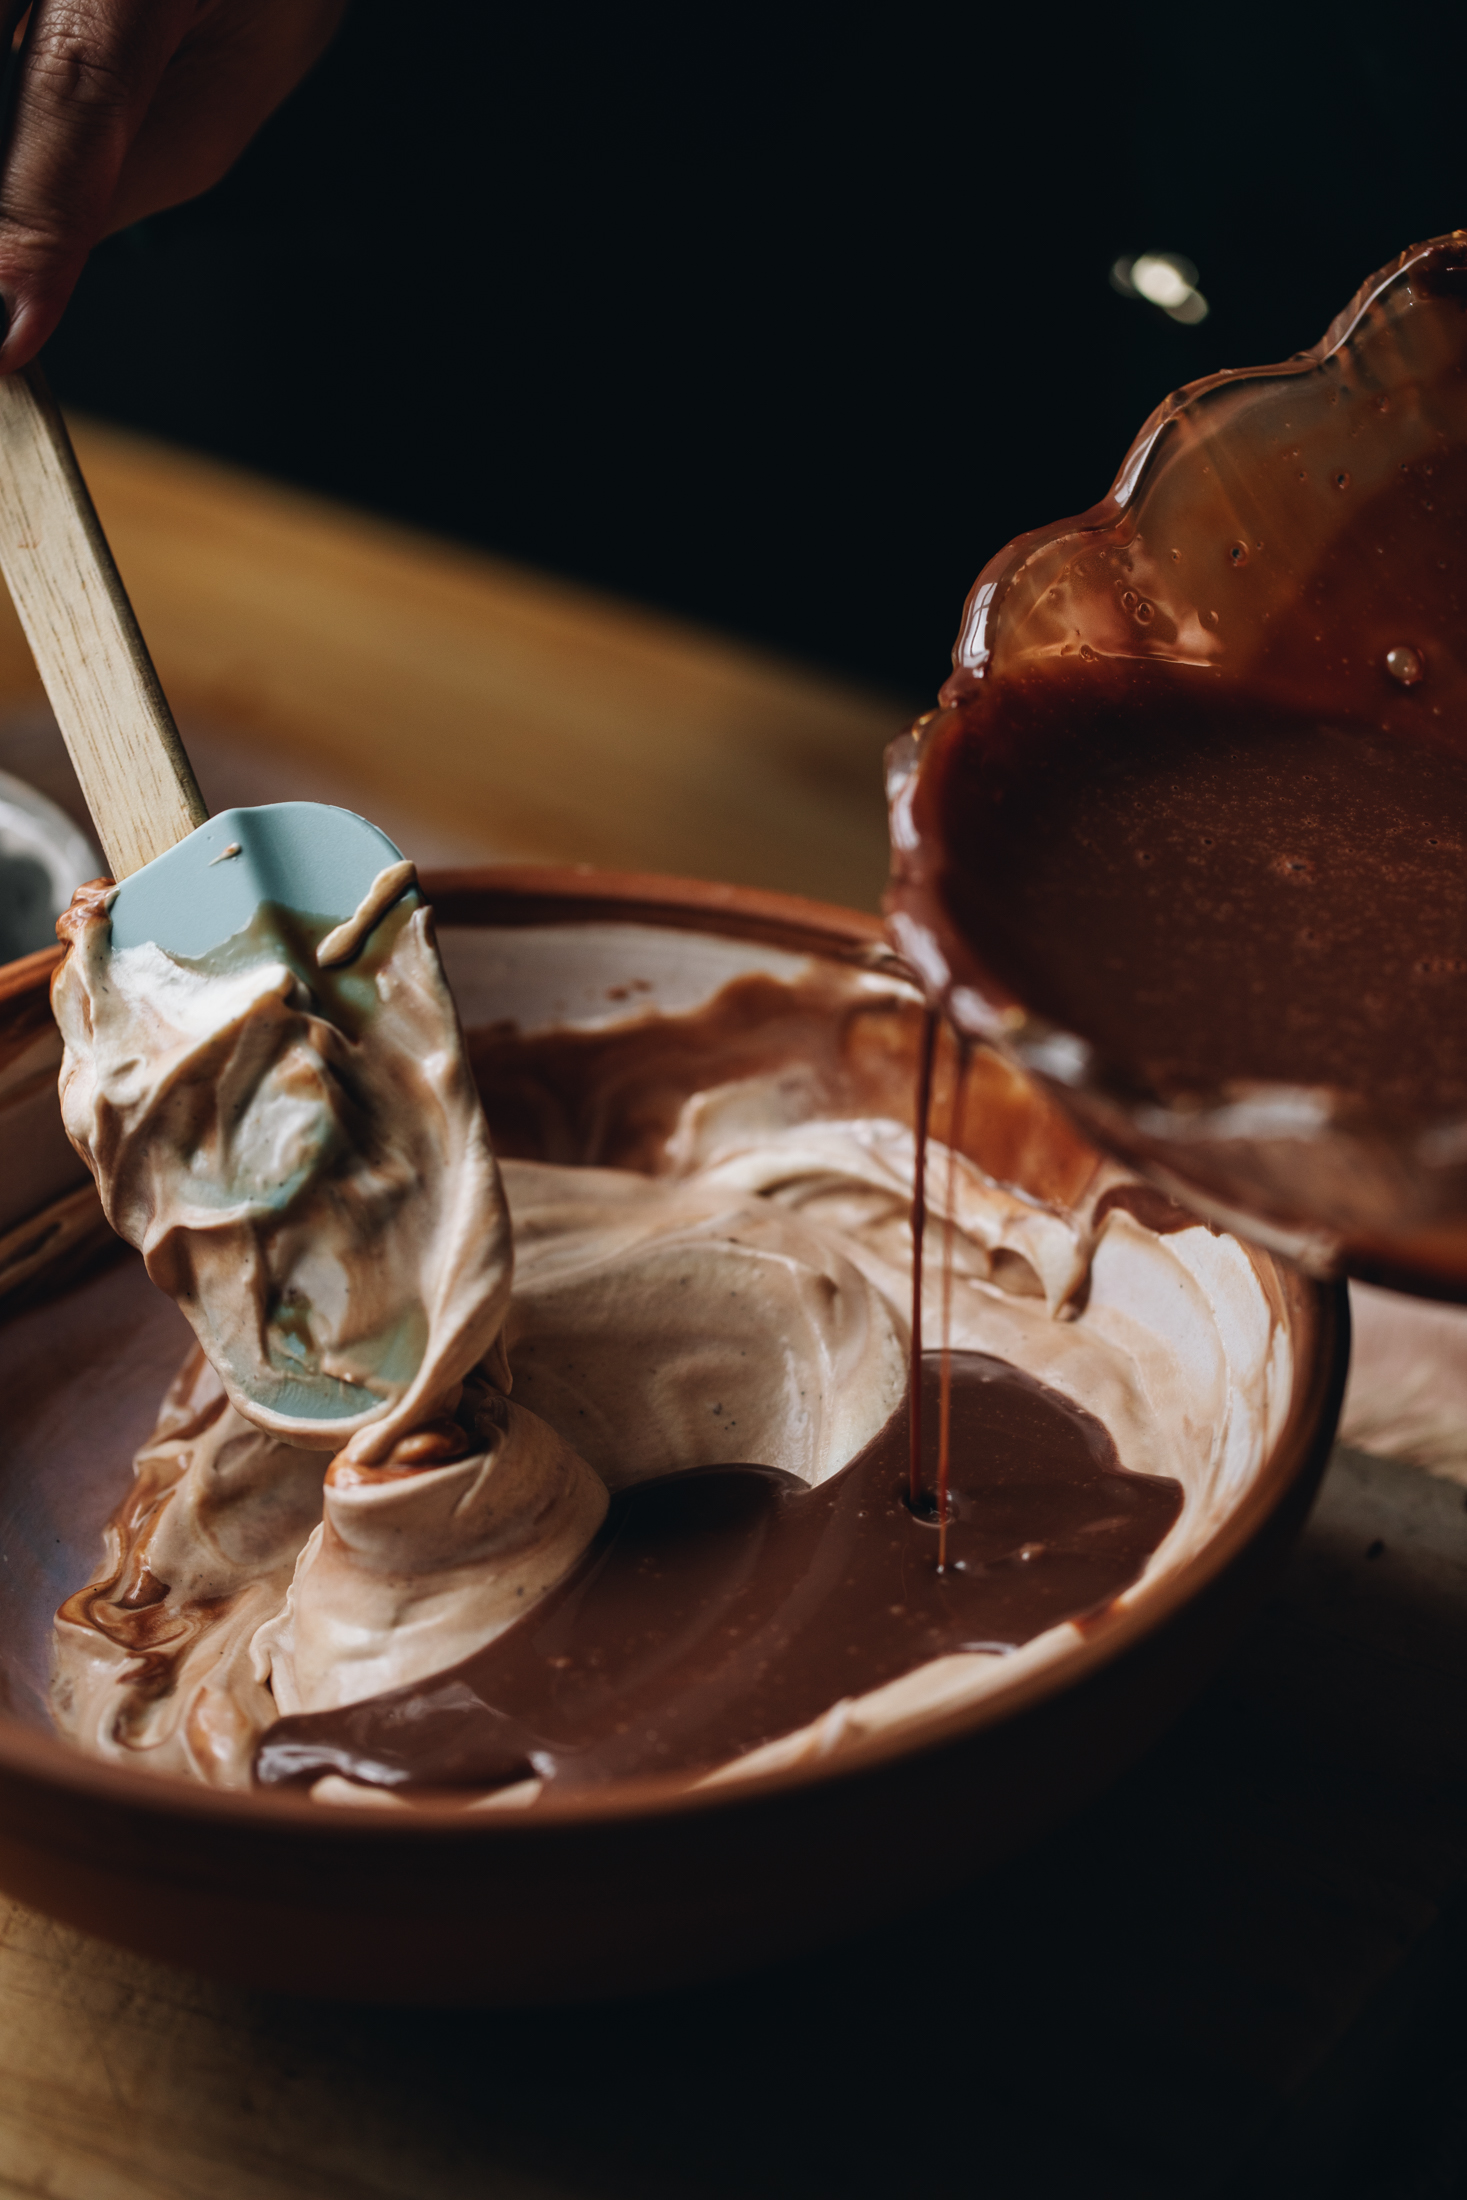
Do as I say, not as I do in the milk chocolate layer of the cake in the video. You will see the mixture is really runny - it is not supposed to be runny so look away! It should be the same consistency as the dark chocolate cream.
STEP BY STEP INSTRUCTIONS FOR THIS NO-BAKE CHOCOLATE CHARLOTTE CAKE.
Note: The full recipe card with the full list of ingredients, instructions and step by step video are found at the bottom of this page.

1. Prepare the Lady Fingers:
Cut 2 cm off each matimati kōpunga (sponge fingers).
Leave the small pieces to the side.
Line a 20 cm, loose base cake tin with the lady fingers.
Place the cut side on the base, and the sugar side against the tin.
You will have a few matimati kōpunga (sponge fingers) left over so cut them in to small pieces too.

2. Add the Lady Fingers Pieces to the Base:
Pour around ½ cup of juice from the paramu (plums) or poihanapere (boysenberries) into a small bowl.
Reserve the fruit for the topping.
Add the lady finger pieces in to the juice and soak them for 5 seconds. Then place them in the base of the cake tin.
Smooth them out with the back of your spoon, adding a little extra juice if you need to. You don't want it soaking here but just soft enough for the sponges to absorb the juice. Leave to the side.
3. Bloom the Gelatine:
Add the wai (water) in to a small bowl and sprinkle over the paura tetepe (gelatine powder). Whakaranuhia (mix to combine) and then leave it to bloom.
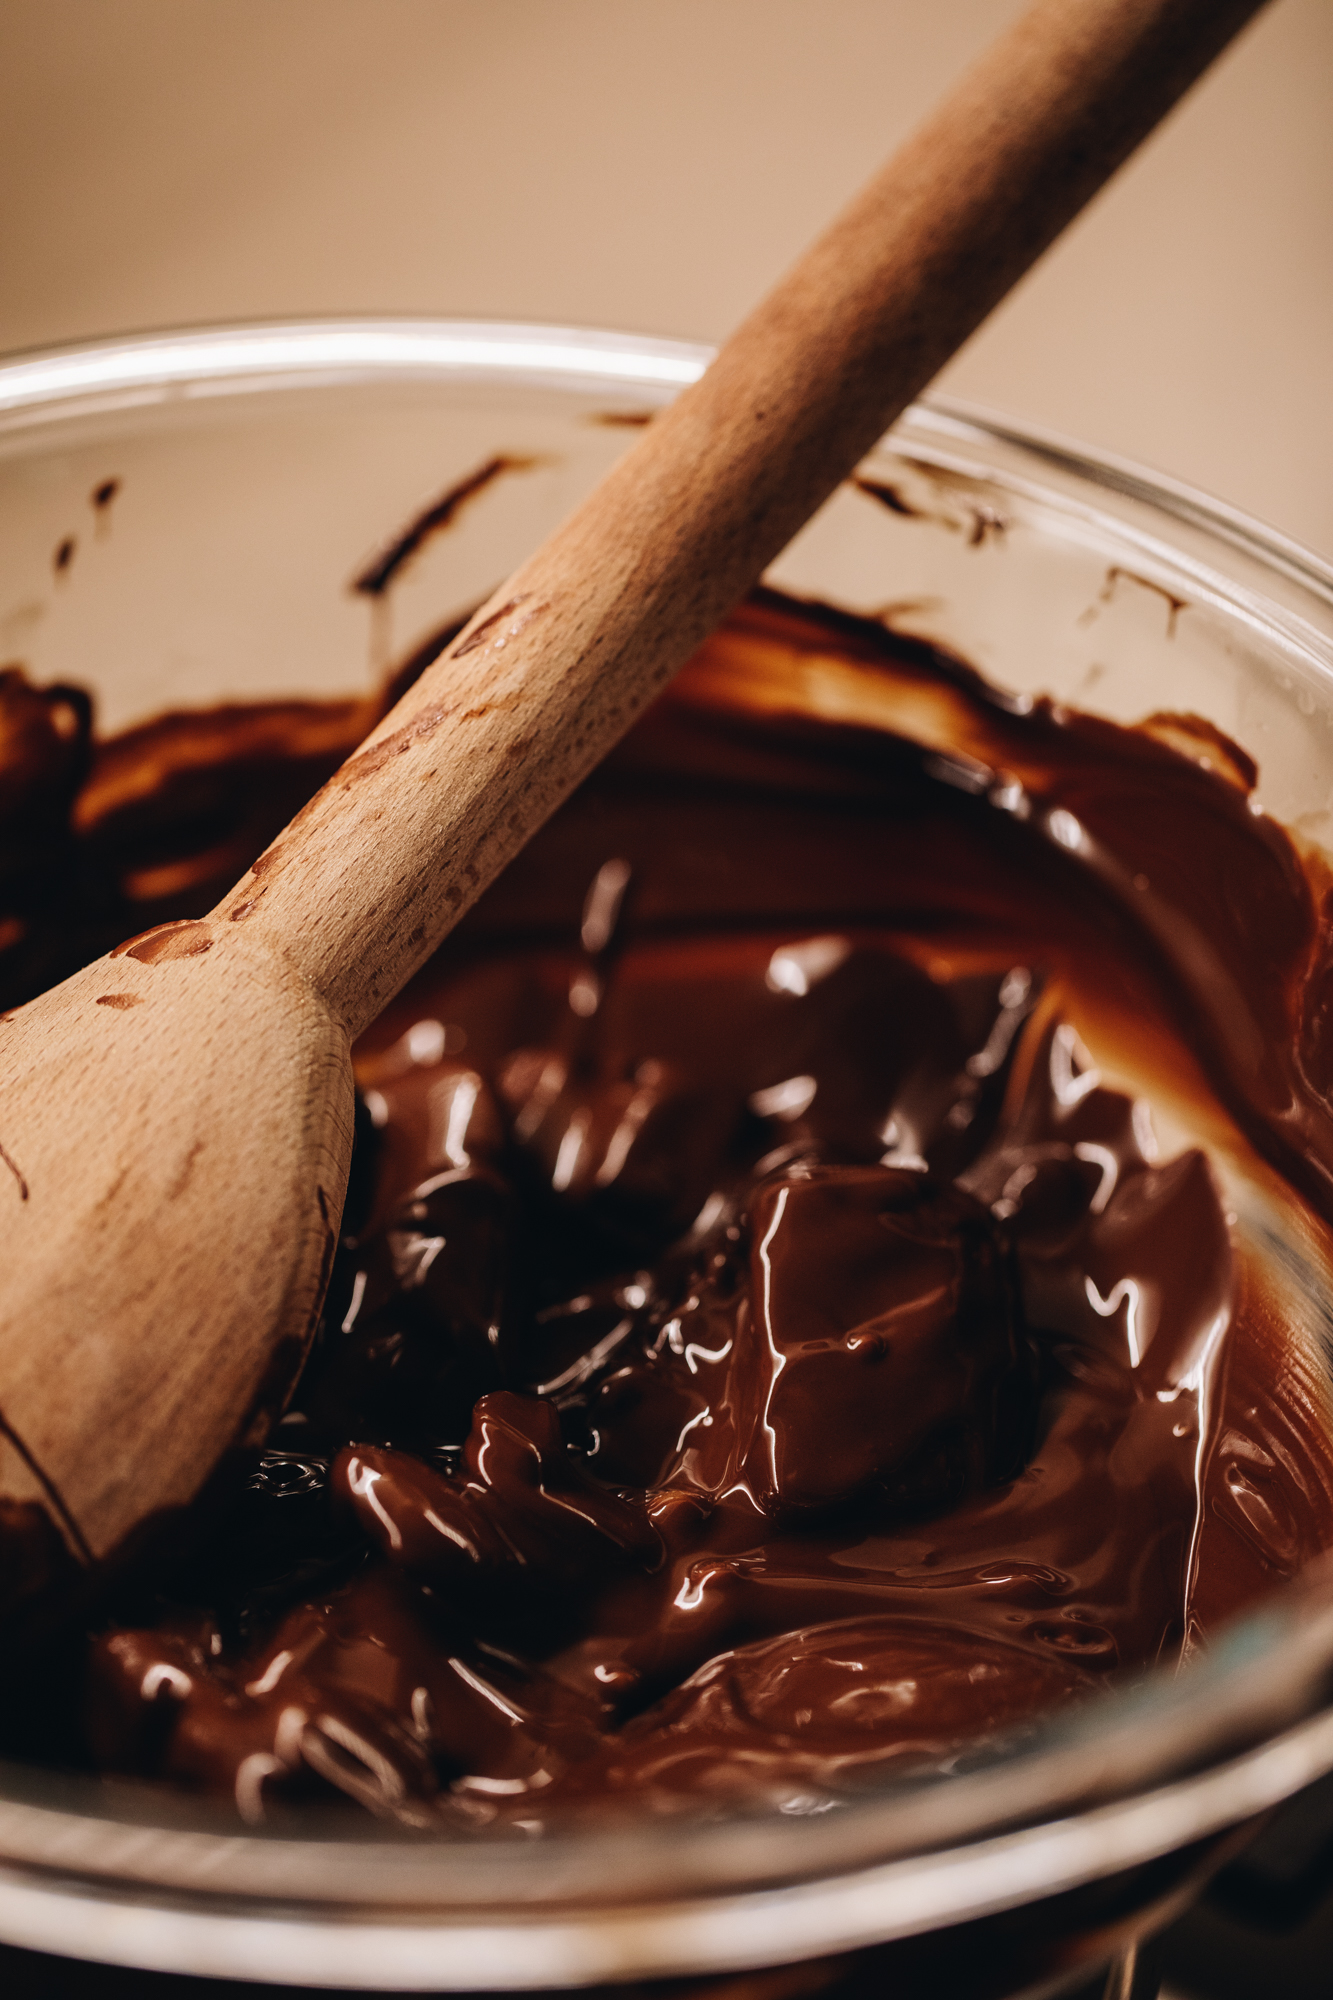
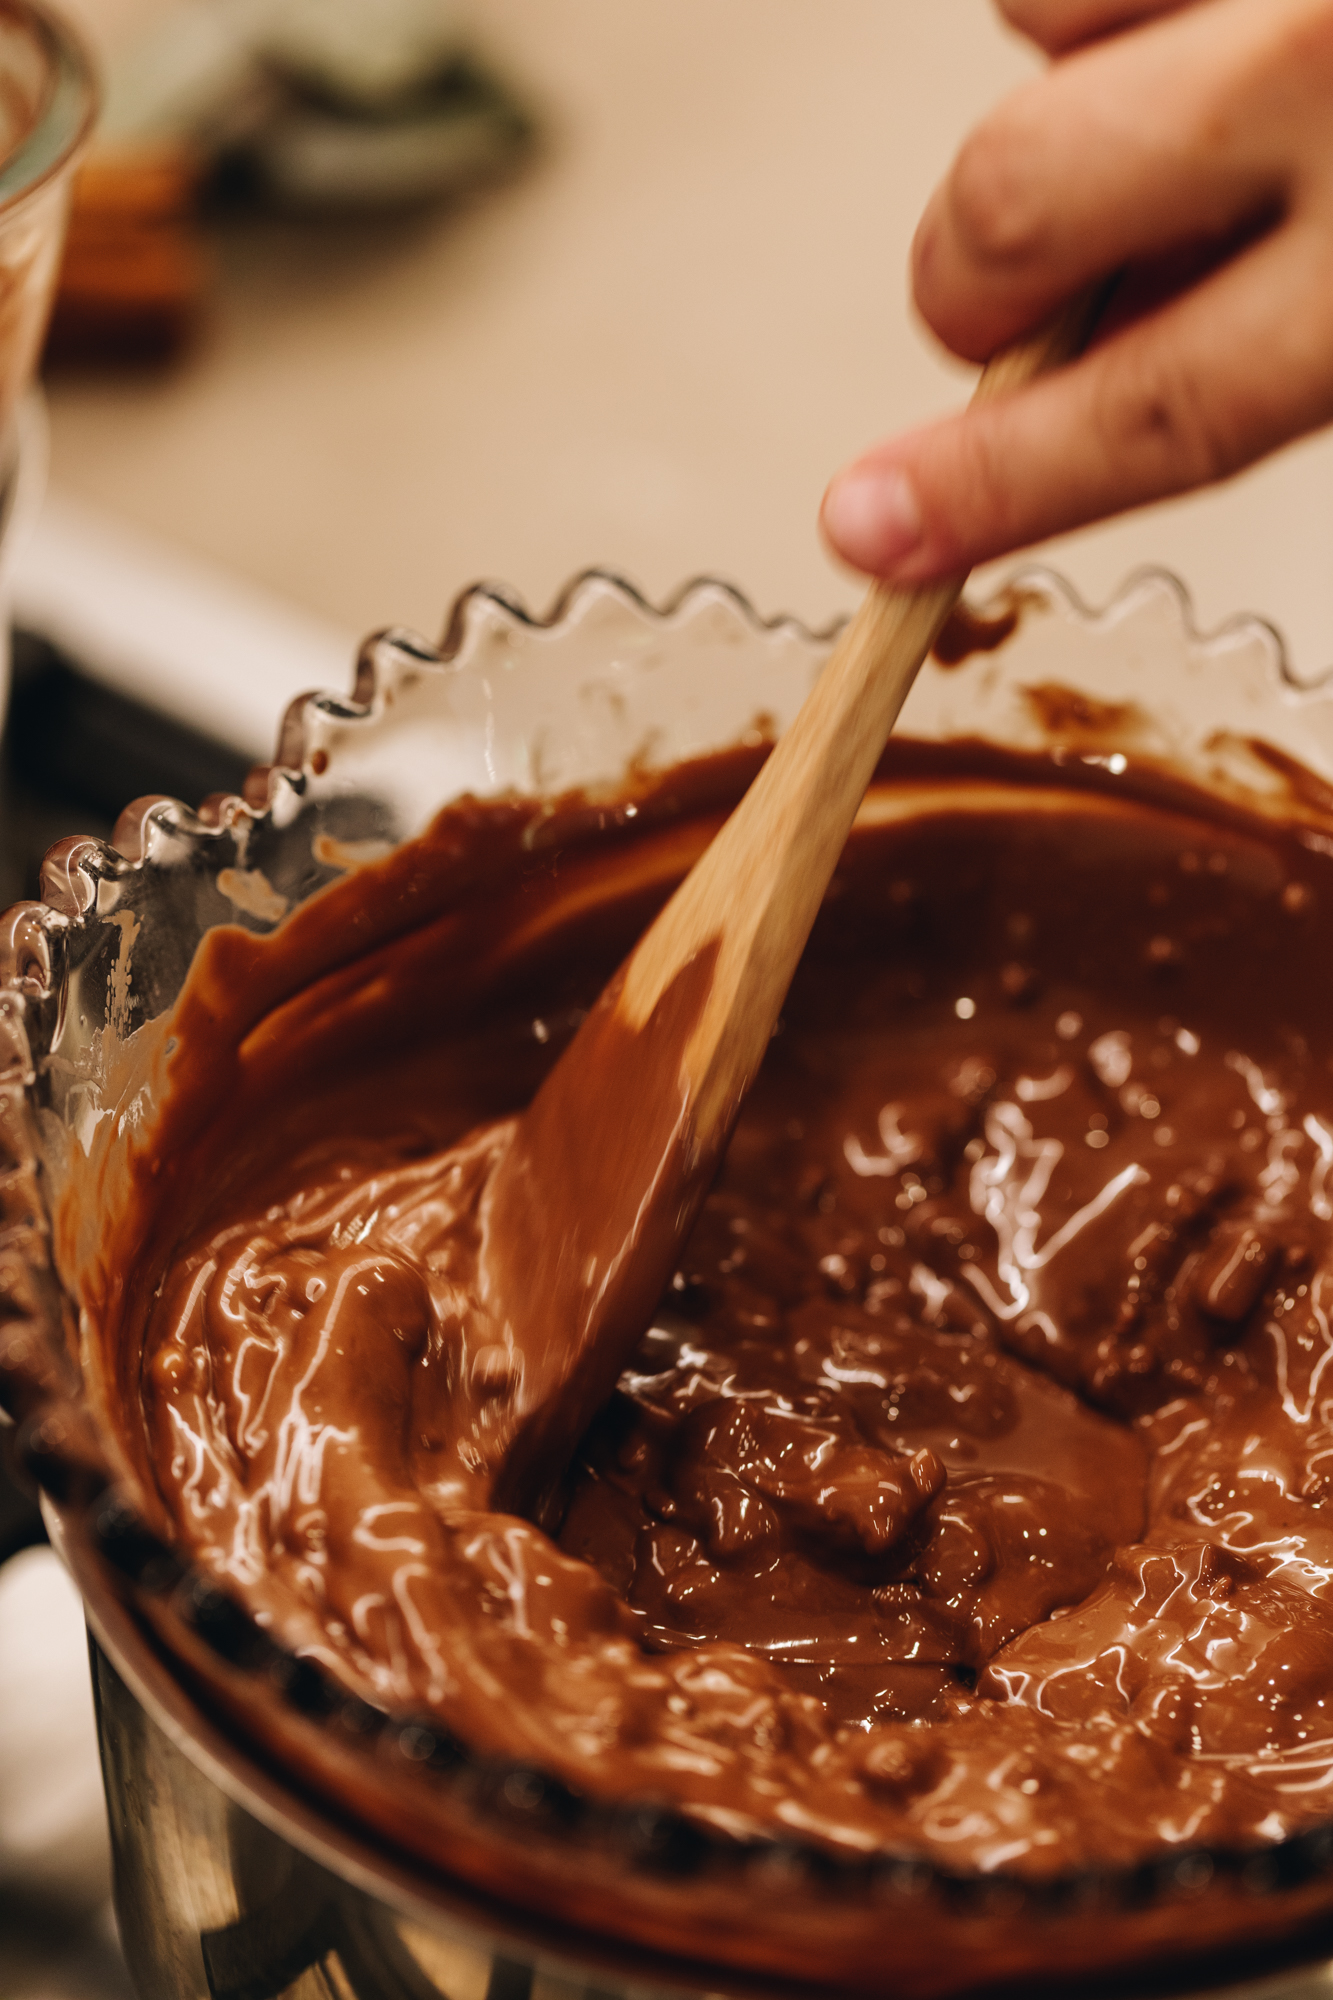
4. Melt the Dark Chocolate:
Add 3 cm of wai (water) in to pot and heat over low-medium heat until gently simmering.
Add the tiakarete parauri (dark chocolate) and miraka (milk) in to a heat proof bowl that is wider than your pot.
Place the bowl on to the pot and melt the tiakarete (chocolate), stirring occasionally until it is smooth. Once it is melted, remove it from the heat.
Cool for 10 minutes.
5. Melt the Gelatine:
Melt the bloomed gelatine in the microwave for 20 seconds or you can place the gelatine bowl in the pot of hot water and stir until it is melted.
Remove from the heat and cool for 5 minutes.
6. Combine the Gelatine and Chocolate:
After five minutes, stir the gelatine in to the melted tiakarete (chocolate). Then leave it to the side as you make the kirīmi (cream).
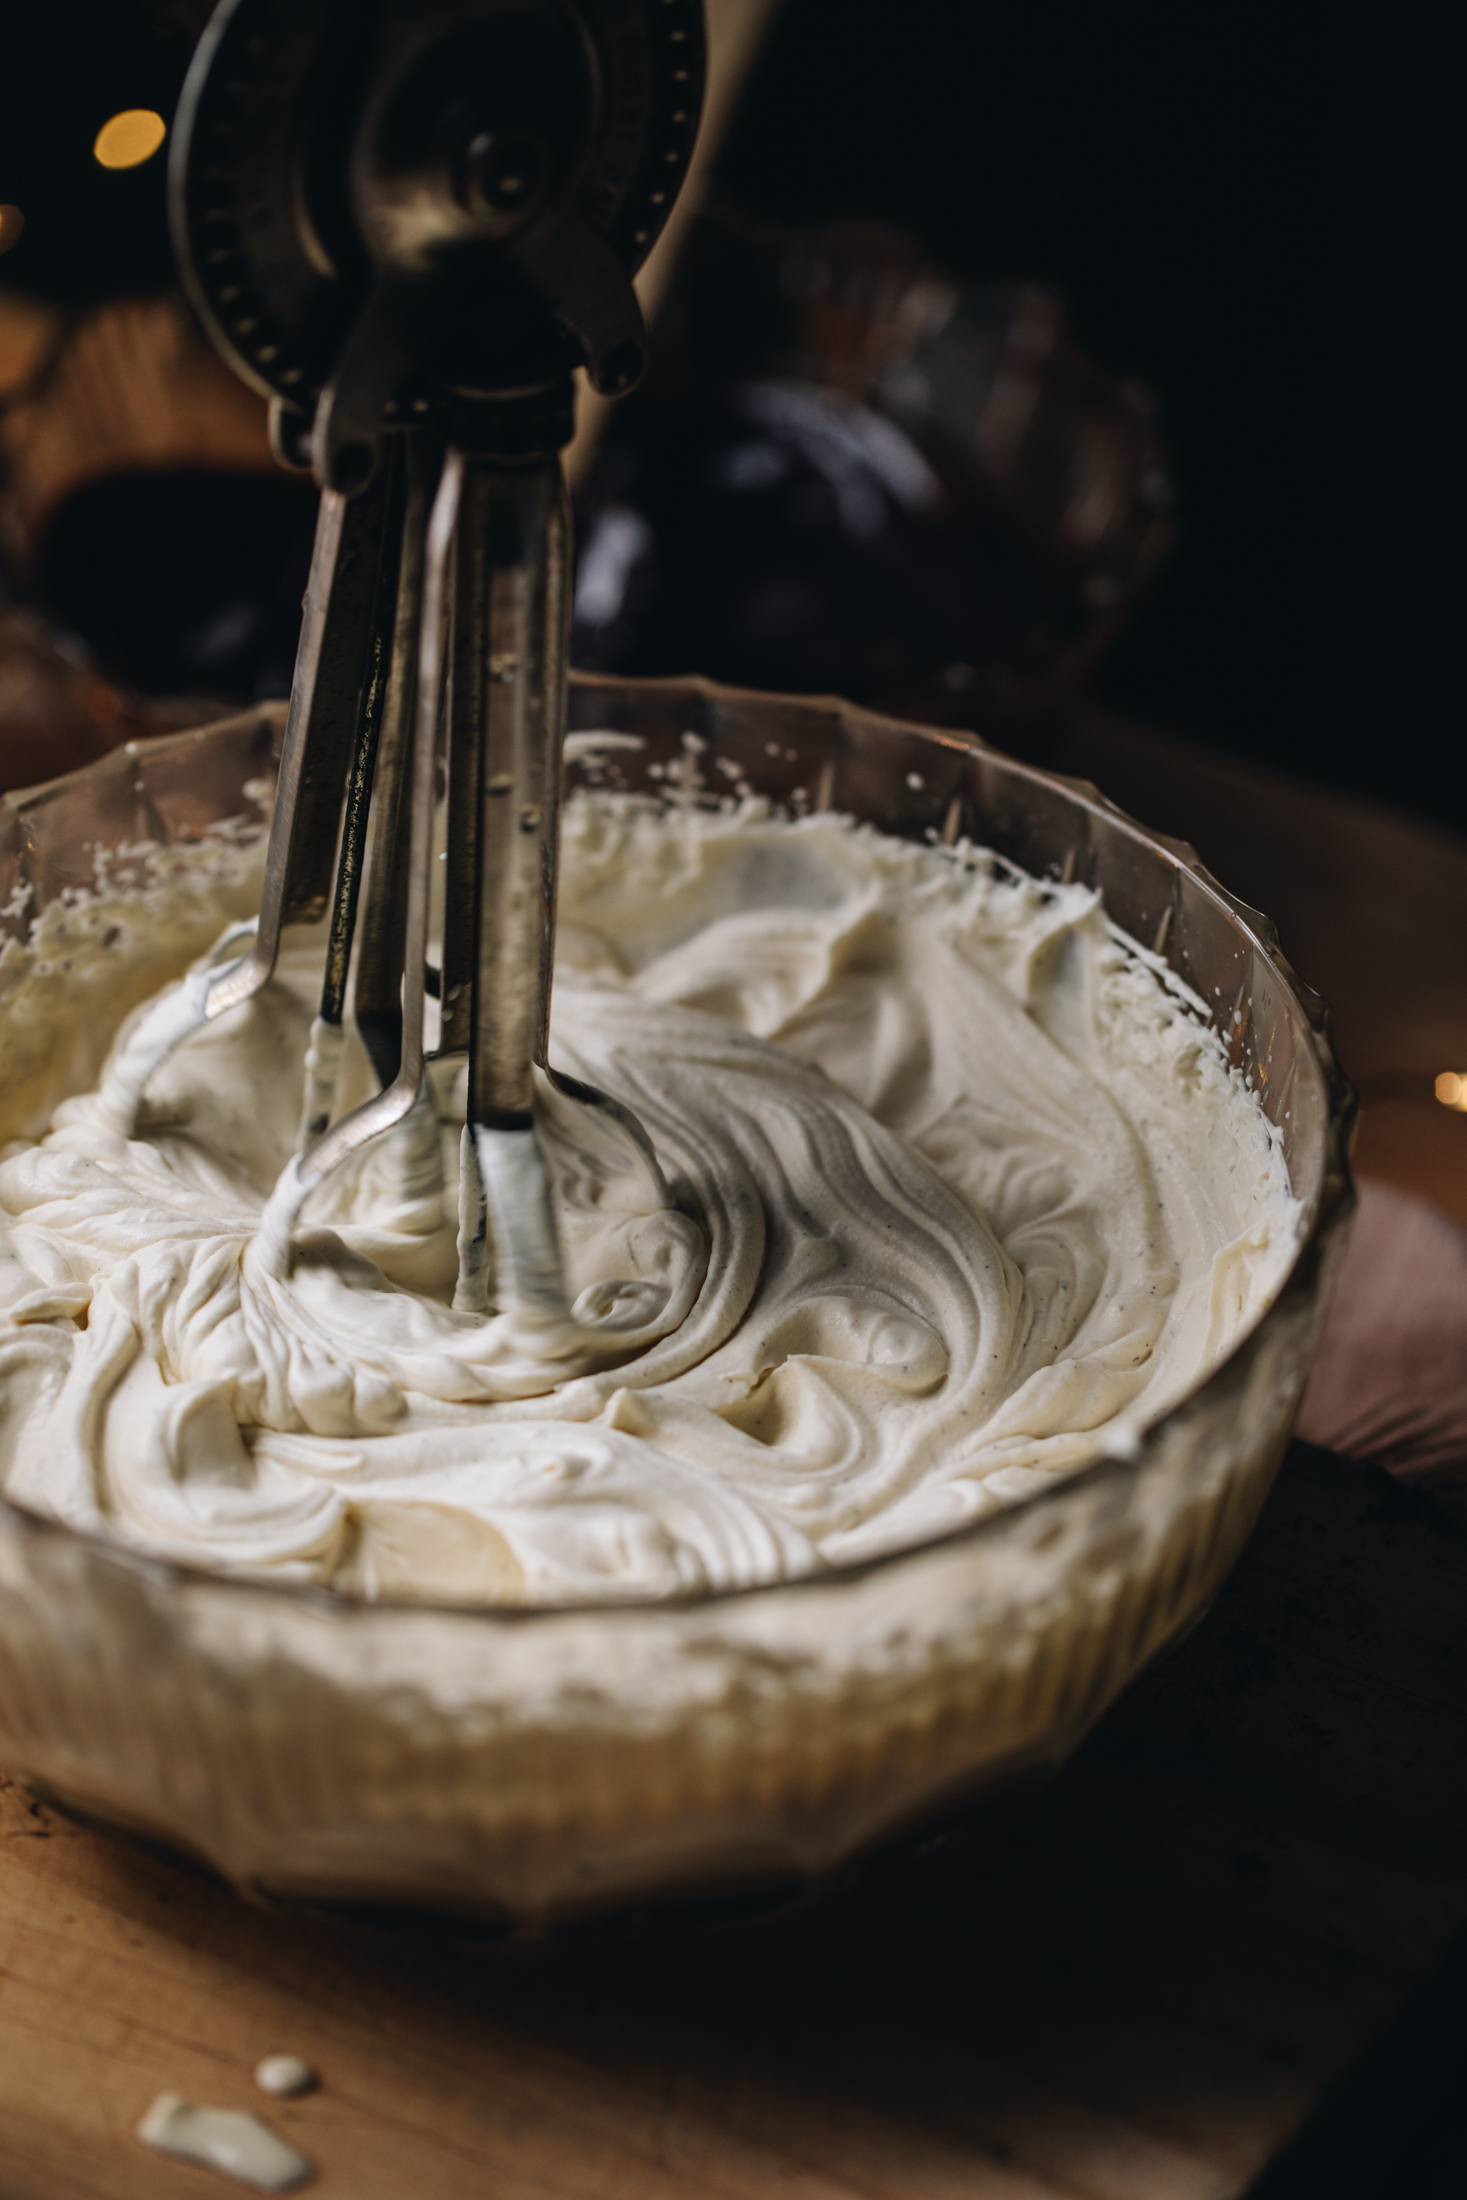
7. Whip the Cream:
Add the kirīmi tepe (creme fraiche), kirīmi (cream), puehu huka (icing sugar) and wanira (vanilla) in to a medium bowl.
Whakapāhukahukatia (whip it) on medium speed until soft peaks are reached.
8. Divide the Cream in to Three Parts:
Reserve ½ cup of kirīmi tāwhiuwhiu (whipped cream) for the topping. Leave it in the fridge until needed.
Split the remaining kirīmi (cream) in half.
Set half (around 2 cups) aside for the milk chocolate layer.
Whakamātaohia (refrigerate).
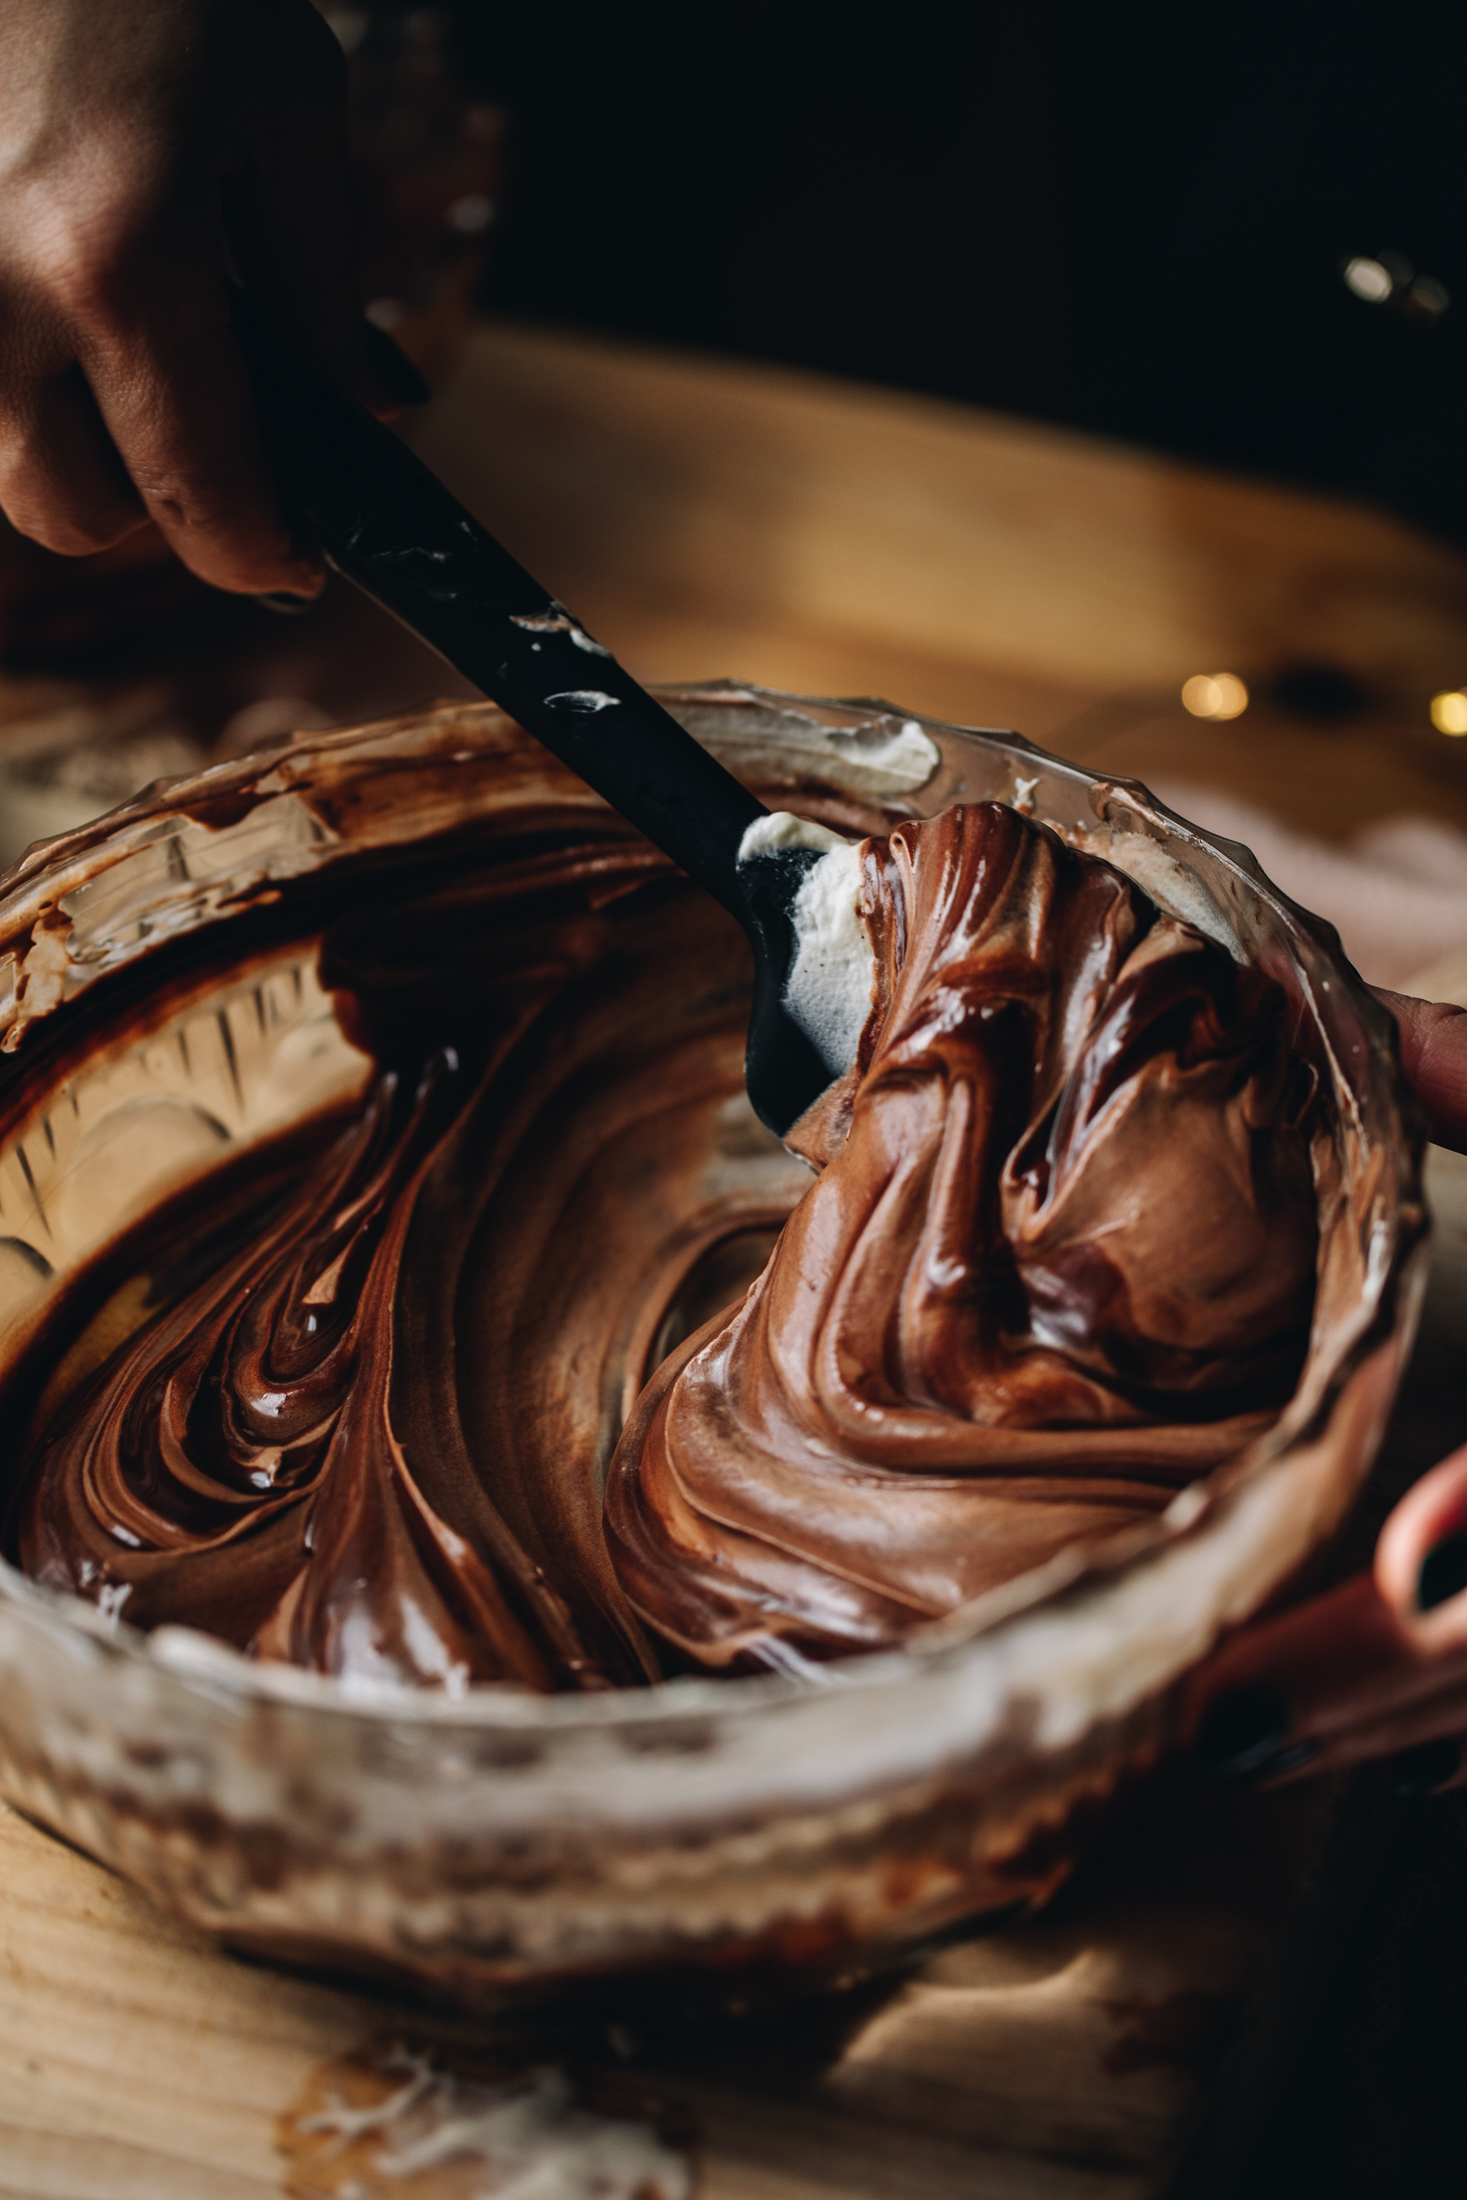
9. Fold the Chocolate in to the Whipped Cream:
The remaining half (around 2 cups) of the kirīmi tāwhiuwhiu (whipped cream) is used for the dark chocolate.
Add the cooled tiakarete parauri (dark chocolate) mixture in to the kirīmi tāwhiuwhiu (whipped cream). Do this in 3 parts, folding gently after each addition.
10. Pour it in to the Tin:
Once it is all incorporated and smooth, pour it in to the prepared cake tin and then smooth out the top. Whakamātaohia (refrigerate) for 45 minutes.
11. Prepare The Milk Chocolate Layer:
Once the first layer has chilled for 30 minutes, prepare the paparanga tiakarete miraka (milk chocolate layer).
12. Bloom the Gelatine:
Add the wai (water) in to a small bowl and sprinkle over the paura tetepe (gelatine powder). Whakaranuhia (mix to combine) and then leave it to bloom.
13. Melt the Milk Chocolate:
Add the tiakarete milk (milk chocolate) and miraka (milk) in to a heat proof bowl. Melt it as you did with the dark chocolate, stirring occasionally. Once it is smooth, remove it from the heat and cool for ten minutes.
14. Melt the Gelatine:
Melt the bloomed gelatine in the microwave for 20 seconds or you can place the bowl in the pot of hot water and stir until it is melted.
Remove from the heat and cool for 5 minutes. Then stir it in to the melted tiakarete miraka (milk chocolate).
15. Fold the Chocolate in to the Whipped Cream:
Once the milk chocolate mixture is room temperature, add it in to the 2 cups of reserved kirīmi tāwhiuwhiu (whipped cream). Do this in 3 parts, folding gently after each addition.
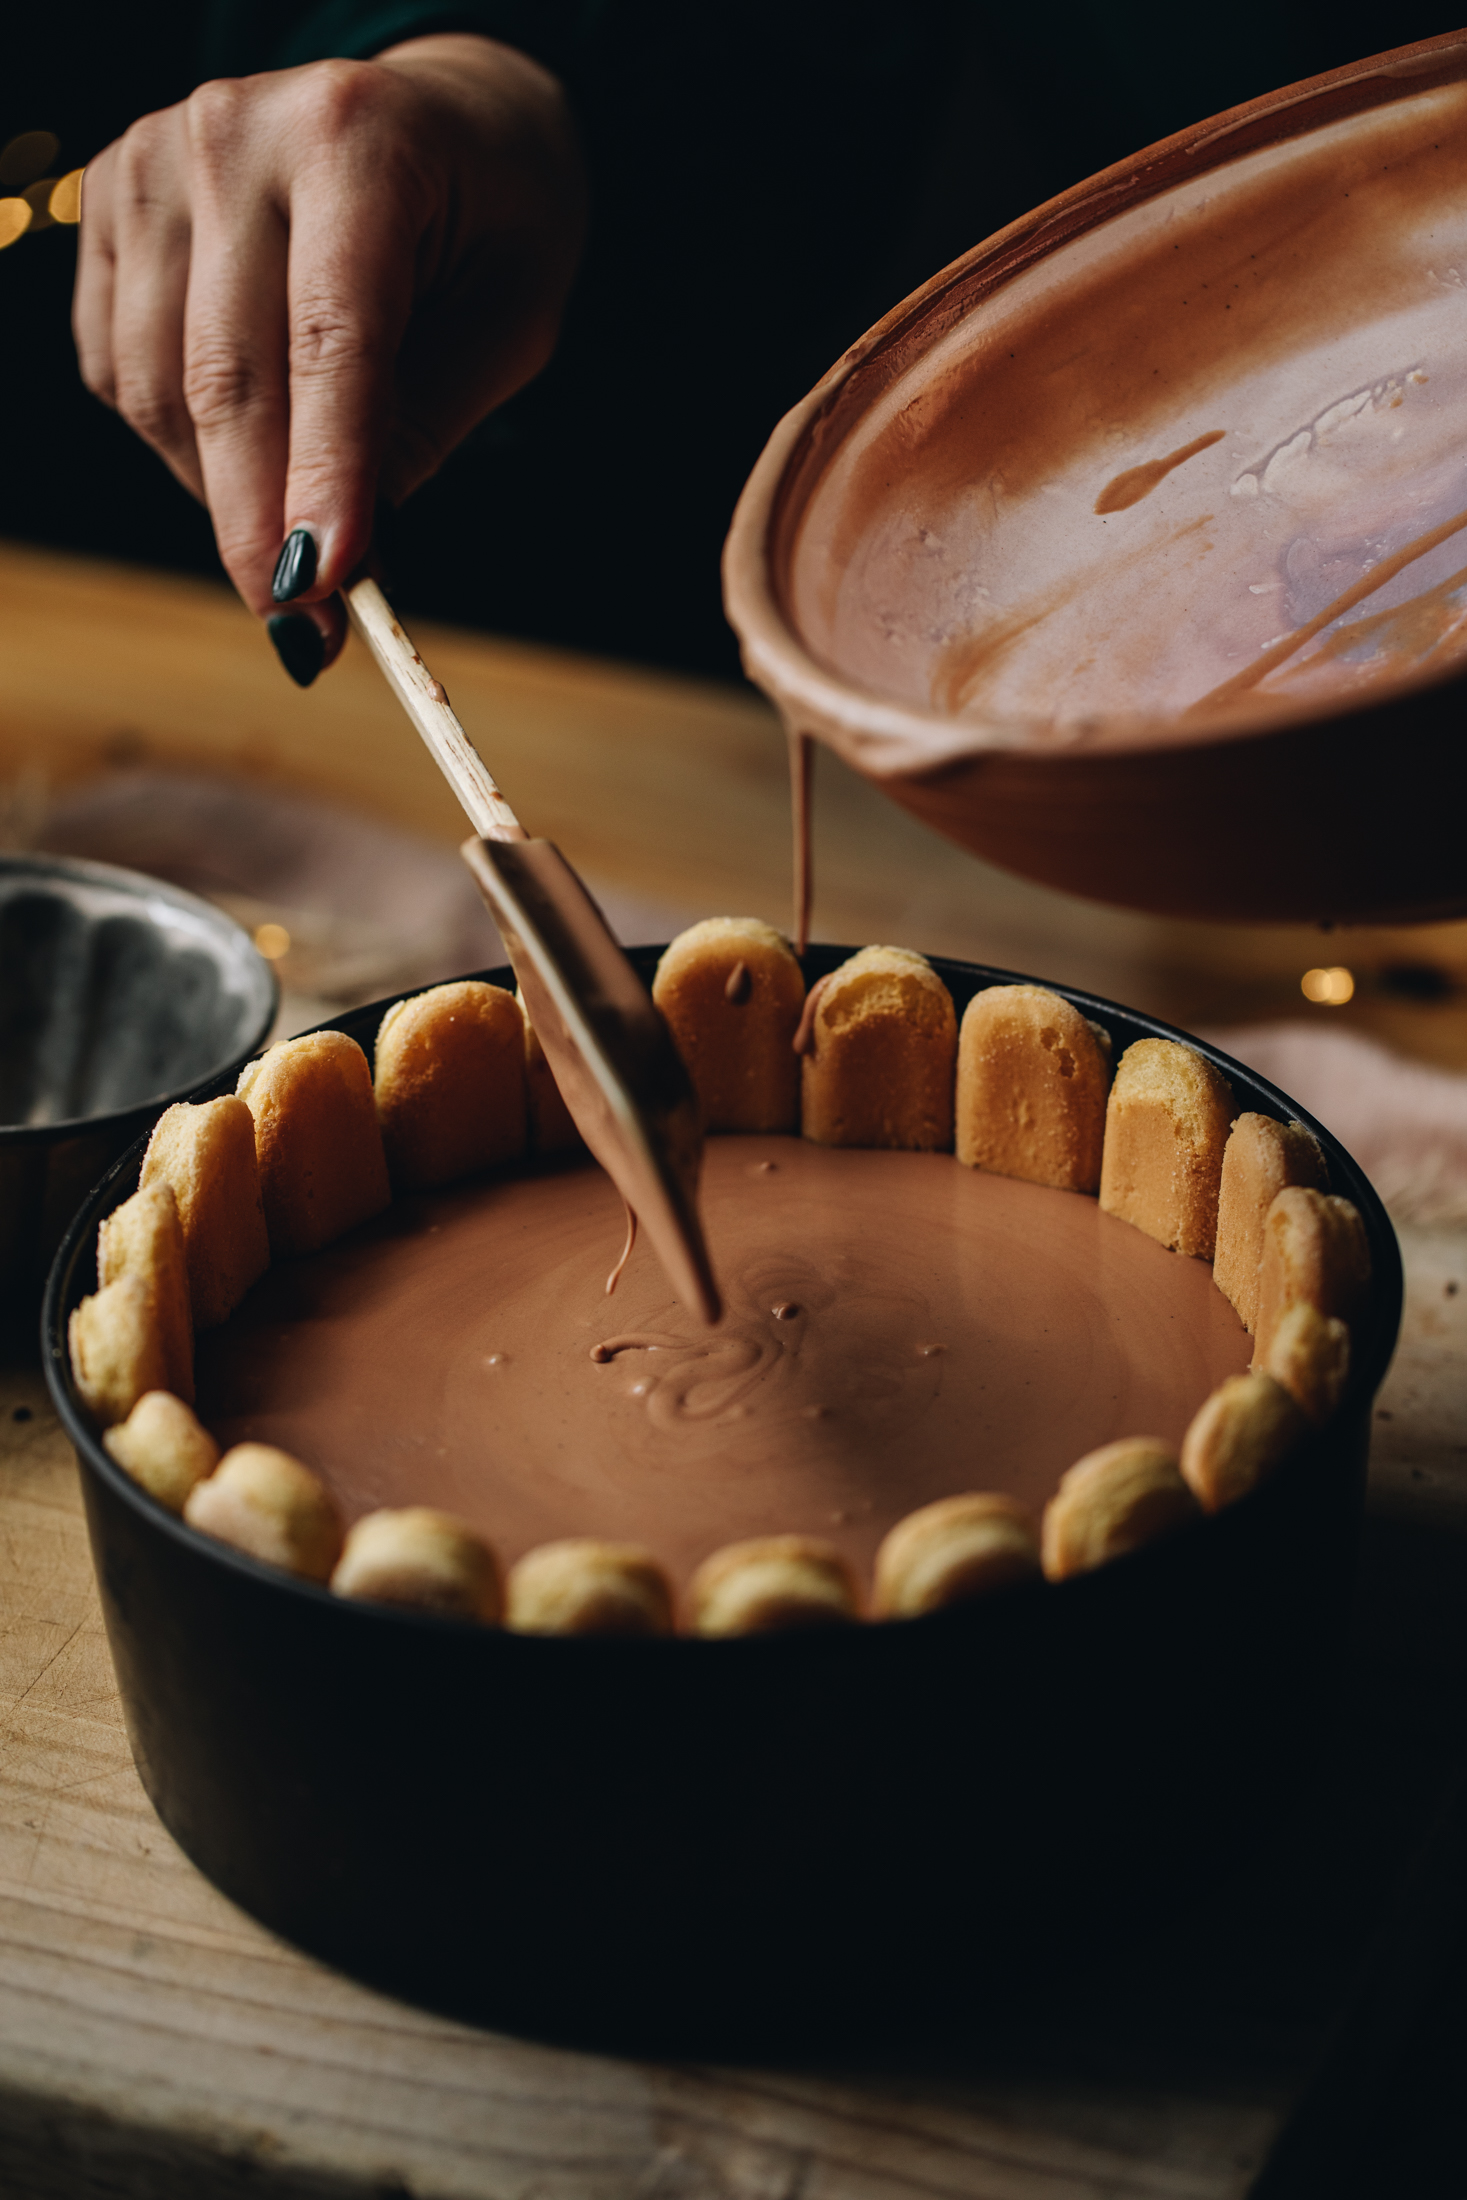
16. Pour it in to the Cake Tin:
Once it is all incorporated and smooth, pour it in to the prepared cake tin.
Please note: This layer in the video was a disaster! It should not look runny like that so take not of this consistency of the first layer, the milk chocolate layer should be the same.
17. Refrigerate:
Chill it for at least 4 hours or you can have this in the fridge for up to 5 days before serving.
If you are leaving it for more than a day, cover it with a bowl cover or place it in a sealed container.
18. Add to a Cake Stand:
Up to 12 hours before serving, decorate the top of the Keke Hāriata (Charlotte Cake).
Add it a serving plate or cake stand. I kept mine on the cake tin base to serve it but you can remove it if you want to.
19. Decorate the No-bake Chocolate Charlotte Cake:
First, spread the reserved ½ cup of kirīmi tāwhiuwhiu (whipped cream) on to the top of the set cake.
Remove the stones from the paramu (plums) and set them aside.
Then mash the paramu (plums) or poihanapere (boysenberries) in a small bowl. Grate in the kiri ārani (orange zest) and stir it to combine.
Add the paramu (plums) or poihanapere (boysenberries) on top of the cream.
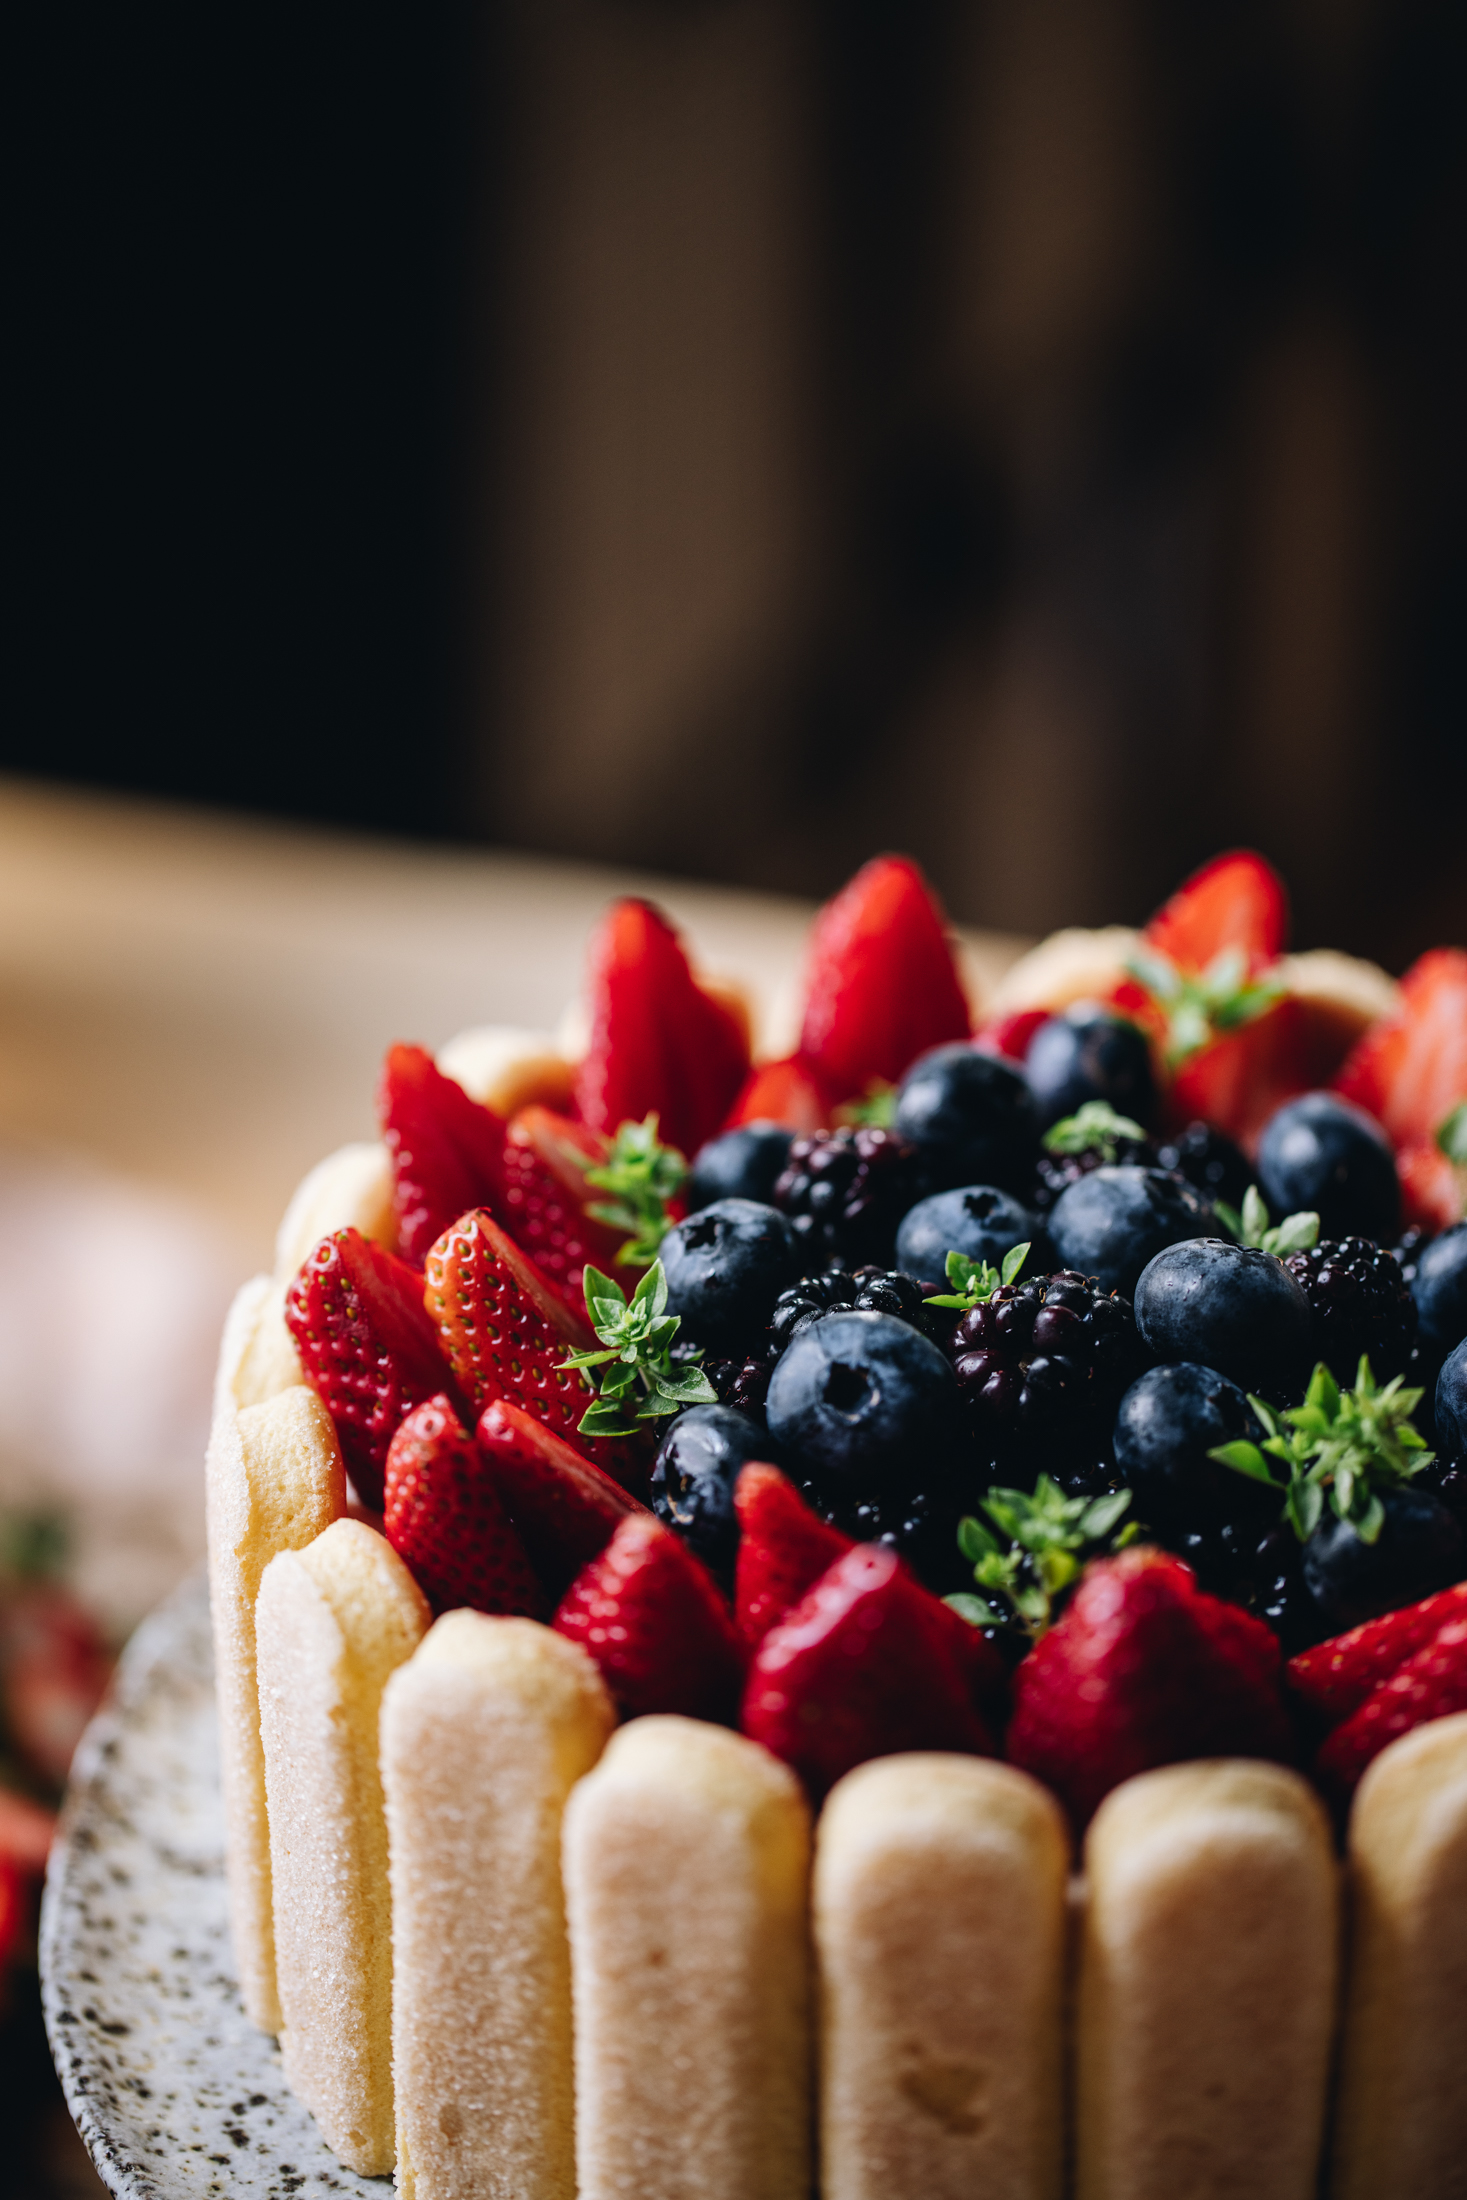
20. Add the Berries:
Arrange the halved rōpere (strawberries) around the edge of the Keke Hāriata (Charlotte Cake).
Place whole parakipere (blackberries) in the centre.
Add the tūrutu (blueberries) on top and adorn it with dainty rau pāhiri (basil leaves).

21. Wrap the No-bake Chocolate Charlotte Cake in a Bow:
Wrap it in a ribbon of your choosing and tie a beautiful bow.
Refrigerate until you are ready to serve.
Once all of the fresh hua (berries) are added to the keke (cake) it will last for around 12 hours.
Anything beyond that and the berries will start to loose their freshness.
22. Serve it to your guests:
Present it to your manuhiri (guests) and listen to the ohhhh's and wow's!
All that effort was worth it and everyone will feel the aroha (love) that you have put in to it.
Take a closer look at all of our
Dessert Recipes
Bless others with a little slice of magic, made by your ringaringa (hands).
DID YOU ENJOY THIS RECIPE?
It would be so awesome if you could please leave a review/comment by clicking the “leave a comment” section at the top of the page.
I love seeing you all make my creations, so send a whakaahua (photo) or kiriata (video) to my Instagram and show me what you made. Let me know if you have any pātai (questions) too, I would love to help.

No-bake Charlotte Cake - Keke Hāriata Kore-tunu
Equipment
- 1 x 20 cm Loose Bottom Cake Tin, around 7 cm high.
Ingredients
The Lady Fingers - Ngā Matimati Kōpunga
- 200 g matimati kōpunga (sponge fingers, lady fingers)
- 1 can (425 g) paramu pango (black Doris plums, from) You can also swap this for a can of boysenberries.
The Dark Chocolate Layer - Te Paparanga Tiakarete Parauri
- 3 tablespoon (45 ml) wai (water)
- 1 teaspoon paura tetepe (gelatine powder, I use Mrs Rogers)
- 150 g tiakarete parauri (dark chocolate, 60% is best)
- ⅓ C (85 ml) miraka (milk)
The Cream - Te Kirīmi
- 250 g kirīmi tepe (creme fraiche)
- 1 ¾ C (435 ml) kirīmi (cream)
- ¾ C (125 g) puehu huka (icing sugar)
- 1 tablespoon (15 ml) wanira (vanilla)
The Milk Chocolate Layer - Te Paparanga Tiakarete Miraka
- 1 teaspoon paura tetepe (gelatine powder)
- 3 tablespoon (45 ml) wai (water)
- 150 g tiakarete miraka (milk chocolate, 33%)
- ⅓ C (85 ml) miraka (milk)
The Decorations - Ngā Whakarākei (All Optional)
- 1 C paramu (plums) or poihanapere (boysenberries) from a can.
- Kiri ārani (orange zest, of half an orange)
- 250 g rōpere (strawberries)
- 100 g parakipere (blackberries)
- 100 g tūturu (blueberries)
- Handful of micro basil
Instructions
Prepare the Lady Fingers:
- Cut 2 cm off each matimati kōpunga (sponge fingers). Leave the small pieces to the side.
- Line a 20 cm, loose base cake tin with the lady fingers. Place the cut side on the base, and the sugar side against the tin.
- You will have a few matimati kōpunga (sponge fingers) left over. Cut them in to small pieces too.
Add the Lady Fingers Pieces to the Base:
- Pour around ½ cup of juice from the paramu (plums) or poihanapere (boysenberries) into a small bowl. Reserve the fruit for the topping.
- Add the lady finger pieces in to the juice and soak them for 5 seconds. Then place them in the base of the cake tin.
- Smooth them out with the back of your spoon, adding a little extra juice if you need to. You don't want it soaking here but just soft enough for the sponges to absorb the juice.
- Leave to the side.
Bloom the Gelatine:
- Add the wai (water) in to a small bowl and sprinkle over the paura tetepe (gelatine powder). Whakaranuhia (mix to combine).
- Leave to bloom.
Melt the Dark Chocolate:
- Add 3 cm of wai (water) in to pot and heat over low-medium heat until gently simmering.
- Add the tiakarete parauri (dark chocolate) and miraka (milk) in to a heat proof bowl that is wider than your pot.
- Place the bowl on to the pot and melt the tiakarete (chocolate), stirring occasionally until it is smooth.
- Once it is melted, remove it from the heat. Cool for 10 minutes.
Melt the Gelatine:
- Melt the bloomed gelatine in the microwave for 20 seconds or you can place the bowl in the pot of hot water and stir until it is melted.
- Remove from the heat and cool for 5 minutes.
Combine the Gelatine and Chocolate:
- After five minutes, stir it in to the melted tiakarete (chocolate).
- Leave it to the side as you make the kirīmi (cream).
Whip the Cream:
- Add the kirīmi tepe (creme fraiche), kirīmi (cream), puehu huka (icing sugar) and wanira (vanilla) in to a medium bowl.
- Whakapāhukahukatia (whip it) on medium speed until soft peaks are reached.
Divide the Cream in to Three Parts:
- Reserve ½ cup of kirīmi tāwhiuwhiu (whipped cream) for the topping. Leave it in the fridge until needed.
- Split the remaining kirīmi (cream) in half.
- Set half (around 2 cups) aside for the milk chocolate layer. Whakamātaohia (refrigerate).
Fold the Chocolate in to the Whipped Cream:
- The remaining half (around 2 cups) of the kirīmi tāwhiuwhiu (whipped cream) is used for the dark chocolate.
- Add the cooled tiakarete parauri (dark chocolate) mixture in to the kirīmi tāwhiuwhiu (whipped cream). Do this in 3 parts, folding gently after each addition.
Pour it in to the Tin:
- Once it is all incorporated and smooth, pour it in to the prepared cake tin and smooth out the top.
- Whakamātaohia (refrigerate) for 45 minutes.
Prepare The Milk Chocolate Layer:
- Once the first layer has chilled for 30 minutes, prepare the paparanga tiakarete miraka (milk chocolate layer).
Bloom the Gelatine:
- Add the wai (water) in to a small bowl and sprinkle over the paura tetepe (gelatine powder). Whakaranuhia (mix to combine).
- Leave to bloom.
Melt the Milk Chocolate:
- Add the tiakarete milk (milk chocolate) and miraka (milk) in to a heat proof bowl. Melt it as you did with the dark chocolate, stirring occasionally.
- Once it is melted and smooth, remove it from the heat and cool for ten minutes.
Melt the Gelatine:
- Melt the bloomed gelatine in the microwave for 20 seconds or you can place the bowl in the pot of hot water and stir until it is melted.
- Remove from the heat and cool for 5 minutes. Then stir it in to the melted tiakarete miraka (milk chocolate).
Fold the Chocolate in to the Whipped Cream:
- Once the milk chocolate mixture is room temperature, add it in to the 2 cups of reserved kirīmi tāwhiuwhiu (whipped cream). Do this in 3 parts, folding gently after each addition.
Pour it in to the Cake Tin:
- Once it is all incorporated and smooth, pour it in to the prepared cake tin.
- Please note: This layer in the video was a disaster! It should not look runny like that so take not of this consistency of the first layer, the milk chocolate layer should be the same.
Refrigerate:
- Chill it for at least 4 hours or you can have this in the fridge for up to 5 days before serving.
- If you are leaving it for more than a day, cover it with a bowl cover or place it in a sealed container.
Add to a Cake Stand:
- Up to 12 hours before serving, decorate the top of the Keke Hāriata (Charlotte Cake).
- Take the chilled cake out of the fridge and release it out of the tin.
- Add it a serving plate or cake stand. I kept mine on the cake tin base to serve it but you can remove it if you want to.
Decorate the No-bake Chocolate Charlotte Cake:
- First, spread the reserved ½ cup of kirīmi tāwhiuwhiu (whipped cream) on to the top of the set cake.
- Remove the stones from the paramu (plums). Mash the paramu (plums) or poihanapere (boysenberries) in a small bowl. Grate in the kiri ārani (orange zest) and stir it to combine.
- Add the paramu (plums) or poihanapere (boysenberries) on top of the cream.
Add the Berries:
- Arrange the halved rōpere (strawberries) around the edge of the Keke Hāriata (Charlotte Cake).
- Place whole parakipere (blackberries) in the centre.
- Add the tūrutu (blueberries) on top and adorn it with dainty rau pāhiri (basil leaves).
Wrap the No-bake Chocolate Charlotte Cake in a Bow:
- Wrap it in a ribbon of your choosing and tie a beautiful bow. Refrigerate until you are ready to serve.
- Once all of the fresh hua (berries) are added to the keke (cake) it will last for around 12 hours.Anything beyond that and the berries will start to loose their freshness.
Serve the Charlotte Cake:
- Present it to your manuhiri (guests) and listen to the ohhhh's and wow's! All that effort was worth it and everyone will feel the aroha (love) that you have put in to it.


Miss Suzanne Hinemarama Hills
If the filling is quite thick, does that stop it leaking out between the lady fingers? And could I make it the night before and will the lady fingers still be crispy? My birthday is boxing day and I am making a strawberry sponge version inspired by this cake. Sponge on the bottom, strawberry mousse layer; sponge layer; white choc mousse layer; sponge layer; strawberries in jelly layer on top; piped cream and strawberries to decorate! I think the lady fingers around the outside will be just the perfect finish!
Naomi Toilalo WhānauKai
Kia ora, if you are doing a strawberry mousse it is hard to know if you will seep through as I haven't made the recipe that way. But, yes thicker is better! The sponge fingers should stay crisp depending on the moisture from the other ingredients, again, it is hard to tell if you are changing the recipe. All the best with your creation!
Ella
Kia ora! This looks delicious! I am wondering if I can sub the gelatine for agar for my vegetarian friends?
Thank you!
Naomi Toilalo WhānauKai
Kia ora Ella, yes, you totally can. The only thing is do the research on agar agar first as it requires a different treatment before adding it in to the mousse. Let me know how it goes!
Jody
This was so easy and delicious, and not having to turn the oven on is an absolute win for a summery Christmas! I was worried about getting it out of the tin, but the chocolate layers set against the lady fingers and keeps everything nicely in place. I did forget the plums on top, but was yum with the cream and berries anyway. Perfect Christmas dessert
Naomi Toilalo WhānauKai
Yay, I'm so glad it all worked for you Jody! It is such a showstopper of a recipe and has great flavours aye. Thanks for the great feedback!
Rachelle
An absolute hit with friends for Xmas, even with one that doesn’t like dessert! The perfect blend of chocolate and fruit, it was easy to make and looked super impressive. Another great recipe 🥰
Naomi Toilalo WhānauKai
Yes Rachelle, I love how impressive it looks too! So good to hear you enjoyed it!
Rachel Lamason
Was so delicious. Such a simple recipe to follow and I made this 3 days in advance, there was no leakage amd looked amazing. The perfect accompaniment for our Christmas Day.
Naomi Toilalo WhānauKai
Yes!!!! I love that you made it three days ahead, I'm sure it tasted delicious! So glad that you enjoyed it!
Rachel
Was so delicious. Such a simple recipe to follow and I made this 3 days in advance, there was no leakage amd looked amazing. The perfect accompaniment for our Christmas Day.
Bronwyn
Great recipe-fun to make and so clear and easy to follow the instructions
Was a hit with the family
I did have a little seepage from the mousse into the bottom edges of the savoirdi so I just layered cherries around the outside to cover it
Many thanks Naomi
Naomi Toilalo WhānauKai
Kia ora Bronwyn, I love that you knew how to fix the seepage! Maybe you used a touch too much juice with the lady fingers! So glad you enjoyed it though! So awesome to hear!
Kerry Cane
Ka rawe! This was absolutely awesome. So delicious, looked stunning and beautiful layers when sliced. The instructions were simple to follow and I prepared it over 24 hours before our Christmas meal. It was a total hit and unfortunately very little leftover because I would’ve loved some for breakfast the next day too… it tasted divine. Thank you so very much for sharing Naomi ♥️
Naomi Toilalo WhānauKai
Tēnā koe Kerry, I love that you nailed this recipe and enjoyed it with your whānau! Maybe next time, sneak a little piece for the next day he he. I love having dessert during any time of the day for Boxing Day!
Kerry Cane
I also made your Chilled Lemon and White Chocolate cheesecake which was also out the gate amazing! It was a bit of a Whānau Kai cookbook Christmas too, thanks Naomi… you’re a legend 🤩
Naomi Toilalo WhānauKai
Woo hoo! I made it for Christmas Day too! What an honour that my recipes made your Christmas table!