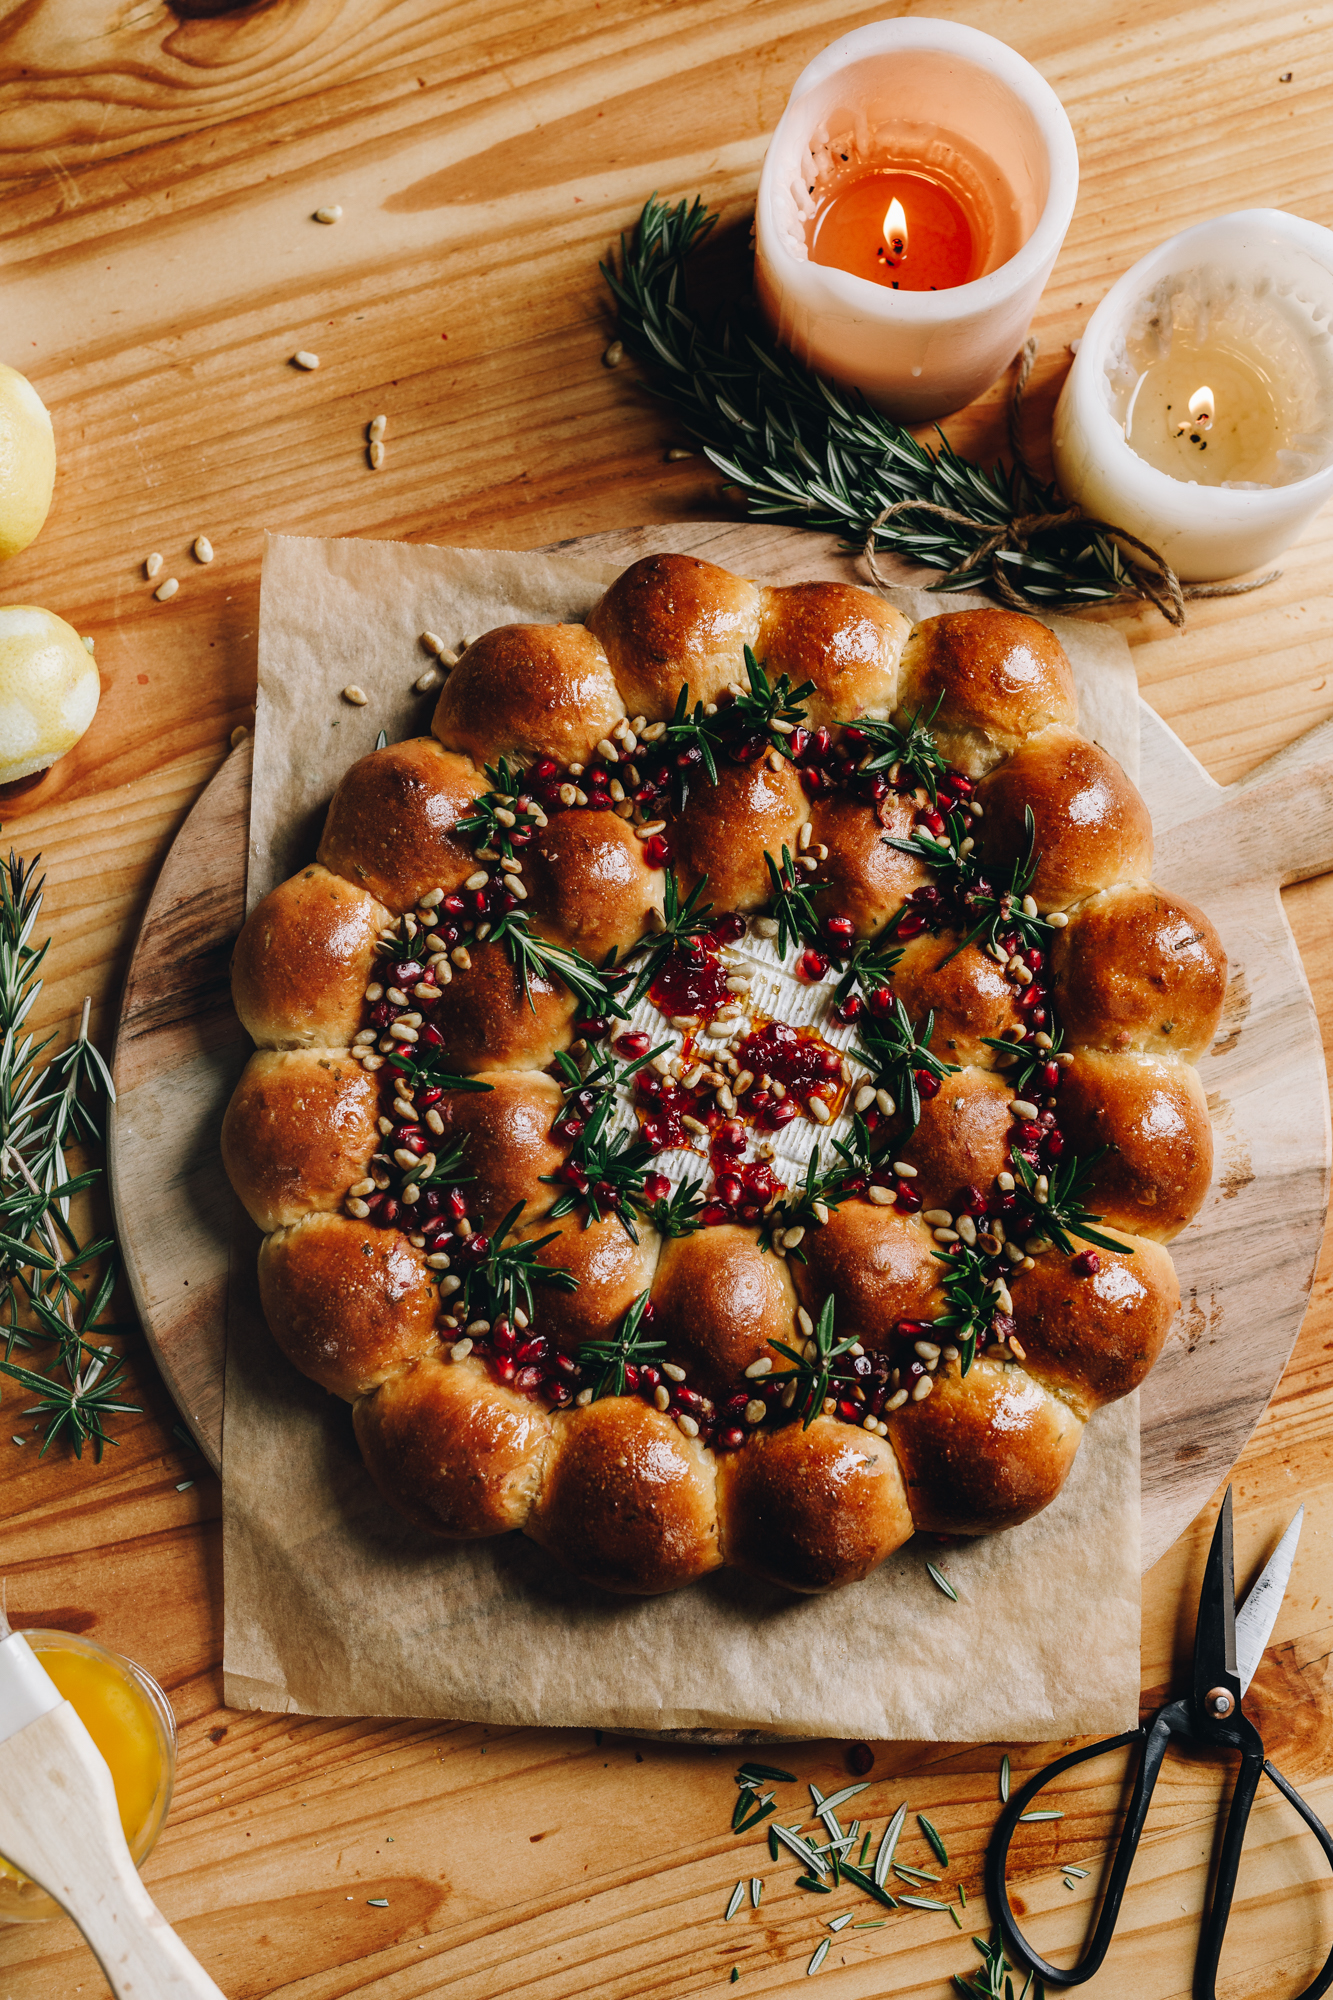
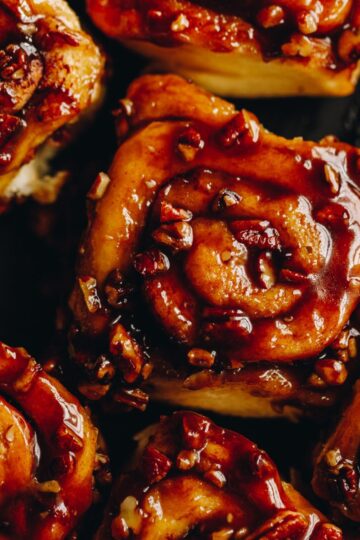
What could be more beautiful than a wreath? A Brie Cheese Bread Wreath, that's what! This is the perfect centrepiece for a simple meal or an extravagant celebration. Serve it with a side salad and some cured meat or enjoy it on its own with some butter.
Bake this pare parāoa (bread wreath) until golden and fill your whare (house) with the aroma of rohimere (rosemary) and puna riki (spring onions). Pull apart the freshly baked buns and smear them with gooey brie cheese. Te mutunga mai o te reka (absolutely delicious).
MORE TOHUTAO PARĀOA (BREAD RECIPES):
Making a brunch and need a good bread recipe? Then you must try these Bacon and Egg Buns, they have a cheesy herb crust and are so delicious. Do you want to make a braided bread? Then try my Savoury Brioche Bread loaf or Chocolate Chip Bread. 🥖
Videography and photography by Sarah Henderson.
Ingredient Tips for this Brie Cheese Bread Wreath:

- Milk: Full fat cows milk or trim will both work well in this recipe.
- Brown sugar: Use huka hāura (brown sugar), huka mā (white sugar), marahihi māpere (maple syrup) or mīere (honey) in the dough.
- Instant yeast: Use īhi horo (instant yeast) in this recipe for efficient rising. If you are using Surebake or breadmakers yeast, double the amount.
- High grade flour: Always use puehu parāoa kounga (high grade flour) in bread recipes for the fluffiest result.
- Salt: I use Himalayan salt in my baking because it gives a subtle flavour. If you are using iodised table salt, half the quantity.
- Egg Yolks: The tōhua hēki (egg yolks) give a lovely richness to the dough but can be replaced with one small egg.
- Garlic Powder: This is optional but gives a great background flavour. Onion powder would be a good replacement.
- Vinegar: Winika (vinegar) helps relax the gluten in the dough, creating a soft bun but it is not essential to the recipe.
- Oil: I use noni ōriwa (olive oil) in the dough but use any oil you have.
- Rosemary: Fresh rohimere (rosemary) in the dough is definitely recommended but it can be replaced with rohimere raki (dried rosemary).
- Brie Cheese: For the best melty cheese experience, you a double cream Brie.
Expert Tips:
Always give the yeast enough time to activate before adding the dry ingredients. The yeast will float to the top and it will be slightly foamy when it is ready.
Follow the kneading times as they are written because the gluten needs time to develop properly. If you need some more tips, check out this How to Knead Dough post.
When hand kneading use the palm of your hands, not your fingers. The dough and hands seem to get much stickier when it is worked like that, so work those palms in to the dough.
In the video my cheese did not have the melty effect because I used camembert cheese. I have learnt from my mistake though and so here I am, reminding you to buy a double cream brie for the best cheese pull.
STEP BY STEP INSTRUCTIONS FOR THIS BRIE CHEESE BREAD WREATH:
Note: The full recipe card with the full list of ingredients, instructions and step by step video are found at the bottom of this page.
1. Activate the Yeast:
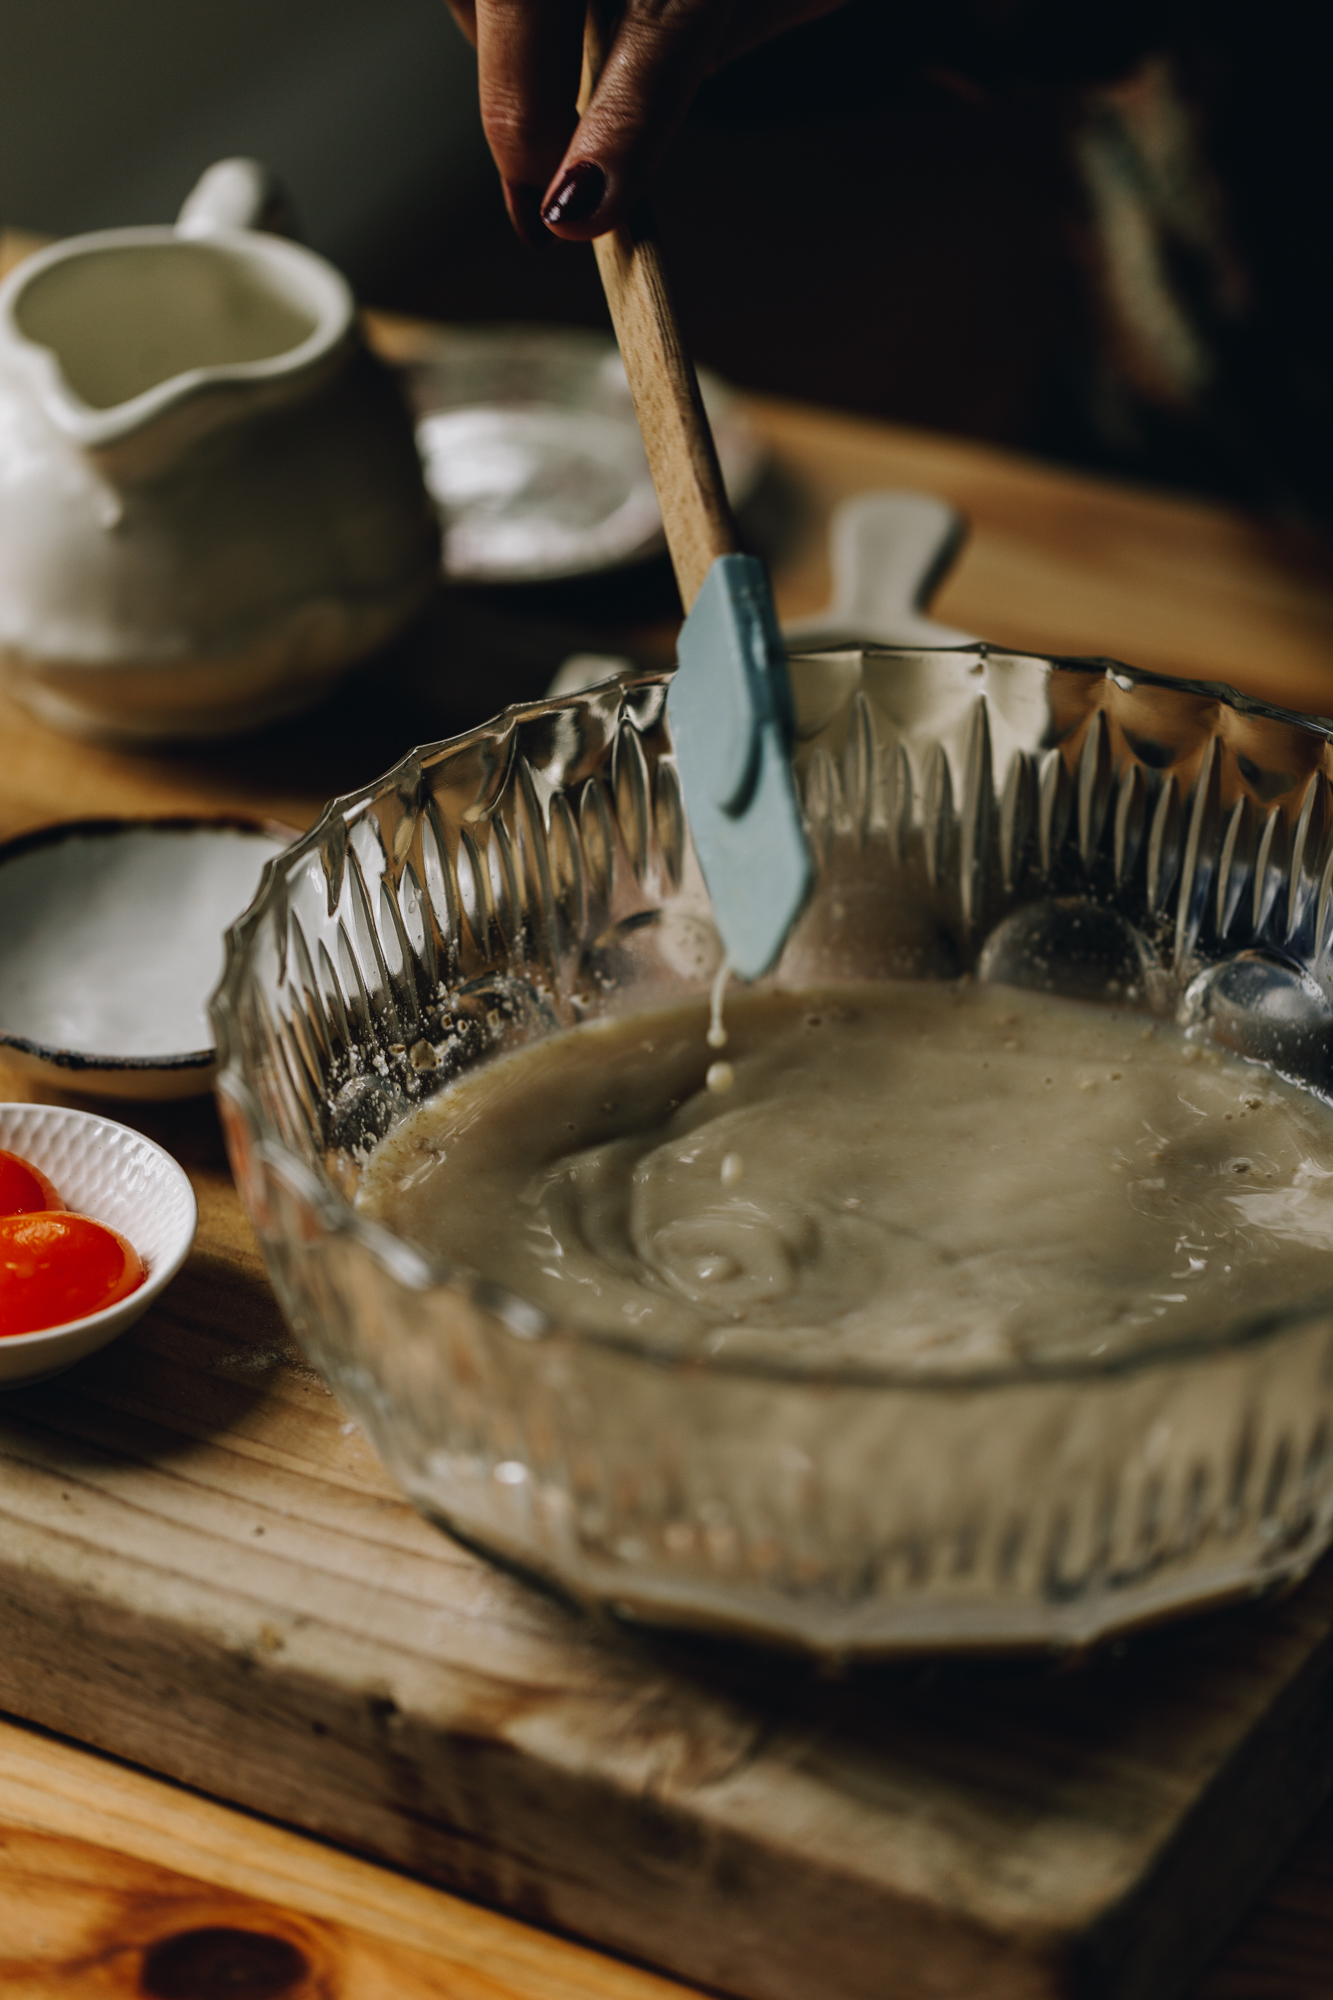
Pour the wai wera (hot water), miraka (milk) and huka hāura (brown sugar) in to a large bowl. Stir until the sugar is dissolved.
Add the īhi (yeast) and stir again.
If you are using instant yeast, leave it for 5 minutes until the yeast has floated to the top.
If you are using surebake yeast, leave for 10 minutes until the yeast has floated to the top and is slightly foamy.
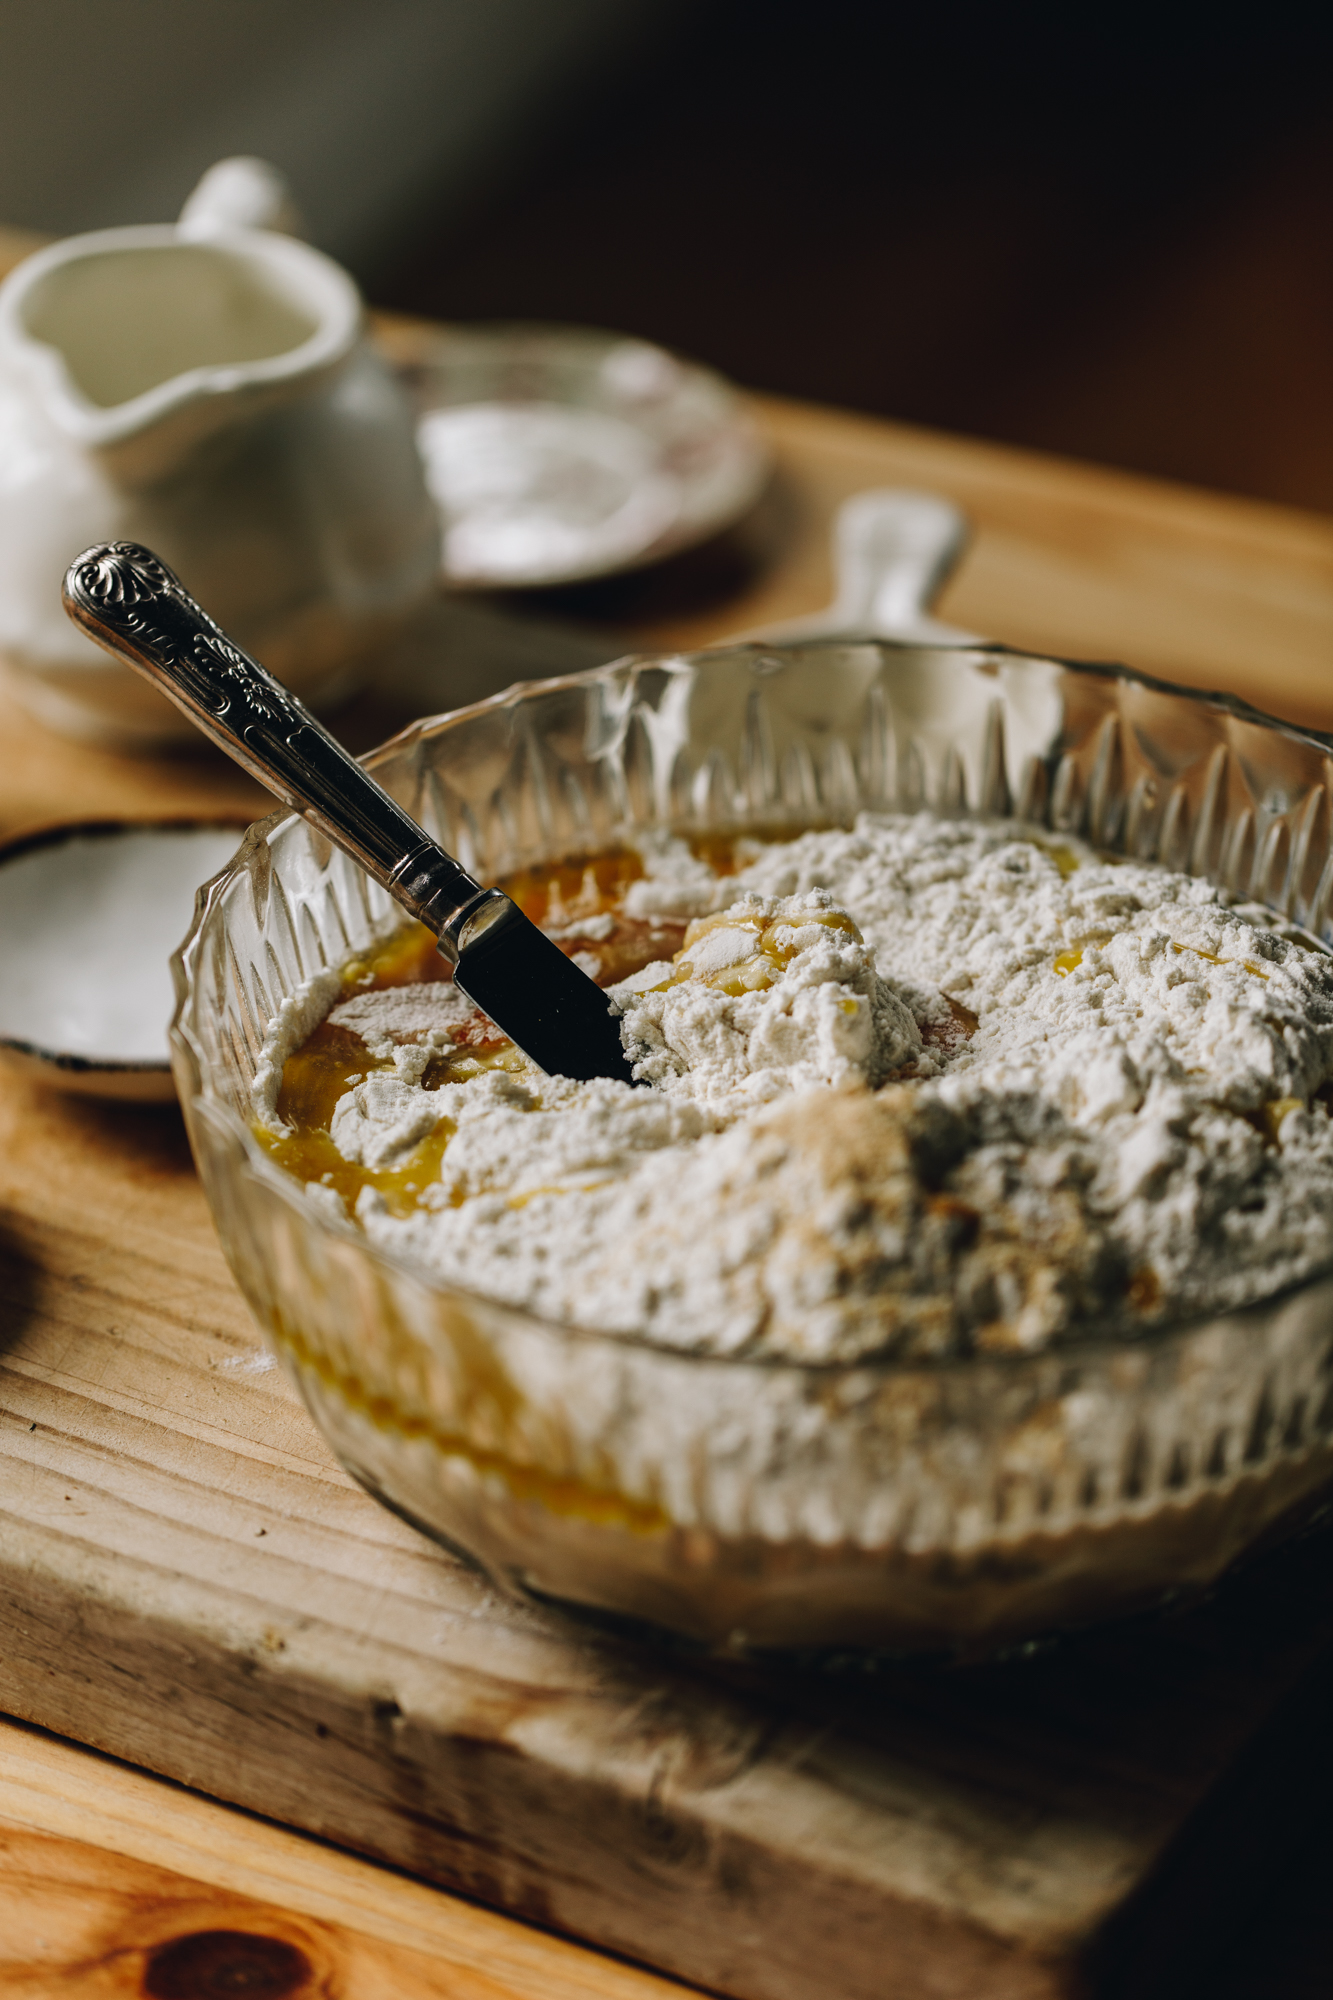
2. Add the Remaining Ingredients:
Add the puehu parāoa kounga (high grade flour), tote (salt), tōhua hēki (egg yolks), paura kāriki (garlic powder), winika (vinegar) and noni ōriwa (olive oil).
Chop the riki amiami, puna riki rānei (chives or spring onions) and rohimere (rosemary) in to fine pieces. Raua atu te katoa (add them all in).
Using a bread and butter knife, mix it all together until a dough forms. Once the dough is roughly incorporated, it is time to knead the dough.
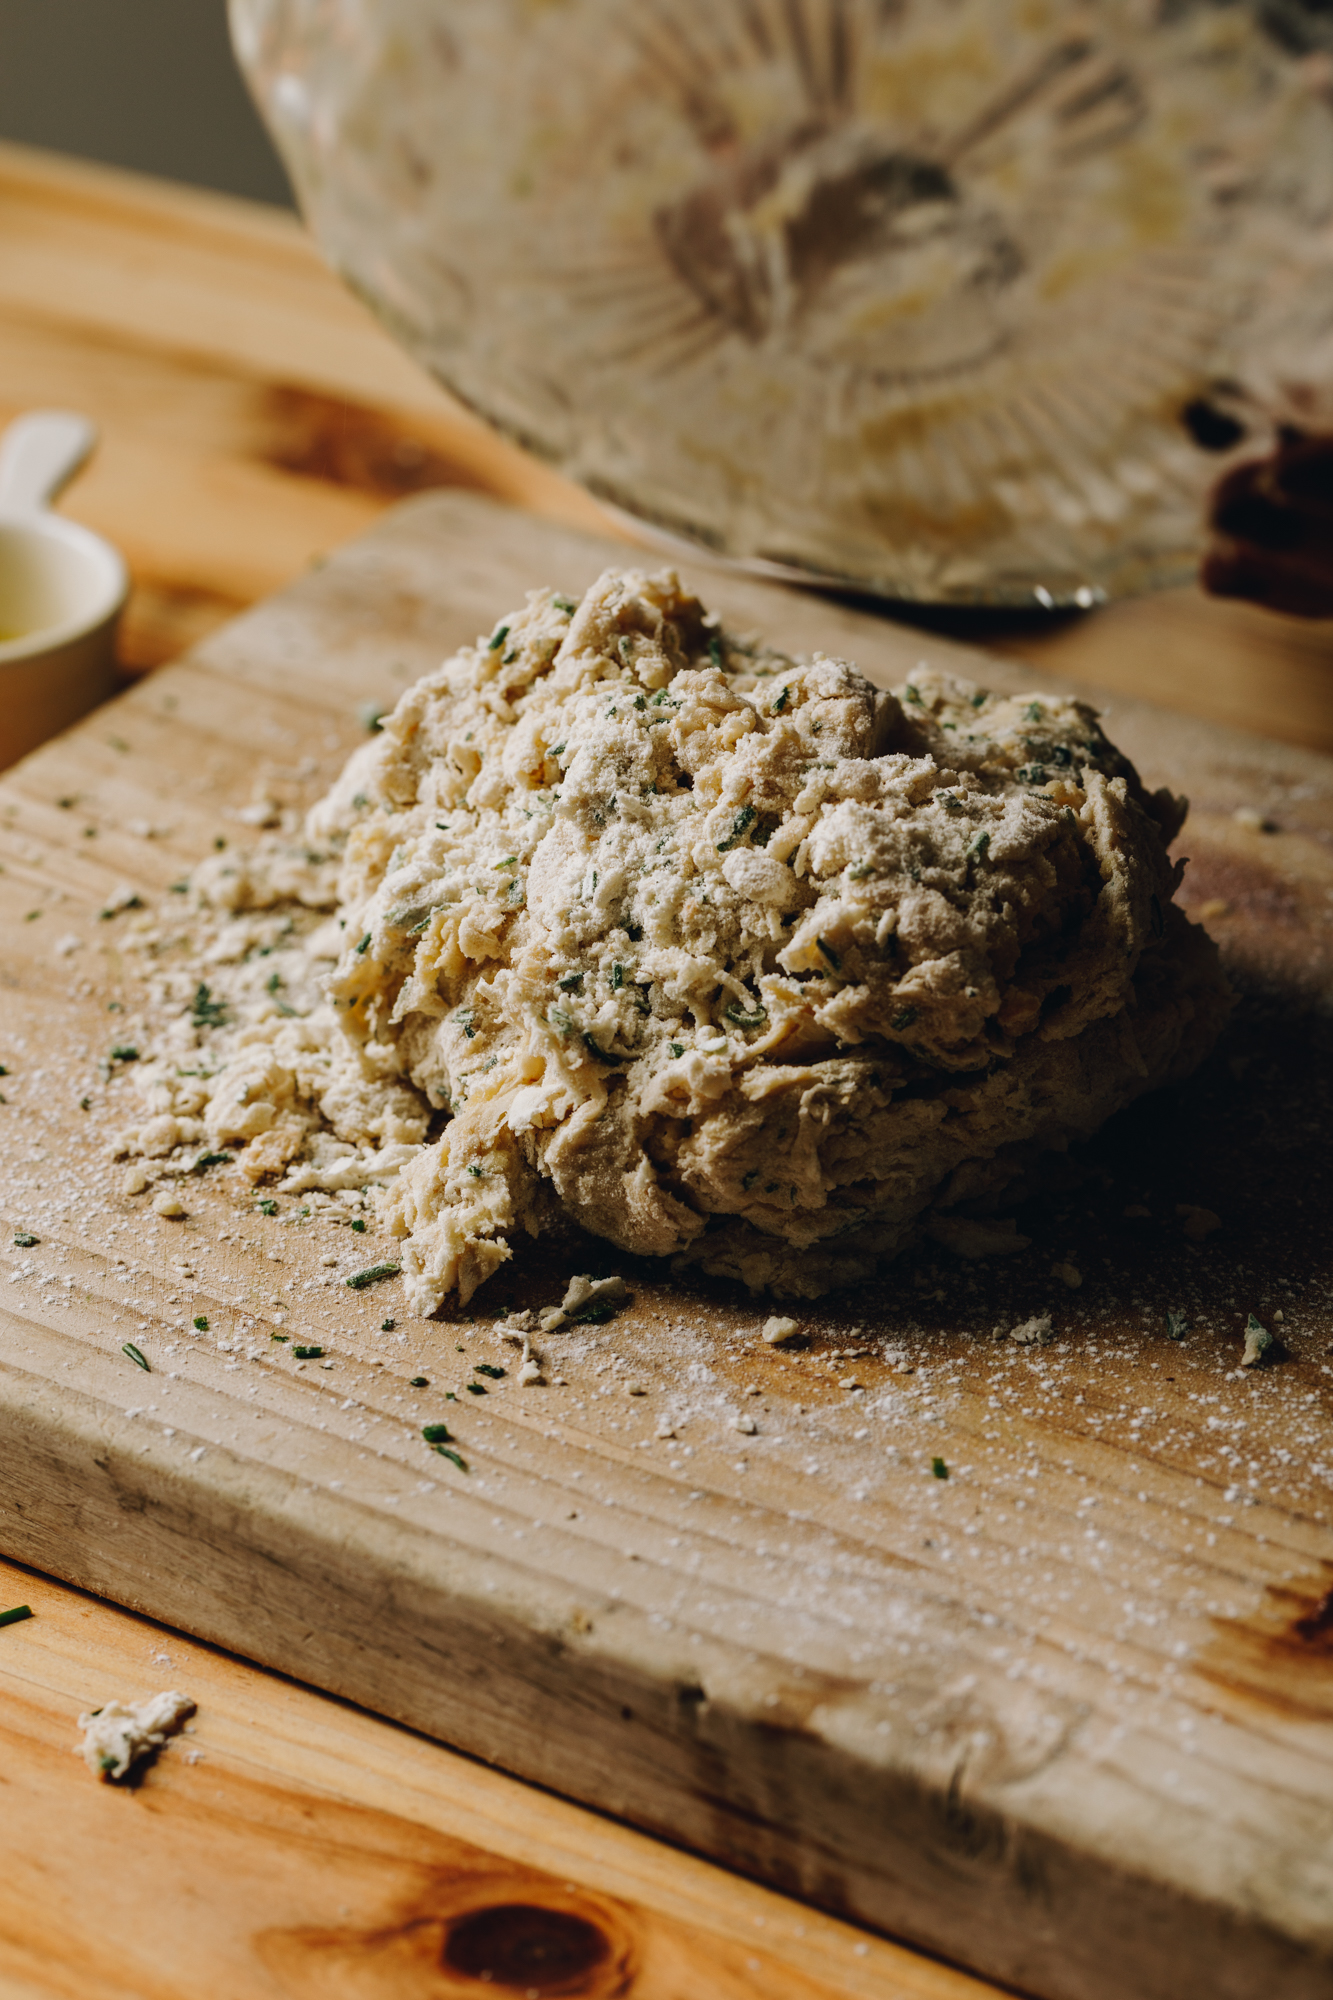
3. Knead the Dough:
If you are using a mixer, place the dough in the mixing bowl. Using a dough hook, knead for 9 – 10 minutes on low-medium speed.
If you are kneading by hand, add the dough to a lightly floured bench or table. Knead the dough with the palms of your hands (not with your fingers), for 10 - 12 minutes.
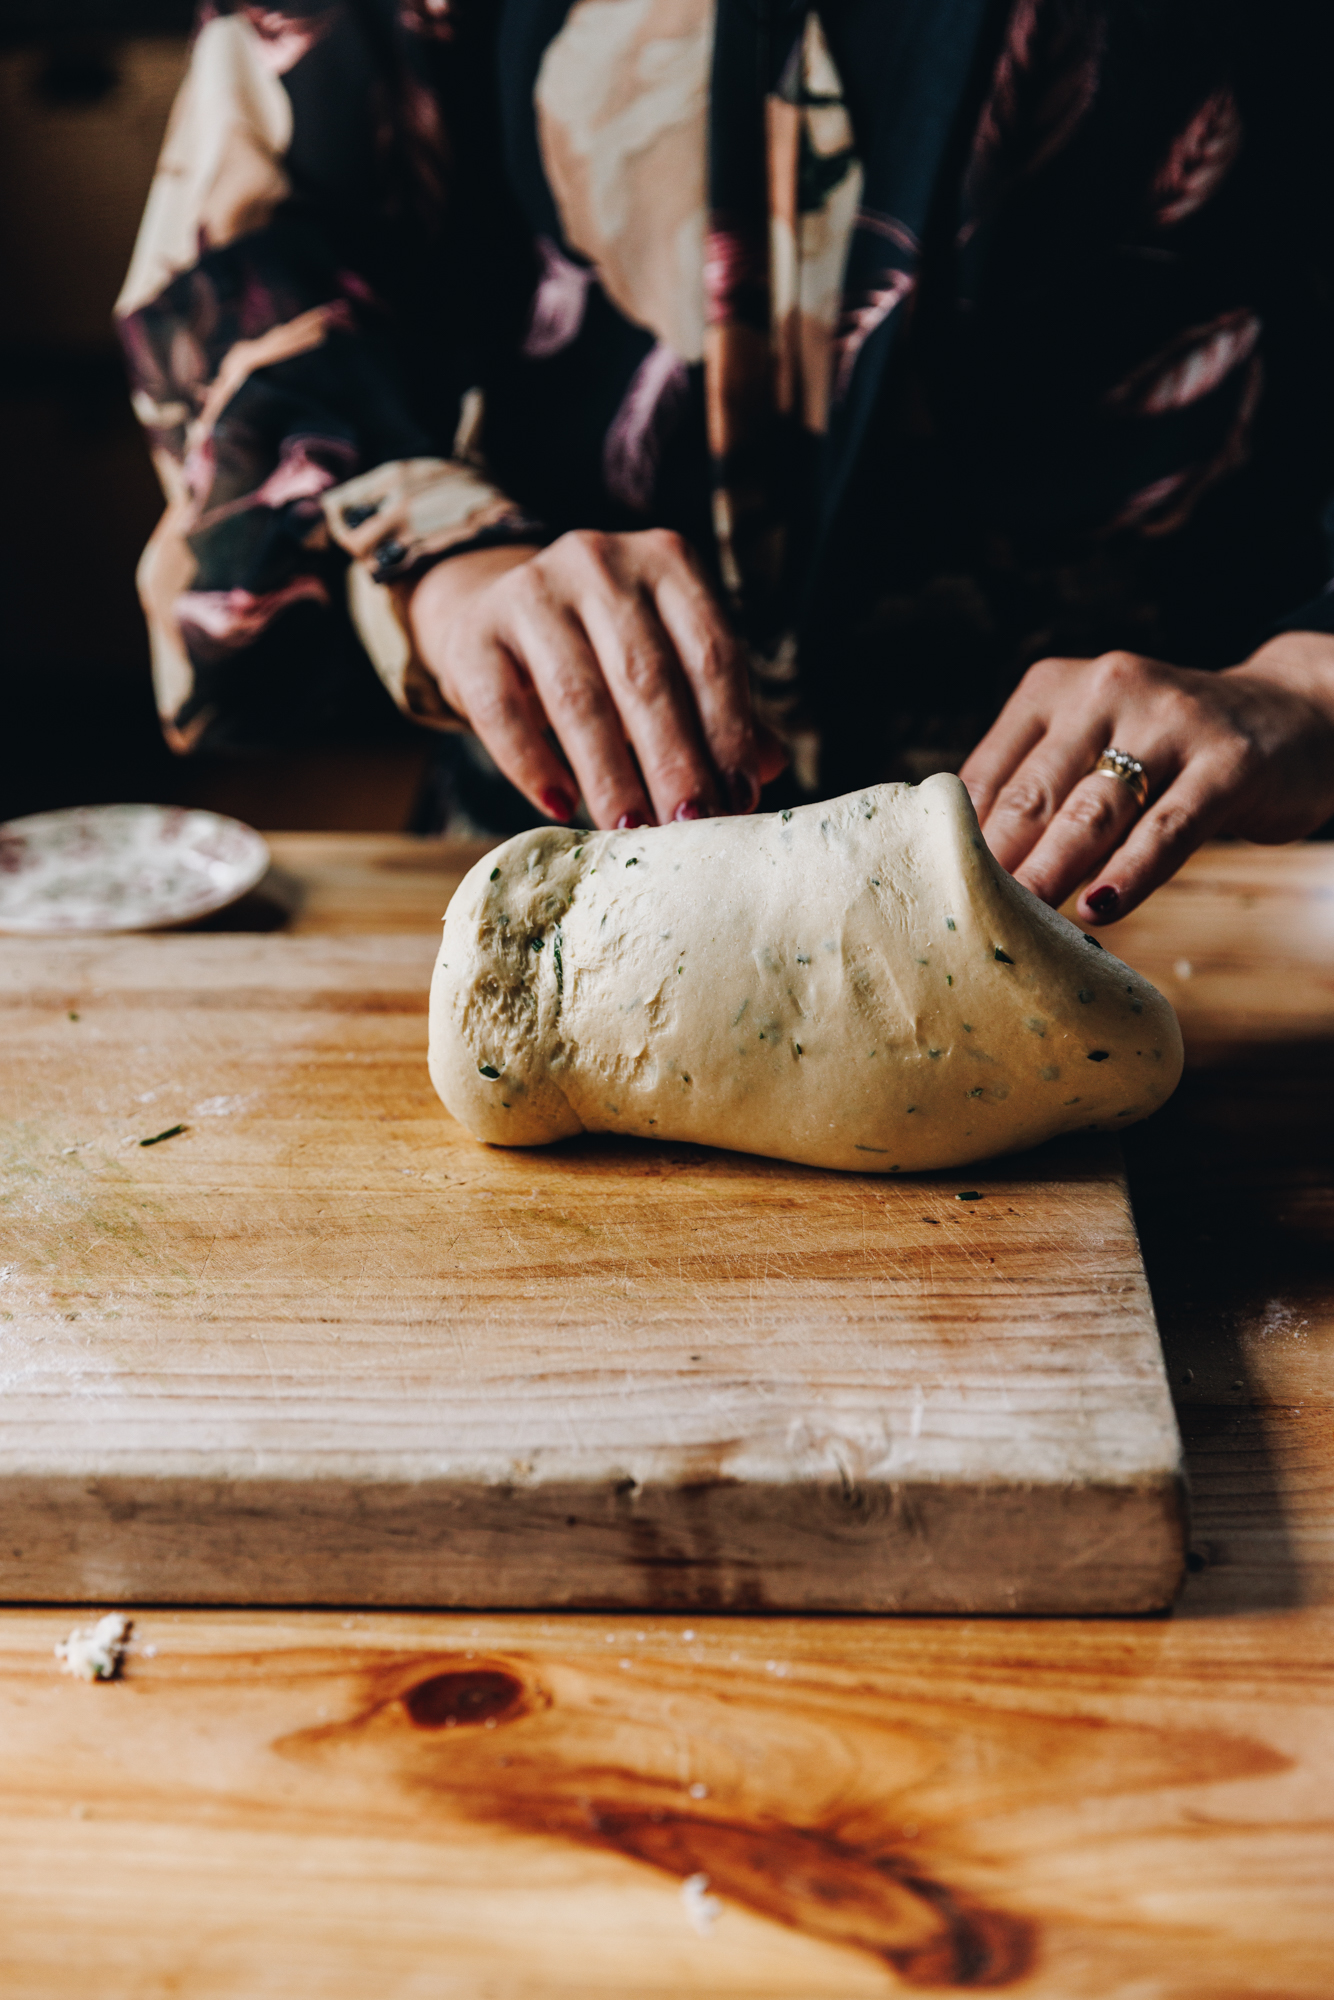
Kneading Tip:
Try not to add any extra flour when you are kneading.
Remember, a slightly sticky dough is better than a stiff dough.
4. First Rise:
Once the dough is lovely and stretchy (see the video for reference), mould in to a ball and add it in to a clean bowl.
Cover with a tea towel or bowl cover.
Rise the dough for 1 ½ hours or until the dough has doubled in size.
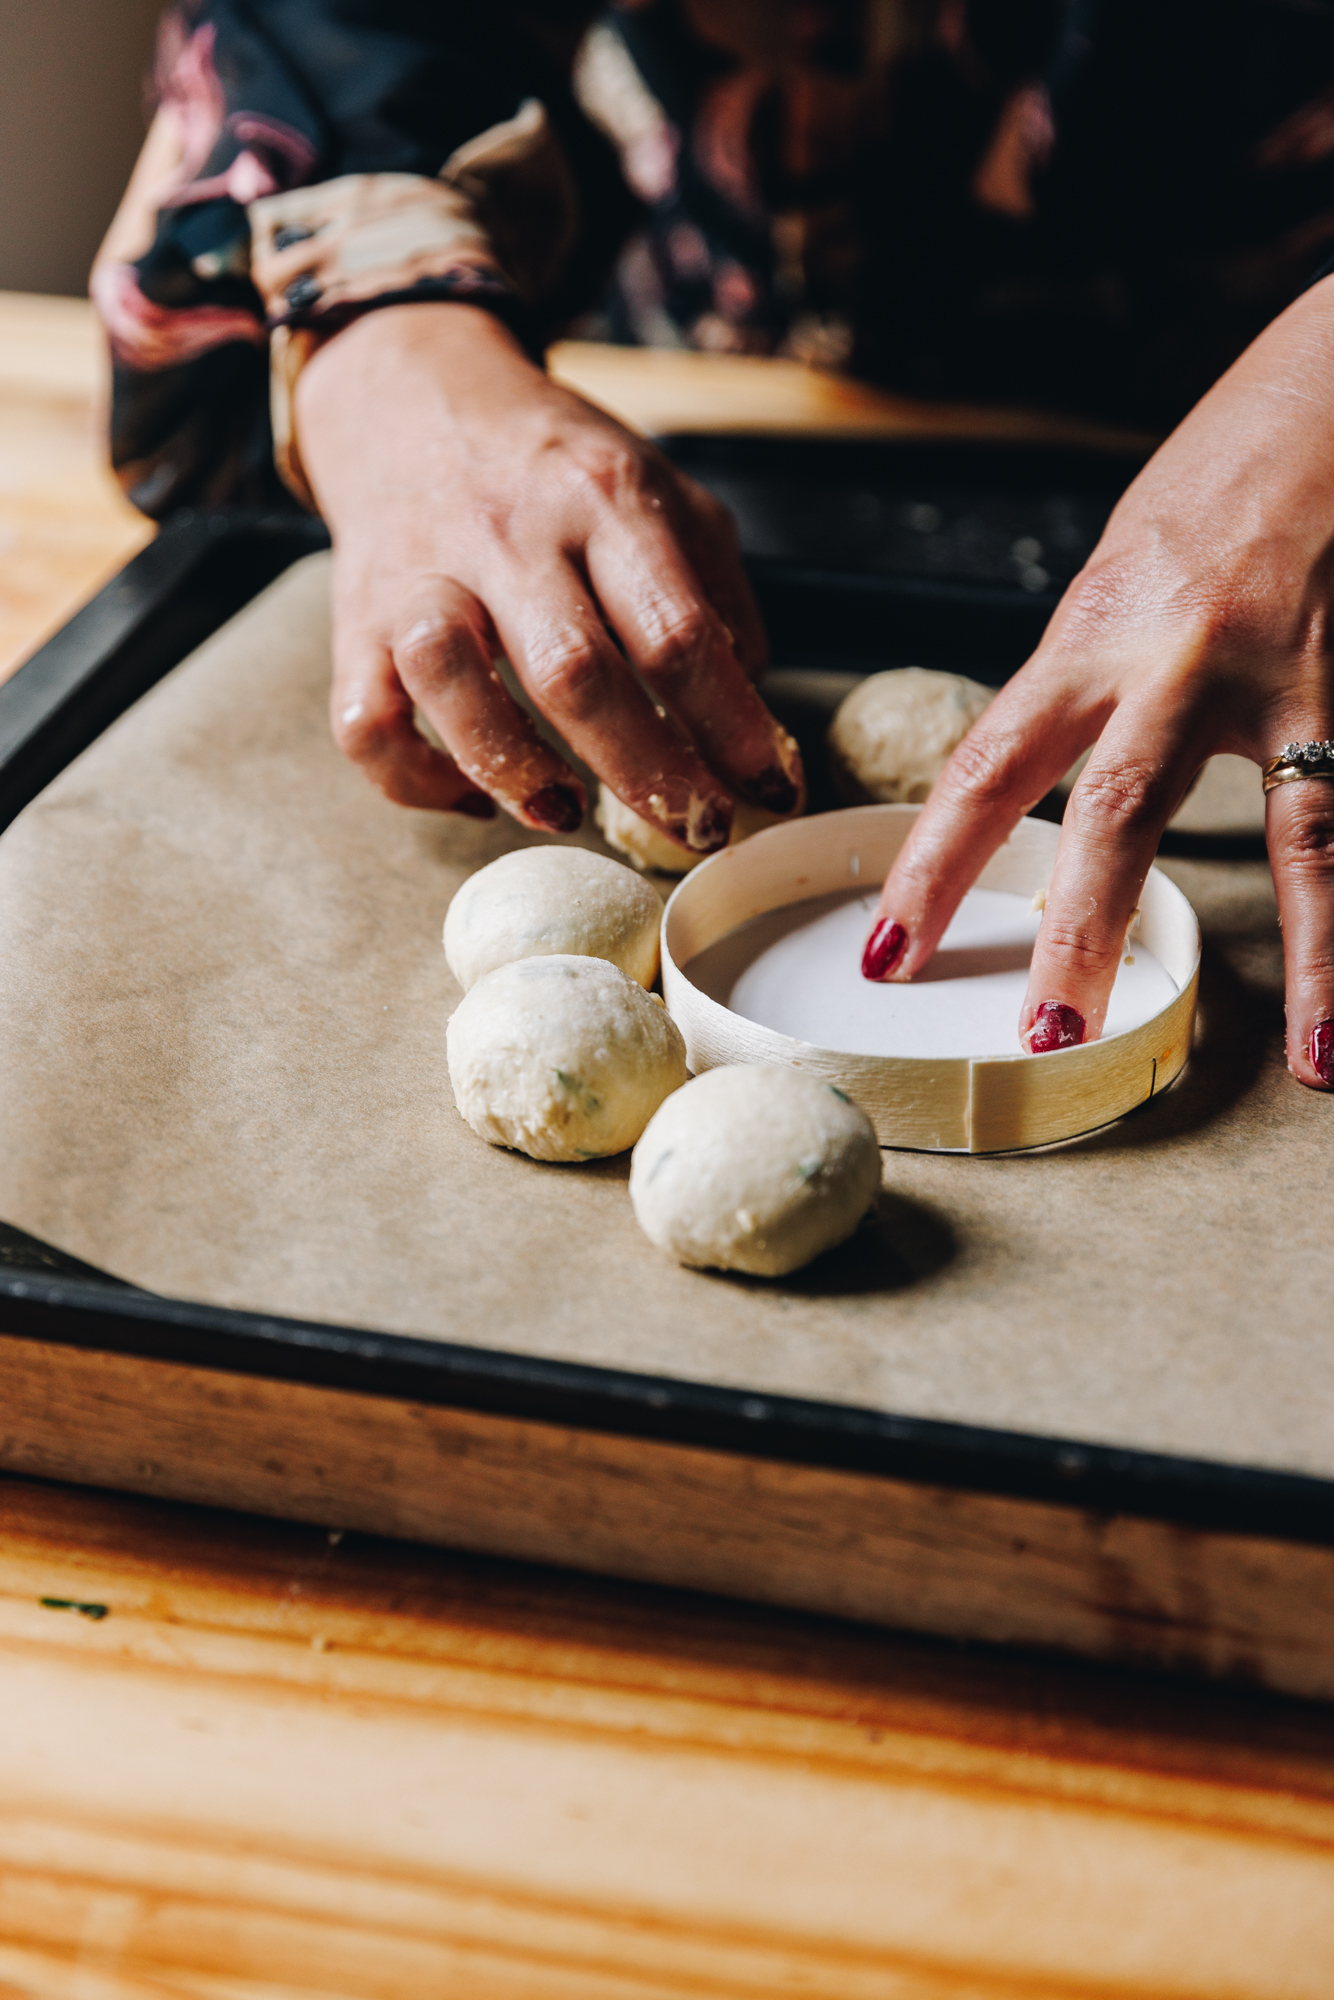
5. Prepare the Baking Tray:
Line a large flat tray 30 cm x 40 cm with baking paper.
Place a 10 cm ramekin (or the container the cheese came in) in to the centre.
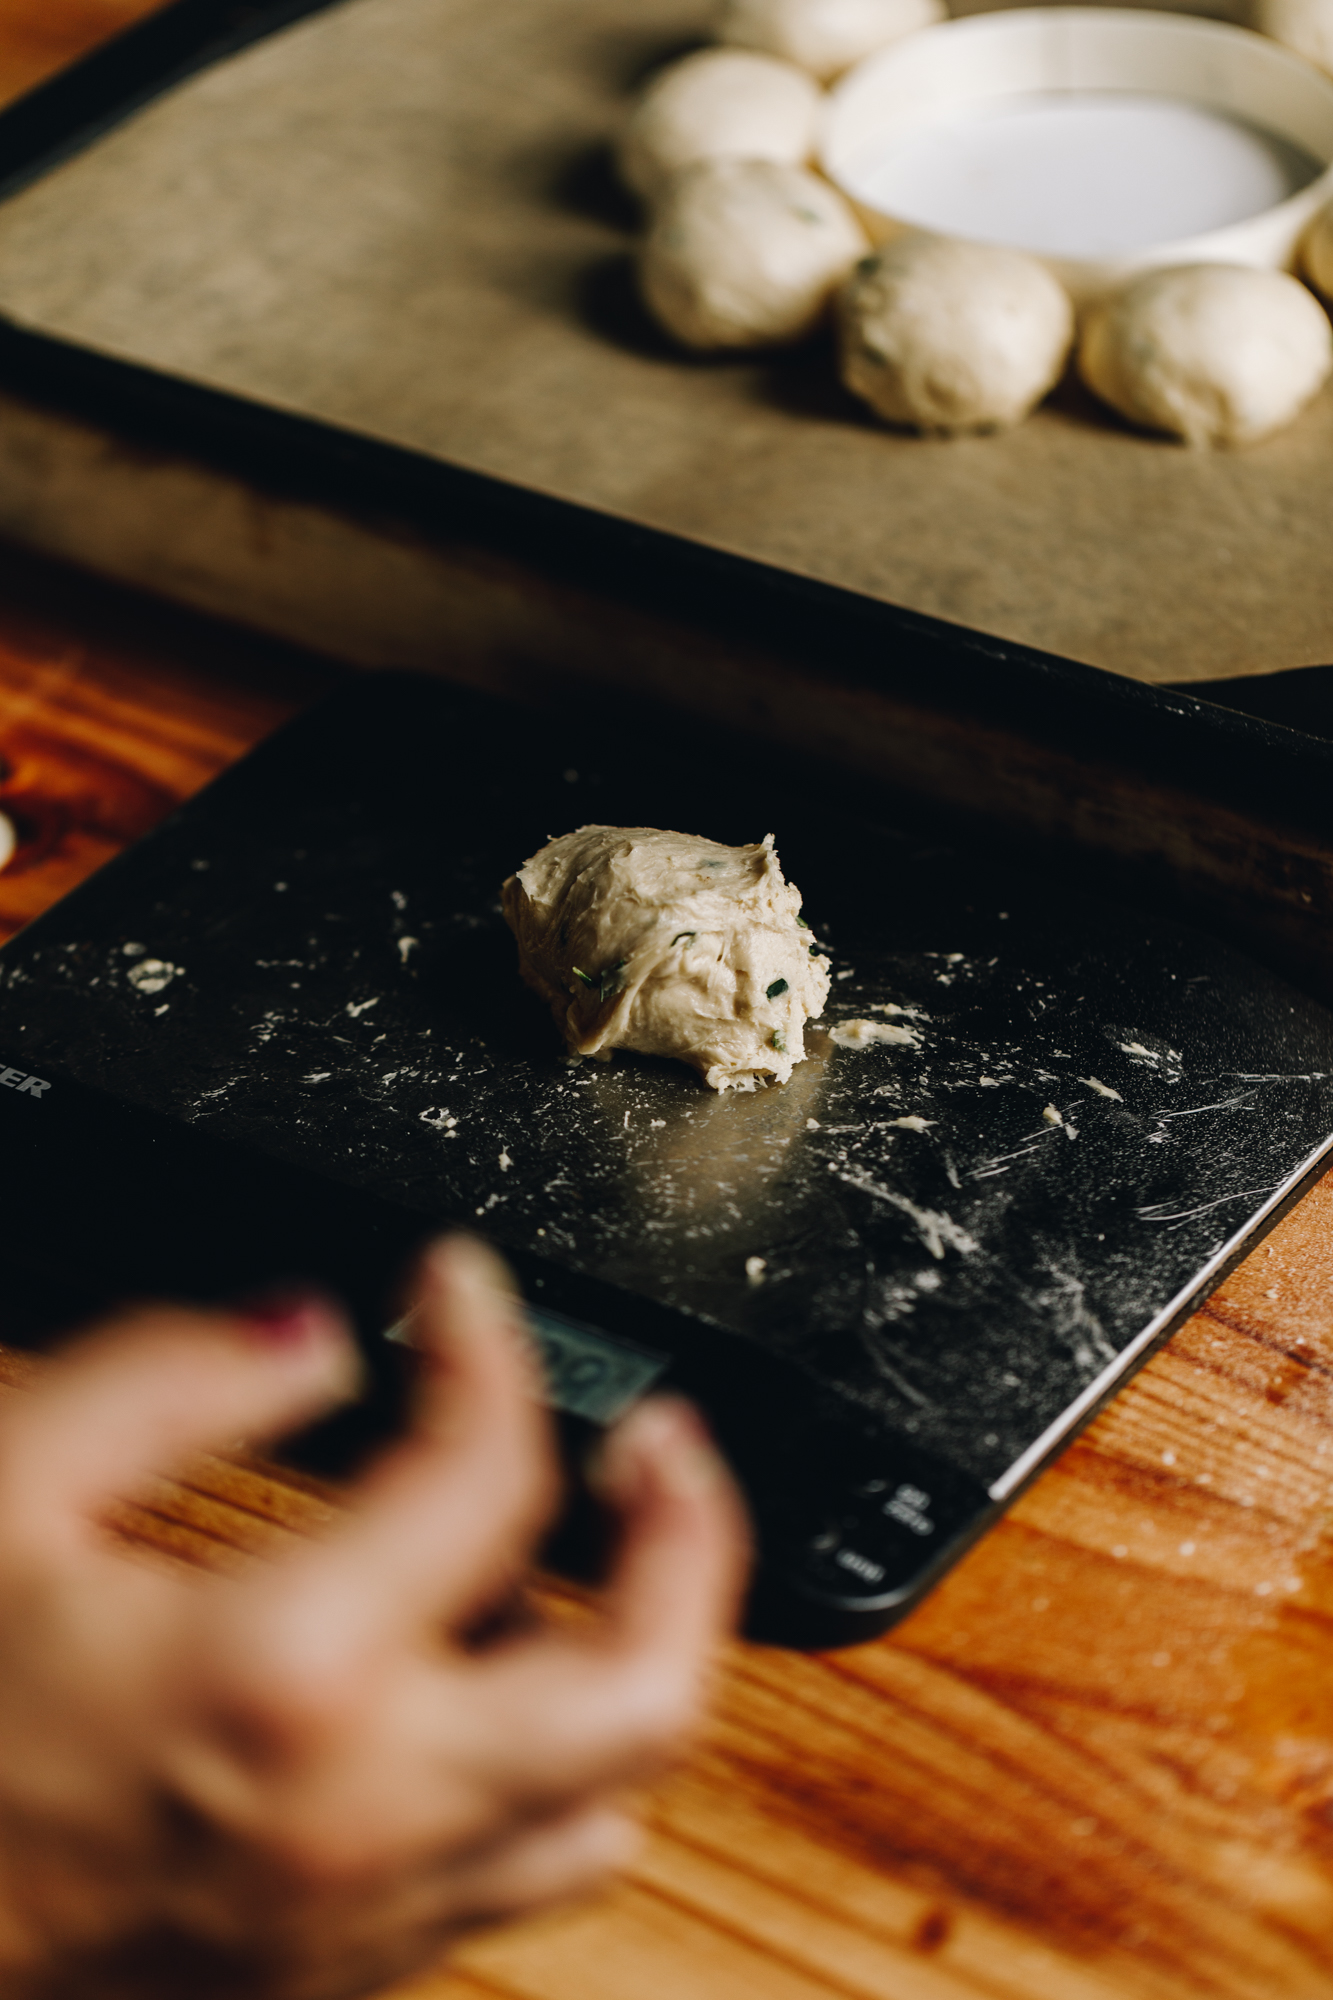
6. Divide the Dough in to 28:
Remove the risen dough from the bowl, roll it in to a log and cut it in to 28 equal pieces.
Weigh the dough if you want to be super accurate. Simply add the dough on to the scales and divide the total weight by 28.
Then weigh each piece to create equal sizes. Mine came to 35 g each.
7. Mould the Dough in to Buns:
Take each piece, fold all the corners in to the centre until you have a tight ball and seal the seams by pinching them with your fingers. (Refer to the video for a guide).
Don't add extra flour here, the dough will be a little sticky but let it be.
Flip the dough over and use your hands to tuck it in to a ball shape and repeat with each piece of dough.
8. Arrange the Buns
Place 10 dough buns around the centre ramekin in a circle.
Add the remaining 18 pieces around the next circle, creating two rows of buns.
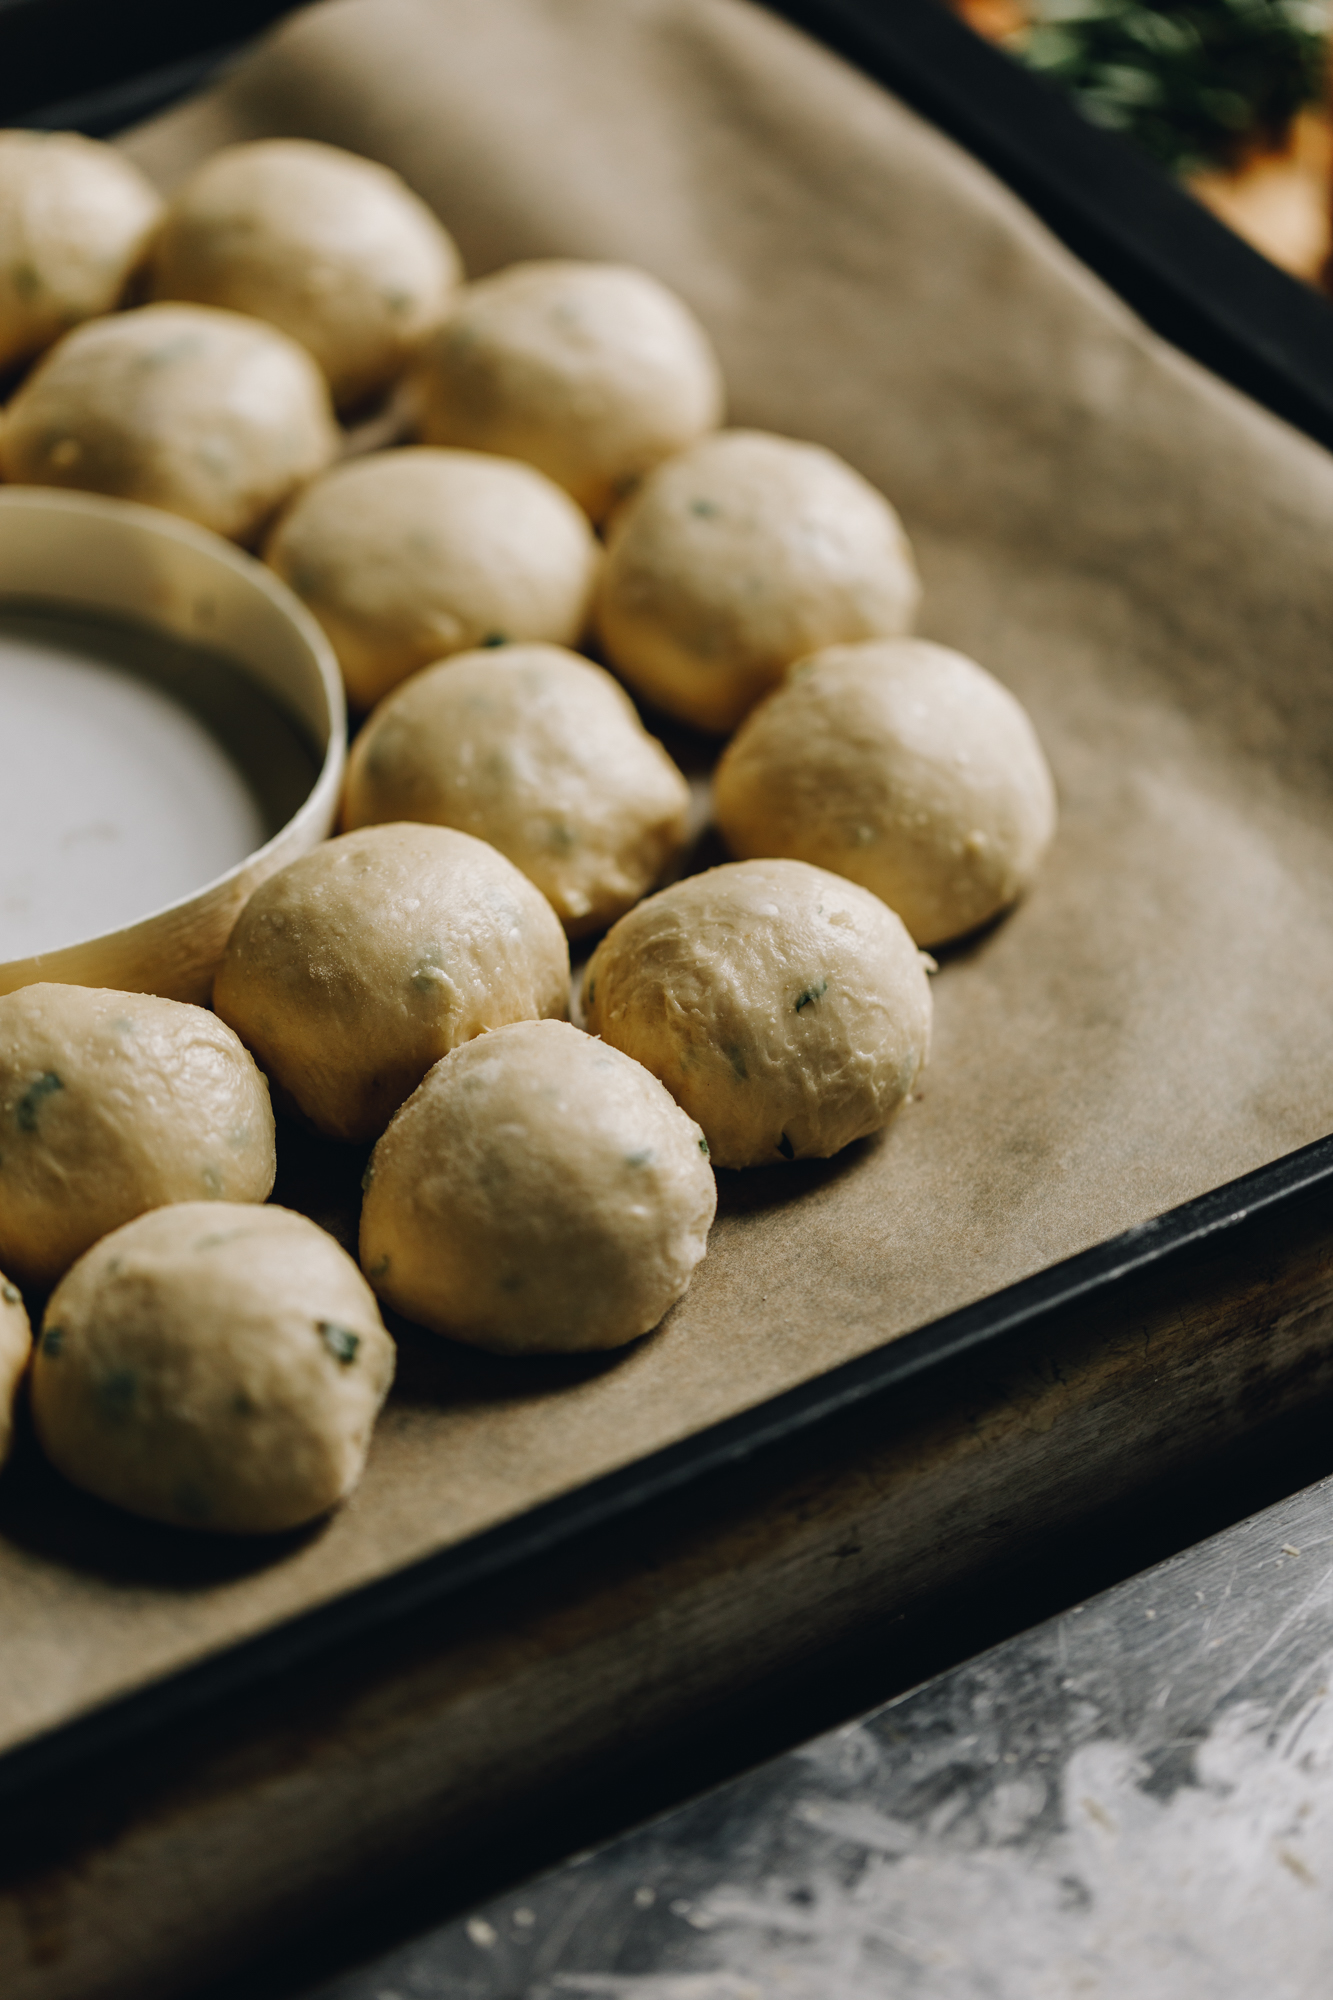
9. Second Rise:
Cover the tray with a tea towel and leave it to rise for 30 - 40 minutes.
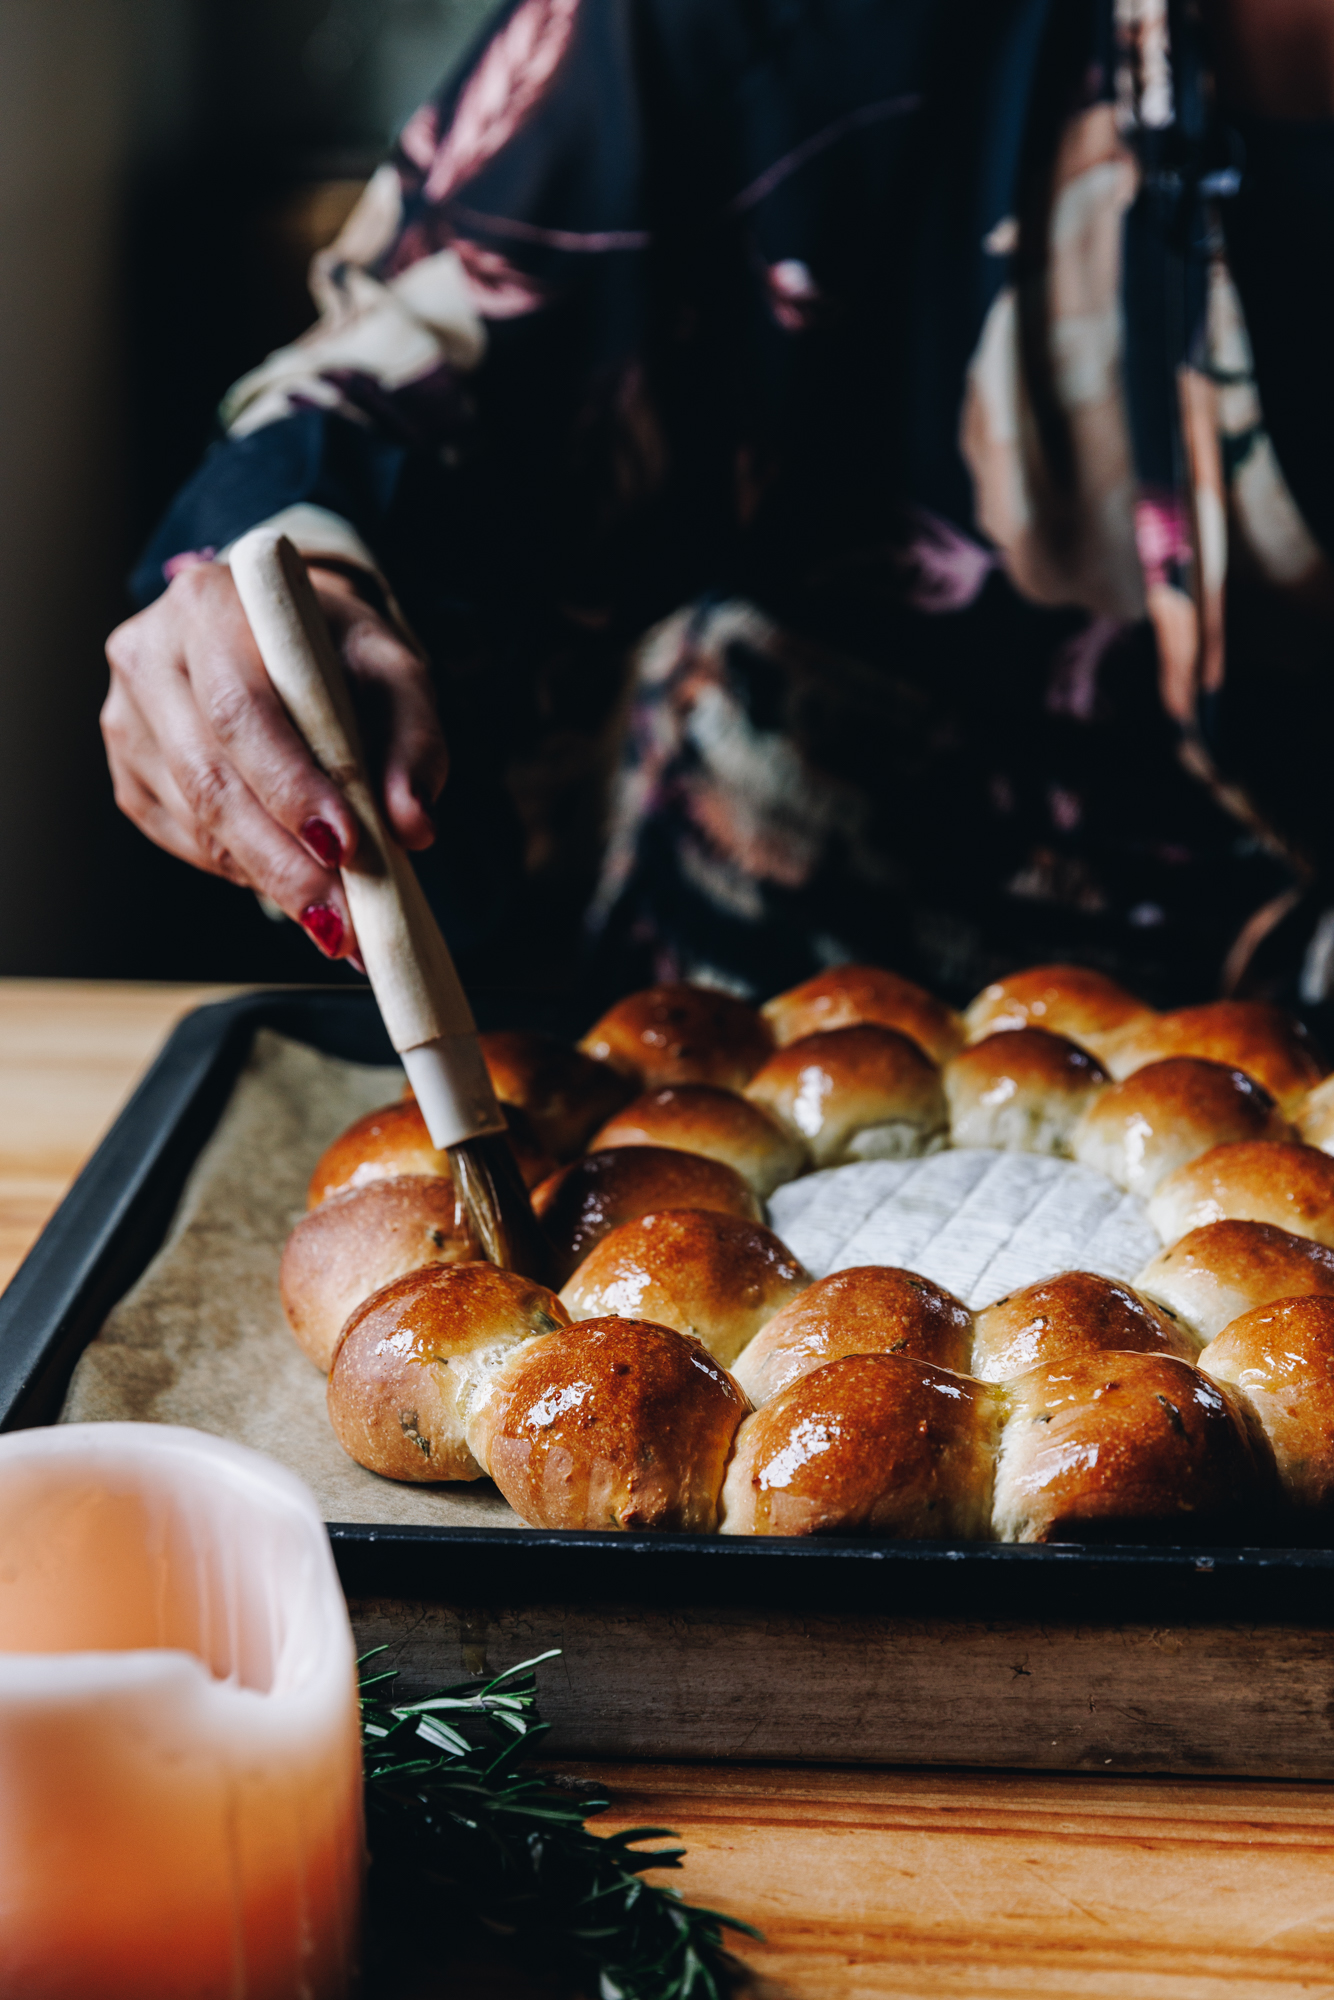
Once it has risen, replace the ramekin in the centre of the pare (wreath) with the tīhi brie (brie cheese).
10. Preheat the Oven:
15 minutes before the rising time is up, preheat the oven to 175 °C bake setting or 165 °C fan bake setting.
11. Bake the Bread Wreath:
Bake the risen buns for 20 -25 minutes until golden.
The buns are ready when the buns in the centre spring back when pressed in the lower part of the bun.
12. Glaze the Buns:
Brush the pata kua rewaina (melted butter) over the bread buns straight from the oven, using a pastry brush.
13. Prepare the Pine Nuts (Optional):
As the pare parāoa (bread wreath) bakes, add the nati paina (pine nuts) to a dry frying pan and set it over low - medium heat.
Lightly toast them until golden.
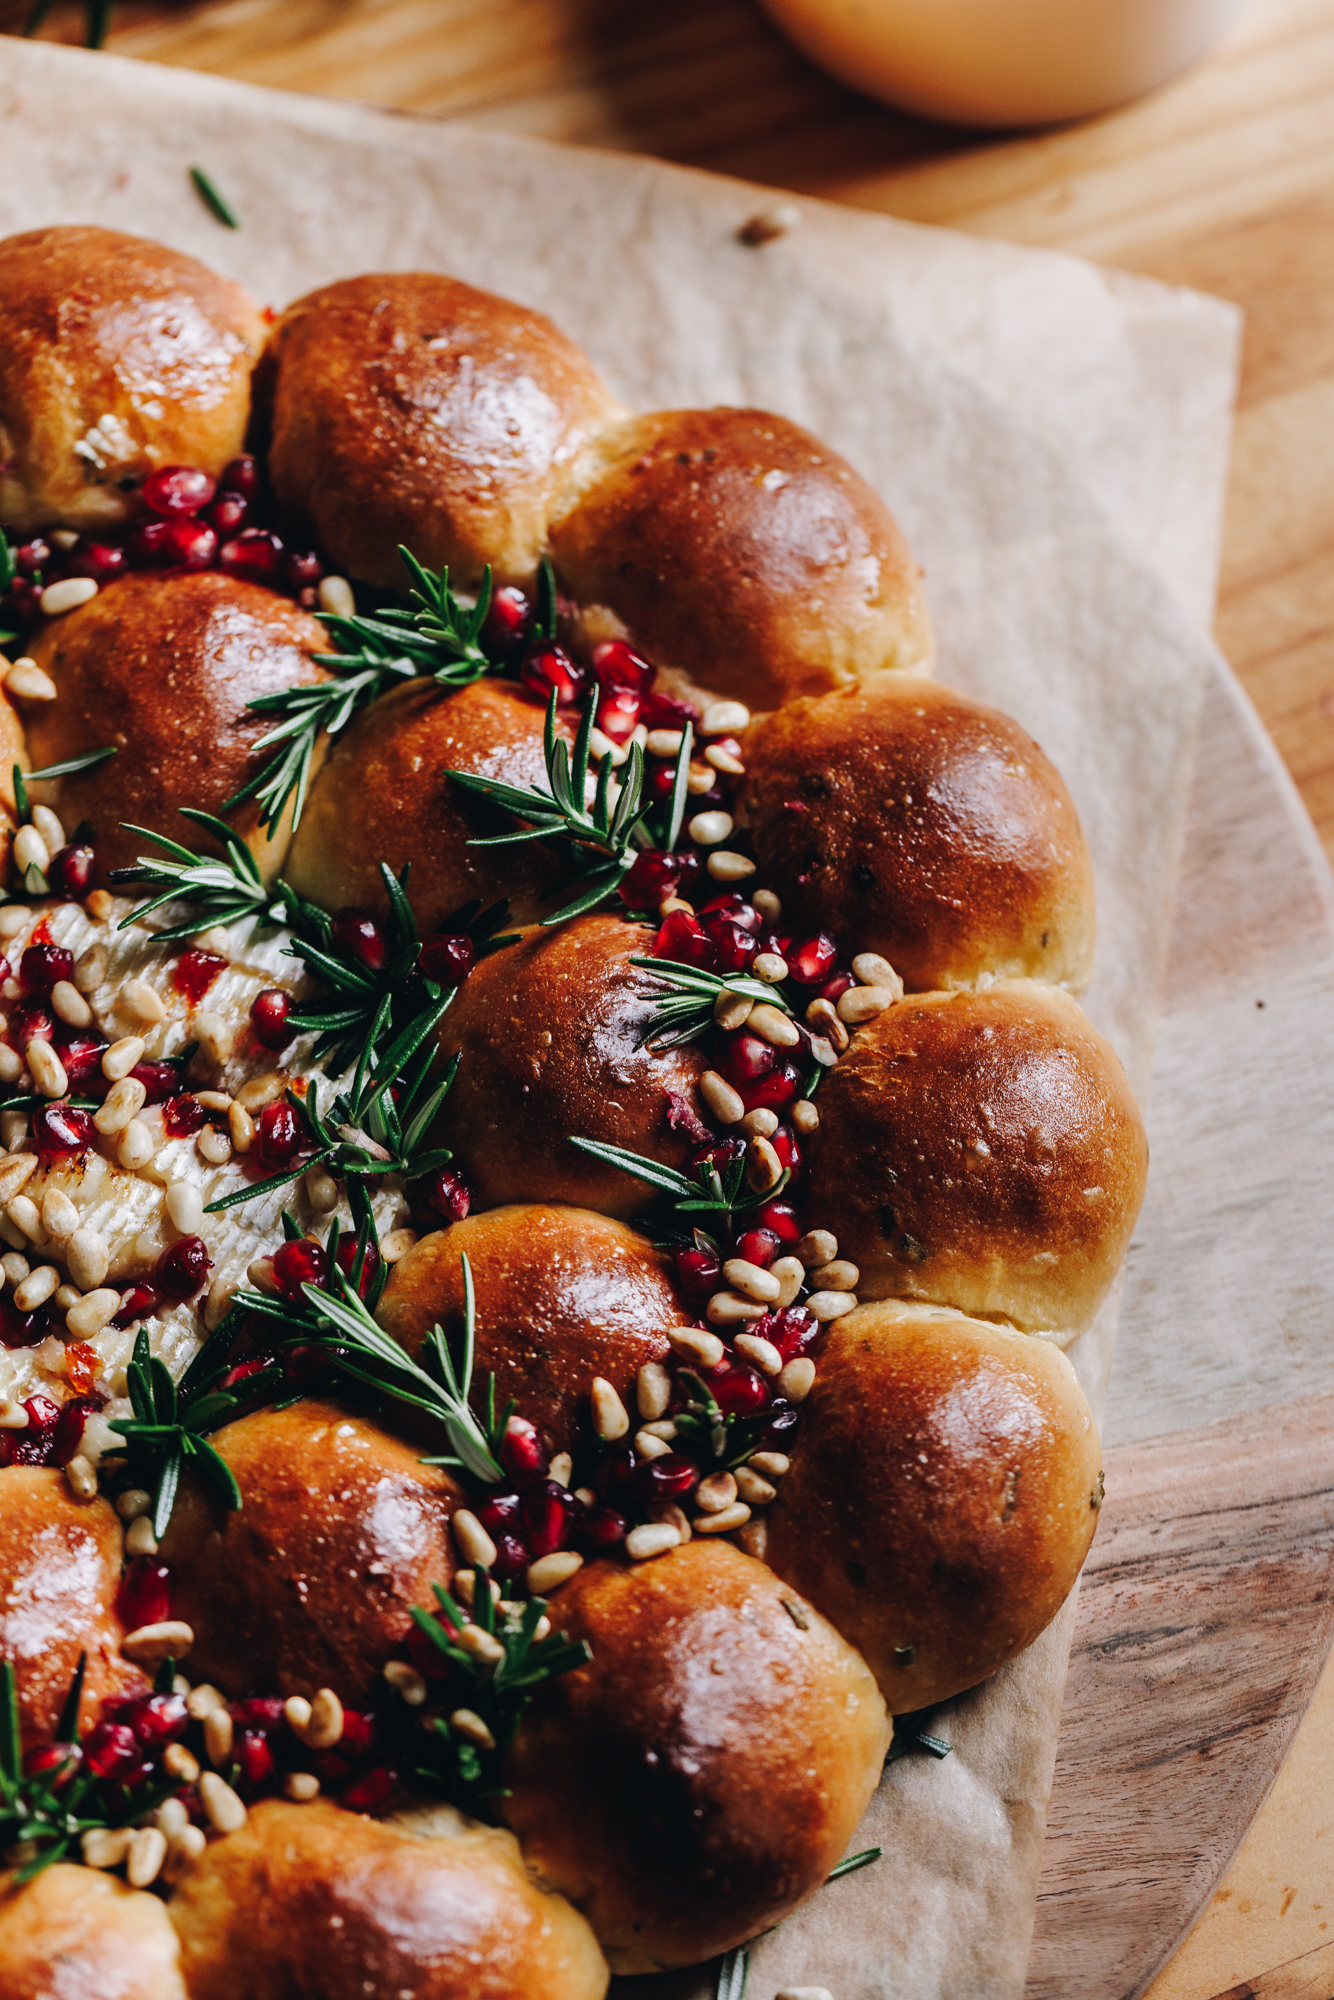
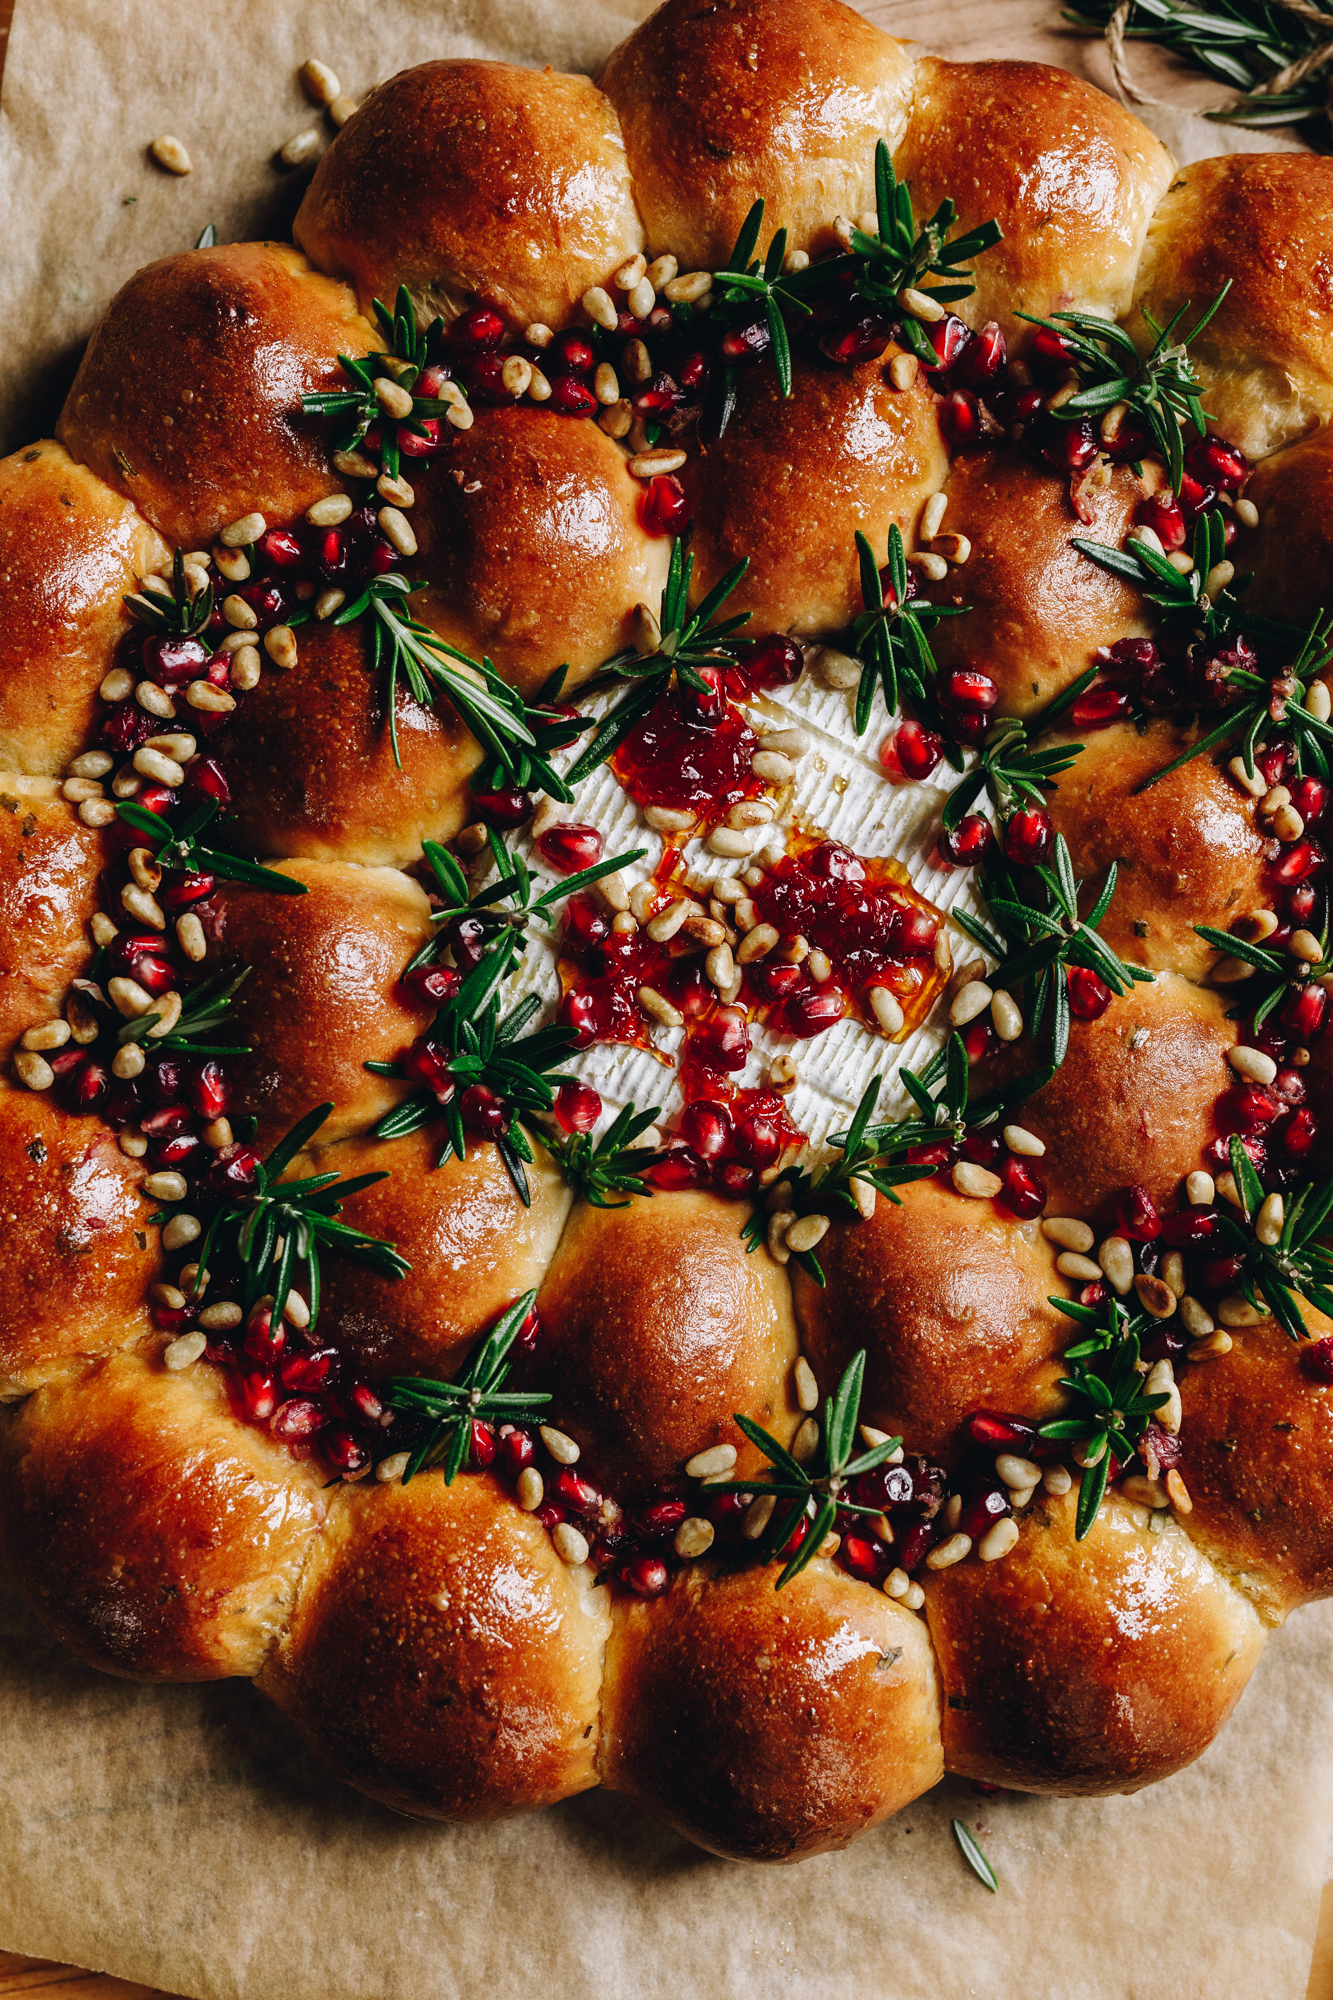
14. Decorate the Baked Brie Cheese Bread Wreath:
Sprinkle the nati paina (pine nuts) over the parāoa (bread).
Break the tākupu rohimere (rosemary sprigs) in to smaller pieces and add in to the gaps of the parāoa iti (bread buns).
Grate over the kiri rēmana (lemon zest) and drizzle over the mīere hirikakā (chilli honey).
Remove the seeds from the pamakaranete māota (fresh pomegranate) and sprinkle them over the bread.
The deliciousnesses is ready to serve and wow your manuhiri (guests).
15. Serve the Bread:
These are best served warm.
If you have any left over, store in a plastic bag or in a sealed container.
Toast them under the grill the next day to bring them back to life.
Take a look at these
Parāoa (Bread) Recipes
Make something special with simple ingredients and a touch of aroha (love).


DID YOU ENJOY THIS RECIPE?
It would be so awesome if you could please leave a review/comment by clicking the “leave a comment” section at the top of the page.
I love seeing you all make my creations, so send a whakaahua (photo) or kiriata (video) to my Instagram and show me what you made. Let me know if you have any pātai (questions) too, I would love to help.

Brie Cheese Bread Wreath - Pare Parāoa Iti me te Tīhi Brie
Equipment
- 1 x 30 cm x 40 cm flat baking tray
Ingredients
The Dough Rosemary - Te Pokenga Rohimere
- ¾ C + 2 tablespoon (220 ml) wai wera (hot water, from the tap)
- ½ C miraka (milk)
- 2 ½ tbsp huka hāura (brown sugar)
- 2 ½ teaspoon (8 g) īhi horo (instant yeast). This can be swapped for 4 teaspoon (16 g) Surebake yeast.
- 4 C (600 g) puehu parāoa kounga (high grade flour)
- 1 ½ teaspoon tote (salt, fine)
- 2 tōhua hēki (egg yolks, from two small eggs) or one small whole egg, size 6.
- 1 tsp paura kāriki (garlic powder)
- 1 teaspoon (5 ml) winika (vinegar, optional)
- ¼ C (60 ml) noni ōriwa (olive oil or any oil you have)
- He kapuranga riki amiami, puna riki rānei (a handful of chives or spring onions)
- 1 tākupu rohimere nui (large rosemary sprig) or 2 teaspoon of rohimere raki (dried rosemary)
- 200 g tīhi brie (brie cheese, a super creamy version)
- 15 g pata kua rewaina (melted butter)
Condiments - Ngā Kīnaki (All optional)
- 40 g nati paina (pine nuts)
- ⅓ pamakaranete māota (fresh pomegranate)
- Kiri rēmana (lemon zest, of 1 lemon)
- 1 - 2 tablespoon mīere hirikakā (chilli honey)
- 3 - 5 tākupu rohimere (rosemary sprigs)
Instructions
Activate the Yeast:
- Pour the wai wera (hot water), miraka (milk) and huka hāura (brown sugar) in to a large bowl. Stir until the sugar is dissolved.
- Add the īhi (yeast) and stir again. If you are using instant yeast, leave it for 5 minutes until the yeast has floated to the top. If you are using surebake yeast, leave for 10 minutes until the yeast has floated to the top and is slightly foamy.
Add the Remaining Ingredients:
- Add the puehu parāoa kounga (high grade flour), tote (salt), tōhua hēki (egg yolks), paura kāriki (garlic powder), winika (vinegar) and noni ōriwa (olive oil).
- Chop the riki amiami, puna riki rānei (chives or spring onions) and rohimere (rosemary) in to fine pieces. Raua atu te katoa (add them all in).
- Using a bread and butter knife, mix it all together until a dough forms. Once the dough is roughly incorporated, it is time to knead the dough.
Knead the Dough:
- If you are using a mixer, place the dough in the mixing bowl. Using a dough hook, knead for 9 – 10 minutes on low-medium speed.
- If you are kneading by hand, add the dough to a lightly floured bench or table. Knead the dough with the palms of your hands (not with your fingers), for 10 - 12 minutes.
Kneading Tip:
- Try not to add any extra flour when you are kneading.Remember, a slightly sticky dough is better than a stiff dough.
- Once the dough is lovely and stretchy (see the video for reference), mould in to a ball and add it in to a clean bowl. Cover with a tea towel or bowl cover.
First Rise:
- Rise the for 1 ½ hours or until the dough has doubled in size.
Prepare the Baking Tray:
- Line a large flat tray 30 cm x 40 cm with baking paper.
- Place a 10 cm ramekin (or the container the cheese came in) in to the centre.
Divide the Dough in to 28:
- Remove the risen dough from the bowl, roll it in to a log and cut it in to 28 equal pieces.
- Weigh the dough if you want to be super accurate. Simply add the dough on to the scales and divide the total weight by 28. Then weigh each piece to create equal sizes. Mine came to 35 g each.
Mould the Dough in to Buns:
- Take each piece, fold all the corners in to the centre until you have a tight ball and seal the seams by pinching them with your fingers. (Refer to the video for a guide).Don't add extra flour here, the dough will be a little sticky but let it be.
- Flip the dough over and use your hands to tuck it in to a ball shape and repeat with each piece of dough.
Arrange the Buns:
- Place 10 dough buns around the centre ramekin in a circle. Add the remaining 18 pieces around the next circle, creating two rows of buns.
Second Rise:
- Cover the tray with a tea towel and leave it to rise for 30 - 40 minutes. Once it has risen, replace the ramekin in the centre of the pare (wreath) with the tīhi brie (brie cheese).
Preheat the Oven:
- 15 minutes before the rising time is up, preheat the oven to 175 °C bake setting or 165 °C fan bake setting.
Bake the Bread Wreath:
- Bake the risen buns for 20 -25 minutes until golden.
- The buns are ready when the buns in the centre spring back when pressed in the lower part of the bun.
Glaze the Buns:
- Brush the pata kua rewaina (melted butter) over the bread buns straight from the oven using a pastry brush.
Prepare the Pine Nuts (Optional):
- As the pare parāoa (bread wreath) bakes, add the nati paina (pine nuts) to a dry frying pan and set it over low - medium heat. Lightly toast them until golden.
Decorate the Baked Brie Cheese Bread Wreath:
- Sprinkle the nati paina (pine nuts) over the parāoa (bread).
- Break the tākupu rohimere (rosemary sprigs) in to smaller pieces and add in to the gaps of the parāoa iti (bread buns).
- Grate over the kiri rēmana (lemon zest) and drizzle over the mīere hirikakā (chilli honey).
- Remove the seeds from the pamakaranete māota (fresh pomegranate) and sprinkle them over the bread. The deliciousnesses is ready to serve and wow your manuhiri (guests).
Serve the Brie Cheese Bread Wreath:
- These are best served warm. If you have any left over, store in a plastic bag or in a sealed container. Toast them under the grill the next day to bring them back to life.


Jess
Beautiful receipe! So delicious...fyi to thr writer, the brown sugar measurement is missing!
I used a tablespoon.
Otherwise so yum!
Naomi Toilalo WhānauKai
Oh kia ora, just wondering what brown sugar measurement you are referring to as they are there for sure! So glad you enjoyed the recipe though, that is wonderful to hear.
Tash
Looks beautiful!
Want to make this for Christmas, just wondering if I can make the dough a day ahead? Or have you tried baking it the night before leaving out the brie center?
Naomi Toilalo WhānauKai
Kia ora Natasha, thanks so much for you message. You can make the dough up to 15 hours before you need to bake it. Make the dough and allow it to rise in the bowl (covered) for 45 minutes on the bench. Then refrigerate for up to 15 hours. Then take the dough and shape them in to the balls (with the brie). However, the dough will take 1 1/2 - 2 hours to rise before baking as the yeast needs to come back to life. Make sure the buns have doubled in size before you bake them. They will be a touch smaller than the same day buns but will still be delicious!