No-knead Bread Loaf - Rohi Parāoa Kore-Poke
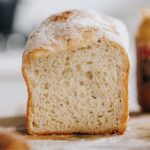
A soft and fluffy no-knead bread loaf baked in a loaf tin. This recipe offers same day and overnight baking options.
Servings 1 Loaf
Ingredients
The Dough - Te Pokenga
- 2 C (500 ml) wai aromahana (lukewarm water)
- 2 tablespoon mīere (honey, you can also swap this maple syrup or any type of sugar)
- 2 ½ teaspoon (8 g) īhi tere (instant yeast) OR 16 g (2 tbsp) Surebake/ breadmakers yeast.
- 3 ¾ C (560 g) puehu parāoa kounga (high grade flour). If you are not adding seeds increase the flour to 4 C (600 g).
- 2 teaspoon tote (salt, fine). I use Himalayan salt here, if you are using iodised table salt, half this amount.
- ½ C (70 g) kākano (seeds). Chia, sunflower, pumpkin or LSA would work well here.
Instructions
Prepare the Loaf Tin:
- Grease your bread tin with neutral oil. Mine is 22cm long x 11cm wide and 10cm high but a smaller loaf tin will work. If you have smaller tin, split the dough in two and make two smaller loaves.
Activate the Yeast:
- Add the wai (water) and mīere (honey) in to a large bowl. Stir it until the mīere (honey) is dissolved.
- Add the īhi horo (instant yeast) and stir it in. Leave the īhi (yeast) to activate for five minutes. The yeast is activated when it has floated to the top.
Add the Dry Ingredients:
- Add the puehu parāoa (flour) and tote (salt). If you are adding kākano (seeds), add them in now too.
- Stir it all together with a bread knife for 1-2 minutes until combined. It will be sticky, don't add any more flour.
First Rise:
- Cover the bowl with a bowl cover or tea towel. Leave to rise for 30 minutes.
First Stretch and Fold:
- After 30 minutes, it is time to stretch and fold the dough.
- With wet hands, take a handful of dough from the side of the bowl, pull it high in the air (see video for reference) and then place it in to the centre of the bowl.
- Turn the bowl a quarter turn and repeat that process. Every time you place the dough in to the centre it is one count. In total do 26-30 stretch and folds. This should take 1-2 minutes.
Second Rise:
- Cover the bowl again and leave for 30 minutes.
Second Stretch and Fold:
- Repeat the stretch and fold process. This time do 18-22 stretch and folds.
- From this point you choose what to do. If you are baking the sough the Same Day Version, carry on to the next step. If you are doing the Overnight Version, skip down to those instructions.
Same Day Version - Third Rise:
- After you have completed the second round of stretch and folds, cover the bowl and allow the dough to rise again for 15 minutes.
Shape the Dough:
- Tip the dough on a very lightly floured bench. Don't handle the dough too much here. If you are making two smaller loaves, split the dough in two at this point, using a knife or your hands.
- Fold the dough in to the centre from the top and each side. Then take the bottom piece and flip it forward, over the dough. Tuck your hands underneath the dough and pull it towards yourself a couple of times.
- Gently lower the dough in to the loaf tin or tins, seam side down.
Fourth and Final Rise:
- Cover with a bowl cover or a tea towel and rise 15 - 30 minutes. The main thing here is that the dough doubles in size.In the colder months - the dough will need 30 minutes. In the warmer months - the dough will only need around 15-20 minutes.
Preheat the Oven:
- Pre-heat the oven to 180 °C on fan bake, 15 minutes before baking.
- Just before baking, dust the loaf with a little flour or fine semolina. Score or make slits down the middle of the loaf with a knife or scissors. The helps the dough rise correctly in the oven.
Bake the Loaf or Loaves:
- Bake for 45 minutes if you are baking it in one tin. Bake for 35 minutes if you are baking it in two tins.
- Cool on a baking tray for 5 minutes and devour.
Overnight Version.
Third Rise:
- After you have completed the second stretch and fold process, cover the bowl and leave on the bench for 15 minutes.
Refrigerate the Dough:
- Keep the dough covered securely with a plastic bag or bowl cover and refrigerate for 2 to 24 hours.
Shape the Dough:
- When you are ready to bake, remove the dough from the fridge. Tip it straight on to a bench with no flour.
- Fold the dough in to the centre from the top and each side. Then take the bottom piece and flip it forward, over the dough. Tuck your hands underneath the dough and pull it towards yourself a couple of times.
- Gently lower the dough in to the loaf tin or tins, seam side down.Cover with a tea towel to rise.
Final Rise before Baking.
- Take note of the how long the dough has been in the fridge:
- If the dough has risen in the fridge for 2-6 hours, rise the dough for 1 hour. If it has risen for 7-12 hours, rise the dough for 1 hour and 15 minutes.If it has risen for 13 - 18 hours, rise for 1 hour and 30 minutes.If it has risen for 19 - 24 hours, rise for 1 hour and 45 minutes - 2 hours.The main thing to look for during the second rising process is if the dough has doubled in size. Sometimes it can take 10 minutes less, other times it takes 10 minutes longer.
Pre-heat the Oven:
- Pre-heat the oven to 180 °C on fan bake 15 minutes before baking.
- Just before baking, dust the loaf with a little flour or fine semolina. Score or make slits down the middle of the loaf with a knife or scissors. The helps the dough rise correctly in the oven.
Bake the Loaf or Loaves:
- Bake for 50 minutes if you are baking it in one tin. Bake for 40 minutes if you are baking it in two tins.
- Cool on a baking tray for 5 minutes and devour.
Storing the Bread:
- This loaf will be at its best on the day but will also make great toast or epic toasties the next day.
- I keep homemade bread in a plastic bag for a day on the bench. Beyond that I slice it and store it in the freezer and remove a piece at a time for toasting.